Toy sewing machines
Singer Sewhandy Model 20 — User manual
User manual for Singer Sewhandy Model 20. 36 pages in English. Read the original PDF, download or print a copy without registration.
36 pagesEnglish3.7 MB PDF
Loading your manual…Open PDF directly
Document details
- Brand
- Singer
- Model / document
- Singer Sewhandy Model 20
- Document type
- User manual
- Language
- English
- Pages
- 36
- File size
- 3.7 MB
- Category
- Toy sewing machines
- Document date
- Not specified in catalog
Search available document text
Find a term, then jump to its page in the original PDF. Image-only pages may not be searchable; check the PDF for exact wording and diagrams.
Page 1 · Read text
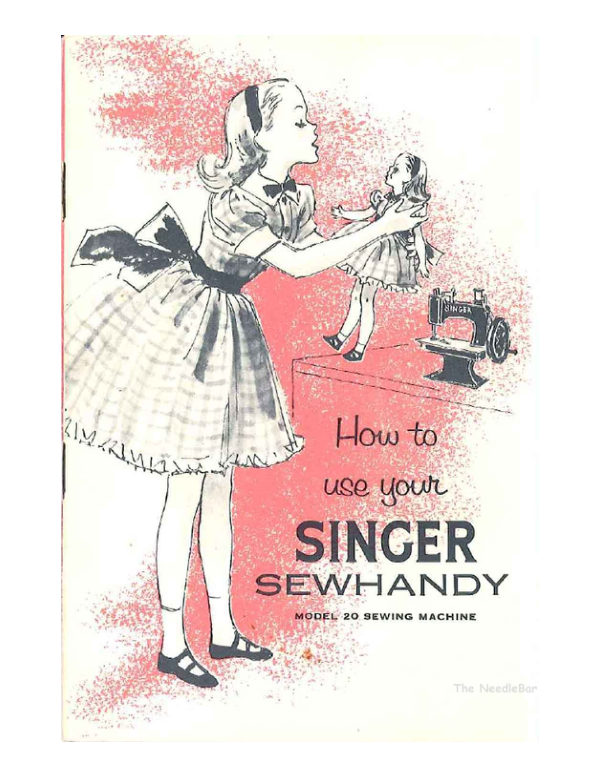
How to

    use your
 SINGER
SEWHANDY
    MODEL 20 SEWING MACHINE


                           The NeedleBar
View original page 1Page 3 · Read text
Your SINGER sewing machine.

is a sturdy, dependable one, designed especially
for you. The threading points are marked, the
adjustments for tension and stitch length are
simple, and the presser foot acts as a finger
guard to protect your fingers from coming in
contact with the needle. This is a real machine
- not a toy. Using this machine you will learn
the basic principles of machine sewing, first
making your dolly's clothes and perhaps small
 gift articles; then your own play clothes, shorts,
pinafores, skirts, and clothes for little sister.
   You'll want to take your machine with you
on vacations with the family, weekend visits
with friends, and finally to college. Ever ready
for mending or making a simple garment.


                                                    1
View original page 3Page 4 · Read text
One of the many things you'll enjoy about
                  this machine is that you can use it so many
              places - your own play table, a desk, the
               breakfast table, or the leaf of your mother's
             sewing machine.

         Let's examine the parts


                   SINGER


FIGURE 1. The box in which your        FIGURE 2. Place the sewing
SEWHANDY* comes contains In-         machine on the table. Posi-
struction Book, Clamp, Screw driver,             tion clamp as shown. Tighten
Needles, and Spool of thread.             clamp by turning crossbar to
                                                  right.
  2
View original page 4Page 7 · Read text
FIGURE 5

  Turn the wheel, following direction of the
arrow, Figure 5, over away from you until
the needle moves to its highest point.
  Place your spool of thread on the spool
pin. Now follow the numbers and red line
as shown in Figure 4. First pass thread
through 1, forward through 2, across to
your left and down through 3, over and
between the discs point 4, straight across
and through point 5, up and through point
6 at top of needle bar. Now draw thread
straight down to the eye of needle.
  Thread needle from left to right and draw
two inches of thread through the needle.
View original page 7
Page 8 · Read text
To sew:


                                            SING!
                  SINGEI


 FIGURE 6. Raise presser foot. Place    FIGURE 7. Lay forefinger of left
 material under presser foot. Lower     hand on thread.
 presser bar.


NGER

                              SING


FIGURE 8. Turn the hand wheel      FIGURE 9. Then place thread un-
 over from you until the first two      der presser foot and continue
 or three stitches are made.           sewing.


  6
View original page 8Page 9 · Read text
SINGER


To finish
a seam
                           FIGURE 10

  Make two stitches past the edge of the
seam. Stop machine with the needle bar at
highest point. With left hand draw about
two inches through point 6. See Figure 10.
  With right hand, using your scissors or
screw driver draw thread through eye of
needle as shown in Figure 11.


         SINGER


 FIGURE 11               FIGURE 12

   Pull thread up from work and cut thread
close to the material. See Figure 12.


                                                               7
View original page 9Page 10 · Read text
Raise presser bar and pull material

              straight back as in Figure 13.

         TO FASTEN OFF THE STITCHING IN THE
         WORK, as for a tuck or pleat, stop machine
             with the needle bar at the highest point.
         Draw about 6 inches of thread through
             point 6 and through the eye of needle as
           given in Figure 11. Cut thread about 2
           inches from needle eye as in Figure 14.
            Raise presser bar and draw work from the
           back of the presser foot.


           SINGER                                     SINGER


 FIGURE 13                       FIGURE 14


                        Thread hand needle
                         with thread at end of
                      seam and take two hand
                                 stitches, drawing needle
                      through loop of the
                              thread. See Figure 15.


                                 FIGURE 15

8
View original page 10Page 11 · Read text
The right stitch
                                FIGURE 16
    If the seam puckers as shown
in Figure 16, there is too much
 pull on the thread. This is a
 simple adjustment. Turn the
 tension screw, Figure 17, one
 full turn over toward the needle
 bar. Then test stitching. If still
 too tight, turn the tension screw
 another full turn and test
                              FIGURE 17 NTstitching.
  If loops and uneven stitches
appear in the stitching as in
Figure 18, there is too little
pull on the thread. To adjust,
turn the tension screw over to
the right. Test stitch and ad-
just again if necessary.
  The proper stitch should be
even and material smooth as     FIGURE 18
shown in Figure 19.
   Always test your stitch on a

scrap of material, using correct
thread - cotton for cotton ma-
terial and silk thread for silk
or wool.


                                        FIGURE 19
View original page 11Page 12 · Read text
To change length of stitch
         For shortest stitch lift lever to highest
        position as in Figure 20.
          For longest stitch move lever away from
      you as far as possible as in Figure 21.
         For medium length stitch position lever
        in center as in Figure 22.


          FIGURE 20


           FIGURE 21


          FIGURE 22
View original page 12Page 13 · Read text
FIGURE 23


The seam guide

  This you will find helpful for
making

     EVEN SEAMS
     ROWS OF STITCHING
      TUCKING

  The adjustment is made by
loosening the screw, and mov-
ing guide to the desired posi-
tion, right or left. See Figure
23. Tighten screw.

                                              11
View original page 13Page 14 · Read text
To oil the machine

             Your sewing machine should be oiled oc-
              casionally, the same as your mother's. Bor-
          row her can of SINGER*sewing machine
               oil and apply one drop to each place where
           one part moves against another as shown
             in Figure 24.
     About needles + thread
         When you need needles, and you will
          want a selection of sizes for the different
              sizes of thread and types of materials used,
             they are available at the SINGER SEWING
         CENTER. Ask for Class 24x1 and size de-
              sired. Be guided by chart on the right.
      To change needles
           To remove needle, raise needle to highest
            point, loosen screw with screw driver.
            Figure 25. Draw needle down.
          TO REPLACE NEEDLE hold needle with left
          hand with flat side of needle toward the
              right hand. Push needle up as far as it will
             go. Tighten set screw.

12
View original page 14Page 17 · Read text
Shirring
  You'll want to do much more than
straight stitching with your sewing ma-
chine. For example - shirring. This you
will use for your dolly's full skirts, blouses,
and where several rows are used as a trim.
  To adjust machine for shirring simply
tighten the tension by turning the tension
screw - over to the right as shown in Figure
26. Test for fullness desired. Use your
presser foot as a guide for spacing rows
of shirring.


                                          15
View original page 17Page 18 · Read text
For your doll's skirts -
                            skating costume, crib cover Quilting
                        or a hot dish holder for

                            mother - quilting is effee-
                               tive, easy and fun to do. To
                        vary the design use the un-
                       derneath or chain of the
                              stitch on the right side.


                                            FIGURE 27


16
View original page 18Page 19 · Read text
¡ Preparation of materials

                   The Fabric of your choice is
                   used for the top surface (A).
                       Outing flannel is used for padding
                         (B). Lawn or organdy, on which
                   a design may be stamped or
                     drawn, is used for backing (C).
                      Place the materials together as
                    shown in Figure 27. Then baste -
                         using long, even hand stitching as
                        indicated. Stitch with machine,
                        following design or parallel rows.

                                                     17
View original page 19Page 20 · Read text
Finishing edges
            The edge of the hot dish holder is bound
            with bias binding. Use #5 bias. Press open
           one folded edge. Place right side of binding
             to wrong side of material. Keep the two
           edges together and stitch on crease as in
             Figure 28. Press. Turn folded edge to the
             right side and stitch as in Figure 29.
                   If you want to cut bias strips for finish-
             ing: First determine bias of your material
           by folding material to form a triangle as in

              Figure 30, that is the placing of the cross-

              wise edge of the material to the lengthwise

             edge. The folded edge is the bias. Cut the
             bias strip six times the width of the edge
              finish desired as in Figure 31. For example,
            for a ¼" edge, cut strip 1½" wide. Fold
              strip as in Figure 32 and press. Place the
          two edges to right side of the edge to be
             finished. Stitch, taking a scant ¼" seam as

             shown in Figure 33. Press. Now turn folded
             edge to underneath and catch edge down by
            hand as in Figure 34.


18
View original page 20Page 23 · Read text
First determine size of tuck and the space
desired between each tuck. Then mark -
dot with pencil every 2", or crease the
material for each tuck. See Figure 35. Fold
material on dotted line or crease and stitch
using the seam guide for even stitching.
Figure 36.
  Spacing - for example, if you want to
make a group of ¼" tucks with ¼" space,
your markings - dots or crease should be
1" apart. If no space between is desired
markings should be ¾" apart. For ⅛"
tucks ⅛" space between make markings
½/" apart, or no space between ⅜" apart.


 FIGURE 35                       FIGURE 36


                                              21
View original page 23Page 24 · Read text
Pleats and ruffles
                   Strips for ruffles should be cut the
                crosswise (from selvedge to selvedge)
               grain of the material. For ruffling
              make the same adustment as for
                shirring-tighten tension by turning
                the tension screw over to the right.
                  First row of stitching about ¾" from
            edge then another row about ⅛"
              from first row. See Figure 37.


22
View original page 24Page 25 · Read text
FIGURE 37                           FIGURE 38


    For pleating-adjust ten-
  sion for straight stitching.
  Fold material for depth of
  pleat desired — ⅞" to ¼"
  for ruffles. Pleats should not

   over-lap. With a little prac-

   tice you will find it easy to

  make even pleats. Figure 38.


                                              23
View original page 25Page 27 · Read text
LACE EDGE - Turn edge of
material under a scant ⅛".
Place heading of lace over
turned edge and stitch. Figure
39.
  BANDS - Mark line or de-
sign for bands. Pin or baste
band to place. Stitch on very
edge of band. Figure 40.                                   FIGURE 39
  RIC-RAC - Mark design for
even spacing unless applied
directly to edge. Use sewing
thread to match the color of
the ric-rac. Stitch through
center of ric-rac as shown in
Figure 41. If used as edge
trim follow instructions for
sewing on lace.                    FIGURE 40


                                    FIGURE 41


                                              25
View original page 27Page 28 · Read text
Seams
         PLAIN - Keep two edges even and pin
            baste. Stitch as in Figure 42... remove pins
           as you work. When using a pattern follow
            instructions for width of seam allowed.
         FRENCH - Place wrong sides of material
           together. Take ⅓" seam. Figure 43. Press.
          Crease on line of stitching, Figure 44, en-
           closing the two edges and stitch taking a
            full ⅓" seam. Figure 45. Seam used in
           blouses, slips.
         FLAT FELL - For Play Clothes - blouses,
           undergarments. Take full seam allowed ⅜",
        ½" or ⅝" — place wrong sides of material
            together. Stitch. Trim under side of seam
           to ⅛" as shown in Figure 46. Turn edge of
          top side ⅛" or ¼" depending on size of
         seam desired. Pin or baste, Figure 47, and
            stitch on folded edge as in Figure 48.


                      FIGURE 42


26
View original page 28Related documents and language editions

SingerPDF
Adjuster's for the Singer Model 20
Service manual
19 pages · EnglishRead →

SingerPDF
Singer 101-4 & 101-12
User manual
56 pages · EnglishRead →

SingerPDF
Singer 101-4 & 101-12 (black and white scan)
User manual
54 pages · EnglishRead →

SingerPDF
Singer 115
User manual
36 pages · EnglishRead →

SingerPDF
Singer 127 & 128
User manual
18 pages · EnglishRead →

SingerPDF
Singer 12K
User manual
12 pages · EnglishRead →

SingerPDF
Singer 15
User manual
36 pages · EnglishRead →

SingerPDF
Singer 15-125
User manual
38 pages · EnglishRead →

SingerPDF
Singer 15-22
User manual
13 pages · EnglishRead →

SingerPDF
Singer 15-30 / 15-87 & Generic 15 Class (rotated for printing)
User manual
14 pages · EnglishRead →

SingerPDF
Singer 15-30 / 15-87 & generic 15 class machines
User manual
14 pages · EnglishRead →

SingerPDF
Singer 15-86
User manual
24 pages · EnglishRead →
From the ISMACS International. Original publisher and archive notices are retained.
Check the model and edition against your equipment.
PDF verified 2026-10-11.