Sewing machines
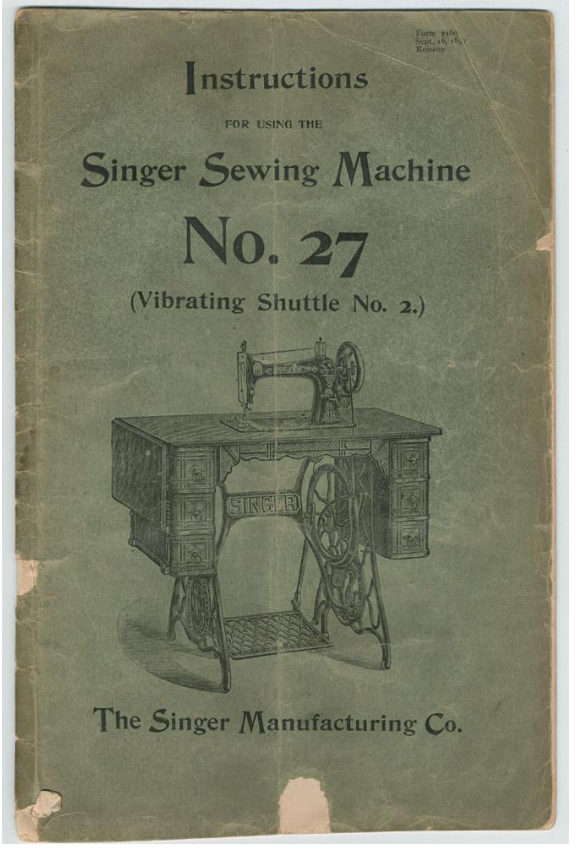
Singer Vibrating Shuttle Model 27, Number 2 — User manual
User manual for Singer Vibrating Shuttle Model 27, Number 2. 20 pages in English. Read the original PDF, download or print a copy without registration.
20 pagesEnglish5.3 MB PDF
Loading your manual…Open PDF directly
Document details
- Brand
- Singer
- Model / document
- Singer Vibrating Shuttle Model 27, Number 2
- Document type
- User manual
- Language
- English
- Pages
- 20
- File size
- 5.3 MB
- Category
- Sewing machines
- Document date
- Not specified in catalog
Search available document text
Find a term, then jump to its page in the original PDF. Image-only pages may not be searchable; check the PDF for exact wording and diagrams.
Page 6 · Read text
INSTRUCTIONS‘


  Uxtmg Plumes Show" by Arrow».


                    ;
oiling Places Show“ by Arrow...
View original page 6Page 7 · Read text
_._J)


          INSTRUCTIONS
                       FOR Us! NO THE
       Singer Sewing Machine
          No. 27.

                  To on the Machlne.
    The places where the machine should he oiled are indicated by
the arrows in Figs. 3 and 4.
     Oil the loose balance-wheel through the  oil hole in the end of
the stop-motion flange, the needle-bar emu through the oil hole at
the back and near the top of the head, the thread take-up lever
hinge screw and cam roller through the opening in the side of the
head towards the operator, and he top hearing of the arm rock
shaft through the oil hole in the ‘op of the arm.
    Then remove the plate from the back of the arm and oil the
 feed-cam. the~forked connection roller and stud, the crank of the
 arm shaft and the lower bearing of the arm rock shah.
'    Moisten a small piece of muslin with oil and rub  it over the
 face of the shuttle-race, and also put  a few drops of oil  in  the
 shuttle-race oil hole under the front  slide, at least once a day when
 in constant use.  The bobbin-winder spindle. the spindle-bearing,
 the wonn-nnd the cam which        '  rates the thread guide must be
 oiled: also the point of the bohlzheat the left centre.
    To reach the parts to be oiled under the bed of the machine,
 turn it back. as in Fig. 4.  To enable the operator to do this, the
 belt must first be thrown  off the’bmtd-wheel, which  is done (the
 machine being in motion) by turning the belt shifter handle (shown
 in Fig. 2) to the  left.  After oiling. turn the machine up again,
 and operate the treadle as in sewing, which will automatically re-
 place the belt on the hand-Wheel.
    The points requiring oil in the stand are the bearings at each
 end of the hand-wheel crank. treadle and treadle pitman.  After
 oiling, ran the machine rapidly for a few moments (with  the
 pressepfoot up) to work the oil into the hearings  Then carefully
 wipe off the surplus oil.   All p     where one part of the machine
 rubs against another, producing  i‘ction."FEf;uire oiling. and it. after
 oiling. the machine runs hard, it is certain that some place has been
 overlooked.
      It the machine runs hard after standing for some time, use a
 little kerosene or henzine on the wearin  points, run ra  idly, wipe
 clean and then oil with the best sperm 0 l, which shoul  always be
 used.  The machine should he oiled once a d      '  in constant use.
 and after standing for some time should be alwa   med ard oiled
 before using.

      5
        A»,             .,          A,,               ,         U
View original page 7Page 8 · Read text
INSTRUCTIONS.

    To make sure of getting good oil buy it at nnyof the company's
   ofl‘ices. or from its authorized agents.  The genuine oil is put up in
  bottles which have  Tin-z ermtn MANUFACTURING CoxrANr’s
  “trade-mark " blown in their panel and bears the company's label.
                    The Stop Motion.
    The object of the stop motion is to‘enable the operator to wind
  n  bobbin  by running  the  balmée—wvheel without  running  the
  machine, which not only saves labor, but permits the re-winding of
  a bobbin when a seam  is  partially sewed. without removing the
  goods‘ from the machine or interfering with the upper or needle
  thread.
    To operate the stop motion turn the friction-screw outside of
 the balance-wheel over towards you to release the balance-wheel,
 and in the opposite direction to clamp  it.
           To Operate the Treadle and Machine.
     Release the balance-wheel  as explained  (see “stop motioni'),
 place your feet upon the treadle with the instep directly over  lts
 centre, turn the balance-wheel over towards you with the right
 hand and continue with the feet (giving an nltemate pressure With
istheobtained.heel and toe)Nexttheclampmotionthethusbalnnceqvheelcommenced untilto thea regularmachinemotion(see
 “stop motion ") see that the presser-foot does not  rest on the feed-
 ing surface, and operate the treadlflns before.
     Finally. place some goods in  the machine, loosen the presser-
 foot upon them and again operate the treadle.
            Do not attempt to sew until you are sufficiently familiar with
 C      v  1         the trendle motion tag-be able to start the machine without.
  “rm"      '        turning it buckwnrds. Io run it with a regular nnd steady
  ,                   motion, nnd to gui'dcflw goods.
                                   1' Never run the machine with the prewar-foot mtin  on the
 CAurtox 2.  1      feed and no cloth          ‘ eon.                g
              ( Practice upon strips of cloth. and do not attempt practical
 CAu'nus 3.   ~     lewing until you can guide the material an       nee n
                   (     regular motion of the machine.
c”“”” 4'  { Do notbendtrythetoneedhelpc:thethemnchiuemachinebyfeed-zpullingwithoutthe fabric,any avistnnce.lest you
GMT”? 5   1 Never run the machine with both shuttle and needle threaded.
                             '       ‘     a     except while you are sewing.
            Do not nllow lint or dust to accumulate In the shuttle or under
                     the shuttle tension-spring in: any foreign substance inside
Gnu-nos 8.         of the shuttle  pm‘ticnlarly in the inner end] will prevent
                    the proper  cton n‘dhe bobbin: and under the tension-
                    spring. wll render the shuttletennion inoperative.
                    To Set the Needle.
   Hold the needle in the left hand with the that side of the shank
towards the arm of the machine: raise the needle bar to its highst
point. put the needle up in the clamp  as far as it  will go. and
tighten the thumb-screw.
View original page 8Page 9 · Read text
mauve-nous.                        7


                                     Fig. 5.


                 To Thread the Needle.
                           [he Flr- 5.)
                                            < h
    Pass the thread from the spool through the eyelet l at the top
of the front of the face-plate, downward between the tension disc.
2 from right to left through the eyelet 3 of the thread take-up spring,
up and through the eyelet hole 4- in the end of the take-up, from
the front; into the thread guard 5 on the front of the face-plate, then
under the thread guide 6 on the lower end of the needle bar, and
from left to right through the eye 7 of the needle.
View original page 9Page 10 · Read text
IN’TIUCTIONS.

                               To Wind the Bobbin.
                      First detach the balance-wheel. and swing the bobbin-winder at
                the right of the operator (see‘cut on  title page) forward until  It
              comes against the belt with pressure sufficient to drive it  ; then place
                the bobbin  in the bobbin-winder and the spool of thread on the
                spool pin of the machine.                                    ', ""                                                                        .
                Draw the thread into the fight the face-plate as in sewmg,
               thence into the evelets in the      d-guide (first at the lower end
              and then at the top), secure the free end of the thread by placing
                         it between the head of the bobbin and the cup at the end of the bob-
                wiuder-spiudle, and operate the trundle the same as in sewing.


mfw‘.

  a,
 “be-“                         To Thread the Shuttle.
               Take the shuttle between the thumb and fingers ofthe left hand,
              with its point towards you. put thgybbhin in the shuttle with the .._--
              thread drawing from  it from the'top side towards the right, as shown
                 in F ig. 6.  When the bobbin is in its place, put a slight pressure on
               the end ofit with the iorefinger of the left hand, and draw the free
             end of the thread into the slot in the shuttle body in the direction
             ofthe point of the shuttle as far as it will go, as shown in Fig. 1;
             then draw towards the butt again, as shown  in Fig  8,  until the
             bobbin commences to revolve.
View original page 10Page 12 · Read text
lh’fll HONORS

                            To Prepare for Sewing.     '
                Open the front slide of the machine, turn the balance-wheel  till
                the shuttle mrrier comes under the opening, place the shuttle in its
                  carrier with the point towards you. with the left hand take hold of
                the needle thread (leaving it slack between the hand and the needle)
                turn the balance-wheel towards yon until the needle moves down
              and up again to its highest point, thus catching the shuttle thread:
              draw up the free end of the needle thread and the shuttle thread
                   will appear: then draw the shuttle thread up through the hole in
                 the throat-plate, in)“ both threads back across the feed  points. close
                 the slide. place the material beneath the needle, lower the presser
                  foot upon  it. and commence to sew. tuming the wheel towards you.
                 Be sure that every part is clmn before you commence to sew.
                            To Regulate the Tensions.
              The tension of the needle thread  is regulated by turning the
             thumb screw at the side of the fine plate nearest the operator. over
                 to the right to  increase. and  to the left to diminish the tension.
            The tension Of the shuttle thread is regulated by  the small screw
                near the point of the shuttle on  its top  side.  thing the small
                screwdriver. turn to the right to increase. or to the left to diminish
                the tension.  (See caution 6 on page 6).
               The tension should be regulated so as to lock the stitch in the
                centre of the fabric.          -:~.—_-..
                            To Remove:the Work.
                  Raise the needle to  its highest point,  lift the presser--foot, re-
                 lease the tension on the upper thread by pressing the lever below
               the tension  discs, and draw the work backwards and  to the  left
               about two inches: then cut the threads close to the goods. leaving
               the two inches of thread with which to commence sewing.

                         To Alter the Length of Stitch.“fizz-anneaflxvu
              On the side of the arm near the trade- mark (see Fig. l). is the
                feed                    regulating                             thumb-screw.                                                                         stitch                                                                    turn it over                                                         the                             Ejengthen man?\            to                 the                                                                                                                   it.                  m the oppositedirection                    right nud'                                                              to                                                          shorten
                      To Change the Pressure on Material.
               Turn the thumb-screw through which the presser-bar passes at
               the top of the head of the machine, to the right to increase and to
              the left to decrease the pressure.  For ordinary family sewing this
               pressure rarely needs to be changed.
View original page 12Page 13 · Read text
ms‘ruucrloxs.                                  ll

                      General Remarks.
   The lenther  belt. which gives motion to the machine, should
always be tight enough not to slip and no tighter: not so tight as
to prevent the easy motion of the machine.   If the belt is too long,-
uncouple it and cut oil squarely hon?one end to the desired length.
   Be sure that the slide over thE‘shuttle race is kept closed.  This
is important
    If the machine does not work well. it will be found to be because
some of theJoregoing directions have not been followed.

      Twist. Linen and Cotton Thread. Needles and Oil.
   Do not use poor thread or needles.  Any good thread will work
well, but you must not expect to make a smooth, even stitch. with
poor, rough thread: nor can you expect a machine to work well
with a cheap grade of needles. made in imitation of ours.  As our
interest is to maintain the reputflfon of the machine. it  is evident
that we will always supply the best.  Persons living at a distance
 from an agency can send by mail, enclosing us the money, and we
 will fill orders promptly, either by mail or express.
|._——if »   Relative Sizes of Needles and Thread.                                                        stIrefSogtfln.Llnon
 fill-2'-
                                        lW awto 150SilkCotton,Twist  0       Very thin Muslin. Camhflt'j,f  Linen. etc.
—-            _/____..__        77.7.— —Very fine Carlie     LinensShirtings, fine      a) to l!» Cotlotl.
                             silk Goods. etc.                 0 Silk Twill.

                                            Muslim.                                           Cnlicoes,                             Bleached                    Shceiings.                                                                                                     l‘smningx
                                        and                                       goods.                Silk. and                                                                    all    A 80t toB El)Sill:Cotton.Twin.                               general work.                                                1: uses'  em]of domestic
           All kinds of heavy Cniieoes. light Woolen Goods,  do to no Cotton.
              heavy Silk. Senmlng. Stitching. etc.       C Silk Twist.
         Tickings. Woolen Goods. W3, ”Boys' Cloth-  so to 40 Cotton.
                  ing. Cork-Ls. Cloak;   finds, etc.       D Silk twist.
        Henvy Woolens. Tickings Bags. Heavy Coats.     “24E toSill:30Twist.Cotton.
             Trousers. etc.  Heavy Clothing generally.      80 to so l._i_non.
  4   hugs. Connie Cloths. Heavy Goodsof any texture. very40 to(Ia-m00 LinenCottonor

     In sending orders. always specify the  .. Size " required.
View original page 13Page 14 · Read text
INSTIUCTIUNS.


               uremia (cu-mt

   To open the cabinet turn over the leaf which covers the machine,
release the platform upon which the machine is fastened by pressing
the button at the right of the operator near the bottom of the centre
doors. first taking hold ofthe arm of thc machine with the left hand
to steady  it as  it rises. and whvnvqntirely up push back the centre
doors which then become a mi: support  for the platform  See
page 13.
View original page 14Page 15 · Read text
isnluc‘nuss.


                            Drup Cnblnet 10pm;

  To close the cabinet, bring the small doors  to the  front, as
shown on page 12.  A slight pressure upon the machine will then
force  it down beneath the top of the cabinet, and. after the platform
is latched. the leaf is folded over the aperture, completely enclosing
the machine.                       > \,         --
   The cabinet, when closed, forms a handsome piece of fumiture.
View original page 15Page 16 · Read text
INSTRUCTIONS.


                                                                                                                            '  Dion Cabin" Own lnr Olllnn.

   To prepare the cahinel fnr the oiling of the machine zmd of the
driving mechanism. open the from and ma; minors of the right end
of the  vilhiuul:  than  oil as  instructed on page  5, “To Oil the
Machine."                                      ,,   3"
View original page 16Page 17 · Read text
tNiuucnoss.                               15

                     Fig. 12.

                                                Fig. 12 showsonr Stand
                                           Brnoe,carrying the entire
                                          driving mechanism.
                                         Both  the  lurid-wheel
                                      and  treadle work upon
                                           adjustable centres, which
                                      admit of accurate adjust-
                                    ment with  a minimum
                                   amount of  friction.
                                             Thistlifliuctive feature
                                          renders ours the lightest
                                      running  of any  \c\\'ll|g
                                     machine  >t.in:l  _\et con-
                                              structed, and  i\  ll matter
                                            of  great importance  to
                                           the health and comfort of
                                           the operator.

      The New “mmsung"In Minaoil).—P-tutdfirm (will Bel

  This  invention  simplifies
nmkes easy the often-irritating (E
of throwing  (iii  untl replacing
belt.  Tn throw  oil the belt, press
the small lever  at the  top of the
dress guard to the left with the tore-
finger, keeping up the motion of
the treztdle meanwhile.  To put on
the  hell, allow the lever to spring
back  in  its  plaice, and operate  he
treadle  as  in  sewing  (WIlh fix?
wheel turning toward you). when a
single revolution of the wheel will
bring tlte belt back in place.
View original page 17Related documents and language editions

SingerPDF
Adjuster's for the Singer Model 20
Service manual
19 pages · EnglishRead →

SingerPDF
Singer 101-4 & 101-12
User manual
56 pages · EnglishRead →

SingerPDF
Singer 101-4 & 101-12 (black and white scan)
User manual
54 pages · EnglishRead →

SingerPDF
Singer 115
User manual
36 pages · EnglishRead →

SingerPDF
Singer 127 & 128
User manual
18 pages · EnglishRead →

SingerPDF
Singer 12K
User manual
12 pages · EnglishRead →

SingerPDF
Singer 15
User manual
36 pages · EnglishRead →

SingerPDF
Singer 15-125
User manual
38 pages · EnglishRead →

SingerPDF
Singer 15-22
User manual
13 pages · EnglishRead →

SingerPDF
Singer 15-30 / 15-87 & Generic 15 Class (rotated for printing)
User manual
14 pages · EnglishRead →

SingerPDF
Singer 15-30 / 15-87 & generic 15 class machines
User manual
14 pages · EnglishRead →

SingerPDF
Singer 15-86
User manual
24 pages · EnglishRead →
From the ISMACS International. Original publisher and archive notices are retained.
Check the model and edition against your equipment.
PDF verified 2026-10-11.