Film cameras
SPARTUS Super R-1 Reflex User manual
User manual for SPARTUS Super R-1 Reflex. 17 pages in English. Read the original PDF, download or print a copy without registration.
17 pagesEnglish1.4 MB PDF
Loading your manual…Open PDF directly
Document details
- Brand
- Spartus
- Model / document
- SPARTUS Super R-1 Reflex
- Document type
- User manual
- Language
- English
- Pages
- 17
- File size
- 1.4 MB
- Category
- Film cameras
- Document date
- Not specified in catalog
Search available document text
Find a term, then jump to its page in the original PDF. Image-only pages may not be searchable; check the PDF for exact wording and diagrams.
Page 1 · Read text
www.butkus.us

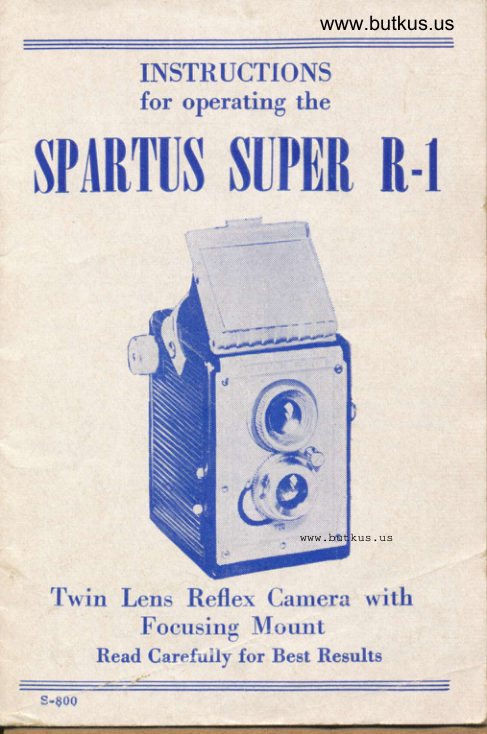
       INSTRUCTIONS
         for operating the
SPARTUS $UPTB R.I


                                     www.butkus.us

  'l'win Lens Refler Carnera with
        Focusing Mount
     Read Carefuily for Best Reeults
View original page 1Page 4 · Read text
www.butkus.us

           INfNODUCTTON
  This type of reflex cqmerq is qruqrcrrteed to
give good results if used properly cmd in ac-
cordqnce with these instructions. If for cny rea-
son your ccrmerq is not doinq crs well qs you
think it should, write direct to us. Do not be
sctisfied until you get good results from every
roll of film.
  Your cctmerct is cr precision built instrument
so hcrndle it qs such crnd you will be rewqrded
for your care with consistent sotisfcrctory results.
    WHAT YOUR CAMERA DOES
 When c film which is sensitive to liqht is
ploced in your ccmerq qt cr determined distcrnce
irom the l-ens ond the shutter lever is tripped,
the liqht odmitted throuqh the lens for the time
the shutter remqins open is focused by the lens
onto the sensitive film. The film is then termed
"exposed" cnd when chemicqlly trecrted pP-
duc-es cr negqtive of the imqge picked up by the
lens. As noted from the above, light is the most
importont fqctor in the qrt of picture takinq.
Since this is true, controls cne plcrced on the
cqmerq for qdiustins the qmount of liqht that
should enter to properly sensitize the film. This
is cccomplished on the cctmerct by chcnrging
the size of the hole locqted neqr or inside the
lens. This is commonly known qs ct stop, dic-
phrcgm, or operture ond is expressed in vclues
of f, such qs f7.7, fl6, etc.
                             3
View original page 4Page 5 · Read text
Films qre mode of vqrious sensitivity, known
cts "speed," qnd mqnufqcturers supply you
with this speed rqting so crs to enoble you to
qdjust your cqmercr to properly expose the por-
ticulqr type of film you crre using. Instructions
for the correct "f" vqlues for your cqmero will
follow.


         INSTNUCTIONS FOR
        OPERATING CAMENA
  Use qny stondord. size No. I20 film, type crnd
speed to meet your requirements. You will get
12 exposwes (2V+ x 2V+) from eoch roll.
  Before tckinq ony pictures, fomilicnize your-
self with the cqmerq. Reod the instructions,
which will explain the wcry to open crnd lood
the ccmerc, how to cdjust the controls, qnd
methcds of focusing. In generql, ccquoint your-
self with the equipment so that when you ctre
recldy to "shoot," you will be oble to hondle
tre cqmerq in the best mcmner to produce the
Cesired results.
View original page 5Page 6 · Read text
www.butkus.us
         TOADING CAMENA
  To open the cqmera for loqding, unscrew the
bcck lock (A) cnd press down the L shcped
bqck (B) -do not force the bcck fqrther thon  itwill qo.
  When purchcsed the ccrmerq will hcnre ctn
empty spool in the upper spool compcrtment.
To replcce qn empty spool, pull out winding
krrob (C) crnd tum in direction of qrrow until it
remqins in outward position. Plcce the spool
with slotted hole towcnd the knob crnd put the
other end of the spool over the stud on opposite
end. Drop the spool in crnd releqse the knob,
turning until the tonque on the knob shcdt is
engosed in the slotted hole in the spool.
  www.butkus.us
  Now tqke q spool of film, remove the outslde
wrcrpping crnd insert it in the lower chqmber
with the blcck side of the fitm fqcins the inside
of the cqmero. Pull the pqper leqder crcross the
dcrk comportment toword the empty spool cnrd
threod the pcrper leoder in the wider slot. Give
the windinq knob one or two tums to the right,
mokins sure thqt the poper leoder is firmly cen-
tered between the spool flqnqes. If the pcrper
leqder hqs not been inserted correctly, the spool
will hcrve q tendency to bind, therefore, press
the poper gently sidewoys to properly center  it.
Close the lock of cqmerq cmd be sure that it ts
securely locked.
                            s
View original page 6Page 7 · Read text
After locdinq and the back is locked, look
    into the smqll round window in the bock ond
    turn the windins knob (C) in direction of qrrow
    until the wqrning hands crppeqr. Then continue
   winding very slowly until q series of dots qnd
   the No. I shows in the window. You cne now
   reqdy to toke the first picture. After the first ex-
   posure, wind the knob until No. 2 oppecrs in
   the window. Repecrt this ofter eqch shot until
   the 12th (last) exposure hos been mqde. The
  sqme qpplies to color film os well.
     Cqution: Remember to wind to next number
    ofter eqch exposure
        UNTOADING TTIE FIIM
    When cll 12 pictures hcrve been exposed, con-
   tinue to wind until the end of the pqper pqsses
   the window, qfter which, keep windinq for sev-
   erql more turns to make sure thcrt oll the pro-
    tective pcrper is wound on the spool. Now open
   the bcck, pull out the windinq knob, crnd tcke
   the roll out of the chqmber. Immedicrtely mois-
   ten the gummed lcbel provided ond pcrste to
    roll to prevent unrqvelling. Trqnsfer the empty
   spool from the opposite compcrtment to the
   windinq knob comportment to be recrdy for on-
   other loodinq.
      METHOD OF HOI.DING CAMEBA
    Hold the cqmera firmly qgqinst your body
   with the left hond crt the proper distqnce to see
   c{ecnly the imoqe on the ground glqss in the
                         6i                                                                                                                     I
                                                                                                                                                                                                                                                                                                   I
.            ..-,-    r.     I          -                                                       lu,'r,.                                                                               ,I
View original page 7Page 8 · Read text
www.butkus.us
ftnder cdter the vlewflnder hood (D) hcs been
lified to the open position. Ploce the riqht thumb
on top of shutter lever (H) and support the bot-
tom of the ccrmercr with the remqining fingers
While viewinq the subject in the finder, hold the
ccrmercr perfectly  still crrd press the lever qently
down as fqr crs it will go. Rclise thumb qnd lever
wili return into position for next exposure. The
foregoing covers instructions for using the "re-
flex" or "wqist level" type finder.

              SHUTTEB
  The shutter is a fixed speed type siving an
exposure oI I/60 of q second.  It con  be
cldjusted for either time or instontaneous ex-
posures. For oll snqpshots crnd when the sub-
ject is in motion, push lever (G) to INST. The
mojority of your pictures will be tqken under
this condition.

                                                www.butkus.us
            TIME HI(POSUBE
  When liqhtinq conditions qre poor ond cn
instqntcrneous exposure is not sufficient to prop-
erly expose the film, set the lever (G) to TIME.
When mqking this type of exposure, the subJect
must remcin perfectly  still and the camera mltst
View original page 8Page 9 · Read text
be ploced on some rtgid obJeet such crs c tcrble,
 etc. Hold the cqmerc firmly crnd press the shutter
 Iever down, holdinq it down for the reguired
qmount of liqht exposure. Time of exposure cctn
be determined from the exposure tqble qccom-
pcnying the film. Focus your subject qs you
would do normclly before trippinq shutter lever.

             FOCUSING
  By qrqsping qnd turning the geqr wheel on
the toking lens (F) subjects any distqnces from
sliqhtly less thon 6 feet to infinity (cs fcn os the
eye ccm see) cqn be photoqrcrphed shorply.
  For convenience, the lens mount is colibrcted
in feet cnound its diameter. To focus merely
turn the mount until the footoge on the dicl cor-
responds with the distcrnce in feet from the sub-
ject to the cqmercr. This is q fost qnd reosonobly
sure method of focusing.

     usE oF APERTURE qR "STOP"
 The "stop lever" G) is for reguloting the
crmount of liqht permitted to enter the lens in
cccordqnce with the type of film beinq used.
                             8
View original page 9Page 10 · Read text
www.butkus.us
    You have four settings for your lens, Fiq. E
    F7.7, Fl l, FI6,F22. The purpose of these settinss
    is to qdmit either more or less liqht under pre-
    vqilinq conditions.
     Under very dull conditions, or indoor flosh,
     it is necessory to odmit qs much liqht qs pos-
    sible so use the F7.7 settins qs ihis is the widestI  openlng.
     For normol light, use Fl I which is the medium
  opening-Use Fi6 for briqht snow, beoch
    scenes, qnd neqrby people in mqrine or beoch
   bockqround. For distont londscqpes     Brilliont   sunny beoch or morine scenes, use- F22 the
   smqllest opening.
    \Mhen using color film for indoor flosh, use
   F7.7-For briqht outdoor color Fll ond for dull
   outdoor color F7.7.
     TO TAKE FLASH TIGHT PICTURES
     For best results with flosh liqht, we recom-
  mend the use of crny good reliobie film
I   The Fiosh-Gun supplied with your cqmerq
   requires very little ottention, ond only the fol-
   lowing steps ore necessory to put it in opercting
   condition:
i     l. The reflector should be polished with q solr
      cloth or tissue. This should be repeoted or
       intervqls to keep reflector cleon ond hishiy
       reflective.
                                  I
View original page 10Page 11 · Read text
Two "C"-cell botteries must be stored in the
   bottery compcrrtment of the qun. To do this,
   unscrew the smcil knurled screw on the
    side of the gun. The two sides will then come
   cport. Ploce the botteries TIP UPWARDS be-
   tween the two brqss springs on the side to
   which the reflector is ottqched. Then put the
    side bock toqether ond tiqhten the screw.

3. To instoll the flosh sun, iust insert the stud
   on the side of the sun into the hole. Screw
   the knurled round nut onto the threoded stud
   which is protrudinq from the comerq qnd
   you qre recdy to tcrke flosh pictures.

  Your comero is equipped with cr synchronized
shutter qnd no qdjustments on the cqmercr ore
necessqry. The bulb will flash when the shuf
ter is pressed.
View original page 11Page 12 · Read text
www.butkus.us
    IMPORTANT: When opercrtins the shutter
   press it firmly and sently downwcrd (do not
    hesitqte or stop during the down stroke) until  it
    clicks ond then releqse. This will qssure good
   synchronizqtion ond even exposure.
    When the flosh-gun is removed from cctmerct
   ond contoins bctteries, do not ploce it on crny
    metqllic object. This mcry couse a short circuit
   qcross the connector prongs which will ruin the
    botteries. If the gun is to be stored crwcry for o
    considercrble lenqth of time, it is odviscrble to
   remove the botteries. Your floshgun will crc-
   commodote the most populor size bulbs obtoin
    oble.
,    With the new M-2 cdcpter which comes with
 I   your flcsh gun, you cqn now toke flosh pictures
I   usins the new midqet (M-2) bulbs. Usinq your
   index finger, just insert the odopter qs fqr as it
    will qo into the flosh sun. Moke o quorter turn
   to the riqht cnd the odopter will stoy in ploce
   so that you cqn use the M-2 bulb.
                                    It
View original page 12Page 13 · Read text
It is recommended thct flosh shots should not
 be mqde qt q distqnce greqter thqn twelve feet
 with obove nqmed bulbs. Subjects qt grecrter
 distqnces ccrn be photogrophed with the lcnger
 bulbs.

   The bqtteries for the flqsh-qun qre obtcinoble
 from your photo supply dealer, hcndwore, or
 deportment store. They hcrve o shelf life of six
 months crnd since the current consumed by the
 flosh bulb is very smqll, they should lcst you
 for this period with normql use. If ever in doubt
 crs to the condition of the botteries,  it is odvisoble
to obtain new ones. Their cost is very reqson-
oble.

  With q minimum qmount of care cnd ccrution,
you should get very line results crnd derive o
great cmount of pleosure with this eguipment.
                             t2
View original page 13Page 14 · Read text
www.butkus.us
         TAKING coloR ptinrnrs

    To tqke color pictures outdoors, use qny
   stqndqrd #120 outdoor colorfilm. The srsbjecta
   must be in briqht sunliqht to tcke sncrpshots.
     I   The best time of the doy to toke color pictures is
    lote morning or eorly oftemoon. At noon the
    liqht is too hiqh ond tends to give qn unnqturcrl
   crppeorqnce. Do not ottempt to tqke sncrpshots
   when the subject is in shodow, or the liqht is
   too dull. Follow instructions thcrt qccompany
   your film.

   To tcrke color pictures indoors, toke ony
   stondcnd #120 indoor color film. For liqhtins
   use flqsh or photo flood lomps in reflectors. Do
   not mix dcryliqht with flcsh or photo floods. If
   possible, use cr qood enposure meter to qive the
   correct crperture opening.

                                 l3
View original page 14Page 15 · Read text
TIIINGS TO NEXUEMIEN
 l. Be sure operture is properly set occording to liqht
    condition.
 2. Set focusing mount to proper distcrnce.
 3. Advqnce film ofter eoch exposure to qvoid spoiling your
    pictures by double exposure.
 4. Before crnd ofter using, alwcrys clecrn lenses with o soft,
   dry cloth to remove dust, fingerprints, etc.
 5. Do not toke pictures fccing the sun. The sun should be
   behind your bock when taking pictures.
 6. Locute your subjects in the position desired in the view-
    finder. The cqmercr tokes sliqhtly more thqn you crctu-
    clly see through the viewfinder.
 7. Be sure to hold comero still when toking pictures ct
     qll times.
 8. Place time lever to "INST" when toking snop shots cnd
    to "TIME" position when toking time pictures.
              DON'TS TO NEMEMBER
  DON'T lood or unlood your comerq in direct sunlight.  If
 you hcrve to lood out-of-doors, seek o shody spot or inter-
 pose your body between the sun ond the cqmerq.
  DON'T hove the sun directly in front of you when toking
c picture. Endeovor to orronge your viewpoint so thot the
sun is behind crnd o little to one side of you.
  DON'T jerk the releose of the comero. Press gently cnd
 slowly.
  DON'T be cfraid to take c "Time" exposure in poor light.
It is qs eqsy crs toking o snopshotrproviding the camerq is
ploced upon some suitoble support.
  DON'T loy your cqmerq obout on the sondr.
  DON'T unroll the spool of film to "see the picture." There
ls nothing to be seen until ofter development, which must
be done ln cr proper dcrrkroom or light-tiqht tonk. Any
white light which reoches the film will spoil the picturee to
 : fractlon of q gecpnd"
                                    l{
View original page 15Page 16 · Read text
www.butkus.us
                 cuttlf,lm[
                The Super R-l Cqmerc
is unconditionclly gucnonteed cgoinst defective workmon-
ship ond materiql for a period of ONE YEAR. FOR SERViCE
return cqmercr to foctory with this guorcntee crttqched ond
$1.50 to cover hqndling ond postqge. Crocked or broken ports
qre not covered by this service chorge, therefore, PACK
CAMERA VERY CAREFULLY AND ALWAYS INSURE
PARCEL. For replccement pcrts see list below.  If necessory
to return comerc to foctory be sure to enclose the $1.50
handling chqrge os fqilure to do so will deloy the repoir
qnd retum oI your cqmercr.

  ShouIC your ccrmero require qny or the following repcirs,
it will expedite motters if you will send us remittqnce occord-
ing to the following schedule ot the sqme time thot you
moil us your comerct:
Nqme Plote, Both Lenses & Mounts.            ......S5.00
Top Lens & Mount.                               :.....  ....2.00
Bottom Lens & Mount.                               ......   2.50
Nome Plote .                                                     .50
Back  .
Bieht Side-Knob Side.                                ....  1.25
Left Stde                                                 .... . 1.00
Shutter Assembly                                       ...  1.00
Strop .                                                            .25
Top Assembly ..                                          ....   1.00
       HENOTD PRODUCTS COMPANY. INC.
               2ll0 Wesl Wclnut Street
                 Chicqgo 12, Illinois
                              l5
View original page 16Page 17 · Read text
PROTECT YOUR CAMBRA
        with a Custom-Built
  CARRYII\G CAST

 The $partus $uper B-l
 Has cr bequtiful Evereqdy ccrrrying cose . .  .
mqde of rich brown genuine leqther reinforced
for maximum weqr.
Avoiloble from your deqler or send:   $5.00 crrd
include ncrme of decrler.
                     :
  HENOTD PRODUCTS COMPANY, INC.
          2ll0 West Wclnut Street
           ChiccAo 12, Illinois
View original page 17Related documents and language editions

From the M. Butkus archive. Original publisher and archive notices are retained.
Check the model and edition against your equipment.
PDF verified 2026-10-10.