Film cameras
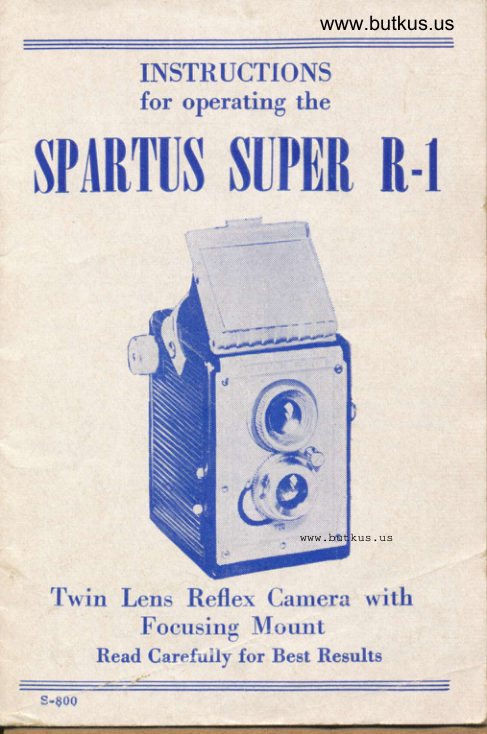
Super R-1 Reflex User manual
User manual for Super R-1 Reflex. 17 pages in English. Read the original PDF, download or print a copy without registration.
17 pagesEnglish2.4 MB PDF
Loading your manual…Open PDF directly
Document details
- Brand
- Various brands
- Model / document
- Super R-1 Reflex
- Document type
- User manual
- Language
- English
- Pages
- 17
- File size
- 2.4 MB
- Category
- Film cameras
- Document date
- Not specified in catalog
Search available document text
Find a term, then jump to its page in the original PDF. Image-only pages may not be searchable; check the PDF for exact wording and diagrams.
Page 4 · Read text
INTRODUCTION

   This type of reflex cqmero is guoronteed to
 give good results if used prop"rly qnd in qc-
 cordqnce with these instructions. lf for onV
 reoson your comero is not doing qs well os
you think it should, wrife direcr to us. Do not
be sotisfied. until you get good results from
every roll of film.
  Your cqmero is o precisibn buift instrument
so hondle it os such ond you will be reworded
for your cqre wilh consislent solisfoctory  results.
View original page 4
Page 5 · Read text
www.butkus.us


  Whcn o ftlm which is scnsitive to light ir
ploced in your cqmerq ot o determined distonce
from the lens ond the shutter lever [s tripped,
the light odmitted ihrough the lens for the time
lhe shuiter remoins open is focussed by fhe
lens onto the sensitive film. The film is fhen
fermed "exposed" ond when chemicolly treoled
produces o negotive of the imoge picked up
by the lens. As noled from the obove, light is
the most importonl focfor in fhe ort of picture
toking. Since lhis is true, controls qre ploced
on lhe comero for odiusting the omount of
light thot should enter to properly sensitize lhe
film. This is occomplished on the csmerq by
chonging the size of the hole locoted neor or
inside the lens. This is commonly known os o
stop, diophrogm, or operlure ond is expressed
in volues of f, such os t7.7, fl6, etc.


   Films qre mode of vorious sensilivily, known
os "speedr" ond monufocturers supply you
with this speed roting so os to enoble you to
 odiust your comero to properly expose the
 porticulor fype of film you ore using. lnslruc-
 tions for lhe correct 't|t' volues for your
 comero will follow.
View original page 5
Page 6 · Read text
:','oil#ro
                                                                                                                                                         r:a'      .,


       Usa ony stondord rize No. 120 ftlm, typc
      ond speed to meel your requiremenls. Vou will
      gef 12 expoiures (2tA x21/a) lrom eoch roll.
                toking ony ,picfures, fomiliorize your-         .Before
       self with the cqmero. Reqd the instruciions,
      which will exploin the woy to open ond looj
      lhe comero, how to odiust the controls, qnd
     methods of focusing. ln generol, ocquoint
       yourself with the equipment so thot when you
      ore          -reody lo "shoot,r, you will be oble to
      hondle the comero in the best mqnner fo pro-     duce the decired recults.


          . To- open lhe comerq fior looding, unscrew        rlt" bock lock (A) ond prcss down the t     shoped bock (B)  do not force the bqck
       forther thon it witl go.
      When purchosed the comero wilt hove on
     empty spool in lhe upper spool comporfment.
     To reploce on empty spool, pull out winding
     knob (C) ond turn in jirection of orrow until
          it remoins in oulword position. ploce the spool
      with slofted hole roword the knob ond pri thel     other end of the spool over ihe srud on op-
      posite end. Drop the spool in ond releqse ,he
      k.no9, turning until the tongue on the knob
      shoft is engoged in the slJred hole in rh;       spool.
View original page 6Page 7 · Read text
www.butkus.us

  Now loke o spool of film, remove the out'
side wropping ond insert  it  in the lower
chomber with the block side of rhe film focing
the inside of the comero. Pull the poPer leoder
ocross the dork comPortment towsrd fhe empty
spool ond threod the poper leoder in the
wider slof. Give the winding knob one or lwo
turns to the right, moking sure thot the poper
leoder is firmly centered between the spool
flonges. lf the poper leoder hos not been
inserted correctly the spool will hove o lend'
ency to bind, therefore, press the poper gently
sidewoys to properly center it. Close the lock
of comero ond be sure thof  it  is securely
locked.

   After looding ond the bock is tocked, look
 into the smoll round window in the bock ond
turn the winding knob (C) in direction of
orrow until the worning hqnds oppeor. Then
continue winding very slowly until o  series
of dots ond the No. I shows in the window.
You ore now reody to toke the first picture.
 After the firsl exposure, wind the knob until
No. 2 oppeors in the window. Repeot this
 ofter eoch shot until the l2th (lost) exposure
hos been mode. The some opplies to  color
 film os well.             6tfr(rr-' - s

  CAUTION: Remember to wind lo nexl num'
 ber ofter eoch exposure.  t
View original page 7
Page 8 · Read text
rffil

   When oll 12 picturer hove been exposed,
  continue to wind until the end of fhe poper
  posses the window, ofter which, keep winding
 for serverol more turns lo moke sure thot oii
 lhe proteciive poper is wound on fhe spoot.
 l{oy open the bock, pulf out the winding knob, qnd toke the roll out of rhe chombei.
 lmmediotely moisten the gummed lobel pro-
 vided- ond poste to roll to prevent unro""iing.
 Tronsfer the empty spool from the opposiL
 comportment to fh9 winding knob comporl-
 ment to be reody for onother looding.


   Hold the comero ftrmly ogoinsf your body
with the feft hond ot the proper jistqnce ro
see cleorfy the imoge on the ground gloss in
lhe finder ofter the viewfinder hood (D) hor
been lifted to lhe open position. ploce the
right thumb on top of shutter lever (H) ond
support the bottom of the comero with the
remoining            .fingers. While viewing the subiectin the finder, hold the comero perfectly itill
ond press the lever gently down os f-or os
it will go. Roise thumb ond lever will into
position ior next exposure. The foregoing
covers instruclions for using the ,'reflelt"woisl level" type finder.                      "i
View original page 8Page 9 · Read text
www.butkus.us

   The shutter is q fixed rpeed typ. giving on
 exposure ol 1160 of q second. lt cqn be od-
 iusled lor either time or inslontoneous ei-
 posures. For oll snopshots ond when ihe sub-
 iect is in motion, push lever (G) to INST. The
 moiority of your pictures will be loken under
 this condilion.


  When lighting conditions ore poor ond qn
inslontoneous exposure is not sufficient to
properly expose the film, set fhe lever (G) to
TIME. When moking this type of exposure, lhe
subiect musl remoin perfectly sfill ond fhe
comero must be ploced on some rigid obiect
such os o toble, etc. Hold the cqmero firmly
ond press the shutfer lever down, holding  it
down for the required omount of light ex-
posure. Tirne of exposure con be determined
from the exposure fqble occomponying fhe
film. Focus your subiect qs you would do
normolly before tripping shutter lever.


   By grosping ond turning the geor wheel on
 ?he toking lens (F) subiects ony dislonces from
 slightly less thqn 6 feef to infinity (os for os
 the eye con see) con be photogrophed shorply.
View original page 9
Page 10 · Read text
For conyenience, the lens mount is colib-
  roted in feet oround its diqmeter. To focus
  merely lurn the mounl until the footoge on
  fhe diol corresponds with the distonce in feet
  from the subiect to the comero. This is o fosi
 qnd reosonobly sure melhod of focusing.


   The "stop lever" (E) is for reguloting lhe
 omount of light permitted fo enter the lens
  in ocordonce with the type of film being used.
   You hove four settings for your lens, Fig. E
 F7.7, tll,  Fl6, F22. The purpose of these set-
                                                                                                                                                                 I tings is fo odmit either more or less light
 under prevoiling conditions.
   Under very dull conditions, or indoor flosh,
  it. is necessory to odmit os much light os pos-
 sible 30 use the F7.7 sefting ot thi, is the
 widest opening.
,  For normol light, use Fl I  which is fhe
                                        snow, medium opening -  Use Fl6 for bright beqch scenes, ond neorby people i.n morine or
 !e9ch bockground. For distont londscopes                                              - Brilliont sunny beoch or mqrine lcenes, use
 F22 the smcllest opening.
  When using color film for indoor flosh, use
                                        Fl I ond for t7.7 -  For bright outdoor color duf l outdoor color F7.7.
View original page 10Page 11 · Read text
www.butkus.us


  For best results with flosh light, we recom-
mend the use of ony good relioble film.
  The' Flosh-Gun supplied with your cqmero
requires very little oftention, ond only the
following steps ore necessory to put it  in
operoting condiiion:
l. The refleclor should be polished with o soft
   clofh or lissue. This should be repeoted ot
   inlervols to keep refleclor cleon ond highly
    refleclive.
2. Two "C"-cell botteries musl be stored ln
   the bottery comporlment of fhe gun. To do
         f his, unscrew the smoll knurled screw on
   the side bf the gun. The two sides will then
  come oporl. Ploce the botteries TIP UP-
  WARDS between the two bross springs on
   the side to which the reflector is ottqched.
  Then put the side bqck together ond
   fighten the screw.
3. To instoll the flqsh gun, iust insert fhe stud
  on the side of the gun into the hole. Screw
   the knurled round nut onto the threqded
 '  stud which is protruding from the comero
  ond you ore reody to toke flosh pictures.
  Your comero is equipped wirh o synchro-
nized shutter ond no odiuslmenls on the
comero ore necessory. The bulb will flqsh
when the shutter is pressed.
View original page 11Page 12 · Read text
IMPORTANT: When operoring the shuiler
press it firmly ond gently downword (do not
hesitote or stop during the down srroke) until
if clicks ond ihen releose. This will ossure
good synchronizotion ond even exposure.

  When the flosh-gun is removed from comerq
ond contoins botteries, do not ploce it on ony
metollic obiect. This moy cquse o short circuii
ocross the connector prongs which will ruin the
botteries.  lf. fhe gun is to be stored owoy for
o consideroble length of time, it is odviioble
?o remove the bot{eries. your flosh-gun will
occommodote lhe most populor size bulbs ob-
loinobfe. ijtf/<u    t... :. u2'

  With the new M-2 odopter which comes
with your flosh gun, you con now toke flosh
piclures using ihe new midget (M-2) bulbs.
Using your index finger, iust insert the odopter
os for os it will go into the flosh gun. /vtoke
o quorter turn to the righr ond the odopter
wilJ         in ploce so thot you con use lhe     -stoyM-2 bulb.

   tt is recommended thot flosh shots should
not be mode ot o distonce greoter thon
twelve feet with obove nomed bulbs. Subiects
ot greoter disloncer con be photogrophed
with the lorger bulbs.
View original page 12Page 13 · Read text
www.butkus.us
  The bottcrics for the flosh-gun qre obtoin-
oble from your photo supply deoler, hord-
wore, or deportmenl store. They hove c shelf
life of six months ond since the curre,nt con-
sumed by the flosh bulb is very smoll, they
should losl you for this period with normol use.
 lf ever in doubt os lo the condition of the
boiieries, it is odvisoble lo obtoin new ones.
Their cost is very reosonoble.
  With q minimum omount of core ond cou-
lion, you should get very fine resuhs ond
derive o greot qmouni of pleosure with this
equipment.


  To tqke color pictures outdoors, use ony
stondord #l2O ouldoor colorftlm. Tha sub-
 iect must be in bright sunlight to foke snop-
shols. The best time of the doy to tqke color
 pictures is lote morning or eorly ofternoon.
 At noon the light is too high qnd tends to
 give on unnoturol oppeqronce. Do not qt-
tempt to lqke snopshots when the subiect
 is in shodow, or the light is foo dull. Follow
 instructions thqf occompony your ftlm.
 'To      toke color picfures indoors, toke ony
 stondord #12O indoor color film. For lighting
 use flosh or photo flood lomps in reflectors.
Do not mix doylighr with flosh or photo floods.
 lf  possible, use q good expoture meter to
 give the correct operture opening.
View original page 13
Page 14 · Read text
l. Be sure operlure is properly sel occording
   to light condition.

2. Scf focusing mount fo proper disfqnce.

3. Advonce film ofter eoch exposure to ovoid
   spoiling your pictures by double exposure.

4. Before qnd ofter using, olwoys clean lenscs
   with o soft, dry cloth to remoye dusf, finger-
    prinfs, etc.

5. Do not loke pictures focing the sun.  Thc
  sun should be behind your bock when  tqk-
   ing pictures.

6. locote your subiects in fhe position desired
   in the viewfinder. The comero tokes sightty
  more ihon you octuolly see fhrough the
   viewfinder.

7. Be sure to hold comerq still when toking
   pictures ot qll times.

8. Ploce time lever lo "INST" when toking
  snop shots ond to "TIME" position whenl
   loking lime pictures.
View original page 14Page 15 · Read text
11f.*,'ir:{ "r        www.butkus.us     rYol I


    DON'T lood or unloqd your comero in direct
   sunlight. lf you hove to loqd out-of-doors,                        fI
  seek q shody spot or irrterpose your body be.                    I
  tween lhe sun ond the comero.                                                        I
                                                                                                                                       I
   DON'T hove the sun directly in fronf of you                   Ii
 when ioking o piciure. Endeqvor to orronge
  your viewpoint so thot the sun is behind qnd
 q little lo one side of you-

   DON'T ierk the releose of the comero. Press
  genrfy ond slowly.                              *                 Bu*f u5-uJ
                                                                               i
   DON'T be ofroid to toke a "Time" exposure
. in poor light. lt is on eosy os toking o snop.
  shoi, providing the cqmero is ploced upon
  some suitoble support.
  .

   DON'T loy your comerq qbout on the sqnd.

   DON'T unroll thd' spoot of fitm to 'isee the
  picture." There is nothing lo be seen until
  ofter development, which musl be done in o
  propef dqrkroom or light-tight tonk. Any white
  light which reoches the film will spoil the pic-
  lures in o frqction of q second.
View original page 15Page 16 · Read text
THE SUPE'R R.I CAMERA
   is unconditionolly guoronteed ogoinst defec-
   tive workmonship ond moteriol for q period
  of ONE YEAR. FOR SERVICE return comero
   lo. foctory with this guorontee ottoched ond
   $1.50 to cover hondling ond postoge. Crocked
  or broken ports ore noi covered by this service
  chorge, therefore, PACK CAMERA VERY CARE-
  FUTLY AND AWAYS INSURE PARCEL. For re-
  plocement ports see list below. lf  necessory
   lo return comero to foctory be sure to enclose
  the $1.50 hondling chorge os foilure to do so
   will deloy the repoir ond return of  your
   comero.
    Should your comerq require ony of  the
  following repoirs, it will expedite motters  if
  you will send us remitiqnce occording lo fhe
  following svhedule ot the some time thot you
  moil us your comero:
  Nome Plote, Both Lenses & Mounts .-.....-$5.00   .
  Top lens & Mount                        2.00
  Bottom Lens & Mount              ..-.---.-.---.. 2.50
 Nome Plote --....                           .50
  Bock                                        1.50
  Right Side -  Knob Side                   1.25  left Side                                .-.----.....-.... 1.00
  Shutter Assembly                      1.00
 Strop                                        .25
 Top Assembly                          ----..... 1.00
HEROTD PRODUCTS CC)., Inc.
2llO W. Wolnut Chicogo 12, lll.
                 Printed in U. S. A.
View original page 16Page 17 · Read text
www.butkus.us


                     p6ffita .u5
            SUPER N-I REFTEX
      SPARTUS
     CAMERA

ffi
 ":$T"T
View original page 17Related documents and language editions
From the M. Butkus archive. Original publisher and archive notices are retained.
Check the model and edition against your equipment.
PDF verified 2026-10-10.