Film cameras
Meopta Opema Machine-translated instructions
Machine-translated instructions for Meopta Opema. 9 pages in English. Read the original PDF, download or print a copy without registration.
9 pagesEnglish0.3 MB PDF
Loading your manual…Open PDF directly
Document details
- Brand
- Meopta
- Model / document
- Meopta Opema
- Document type
- Machine-translated instructions
- Language
- English
- Pages
- 9
- File size
- 0.3 MB
- Category
- Film cameras
- Document date
- Not specified in catalog
Search available document text
Find a term, then jump to its page in the original PDF. Image-only pages may not be searchable; check the PDF for exact wording and diagrams.
Page 1 · Read text
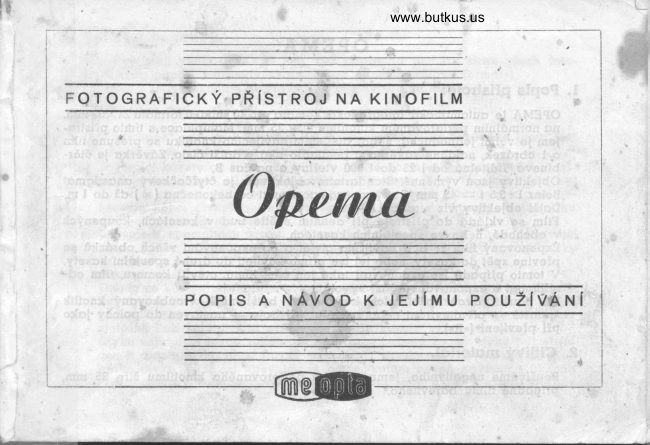
Cover
PHOTOGRAPHIC APPARATUS FOR CINEMA FILM
DESCRIPTION AND INSTRUCTIONS FOR ITS USE

Page 2
1. Device description:

OPEMA is an automatic photographic chamber for 40 images in the 24X32 mm format,

on normal 35 mm perforated cine film. Handling this device is very simple, as turning the rewind knob
moves the film o lobrazek, the shutter cocks and the counter shows the next number. The shutter is
slotted, Readable from 1/25 to 1/500 second and B time.

Lenses are interchangeable. The standard lens is a four-point anastigmat

Belar l : 3.5 f = 45 mm, which can be focused from infinity (oo) up to l m.

Other lenses see page 11-12.

The film is inserted into the device in daylight either in cassettes, purchased in the store or in special
cassettes.

The exposed film is either wound on a reel and after exposure of all the images it rewinds back into the
cassette, or it can be directly wound into a second special cassette.

In this case, it is also possible to expose only part of the film, open the camera, and cut the film and
called out the exposed part.

When used. two special cassettes must have an outer knurled knob trigger -- when opening or closing
the device - set to position as rewind (»RlC).

2. Sensitive material.

We use negative, fine-grained perforated 35 mm film, or color film.


Page 3

3. Size negatlv'li.

The negatives have a size of 24X32 mm, which corresponds to the aspect ratio of all photographs

paper and standardized postcards (»world format!l).

So we will use perfectly negative and positive material.

4. Establishes a film,
View original page 1
Page 2 · Read text
a) In the store, you can buy a movie already in cassettes. The length of such a film is 1.60 m and 40
pictures can be made on it.

b) Remaining film cassettes can be filled in the darkroom with any length of film

(max. 1.60 m). However, care must be taken to ensure that the film is on the reel correctly wound (with
the sensitive layer inward and correctly relative to the extended

end of the coil) and with the coil properly inserted into the cassette, just like for all motion picture
devices.

c) If we use special cassettes, we fill them in a dark room with film (the largest f

length 1.60 ml. Again, care must be taken to properly wind the film and insert the reel to the cassette.

We proceed as follows:

Let's open the cassette; press the pin to release the locking spring on the upper surface cassette (next to
the protruding coil spindle) and turn the pin in the direction clockwise until the longitudinal holes of the
outer and inner cover of the cassette identify. Then we slide out the inner cover from the outer cover of
the cassette (Fig. 1.).

We hold the coil with the left hand so that the extended end of the coil is reversed to the palm of the
hand, the end of the film (straightened up) is inserted with a layer under feather of the coil, by which we
fix it to the coil. Then we tightly wind the film on coil, otherwise we would be touching the sensitive
layer (Fig. 2.). We then insert the coil

Page 4
into the inner cover of the cassette so that the extended end of the tube passes through the opening

rem at the bottom of the packaging (Fig. 3), then insert the outer packaging (Fig. 4) and turn

eat it in the direction of the protruding end of the film until the locking clip clicks. CoDec

of film (several centimeters) protrudes from the cassette. P a k m u that me in yj

ít s k a set o u ad en n í s e tI o.

5. Opening the chamber.

There are two locks on the lower part of the device, which we turn so that the lines point

to the letter »0«. Then we remove the back wall of the pfísrow (we pull it out and remove by lifting - fig.
5 and 6).

'WITH. Loading the film into the device.

We insert the end of the film (just pull it down) under the coil pair (which is
View original page 2
Page 3 · Read text
in the chamber - Fig. 6 and 7). We then insert the coil into the space of the chamber under the winder

with the knob so that the winding axis of the device fits in with its notch of the pin drive pin in the
hollow axis of the coil. We then insert the film cassette into the space of the chamber under the rewind
knob (Fig. 8.).

In the case of a special cassette, make sure that the pin on the bottom of the cassette fits into the hole
in the chamber.

We then arrange the film on the guide of the device and make sure that the teeth of the measuring
device of the roller fit into the perforation holes of the film on both sides.

7. Install the device.

If we have the film properly installed in the device, we attach the back wall of the device so that so that
the pressure plate pinches the film and we insert the back wall (inverted zpu130b as opening). We will
then close both locks (commas against letters

Page 5

Fig. 9.). Immediately after that, with a whistling button. we will turn in the direction of ~ipky et

so we slightly stretch the film (Fig. 10.).

8. Set counters on Dulu.

Turn the winding knob in the direction of the arrow until it stops and press the trigger.

PU rotation of the rewind knob, the rewind knob must be turned in the opposite direction arrows, which
is proof that the film has been properly established. We repeat it all again once or twice to unwind the
illuminated end of the film. Now we turn with the image counter using two pegs in a clockwise direction
until we set -0« against the triangular mark.

9. Preparing the chamber for photography.

a) Before taking pictures, we must not forget to take out the lens.

We do this by gently grasping the grooved sleeve of the lens with our fingers by turning, pull out the
tube ! (about 12 mm) and turn it to the right up to to the stop, so we secure it in the extended position
(bayonet lock fig.

11.).

b) Aperture setting.

The chosen aperture is adjusted by turning the checkered ring on the lens (Fig. 12).

c) Lens focus.
View original page 3
Page 4 · Read text
We focus by turning the ring lever with the meter scale. This focusing is associated with the movement
of the yellow image in the optical viewfinder.

If both images - white and yellow - merge in the viewfinder, the object is correct focused.

The rangefinder can be used with all lenses with focal


Page 6

VOU ~kou f = 4S nim, (then teleobjectivesV1\ Tele-Mirar 1 : 4.5, 1= 90 mm and Tele-Mirar 1 : 4.5, f = 135
mm.

If we use a wide-angle lens Largor 1 : 6.8, f = 30 mm or a telephoto lens Telex l : 6. f = 180 mm, we have
to focus by estimation.

In this case, we set the estimated distance by turning the lever circle with a meter scale against the black
triangular mark, which is under the view of the viewfinder (Fig. 12.). At Opema, we proceed without a
range finder pli focused in the same way.

d) Fixation of long exposure.

The knob with the exposure times can be pulled out and turned with the light stretched verce for any
time against the triangular mark. Exposure times are B (time), 1/25, 1/50, 1/100, 1/200, 1/500 vtefins.

'10. Performing a snapshot.

After finding all the exposure elements and setting the proper distance, we turn winding knob in the
direction of the arrow all the way. The device is now ready to the exposition. We put the viewfinder to
the eye and at the appropriate moment apply pressure the index finger of the right hand gently presses
the trigger. At the same time, we hold the chamber firmly with both hands they cup the forehead (Fig.
13.). ..,'

Beginners are advised to use exposure times I/IDO in order to take pictures they did not fall apart. Only
experienced people can take hand-held pictures of 1/25th of a second, possibly even more longer.

11. Time constraints.

We can't take these images by hand, we have to screw the device on a tripod (for this purpose, the
device is equipped with a 3/8 inch tripod nut) and use a wire trigger.

Page 7

We do not set the cooling button to .S«. 1'0 stlskri\1tldrát~lÍ~ sp6u~ť3 with shutter it opens and stays
open as long as the trigger is held. Closes after release trigger.

We can make the exposure time arbitrarily long in this way.
View original page 4
Page 5 · Read text
12. Additional slides.

After exposure, it is possible to turn the winding knob again and perform another one images. The
counter then shows us the number of images made.

13. End of the movie.

The winding knob can be turned easily. However, once pfi rotation cftfme big resistance and even after
pressing the shutter button you cannot rotate, this is a sign of the end of the film.

Now, as a rule, the film is rewound to the original cassette. Before rewinding we have to release the
mechanism of the device. Lower and turn the outer grooved button first, press against the direction of
the arrow so that the red points are opposite each other her and turn in the direction of the arrow. This
gives us the position .R« and we can wind it turn the knob on the other side of the chamber in the
direction of the arrow and rewind the entire film back to cassette. We know the end of the overdrive if
we feel a lot of resistance in the rotation. .

14. Remove the film from the device.

We will open the chamber in the already known way and take out the film with the cassette and the reel
from the device. The end of the film, fixed on the reel, is released as follows:

We push the film even more under the feather of the cfvka and slide it out laterally (Fig. 14.).

15. preparation of the chamber for the next film.

Before inserting the next film, don't forget to unlock the .R« position. Grooved on the outside lower the
button and turn it against the direction of the tip, which will release it and jump out

Page 8

by pressing the spring upwards (or we can help him by turning the rotary knob) and we turn them in the
direction of the arrow, thereby securing it so that it does not compress.

16. Drawing depth scale.

There is a triangular mark on both sides of the lower ring of the lens umistema scale member, which
shows on the meter scale the distance, between with which the image is sharp.

l'Iláme on pf. zaostfeno to 4 meters, that is, the number »4« is against the triangle brand. We have the
lens stopped at aperture number ll. Triangular on both sides marks we find the numbers II and read
against them: on one side 2.5,

on· the other side about 12 meters. All objects will be sharp on the image distant from 2.5 to 12 meters.

The table serves to determine the depth of the drawing more precisely.

17. Photographs on infrared material.
View original page 5
Page 6 · Read text
Infrared-sensitive material is used for the photography of married telephotos rays. It is necessary to use
special dark red filters. PUtom we have to set meter distances against the red marked IR mark.


Page 10 (developing film)

.J8. Film development.

If we want to develop the film ourselves, we must devote sufficient care to this work, to develop the
film with fine grain and not scratch it, We recommend developing in a developer (tank) with well-known
well-known developers manufacturer

For those who prefer to prepare the developers themselves, we recommend these tried and tested ones

developers:

a) Developer by Kodak - D 76:

Distilled or distilled water (50~ C), 750 cm3

\ \ \. 1\ t\..; Metol", 2 9

\~\J 'v Sodium succinate anhydrous . 100 9

~ (or crystalline sodium sulfite 200 gl

\JI\.;'- Hydroquinone , , , , " 5 9

\. Borax. , , . , . , . , 2 9

~All the herbs dissolve gradually under gentle stirring. After dissolution

medicinal plants, the solution is supplemented with cold distilled or pfevafen water for

1000 cm3,

The developing time at 18-20° C is 20 minutes

12° C " 33

15° C " 26

21°C" 15

24° c:::." 12 il

It is not a pity to extend the exposure,
b) Windisch developer: '"r., • : f
View original page 6
Page 7 · Read text
Distilled or distilled water. . 700 cm3

Sodium citrate anhydrous. 65 9

Phenylenediamine ortho 8 g

Methol. 8 9

Crystalline potassium disilicate. 7 9

Dissolve all herbs individually with gentle stirring. The water of the man be lukewarm. Melol and
phenylenediamine ortho dissolve completely only after slUi of both solutions. To this solution of
developing agents, we then add a solution of rinse of sodium and finally add a solution of potassium
bisulfite. Micham everything until the solution becomes clear, after which the finished solution
according to potfeba we filter. The development time is 12 to 13 minutes at a developer temperature of
18°C.

The exposure must be extended by 3X, which means that the sensitivity of the lens will decrease

by about 4/100 DIN.

19. Special accessories.

a) Interchangeable lenses.

The entire lens can be easily unscrewed from the chamber and replaced with another one.

The following lenses will be delivered to KOPE:

l. Largor l: 6.8, f = 30 mm - wide-angle lens.

2. Belar l: 3.5, f = 4S mm - normal lens.

3. Belar l : 2.8, f = 45 mm - normal lens with increased Bvetelnost.

4. Openar l : 2, f = 45 mm - lens with high brightness.

5. Tele-Mirar 1 : 4.5, f = 90 mm - telephoto lens.

Send feedback

Side panels

History

Saved
Send feedback
Side panels
View original page 7
Page 8 · Read text
History
Saved

Page 12

6. Tele-Mirar l : 4.5, i = 135 mm - telephoto lens. "I

7. Telex l : 6, i = 180 mm - telephoto lens.

It is supplied with each lens of a different focal length than i = 45 mm special viewfinder, which is
inserted into the holder on the top lid of the chamber.

b) FULLY.

l. FUtr fZ} 36 - G l: light yellow filter, extending the exposure by 1.5-2.5X.

2. FiUr fZ} 36 - G 2: medium yellow filter, extending the exposure by 2-3X.

3. FiUr fZ} 36 - G 3: dark yellow filter (orange), extending exposure

3-4X.

4. FUtr 0 36 - GR l: green filter, extending exposure 3-4X.

5. FUtr 0 36 - RI: ruby filter, extending S-1OX exposure.

e) Spare cassettes for film (self-closing).

d) Winding rod (used to wind the film onto the cassette reel).

e) Emergency leather bag with strap.

i) Intermediate rings to the lens i = 45 mm: the first to iotograph the object from distance 87 mm from
the front lens, in the scale l : l, the second to be photographed object from a distance of 347 mm, or
reproduction of AS size originals.

g) Front lens for photographing an object from a distance of 470 mm Art reproduction of A4 size
originals.

. h) Holder (all-metal) for flash bulbs with synchronizer. He gets on tide on the pfístruj

Page 13

fig. l. Special »self-closing« cassette (disassembled and assembled).

In a dark room.

fig. 2. Winding the film onto the reel (core) of the cassette.
View original page 8
Page 9 · Read text
fig. 3. Inserting the reel with film into the inner casing of the cassette.

fig. 4. Inserting the outer cover of the cassette.

By the light.

fig. 5. Opening the chamber (removing the back cover).

fig. 6. Open chamber with a rolling coil.

fig. 7. Capturing the end of the film on the main reel (not the reel other cassettes.)

fig. 8. Opema with established film room.

fig. 9. Bottom of chamber lid with lock and tripod thread.

fig. 10. Stretching the film with a spinning roller (after the film has been installed).

fig. II. Chamber top; Winding and winding wheel, timer shutter button, trigger, depth and meter lens
scale.

fig. 12. Opema from the front.

fig. 13. Holding Opema while taking pictures.

fig. 14. Ejecting the film from the free spool (after rewinding exposed film).

fig. 15. Opema from behind.

Back page
combined plants for fine mechanics and optics

NATIONAL ENTERPRISE PREROV •

PLANT OPTIKOTECHNA PREROV

Knihtskárna Jar. Strojil, Pterov
View original page 9
Related documents and language editions
From the M. Butkus archive. Original publisher and archive notices are retained.
Check the model and edition against your equipment.
PDF verified 2026-10-10.