Film cameras
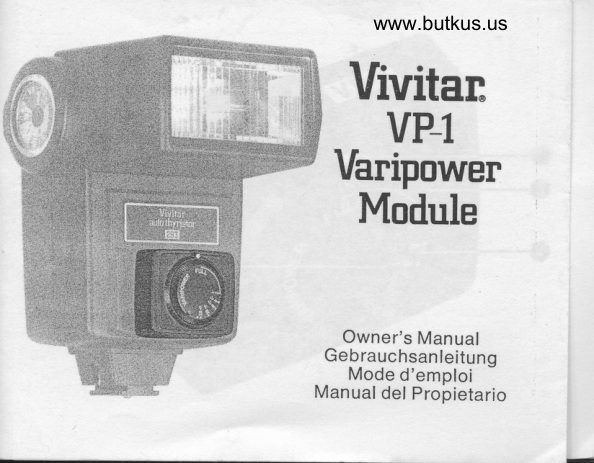
Vivitar VP-1 Varipower Module User manual
User manual for Vivitar VP-1 Varipower Module. 34 pages in German, French. Read the original PDF, download or print a copy without registration.
34 pagesGerman, French2.0 MB PDF
Loading your manual…Open PDF directly
Document details
- Brand
- Vivitar
- Model / document
- Vivitar VP-1 Varipower Module
- Document type
- User manual
- Language
- German, French
- Pages
- 34
- File size
- 2.0 MB
- Category
- Film cameras
- Document date
- Not specified in catalog
Search available document text
Find a term, then jump to its page in the original PDF. Image-only pages may not be searchable; check the PDF for exact wording and diagrams.
Page 1 · Read text
www.butkus.us
  Vivitan
    VP-l

  Module


   Owner's Manual
 Gebrauchsanleitung
   Mode d'emploi
Man ual del Proirietario
View original page 1Page 4 · Read text
www.butkus.us
                VivitanVP-l
            Varipower Module
                  For use with Vivitar Model 283 Auto/Thyristor
                              Electronic Flash Unit only

Introduction
The     Vivitar VP-1-  Varipower Module is your control to "dial in" a
specific amount of flash illumination. You can balance "main" and
"fill" lights without making drastic changes in  f lash-to-sublect
distances. You can conserve battery energy by using the minimum
amount of light required for correct exposures. You can shorten
recycling time whenever "fast shooting" is more important than high
levels of light output.
Getting        acquainled
Plugged           into your 283's-  Sensor Socket, the Vivitar VP-1 Varipower
Module provides continuously variable control of manual light output

                                                       1
View original page 4Page 5 · Read text
*=!F
       between "full" power and 1 /32 ot,,full" power.
   Q ve-t etug
    @Varipower Index Mark
  @ Varipower Dial
  @ Rower Scate
  @ Exposure Correction Scale
     Mounting the Vp-l on your Flash
     1   Remove the Sensor from your-2g3's Sensor Socket.     2 -  Align the Vp-1 plug with the sensor socket making sure that the                                                    ,,Groove,,      - "Key" inside the plug will slide into the                                                   molded
           into the Sensor Socket.
                                                                       in the sensor     3 -  Socket.Gently insert the Vp-1 until  it firmly seats itself
                                                                                                                                                                                                                                                                                                                                l    NorE:Your Vp- j may arbo be prugged into the Remote sensor     Extension Cord.
View original page 5Page 7 · Read text
Since the VP-1 provides continuously variable control, you may
visually estimate changes in light output when the Varipower Dial is
set with the Varipower Index Mark midway between marked positions.
NOTE: The minimum Varipower Dial setting is marked wilh a dot (')
at which point the VP-1 will limit light output to approximately
1 /64 of full manual power. A few test exposures will quickly
establish the light output of your 283 using this minimum dial setting.
                              Scale      the Exposure                    CorrectionUsing                                     indicates-     the difference between    Exposure              CorrectionThe                      Scale @
exposure at full manual power and exposure al a selected dial
setting. This difference is indicated in a number of full f-stops. The
minus symbol preceding each exposure correction serves as a
reminder that the exposure is less than that obtained with full power
and that the camera lens must be opened by the indicated
number of f-stops.
Power-Scale
Setting        FULL  2   4   8  16   32
Exoosure
Correction              -1   -2   -3   -4   -5
View original page 7Page 8 · Read text
www.butkus.us
For example,  if you're using DIN 15 (ASA 25) film and your flash-to-
subject distance is21/q meters (7Vz'feei), the 283's Calculator
Dial indicates correct exposure at fB. lf you now set the Varipower
Dial at "2" or Vz power, your photograph will be underexposed
1-stop unless you open your lens diaphragm to the next larger   f -stop.
ln this example, the exposure correction indicates "-1" which
would result in correct exposure at f5.6.
Since the VP-1 provides continuously variable control, you may
visually estimate exposure corrections in 1/s or 7z f-stop increments
when the Varipower Dial is set with the Varipower Index Mark
between marked positions.
NOTE: The minimum Varipower Dial setting is marked with a dot (')
at which point the VP-1 will limit light output to approximately 6
f-stops below exposure at full manual power. A few test exposures
will quickly establish the exact exposure correction for your
283 using this minimum dial setting.
                     lightingBalancing              "fill-in"                       exposure-       correction when using your               to a specific    may dialYou
283 as a "fill-in" light. For example, using DIN 15 (ASA 25) film'
View original page 8Page 9 · Read text
your daylight exposure calculations  call for fB at 1/60 second.
 (Remember lo check your camera's shutter speed requirements for
 "X" synchronization.)   lf your  f lash-to-subject distan ce is 21h meters
 (7th  f eet), proper  f lash exposure would also be fB. Taking tne
 picture with these daylight and flash conditions would produce a
strong fill (the flash "fill" illumination equals the daylight iilumination
used as a "main" light). For a normal fill, you would ordinarily
increase flash-to-subject distance to 3.3 meters (11 feet). For a
weak fill, you would increase flash-to-subject distance to 4.6 meters
(15 feet). However, you may not have room to make these increases
 in flash-to-subject distance. Also,  if your flash is mounted on
your camera, you'll alter the composition of your picture  if you begin
moving camera and flash to increase flash-to-subject distances.
With the Vivitar VP-1 Varipower Module, simply dial to                                                                ,,- 1 ', for
normal  fill, or dial to       for a weak  fill. There's no need to
change the flash-to-subject distance.
Conserving battery power and shorteninE recycle time
The Vivitar VP-1 varipower Module utitizes your 283's Thyristor-
circuitry to control light output, in much the same manner that its
Automatic Flash Circuitry turns off the light for preprogrammed
View original page 9
Page 10 · Read text
www.butkus.us
exposures. Theiefore, at any Varipower setting less than "FULL,"
your 283's capacitor will retain a portion of its charge thereby
reducing battery drain and shortening recycle times.
For example, using DIN 15 (ASA 25)  f ilm, you're about to make
several exposures with a flash-to-subject distance of 21/z meters
(71h teel). Using full manual power, your Calculator Dial indicates
proper exposure  at fB. Dialing the VP-1 to "8" and opening your lens
to f2.B will also produce proper exposures, decrease battery drain,
and reduce recycling time. Also, you'll find  it easier to "freeze"
aclion when operating at reduced power since you're shortening
flash duration as you dial away  f rom "FULL."
View original page 10
Page 11 · Read text
VivitanVP-l
            Vari-Power-Modul
                Nur fur Verwendung mit dem Vivitar Modell 283
                         Auto/Thyristor-Elektronen   bl itzgerdt


Einleitung
Der Vivitar VP-1-    Vari-Power-Modul  erlaubt lhnen, durch',Anwdhlen"
eine bestimmte Menge Blitzbeleuchtung zu regeln. Sie haben die
Moglichkeit, "Haupt-" und "Aufhell"-Lichter auszugleichen, onne
eine krasse Anderung der Entfernung vom Blitzgerat zum
Aufnahmeobjekt vornehmen zu mussen. Und Sie konnen Batterie-
strom einsparen, indem Sie die kleinste, fLir richtige Belichtung
erforderliche Lichtmenge benutzen. sie konnen die Blitzfolgezeit
immer dann abkurzen, wenn "schnelles SchieBen" wichtiqer als
groBe Lichtleistung  ist.
View original page 11Page 12 · Read text
www.butkus.us                             kennenLernen              lhr Vari-Power-Modul       Sie                                 wird in -die Sensorbuchse lhres               Vari-Power-ModulDer Vivitar         VP-1
Modelles 283 gesteckt und liefert kontinuierlich verdnderliche
Regelung der manuellen Lichtleistung im Bereich zwischen "voller"
Lichtstdrke und 1/32 der "vollen Lichtstdrke."
Q ve-t -srecker
@ Vari-Power-Einstel lmarke
@ Vari-Power-WAhlscheibe
@ licntstarkenskaia
@ Seticntungskorrekturskala
                                ansetzen                         lhr Blitzgerdt       den               an           VP-lWie    Sie                               Sensorbuchse-     lhres Modelles                          aus der                   Sensor1             Sie     Ziehen             den
  -  283 heraus.
2 -  wobeiRichtenSieSiesichdenvergewissern,VP-1-Stecker daBmit dieder "Feder"Sensorbuchseinnerhalbaus,des
     Steckers in die "Nut" hereingleitet, die in der Sensorbuchse
     ausgebildet ist.
                                g
View original page 12Page 13 · Read text
3 -  SensorbuchseFrihren Sie nun sitzt.vorsichtig den Vp-l ein, bis erfest in der
ANMERKUNG; lhr VP-1 kann auch an die Fernsensor-
Verldngerungssch  nu r angesch lossen weroen.
Wie Sie die Lichtstdrkenskala benutzen
Die Lichtstdrkenskala @ zeigt die vari-power-wdhlscheibenein--
stellungen            an,                               @ausgerichtet             sind               die -  diewennWechselsie mitderder LichileistungVari-power-Einstellmarkebewirken(siehe Tabelle).  -
Da lhnen der VP-'l-Modul kontinuierlich verdnderliche Regelung
gestattet, konnen sie visuell Anderungen der Lichileistung schdizen,
wenn sich die Vari-Power-Einstellmarke an der Vari-power-
Wdhlscheibe in der Mitte zwischen markierten Einstellunoen
bef indet.
AN M E R KUNG: Die Minimaleinstellung der Vari-power-wdhlscheibe
ist mit einem Punkt (. ) bezeichnet. Bei dieser Einstellung schrdnkt
der VP-1-Modul die Lichtleistung auf anndhernd 1 /64dervollen
manuellen Lichtstdrke ein. Mit ein paar probebelichtungen konnen
sie schnell die Lichtleistung lhres Modeiles 283 bestimmen, wenn
                                    10
View original page 13Page 15 · Read text
wird als eine Anzahlvon vollen Blendenwerten angezeigt. Das
Minuszeichen vor jeder Belichtungskorrektur  weist darauf hin, daB
die Belichtung geringer als die bei voller Lichtstdrke ist, und daB
das Kameraobjektiv um die angegebeneZahl von Blendenwerren
geoffnet werden muB.
Lichtstdrkenskala-
Einstellung     FULL  2   4   B  16   32
Belichtungs-
korrektur                         -1   -Z   -3   -4   -s
Wenn Sie zum Beispiel 15 DIN (ASA 25) Film benutzen und die
Entfernung von lhrem Blitzgerdt zum Aufnahmeobjekt 2,25 Me\er
betrdgt, zeigt die Rechenscheibe des Modells 283 die richtige
Belichtung als Blende B an. Wenn Sie nun die Vari-power-
Wdhlscheibe aut "2" oder halbe LichtstArke einstellen, wird lhre
Aufnahme um einen Blendenwert unterbelichtet sein, es sei denn,
daB Sie lhre Objektivblende auf den ndchsten groBeren Blendenwert
                                                                                1 " an,off nen. In diesem Beispiel zeigt die Belichtungskorrektur  " -woraus sich eine richtige Belichtung von Blende 5,6 ergeben wurde.
Da lhnen der VP-1-Modul  kontinuierlich verdnderliche Regelung

                               12
View original page 15Page 16 · Read text
www.butkus.us
                                                                                                                  1/zgestattet, konnen Sie visuell Belichtungskorrekturen  in 1/soder
Blendenwert-lnkrementen schatzen, wenn sich die Vari-power-
Einstellmarke auf der Vari-Power-wdhlscheibe  zwischen markierten
Stellungen befindet.
AN M E R KUNG: Die Minimaleinstellung der Vari -power-WAhlscheibe
ist mit einem Punkt (. ) bezeichnet. Bei dieser Einstellung schrdnkt
der VP-.1-Modul die Lichtleistung auf anndhernd 6 Blendenwerte
unter der Belichtung beivoller manueller Lichtsldrke ein. Mit ein
paar Probebelichtungen konnen Sie schnell die genaue Belich-
tungskorrektur fur lhr Modell 283 bestimmen, wenn Sie diese
Minimal-Wdhlscheibeneinstellung  benutzen.
Wie Sie mii "Aufhell-Licht" ausgleichen kiinnenWenn Sie Ihr Modell 283 als ein "Aufhell-Licht" benutzen,-       konnen
Sie mit der Wihlscheibe eine bestimmte Belichtungskorrektur
einstellen. Wenn Sie zum Beispiel 15 DIN (ASA 25) Film benutzen, ist
laut lhren Tageslicht-Belichtungstabellen  Blende B bei 1/60
Sekunde erforderlich. (Vergessen Sie bitte nicht, die Anforderungen
bezuglich VerschluBzeit an "X"-Synchronisierung lhrer Kamera
zu prufen.) Wenn die Entfernung von lhrem Blitzgerdt zum

                               13
View original page 16Page 17 · Read text
Aufnahmeobjekt 2,25 Meter betrdgt, wdre also die richtige
Blitzbelichtung Blende B. Eine Aufnahme unter diesen Tageslichts-
und Blitzbedingungen wdre stark "ausgeleuchtet" (die
"Ausleuchtung" mit Blitz ist derTageslichtbeleuchtung,  die als
"Haupt-"Licht Verwendung findet, gleich). Fur eine gewohnliche
Ausleuchtung sollte normalerweise die Entfernung vom Blitzgerdt
zum Aufnahmeobjekt auf 3,3 Meter vergroBert werden. Um geringe
Ausleuchtung zu erzielen, sollten Sie die Entfernung vom Blitzgerdt
zu lhrem Aufnahmeobjekt auf 4,6 Meler vergroBern. Wenn
lhr Blitzgerdt an die Kamera angesetzt ist, andert sich weiterhin
lhre Bildkomposition, wenn Sie beginnen, Kamera und BlitzgerAt
zu bewegen, um die Entfernung von Blitzgerdt zum Aufnahmeobjekt
zu vergroBern. Mit dem Vivitar VP-1 Vari-Power-Modul  ist es ganz
einfach: Sie stellen die Wdhlscheibe  frlr normales Ausleuchten auf
                                                                                       ist es" -     1 ", oder  f ur geringe Ausleuchtung auf " -2" ein. Dabeinicht erforderlich, die Entfernung vom Blitzgerdt zum
Aufnahmeobjekt zu dndern.
Wie Sie sparsam mit Batterieslrom umgehen und die
                abkiiBlitzfolgezeit
Der Vivitar VP-1               Vari-Power-Modul                  rzen kiinnen -  benutzt den Thyristorstromkreis
                               14
View original page 17Page 18 · Read text
www.butkus.us
 lhres Modells 283, um die Lichtleistung zu regulieren, und zwar
ganz ahnlich wie der automatische Blitzstromkreis das Licht fur
vorprogrammierte Belichtungen abschaltet. Daher bleibt bei jeder
Vari-Power-Einstellung, die unter "FULL" (VOLL) liegt, im
Kondensator lhres Modells 283 ein Teil der Ladung erhalten.
Dadurch wird die Leistungsentnahme herabgesetzt und die
Blitzfolgen werden kurzer.
Nehmen wir an, daB Sie etwa dabei sind, mit 15 DIN (ASA 25) Film
verschiedene Aufnahmen bei einer Enlfernung vom Blitzgerdt zum
Aufnahmeobjekt von 21h Meter zu machen. Wenn sie volle manuelle
Lichtstdrke benrltzen, finden Sie, daB lhre Rechenscheibe die
richtige Belichtung mit Blende B angibt. Wenn Sie die Vp-1-
Wdhlscheibe auf "8" einstellen und lhr Objektiv auf Blende 2,8
offnen, erzielen Sie ebenfalls richtige Belichtungen, setzen die
Leistungsentnahme herunter und kLirzen schlieBlich die
Blitzfolgezeit ab. Es wird lhnen auch viel leichter fallen, die Aktion
"haarscharf" festzuhalten, wenn Sie mit geringerer Lichtstdrke
arbeiten, denn je mehr sich lhre Wdhlscheibeneinstellung von
"FULL" entfernt, umso klrzer wird die Blitzdauer.

                                 15
View original page 18Page 19 · Read text
Module Vivitan
              Varipower VP-1
                      S'utilise uniquement avec le flash 6lectronique
                           auto/thyristor Vivitar moddle 283

Introduction
Le module Vivitar-   Varipower VP-1 vous permet de "s6lectionner
au cadran" une intensit6 d6terminee d'eclairage flash. Vous pouvez
donc choisir ais6ment l'equilibre approprie entre les 6clairages
"principaux" et "d'appoint," sans devoir modifier considerablement
les distances entre le flash et le sujet. Vous pouvez egalement
limiter la decharge des piles, par I'utilisation de la quantit6 minimum
de lumiere requise pour des expositions correctes. Vous oouvez
enfin reduire le temps de recyclage chaque fois que la succession
rapide des prises de vues est plus importante que de hautes
intensit6s d'eclairage.
                                     to
View original page 19Page 20 · Read text
www.butkus.us      Familiarisation
      Enfiche dans la -douille du senseur de votre flash Moddle 283, le
     module Vivitar Varipower Vp-1 autorise le contr6le, par variations
      continues, de I'intensit6 lumineuse emise en mode manuel, depuis
       l'intensit6 "maximum" jusqu'a 1/32 de celle_ci.
         Fiche              VP-1t-   (OO        Index              Varipower
i  O Cadran Varipower
  @ fcnette des intensit6s
  @ fcnette de correction de I'exposition

!I   Montage du VP-l sur votre llash     1    Detacher le senseur de sa douille-    sur votre flash 283.      -                                                           que                                                                        et v6rifier|                                                      ,,gorge" '    2      -  Alignerla "clavette"la fichede VP-1la ficheavecestlaengageedouille dudanssenseurla                                                    de la
           douille du senseur.
     3 -  Enficher le VP-'1, sans forcer, a fond dans la douille du senseur
                                   17
View original page 20Page 22 · Read text
r                                  www.butkus.us
                                                                                                                           il                                                               est donc I   possr0reLr VP-'l permetd'estimerle contr0levisuellementpar variationsles modificationscontinues;de                                                                   I'intensit6
    lumineuse 6mise lorsque l'index Varipower fait face, sur te cadran
    varipower, a une valeur "aveugle" entre deux positions identifides.
   REMARQUE: L'affichage minimum sur re cadran varipower est
     identifi6 par un point (. ); d ce r6glage, le Vp_1 timite I,intensit6
   6mise d1/64 de I'intensit6 maximum en mode manuel. une brdve
    s6rie d'expositions d'essai permettra de juger rapidement de
     l'intensit6 6mise par votre flash 283 lorsque le 169lage minimum
    est affiche ctu cadran.
,  Emploi de t'6chelle de correction de l,exposition    L'6cheile de correction de I'exposition (f indique la- diff6rence
    existant entre une exposition a intensit6 maximum, en mooe manuel,
.   et une exposition au reglage affiche sur le cadran. cette difference
    est exprimee sous la forme d'un nombre donne d'indices d,ouverlure
'   entiers. Le signe moins pr6c6dant chacune des correctionsI  d'exposition rappelre que |exposition est inf6rieure d ceile obtenue
   lorsque l'intensit6 est maximum et que le diaphragme de I'objectif
   doit donc dtre ouvert du nombre d,indices indioue.
                                 19
View original page 22Page 23 · Read text
Affichage sur l'6chelle
                                                              32des intensit6s        FULL(max.) 2  4  B 16
Correction de
I'exposition                     -1  -2  -3  -4  -5
Par exemple, avec un  f ilm de 15 DIN (25 ASA) et une distance
flash-sujet de2,25 mdtres, le cadran de calcul du flash 283 indique
une exoosition correcte  ir fB. Si le cadran Varipower est 16916 sur
la valeur "2," ou 7z intensit6, votre photographie sera sous-expos6e
d'un indice, a moins que le diaphragme de I'objectif ne soit ouvert
d I'indice imm6diatement inf6rieur. Dans cet exemple, la correction
d'exposition indiquee est "-1"; une exposition exacte s'effectuerait
donc d I'indice f5,6.
Le VP-1 permet le contr6le parvariations continues;   il est donc
possible d'eslimer visuellement les corrections d'exposition, en tiers
ou moiti6s d'indice, lorsque l'index Varipower fait face, sur le cadran
Varipower, d une valeur "aveugle" entre deux positions identifi6s.
REMARQUE: L'affichage minimum sur le cadran varipower est
 identifi6 par un point (. ); d ce reglage, le VP-1 limite I'intensit6
 lumineuse 6mise ir 6 indices environ en dega d'une exposition d

                                20
View original page 23Page 24 · Read text
www.butkus.us  l'intensit6 maximum en mode manuel. Une brdve                                                    s6rie d'expositions
  d'essai permettra d'6tablir rapidement la correction d,exposition
  exacte pourvotre frash 283 reg16 d cet affichage minimum au cadran.
 Compensation de l'6clairage ,,d'appoinl',
  llest possible de selectionner directement au-  cadran une correction
 d'exposition donnee, lorsque votre flash 283 est utilise comme
 6clairage d'appoint. par exempre, avec un firm 1s DrN 1es Ase;, vos
 calculs pour une exposition d la lumiere du jour indiquent fB a
 1/60 de seconde. (Ne pas omettre de v6rifier ra vitesse JloLturation
 maximum permise parvotre appareir en synchronisation  ,'X,'.) pour
 une distance flash-sujet de 2,25 mdtres, r;exposition correcte au
 flash serait 6garement obtenue a fB. Une prise de vue effectu6e dans
 de teiles conditions d'ecrairage naturer et au frash comporterait
 un 6clairage d'appoint particulierement puissant (l,eclairage
d'appoint egare r'dcrairage rumiere du jour, utiris6 comme Ecrairage
principar). Pour obtenir un 6crairage d'appoint normar,  ir serait
n6c.essaire d'augmenter d 3,3 mdties ra distance rrasn-suJei. pour
un eclairage d'appoint prus faible, ra distance frash/sujet devrait
passer d 4,6 metres. Toutefois, I'espace requis pour detels
accrorssements de ra distance flash-sujet peut faire d6faut. De prus,
                                 21
View original page 24Page 25 · Read text
rw

   si le flash est mont6 directement sur votre appareil, un d6placement
  de l'ensemble dans le but d'6carter d'avantage le  f lash du sujet
   aurait pour effet de modifier la composition de votre photo. Avec le
                                                                       1 " au cadran  module Vivitar Varipower VP-1  , il suffit d'aff icher  'r -
  pour obtenir un 6clairage d'appoint normal, " -2" pour un  6clairage d'appoint plus faible.  ll n'est donc plus n6cessaire de
  modifier la distance flash-sujet.
  Gonservation de l'6nergie des piles et r6duction du temps
     recyclage  de
  Le     module Vivitar-   Varipower VP-1 utilise le circuit thyristor de votre
   flash 283 pour effectuer le contr$le de I'intensit6 lumineuse 6mise,
  de la mOme manidre que son circuit   f lash automatique interrompt
   l'6mission de lumiere lors d'expositions pre-programm6es. En
  cons6quence, pour tout reglage du Varipower en deqit de "FULL"
   (Max.), le condensateur de votre flash 283 conservera une partie de
  sa charge, ce qui a pour effet de r6duire la decharge de la pile et
  de raccourcir le temps de recyclage.
  Supposons que vous vous pr6pariez d effectuer plusieurs prises de
  vue avec un film de 15 DIN (25 ASA), d une distance flash-sujet
View original page 25Related documents and language editions
From the M. Butkus archive. Original publisher and archive notices are retained.
Check the model and edition against your equipment.
PDF verified 2026-10-10.