Film cameras
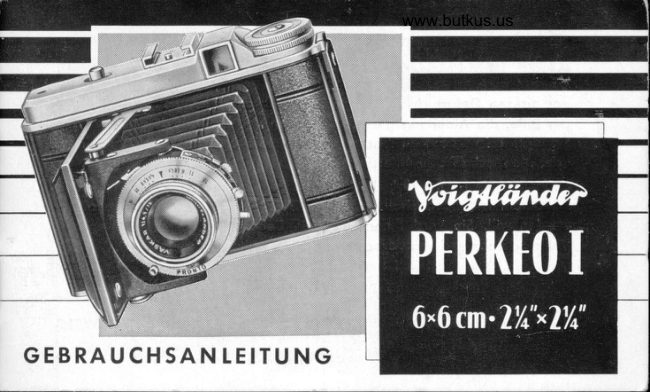
Voigtlander Perkeo I User manual
User manual for Voigtlander Perkeo I. 19 pages in English. Read the original PDF, download or print a copy without registration.
19 pagesEnglish1.8 MB PDF

Loading your manual…Open PDF directly
Document details
- Brand
- Voigtländer
- Model / document
- Voigtlander Perkeo I
- Document type
- User manual
- Language
- English
- Pages
- 19
- File size
- 1.8 MB
- Category
- Film cameras
- Document date
- Not specified in catalog
Search available document text
Find a term, then jump to its page in the original PDF. Image-only pages may not be searchable; check the PDF for exact wording and diagrams.
Page 5 · Read text
www.orphancameras.com        1  Checkwindow for Lxposure lock
        2  Release key
        5  Cable release thread'r 4  Struts
        5  Exposuresetting ring                                                    -*
        5  Keys for closing the camera
        7  Camerafront support (swung out),IJ        8  Shutter setting lever
                 I  Flash contact
        1 0 Aperture lever
        1 1 Accessoryclip
        1 2  Optical finder
        1 5  Film winder
        1 4 Camera back catch

            Erplanations
              to  illustration on  left
View original page 5Page 6 · Read text
ilFp-
      www.orphancameras.com.  !    ,
   I  Checkwindowfor exposure lock
 2  Release
12  Optical finder
15  Film winder
14 Camera- back latch.
15 Take - up spool
1 6 F i l m r o l l e r
17  Film pressure plate
18  Tripod bush
19  Button to open camera front

    Explanations
     to  illustration on rlght
               5
View original page 6Page 7 · Read text
www.orphancameras.com
Opening  ond  closlng comero   front
On depressing button 19 the camera front will
open up.
It is pulled down with thumb and index f inger on
both corners until both struts 4 engage. Now the
lens carrier is in its correct positionfor use.
To close, depress both keys 6 simultaneously,press
f ront back towards camera body. Attention! camera
f ront support7 must be completelyswung in.
Seiling   of  the  ccmero
is exceptionallyconvenient as all scales may be
observed in one directionf rom above and all levers
set with one hand.
20  Distancescale on lens mount
21  Aperture scale on front plate allowing to read
     of f depth of  f ocus
22  Shutterspeed scale
25  Aperture scale
View original page 7Page 9 · Read text
www.orphancameras.com
                 The operture    (: opening of the lens)
                           is set by the lever 10. lt regulatesthe amount of
                        light reachingthe f ilm and controls the depth of focus.
                 S m a l lf i g u r e( e . 9 . 4 . 5 ) _      l a r g e a p e r t u r e :  s h o r t                                t                  exposure time. Large figure (e. g. 16)-   smallest                   aperture_  long exposure time. lt is advisableto      IJt
                      follow the exposure meter when using Colour film.

                  The deprh   of  focus
comprisesthe part of the picture fleld to the foregroundand background
which is reproduced fully sharp. But this does not remain constant.lts
extent is regulatedby the aperture.
The depth of focus is found by setting the correct distance and then you
will  f ind to the right and left   f rom the index mark A   (f ront plate 21)
aperture figures similarly arranged. lmmediately above is the distance
scale in feet. The field of depth of focus extends from the feet figure
above the left aperturenumberto the feet figure above the same aperture
number on the right.
                          r0
View original page 9Page 10 · Read text
www.orphancameras.com
The snopshot setting
will help to  obtain surprisingly nice shots. For
snapshots(e. g. playing children! sports scenes
etc.) one does not set to the exact distance but to
the signs V and O. On near zone setting V one
obtainsa depth of focus from 8.5 to 18 feet and on
far zone setting O  f rom 18 feet to F,  condition
being, that the lens is at least stopped down to 8.
The deloyed   qc?ion  releose
permits the photographerto appear in the picture
himself.lf no tripod is used, place the camera on
an even support (e. g.a  table) after having swung
out the camera f ront support l. set the shutter as
usual,pull up the lever 24 with a red mark on  it as
far as  it will go. After pressing-16" release the
photographer has 8 seconds to go  to  the pre-
arranged spot. The delayed action release must
not be used on t'Bt' setting.
                        t1
View original page 10Page 11 · Read text
www.orphancameras.com
Short  Inslontoneous     Itl:,;'sec. or less)
may be taken from hand. Shouldyou have a quiet
hand or a support to lean ofl, you can take longer
exposuresup to rls sec. without a tripod.
You should look exactly through the centre of the
f inder 12, being visible all four edges of the linder
image. Then hold your breathe and release gently
by depressing the lever softly avoiding so shaky
pictures.

Time  exposureg
require an absolutelyrigid support of the camera.
Fix the Perkeo I to a tripod by means of its tripod
bush 18 or put  it on an even plane after having
swung out the camera f ront support 7.
The shutter is set to "8".  lt is strongly advised to
get a cable release with fixing screw which is
locked after depressingand thus keeps the shutter
open until it is unlocked.
                    12
View original page 11Page 12 · Read text
www.orphancameras.comThe Automoilc    Interlocklng   Devlce
 locks the release 2 after each exposure thus forcing to wind on the film
 to its next number.
Betweenexposuresthe checkwindow1 should be noted. The arrow shows
'at   any time whether one is ready to expose or has to wind on the film.
After loading the camera and setting for the first exposure the arrow will
 point forward :  expose! After setting and releasingthe shutterthe arrow
 will artomaticallyswing round and point to the camera back  :  wind on
 film! At the same time the release is locked.
On winding on the film the arrow will point forward again at the same time
 the release becomes unlocked. Attention: The wing back of the arrow
 after a quarter turn on the film winder 15 does not indicate that the film
 is in position for the next exposurel The winder 15 has to be turned until
 the next number appears in the film window.
                                                                               l 3
View original page 12Page 13 · Read text
www.orphancameras.com
Flcrsh pictures

The shutter is internallysynchronisedallowing the
use of the usual flash bulbs and speed lamps with
the help of which photographsmay be taken in poor
light or in completedarkness.The flash unit has to
be connectedby cable to the flash contact 9. After
setting and on releasingthe shutter the flash is
released simultaneouslyat the moment the shutter
is fully opened up (O-synchronisation).

The correct exposure time in connectionwith aper-
ture, subject distance and film speed, should be
taken from the instructionsissued by the makers of
the  f lashes.On buying a   f lash outfit your dealer
will help you with his expert advice.
                                                  l 4
View original page 13Page 15 · Read text
www.orphancameras.comLooding  ond  unlooding   the  film
On compressingthe two latches14 the camera back
can be opened.
The new film is inserted into the right hand side
spool chamber. lf the empty spool should stilt be
there, remove it and place into the left chamber.
Lift up  f ilm winder 15 and f ix  it in this position by
giving it a quarter of a turn. Swing out spool holder
and place the empty spool with the circular open-
ing towards the pin into it. Now push spool holder
and transporterback. The new film is pushed into
the right chamber, break the gummed seal, pull
the backing paper over the film apertureand insert
paper end  into the  slot of  the empty take-up
spool 15.  Give f ilm winder 15 three f ull turns to
ensure that the backing paper of the film winds
itself tightly to the take-up spool. Make sure that
the film runs straight.
                                                        l 6
View original page 15Page 16 · Read text
www.orphancameras.comNow close camera back and turn f ilm winder 15
slowly until No. 1 appears in the red window in the
camera back. The film is now ready for the first
exposure.After opening the camera front, setting
the camera and shutter, the  first exposure can
be taken.
It  is advisable to transport the film after each
exposure immediatelyto the next film number.
After all twelve exposures have been taken, wind
on  f ilm winder 15 until the whole  f ilm has been
wound on to the take up spool. The passingof the
paper trailer can be observed in the f ilm window.
Now the camera back is opened, the film winder
tifted up and fixed  in  this position. Swinq out
exposed film with its spool holder, fold over paper
end and seal it with its adhesive label. Hold film
tightly to avoid it unrolling,
                    1 7
View original page 16Page 17 · Read text
www.orphancameras.comVolgllonder    yellow    fllters
are almost indispensablein outdoor photography and particularlywithsnow. You can get these filters from your photographicdealer: they are      fI'
simplypushedon to the lens mount.'FilterG 1 is suitablefor most pictures,for more dramatic effects use Filter G 2. Filters increase the exposure                 fIt
time. G1 requires1r/zto 2x normalexposureG2 approximately3 to 4x.

The Voigtlqnder   lenshood                                                                                         {iris recommended for photographs against the light, being exceptionally  P
effective, and it is advised to use the lenshood even with coated lenses
to protect them from direct sun rays. In poor weather it will protect at the                                       f
same time from drops of water.                                                                         F&
The Voigtlander LenshooOis' satin-chromedoutside and black inside.
(Fittingdiameter:32 mm.)                                                                     l 8                                  [ih                                                            f,
View original page 17Page 18 · Read text
www.orphancameras.com
Core  of  the  lens

The lens is as valuableto the camera as the eye to the human.lt has to be
treated with particularcare. Furtherthe glass surfaces,includingthe outer
ones, are coated with an anti-reflectionfilm. Takingthis into consideration
the coating is very hard and will withstandcareful cleaning methods (see
below). On  the  other hand these careful cleaning methods are  a
undispensablynecessary condition for  maintaining the best possible
optical performance.

Finger marks are poison to the lens and have to be avoided at all cost.
They reduce the definition.Dust or sea sand should be remoVed with a
fine hair brush or a soft chamoisleather.Oil or grease can be dabbed off
with a piece of cotton wool dipped into alcohol,or ether.
View original page 18
Page 19 · Read text
www.orphancameras.com


  The stylish

 W              everreqdy rose
  has been made "to measure" from best leather.

  The camera can remain in this case even during

  the exposure, it offers full protection and does
  not reduce the quick readiness of the PERKEOl.

                     . , i


  1r00t-r 5 A/85t                    Printed in Germony
View original page 19Related documents and language editions
From the M. Butkus archive. Original publisher and archive notices are retained.
Check the model and edition against your equipment.
PDF verified 2026-10-10.