Flashes & lighting
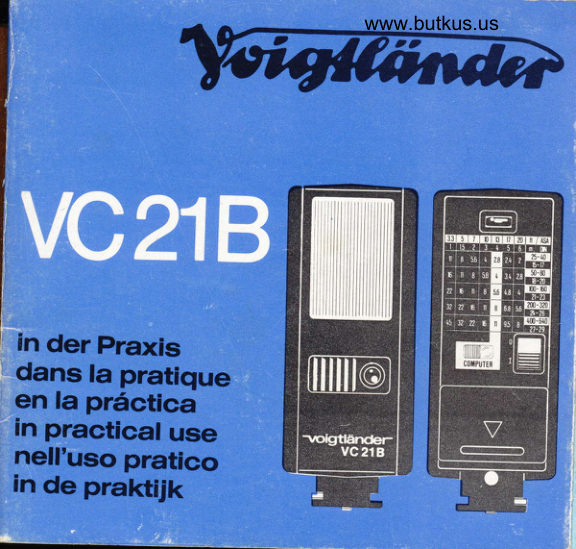
Voigtlander VC21B Electronic Flash User manual
User manual for Voigtlander VC21B Electronic Flash. 68 pages in German. Read the original PDF, download or print a copy without registration.
68 pagesGerman2.8 MB PDF
Loading your manual…Open PDF directly
Document details
- Brand
- Voigtländer
- Model / document
- Voigtlander VC21B Electronic Flash
- Document type
- User manual
- Language
- German
- Pages
- 68
- File size
- 2.8 MB
- Category
- Flashes & lighting
- Document date
- Not specified in catalog
Search available document text
Find a term, then jump to its page in the original PDF. Image-only pages may not be searchable; check the PDF for exact wording and diagrams.
Page 4 · Read text
Venmo @mike-butkus-camera  Ph. 2083
PayPal Name  Lynn@butkus.org      www.PayPal.me/lynnbutkus
View original page 4
Page 8 · Read text
Batterlen elnsetzen               www.butkus.us
 Erforderl ich si nd 2 Trocken batterien Typ AA (M                                                ignon-Zel len) 1,5 Volt                                                                                                                       ' -> Techn. Daten Seite 7 und Tip @ Seiie O. Keinesfalls            gleichgroBe                          Batterlen hoherer                                  spannung                                                    einsetzen - Gerdt       wird dadurch                     funktionsunfdhig                                 oder                                             birscnaoilti
 Deckel 1 wie in Bild A gezeigt in pfeitrichtung driickin uno offnen.
 Batterien entsprechend schema einsetzen +  Bild A. Deckel I mit Unterkante zuerst einsetzen und festdrticken.

Gerdt ansctrlieBen
Kabelloses Blitzen bei Kameras mit Mittenkontakt im steckschuh:
SteckfuB 2 in Kamerasteckschuh  einschieben.
Blitzen mit synchronkabel bei Kameras mit synchronnippel:  ver-
riegeiungsstift 3 nach auBen drticken, synihronaoipter c auf steckfuB 2 aufschieben und stift 3 eindriicken + Bild B. synchron-
adapter 4 bei Kameras ohne Mittenkontakt stdndig montiert lassen.
Blitzgerdt mit synchronadapter in steckschuh ln Kamera oder
Bl itzsch iene einsch ieben.
Synchronkabel 5 mit Kamera-X-Kontakt verbinden.

Kamera elnstellen
SynchronansctrluB  (falls wdhlbar) X (/)  benutzen.
verscJrluBzeit nach Angabe in Kameragebrauchsanleitunj wdhlen:
Bei ZentralverschluB beliebig, meist r/izs s€c; bei schlitzverschluB
meist lleo oder r/go s€c.
View original page 8
Page 10 · Read text
GerHt elnsdralten: Rote Marke ll am Schalterwww.butkus.us10 sictrtbar.
 Blitzbereitschatt wenn Leuchtsignal 12 erscheint.
 Geriit ausscfialten: Am schalter l0 rote Marke 1l unsichtbar (falls
 unmittelbar anschlieBende Aufnahmen nicht beabsichtigt sind).
Tlps zur Blltzpraxlg
@ Energie sparen
Nach Gebrauch und bei ldngeren Aufnahmepausen Ger6t aus-
 schalten    !
@ Leucfitsignal
Nach Einschalten Leuchtsign al 12 abwarten. Erscheint Leuchtsignal
 nicht nach 30-60 sec, dann sind die Batterien verbraucht -+ rii @Seite 6.
@ Ausleudrten des Objektfetdes
Auf volle Ausleuchtung des objektfeldes achten: Blitzgerdt im
steckschuh der Kamera ergibt einen Leuchtwinkel von ca. iso x600.
Bei Nahaufnahmen frei gehaltenes Blitzgerdt auf objektmitte richten
oder Kameraschiene entsprechend drehen
Blitzreichweite wird durch Raumreflexion (helle Zimmerwdnde)
gesteigert. Daher kann in entsprechend hellen Rdumen auch tibei'
3,8 m hinaus automatisch geblitzt werden.
View original page 10
Page 11 · Read text
@ lndirekter Blitz (bounce flash)
iorteil: Weiche Beleuchtung ohne harte Schatten. Synchronkabel
verwenden und Blitzgerdt von Hand oder mit handelstiblichem
                                                                                     E.. AutomatikBiitzneiger gegen Zimmerdecke  richten, ca.600 -+ Bild
ausschalten. J-e nach Aufnahmeverhdltnissen Blende weiter oftnen,
als Blendenrechner  angibt (meist 2-3 Stufen)'
Fiir diese Aufnahmen 5in niogtichst lichtstarkes Objektiv und/oder
hochempfindlichen Film verwenden'
@ Blitzspiegelungen
Aufnahmerichtungen vermeiden, bei denen der Blitz durch spie-
gelnde Objekte direkt in die Kamera reflektiert wird. Standort so
ilahten und Blitzgerdt so anordnen, daB frontale Spiegelungen
lGlasscheinen, Sp'iegel oder polierte FlAchen) vermieden werden.
@ Atitzen in Gemeinsdraft
Auch bei gemeinschaftlichen Blitzlichtaufnahmen mehrerer Foto-
grafen karin automatisch geblitzt werden. Automatik wird durch
6titte anderer Fotografen nicht beeinfluBt (eingebaute Fremdblitz-
sperre).
@ Blitzabstand und Kameraabstand
lassen sich unabhiingig voneinander 6ndern, wenn ein Synchron-
VerlAngerungskabel  zw-ischen BlitzgerAt und Kamera benutzt wird.
nOstan"O Blitigeriit - Aufnahmegegenstand ist maBgebend ftir rich-tige Blendenwahl!
View original page 11Page 12 · Read text
@ Offenblitzmethode          www.butkus.usi
 (Blitzen bei offenem Kameraverscfilug)
 ermoglicht auch mehrfaches Blitzen innerhalb ldngerer Zeitbelich-
 tung zum Erzieren von Effekten und rricks G. g.",Jiopperg6nger-
 aufnahmen", Ausreuchten von sdren usw.): ritit.geiet-und Kamera
 getrennt verwenden, KameraverschluB offnen "uno gritre durch Handauslosung 6 zi.inden.
@ Aufhettbtitz am Tage
zur.Au.fhellung_der schatten: Automatik einschalten. Unter gerber
 Dreieckspitze Blende ablesen, Kamerablende 1-i siuten weiter
schlieBen und hierftir zug.eh.orige VerschluBzeit lnacn Helichtungs-
messer) einstellen. Ergebnis: Motiv wird annahernd normal be-
 lichtet, Blitzanteil jedoch so weit verringert, oin scnatten nur auf-gehellt, aber nicht voll ausgeleuchtet werden.
@ Blitzen mit zwei Gerdten
Bei synchronisierten Blitzlichtaufnahmen mit zwei Gerdten Mehr-
fachstecker zum Kuppern beider synchronkaber verwenden.
P"i eingeschalteter Automatik: Auiomatisch richtigJ Belichtung.Blitzgerdte so anordnen, daB ihre sensoren nicht"vom direkte-n
Licht des anderen Blitzgerdtes beeinfluBt werden.
Bei ausgeschalteter Au[omatik: zwei Blitze frontal aus-einegleichem
Abstand liefern doppelte Helligkeit, daher Blende um       stufeschlieBen.
Bei unterschiedtichem Abstand  (2. B. zweiter Blitz als Nebenlicht)
                                                         ermittetn-.Blende nur ftir Abstand Hauptblitz - Objekt
View original page 12Page 13 · Read text
@ Ausnutzung kiirzester Blltzzelten
Automatik einschalten. Blitzabstand verringern (bis zu 60 cm),
hellen Hintergrund und moglichst auch helles Objekt wdhlen. Mit
k[irzerem Blitzabstand verktirzt sich auch die Blitzdauer bis zu
ca. r/zo ooo S€C.
Fiir extrem schnell ablaufende Bewegungsphasen:  Offenblitz-
methode und geeigneten Kontaktgeber benutzen, der im entschei-
denden Moment vom Objekt selbst ausgelost wird.
@ Wartung und Pflege
Batterien aus GerAt herausnehmen, wenn es lflngere Zeit nicht
gebraucht wird. Reflektorstreuscheibe reinigen und Gerdt duBerlich
entstauben. Deckelkontakte und Batteriepole blankhalten.
@ Batterien
immer paarweise auswechseln, frisches Markenfabrikat sichert opti-
malen blitzbetrieb. Besonders empfehlenswert sind Alkali-Mangan-
Batterien -+ Seite 7 (minimale Selbstentladung bei lAngerem Lagern
oder Nichtgebrauch).
Bei extremer Kdlte GerAt zur schnelleren Blitzbereitschaft auf
Korperwdrme temperieren.
View original page 13
Page 14 · Read text
Technische Daten               www.butkus.us
 DIN-Leitzahl
     fir 21 DIN/100 ASA-Film           21
      ffir 18 DIN/50 ASA-Film            15
 Arbeitsbereich mit Automatik        ca. 0,6-3,8 m
 Arbeitsblende mit Automatik         5,6 frir 21 DIN/100 ASA-Fitm
                               4 ftir 18 DIN/50 ASA-Film
 Blitzdauer (to,r) mit Automatik        Ca. llzoooo Sec bis t/:soo sec
   ohne Automatik                   Ca. l/:soo Sec
 Blitzfolge mit frischen Batterien       ca. 8* -14 sec je nach Batterietyp Blitzvorrat mit frischen Batterien    ca.75-200* je nach Batterietyp
 Blitzenergie                        15 Ws
 Farbtemperatur                     ca. 5500 K
 Leuchtwinkel                        ca. 45o x 600
Ausleuchtung bei24x36 mm Format  bis 35 mm Brennweite
Sensor-MeBwinkel                     ca. 150
MaBe ohne SteckfuB            ca.35x76x73mm
Gewicht ohne Batterien           ca.14Og
 Batterien
   Anzahl                            2
    Bezeichnung                      Trockenbatterie Typ AA
   Spannung                            1,5 V
   Typ 1                                     Al kal i-Man gan-Batterie
                                               z. B. Varta 7244, Mallory MN 1500 o. ii.
   Tvp 2                                 Zin k-Koh le-Batterie
                                               z. B. Varta 280 o. A.
Techn ische Anderungen vorbehalten   ' mit Batterietyp 1 erreichbar
View original page 14Page 15 · Read text
Abhllfe bel Bedlenungsfehlem

 Merkmal        miigliche Ursadre     Abhilfe        Bemerkung
Leucht-          Batterien               Batterien         Batterien
signal          weitgehend           auswechseln    nur paarweise
erscheint       oder vollig                            ersetzen
zu spdt oder    entladen
gar nicht

                 Kontaktfehler         Kabel fest
          am Synchron-         aufstecken
Blitz            kabelstecker
ztlndet nicht
               Synchronkabel        Kabel          Kabel nicht zu
                defekt                ersetzen         stark knicken

                  Filmempfindlicfikeit     Filmempfind-
                 falsch eingestellt        lichkeit genau
                                           einstellenBitdBild tiber-
oderoder unter-
belichtet      beim Blitzen ohne     Blenden-               Automatik Blende     rechner
             zu groB oder zu       beachten
                  klein gewdhlt
View original page 15Page 18 · Read text
Insertlng batterles               www.butkus.us
2 standard 1.5 Volt-AA                        .type dry batteries (Mignon cells) are necessary -+ Technical data on page 17 and hint @ on paje 16.
 Never use batteries of same size but higher voltage as this will
 cause deterioration of performance or damage to flash unit.
 Draw and open coverl as shown in fig.A. Insert batteries according
 to diagram -+ fig. A. Insert lower edge of cover 1 first and pres6
 sh ut.

Connectlng the unit
cordless flashing for cameras with "hot shoe" contact in accessory
shoe: Push foot 2 into this shoe.
Flashing with synchronizing cord for cameras with flash ouilet
socket: Press catch 3 outwards, slide cord adapter 4 onto foot 2and lock by pressing in catch 3 +  fig. A. conn6ct flash cord 5 to
camera X contact. For cameras without hot shoe it is best to leave
adapter 4 always fitted to the flash gun.

Gamera setting
Synchronization (if adjustabte) with X (ll  setting.
s.hutter speed set according to camera instructions: with lens
shutters any setting, usually r/rzs S€c; with focal plane shutters
usuaf fy ,1/eo ot r/so SOC.


                                                                          11
View original page 18Page 19 · Read text
I
Automatlc flash
at distances between about 0.6 and 3.8 m / 2 and 121lztt.
Switch to automatic operation: Uncover sensor 7 with slide 8.                                       j
Determine aperture: Find ASA or DIN number of film speed on
aperture calculator 9. Read off the aperture in white computer field.                             l
Keep camera constantly set to this aperture.                                                                                                                                                                                                                             I
Example: 100 ASA / 21 DIN film, constant aperture f/5.6 +  fig. G.                       i
Switch on: Red mark 11 appears on switch 10.
Flash ready when signal lamp 12 lights up.                                                                                                                                      Ij
Switch off if no immediate further shots are planned (red mark 11
on switch 10 hidden)

Non-automatlc flash
at any distance.
Switch off aulomatic system: Cover up sensor 7 by slide 8.
Determine aperture: Find ASA or DIN number of film speed on
aperture calculator 9. Read off the required aperture under flash-
to-subject distance used.
Example for average subjects of medium brightness in medium-size
rooms with normally reflecting walls: 400 ASA / 27 DIN film, flash
distance approx. 6 m / 20 ft, required aperturef /8 -+ fig. D.

12
View original page 19
Page 20 · Read text
E_       _      ilr          ,r-     Switch on: Red nrark 11 appears on switch 10.
     Flash ready when signal lamp 12 lights up.
     Switch otf if no immediate further shots are planned (red mark 11
    on switch 10 hidden).
    Practicat flash hints
  @ Power economy
     After use and during longer shooting intervals: Switc*t unit off.
                                                -  @ Signal lamp
      [tter lwitching on: Wait for signal lamp 12 to light up. More than
    30 to 60 seconds delay in lighting up indicates that the batteries
     are exhausted -> hint @ page 16.
  @ Full illumination of subject area
   Be sure that entire subject area is fully illuminated: Flash unit
    mounted into accessory shoe of camera will give an angle of illu-
     mination of approx. 45o x 600. For close-ups direct hand held flash
    towards centre of subject, or turn camera bracket as required.
    Range of flash is increased by room reflection (for example light-
    coloured walls). In very light-walled rooms, automatic flash ex-
    posures are therefore possible even beyond 3.8 m / 121lztt.


                                                                     13
View original page 20Page 21 · Read text
Advantages: Soft illumination without hard shadows. Use flash
 cord and direct flash unit by hand or commercial  tilting bracket
 towards ceiling (approx.600) +  fig. E. Switch off automatic system.
 According to subject condition, open aperture more than indicated
 by calculator (usually 2-3 stops).
  lf possible, use a rather fast lens and/or high speed film for this
 bounce flashing.
@ Flash reflections
 Avoid shooting in directions where reflecting surfaces would throw
 your flash light directly back into camera. Choose viewpoint and
 arrange flash unit so that frontal reflections (window panes, mirrors
 or polished surfaces) are eliminated.
@ Communal Flashes
 Even when several photographers are using flash at the same time,
 your unit still controls your exposure automatically. lts stray light
 barrier prevents flashes of other photographers from affecting the
 automatic control system.
@ Flash distance and laking dlstance
 can be varied independently by using flash extension cord between
 flash unit and camera. Refer to flash-to-subject distance when
 setting aperture!
@ Open tlash
 This method allows series of flashes during a long time exposure
 to obtain special effects and trick shots. Use flash and camera
 separated, open camera shutter, and flash by manual firing 6.

14
View original page 21
Page 22 · Read text
@ Fill-in flash in daytight             www.butkus.us
 To relieve shadows: switch on automatic system. Find required
 aperture opposite yellow triangle mark, but ilose apriture further down      by         1-2.stops and use appropriaie shutter-sp6"J t", to ex- posure         meter).
 Result: .subject is nearly correcily exposed, but share of flash reduced so far that shadows are ierieved otiry, noweuer, without being fully lightened.
@ Doubte ftash
synchronized flash shots with two flash units: use a multiple adap- tor for coupling both flash cords.
with automatic_system switched on: correct exposure is obtained
automatically. Place the flash units so that their seniors are notsubjected to direct light from the other flash unit.
with automatic system switched off : Two flashes frontaily at equal
distance will doubre your right, so use next smaile. aperture stop.
with flashes at different-distinces (second flasn servini as fill-in for
example): Use aperture for distance between subject an'd main flash.


                                                               15
View original page 22Page 23 · Read text
@ Use of very short flash timesSwitch on automatic system. Use a short flash distance (minimum
                                                                             light60 cm / 2ft), choose a light background and if possjble asubject. With a shorter flash distance, flash. duration is also
sholtened to a minimum of about r"ho,ooo second.
For extremely rapid movements: Use open flash method and a
suitable contactor which is operated by the subject itself at the
decisive moment.
@ Care and maintenanceH'emove batteries from flash unit if not in use for longer periods.
Clean reflector diffuser and dust flash unit externally. Keep battery
poles and contacts inside of cover free from oxydes.
@ Batteriesdry batteries should be exchanged in pairs only. Known makes in
freih condition will ensure optimum flash operation.'- Alkali-man-gin"r" cells are highly recommended (minimum selfdischarge   ifstored or not in use for longer periods) + pa$e 17.
ln extreme cold carry flash gun next to body for speedy readiness.


 16
View original page 23Page 25 · Read text
Handllng faults and remedles

 Fault           Posslble Gause    Remedy          Remark
Ready          Batteries          Exchange       Renew both
signal          nearly or entirely    batteries            batteries
delayed or     exhausted
missing

               Gontact failure on  Connect cord
                 flash cord plug       tightlyFI ash fails
to fire          Flash cord        Renew cord     Do not bend cord
                defective                           too strongly
               Film speed set      Set film speed
               wrongly              exactlyPi,cture over-
or' under-      Without automatic  Attend to aperture
exlposed        flash aperture too   calculator
                large or too small


18
View original page 25Page 27 · Read text
Voigtldnder VC 21 B
Nous vous souhaitons beaucoup de joie et de succds avec votre
nouveau flash 6lectronique A computer.
Voigtldnder Vertriebsgesellschaft mbH

Organes et fonctions
 1 Couvercle qour compartiment des piles
 2 Sabot pour"fa fixation du flash dans la griffe de I'appareil ou
    dans le bras-support
 3  Pidce de blocage de I'adaptateur
 4 Adaptateur de cAble
 5 CAble de synchronisation
 6 D6clenchement manuel
 7  Cellule pour 169lage automatique de la lumination
 I  S6lecteur pour la cellule
 9  Calculateur de diaphragme (6chelles: en blanc, DIN et
    m6trique; en jaune, ASA et en pieds)
10 lnterrupteur
11 Repdre rouge indiquant la position de I'interrupteur
    SUf ( mafche   ))
                      flash pr€t A fonctionner12 Lampe-t6moin:  "                                                    "13 Contact central pour utilisation sans cdble
View original page 27Page 28 · Read text
www.butkus.us
 Mise en place des plles
 On devra utiliser deux piles usuelles du type AA - 1,5Volt (Mignon) -> les dates techniques page 27 et le conseil @ page 26. Ne jamai6
 utiliser des piles de dimension identique mais de tension plus
 haute,  il s'en suivrait une perte de rendement ou une d6t6rioration
 du flash! Enlever comme indiqu6 d la figure A le couvercle 1.
 Disposer les piles suivant le sch6ma se trouvant d I'int6rieur  .-->
 figure A. Remettre le couvercle 1, introduire d'abord I'ar6te in-
 ferieure, et puis I'appuyer.

 Brancfiement
 Fonclionnement sans cible (appaieils a contact central): glisser le
 sabot 2 dans la griffe-porte accessoires de I'appareil ou dans le
 bras-support.
 Fonctionnement avec c6ble synchro (appareils avec prise flash
standard): Introduire I'adaptateur de cable 4 dans le iabot 2 du
flash, et verrouiller en appuyant la pidce de blocage 3 -+ Fig. B.
B.rancher a I'appareil de cdble synchro 5. pour permettre un emploi
plus rationnel, laisser toujours dr sa place I'adaptateur lorsque
 I'appareil de photo ne possdde pas de contact central.
R6glage de l'apparell
Utiliser (si le choix est possible) le contact synchro X (,  ).
vitesse d'obturation: se conformer aux instructions de I'appareil;
avec un contact central, n'importe quelle vitesse, de pr6f6rence
1/tzs s; avec un obturateur d rideau, g6n6ralement r/eo ou r/ro s.
View original page 28
Page 29 · Read text
R6glage automatlque de la lumlnatlon
 dans la zone d'utilisation de 0,6 d 3,8 m.
 Mettre en service le dispositif automatique: lib6rer la cellule 7 au
 moyen du s6lecteur 8.
 Calcul du diaphragme: Lire la valeur ASA ou DIN au calculateur 9.
 Lire le diaphragme dans la zone blanche d computer. Reporter
 cette valeur de diaphragme sur I'appareil.
 Reporter cette valeur de diaphragme sur I'appareil.
Exemple -+ fig. c: film 21 DIN / 100ASA, diaphragme constant 5,6.
Mise en marche du flash: repdre rouge l1 de I'interrupteurl0visible.
L'6clair est pr6t d jaillir lorsque la lampe-t6moin 12 s'allume.
Arr€t: faire disparaitre le repdre rougell de I'interrupteurl0 (si I'on
n'a pas I'intention de proc6der aussit6t d d'autres prises dd vue).

R6glage non-automatlque de la lumlnatlon
Dans ce cas, la zone d'utilisation n'est pas limit6e.
Mettre le dispositif automatique hors service: obturer la cellule 7
au moyen du s6lecteur 8.
calcul du diaphragme: Lire la valeur ASA ou DIN au calculateur 9.
Lire le diaphragme requis en - dessous le distance flash - sujet.
Exemple courant: sujets de brillance moyenne dans des locaux
de dimension moyenne, normalement 6clair6s (r6flexion du local
normal), lilm 27 DIN / 400 ASA, distance du flash 6 mdtres env.
diaphragme requis 8 -+ fig. D.
View original page 29
Page 30 · Read text
Mise en marche du flash: repere rouge 11 de www.butkus.usl'interrupteurl0visibte.
 L'6clair est pr6t i  jaillir lorsque la lampe-t6moin 12 s'allume.
Arr6t: faire disparaitre le repdre rouge 11 de I'interrupteur'10 (si I'on
 n'a pas I'intention de proc6der aussit6t d d'autres prises de vue).

Gonseils pour la pratique
@ Economiser l'6nergie
Mettre le flash hors circuit aprds utilisation et lors de longs inter-
valles entre les prises de vuel
@ Lampe-t6moin
Attendre, aprds la mise en marche, que la lampe-t6moin 12 s'allume.
Si la lampe-t6moin ne s'allume pas au plus tard aprds 30-60
secondes, les piles sont us6es -> cons€il @ page 26.
@ Eclairement du sujet
Veiller d ce que I'axe du r6flecteur soit dirig6 dans la direction
du sujet. Avec le flash gliss6 dans la griffe-porte de I'appareil:
Angle d'6clairement 45o x 600 environ. Lorsque celui-ci est trds
rapprochd, diriger le flash, tenu d la main, vers le centre du sujet,
ou modifier en cons6quence I'orientation du bras-support.
La port6e de l'6clair est renforc6e par les r6flexions sur les murs
(parois clairs d'un local). C'est ainsi, que dans des pidces trOs
claires, on peut utiliser le flash en fonctionnement automatique
pour des sujets situds d plus de 3,8 m.
View original page 30
Page 31 · Read text
@ Eclair indirect (bounce flash)
 Avantage: un 6clairage doux, sans ombres dures. Utiliser le cAble
 synchro et diriger l'6clair vers le plafond (60o env.), en tenant le
 flash d la main +  fig. E (ou A I'aide d'un dispositif d rotule vendu
 dans le commerce). Debrayer l'automatisme. Selon les conditions
 de prise de vue, ouvrir le diaphragme plus que ne I'indique le
 calculateur (gdndralement de 2 ou 3 diaphragmes).
 Si possible, utiliser pour cettes vues un objectif trBs lumineux
 etlou un film de haute sensibilit6.
@ Reftets de l'6clair
 Eviter de diriger I'appareil photographique dans une direction telle
 que des surfaces polies renvoient I'image de l'6clair vers I'appareil.
 Choisir I'emplacement et orienter le flash de fagon d 6viter les
 rdflexions de face (fen6tres, miroirs ou surfaces polies).
@ Le flash en groupe
 Mdme si vous op1rez en m6me temps que d'autres photographes,
 vous b6n6'ficierez de I'automatisme de I'exposition. L'automatisme
 n'est pas influenc6 par les 6clairs d'autres photographes (dispositif
 de s6curit6 sp6cial incorpor6 contre I'influence des autres 6clairs).
@ Distance du flash et distance de I'appareil
Ces distances peuvent 6tre r6gl6es ind6pendamment I'une de
 I'autre en utilisant un cAble synchro de rallonge entre le flash et
 I'appareil.
 La distance flash -  sujet est d6terminante pour le choix du dia- phragme.


24
View original page 31
Related documents and language editions
From the M. Butkus archive. Original publisher and archive notices are retained.
Check the model and edition against your equipment.
PDF verified 2026-10-10.