Film cameras
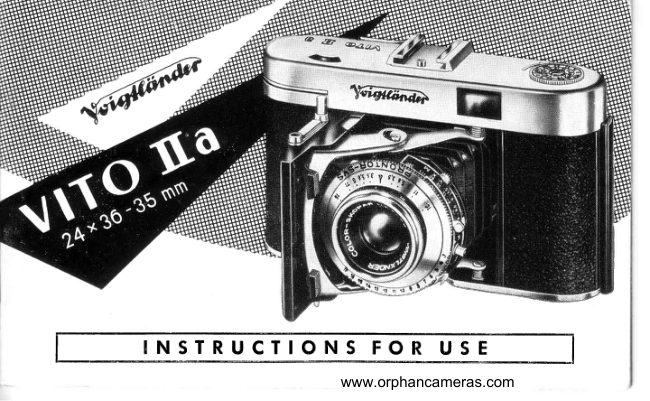
Voigtlander Vito IIA User manual
User manual for Voigtlander Vito IIA. 33 pages in English. Read the original PDF, download or print a copy without registration.
33 pagesEnglish3.2 MB PDF
Loading your manual…Open PDF directly
Document details
- Brand
- Voigtländer
- Model / document
- Voigtlander Vito IIA
- Document type
- User manual
- Language
- English
- Pages
- 33
- File size
- 3.2 MB
- Category
- Film cameras
- Document date
- Not specified in catalog
Search available document text
Find a term, then jump to its page in the original PDF. Image-only pages may not be searchable; check the PDF for exact wording and diagrams.
Page 3 · Read text
R i s h t  H e r e
                                  is the first and most important piece of adaice
                                                   f or theVITO  Il a: Please read this boolclet care-
                                 fully, Make  yourself thoroughly  familiar  with
                                aII the operations and controls of the camera,
                      Then you can Ioad your  f irst film and begin to
                            tal<e pictures.
                      Rernember also that the VITO   lI a is an optical
                      and  mechanical precision  instrument  which
                       wants gentle and understanding treatment. The
                      camera will repay caref uI handling with beauti-
                                                   f ully clear and sharp pictures  f o, many y ears
2OOYEARS          to come.

                V O I G T L A N D ER A . G . B R A UN S C H W E I G

                                  www.orphancameras.com
View original page 3Page 4 · Read text
Poge
C O N T E N T S  Views of the Comerq                       2-s
              Openingthe Bqck . Insertingthe Cossette    6-9
            The FilmCounter. The FilmIndico t o.r. . . . . .  1 0
               Unfooding.ChongingPortlyExposedFilms.  11-12
             Openingond Closingthe Bosebo o r.d. . . . . . .      l 3
             ExposureTimes. Apertures.Self-timer    14-19
            D i s t o n c e . S n o p s h o t F o c u s i n g . . . . .     2 0 - 2 1
              RopidWinder . DoubleLock              22
               Holdingthe Comero. Releosing          23
               FloshExposures                        24-27
                   Filters. Focor Lenses                    28-29
              AccessoryRongefinder. The KonturFinder. .  30
               Apertureond Depth of Field            31
              Core of the Comeroond Lens             32

                          www.orphancameras.com
View original page 4Page 6 · Read text
I  Bock Lock
 9 RewindKnob with Film
    lndicotor
l5  ViewfinderEyepiece
16 ReversingLever
77 Buttonto Open
   Boseboord
I I  Boseboord Leg
19 AccessoryShoe
20 RopidWinding Lever
2l  Film CounterSetting
    Button
22 Tripod Bush
23 Boseboord
- 4 -                                                                   www.orphancameras.com
View original page 6Page 8 · Read text
I  RewindKnob with
    Film Indicotor
     (fully extended)
 l5  Viewfinder
    Eyepiece
16 ReversingLever
2A Ropid Windins
    Lever
2l  Film Counter
    Setting Button
24 Film Chomber
25 Film Trock
26 Film Tronsport
   Sprocket
27 Toke-upSpool
                                    www.orphancameras.com
View original page 8Page 9 · Read text
lnserting the Cqssette           The norrow  slit of the toke-up spool (27l,
                                  must foce upwords before threoding the
                                             film  leoder.  lf necessory, turn the toke-
                                  up spool (with one finger or by working
                                        the ropid winding  lever) to  the correct
                                        position.Then:
                                      o Pull out o short length of ihe f ilm leoder
                                       from the cqssette, ond push it into the
                                                         slit of the toke-up spool os for os  it
                                                   will go (see illustrotion).
                                      o Drow the cossette ocross the tronsport
                                       sprocket ond the film trock, ond insert
                                                                      it in the film chomber.
                                      o Finolly  push bock  the  rewind knob
                                                  fully into the comero body, turning  it
                                              slightly   if  necessory to  engoge the
                                        centre spool of the cossette.
                                                                - 8www.orphancameras.com-
View original page 9Page 11 · Read text
Settingthe FilmCounter
                        Fully pull out the ropid winding lever (20).Pushthe revers-
                        ing lever (.|6) to the  left  (this extends the rewind knob),
                   ond keep pushing the                                                  film counter setting button (2.|)to the    a'                                           "F"                         right until the letter   oppeors below the red triongulor V
                     index in the curved film counter window (14).(See illu-
                         strotion). Push the rewind knob bock into the body, ond
                          pull out the ropid winding lever qs fqr qs it will go.
                  Work the reversing lever o second time, ond immediotely    1
                    push bock the extended rewind knob into the body. Fully
 pull  out  the ropid  winding  lever once more.  No.   I  (for the  first exposure)  is now
below  the  red  V  index  (see illustrotion).  Every time  the  film   is odvonced, '  the                                                                                                1fitm  counter  outomoticolly  shows  the  coirect  frome  number.
 Setting the Film Indicotor
Rotote the disc in the rewind knob in lhe direction of the orrow  until the index line on the
milled ring  is opposite the oppropriote morking. The block figures indicote film speeds of
block-qnd-white film  in ASA index numbers ond DIN degrees; the red letters stond for one              l
 of the following types of colour film looded into the comero:
D (T)  :  Doylight fype reversol film                 I  ND (NT)  :  Doylight type negotive film
A (K)  :   Artificiol light type reversol film     I  NA (NK) :   Artificiol light type negotive film
- r 0 -
                                    www.orphancameras.com
View original page 11Page 12 · Read text
After the lost shot the exposed film must         Unloqding the Cqmerq
be rewound  into  its cqsselle. Proceed qs
follows:

o Push the reversing lever to the  left to
  extend  the  rewind  knob  (see  illu-
   strotion).
o Turn the rewind knob smoothly in the
  direction of the orrow. At the some time
  wotch the film counter window; the f ilm
  counter will now count bockwords from
  the number of the lost exposure.
o When the  letter oFo reoppeors below
  the red Y  index mork in the counter
  window, the film  is fully rewound.  lt
  con now be removed by opening the
  comero bock ond fully pulling out the
  rewind knob.
                                                                -      l l  - www.orphancameras.com
View original page 12Page 13 · Read text
ChqngingPortly ExposedFilms
Wirh the VITO llo you cqn qlwoys unloqd q portly exposed film qnd chonge over
lo qnother one (e. g. from blqck-qnd-white  to colour) without q dqrkroom.            1
o Rewind the portly exposed film into its cossette,os olreody described on poge
    ll. But moke o note of the number of the lost exposurewhich oppeored in the
  curved film counter window.
                                                                                  1
c When relooding the portly exposed film, proceed os described on poges B to
  10, up to setting the film counter to No. l.
c Then push the reversing lever to the left (extendingthe rewind knob), ond keep       )
  working the ropid winding lever until the triongulor !   index mork in the film
  counter window  indicqtes two fromes beyond the number noted when you
  unlooded the film.
                                                                                                                                                                   \
o Finolly push bock the rewind knob into the body, once more pull the ropid
  winding lever os for os it will go, ond corry on exposing the film in the normol
  woy.
 - 1 2 -                               www.orphancameras.com
View original page 13Page 14 · Read text
Briefly press the button (17') underneoth  Opening ond Closing
the comero to releose the boseboord (see                   the Bqseboqrd
illustrotion).Pull it out by its two corners
until the struts engoge firmly. The lens
ponel is now in its toking position.

To  close, simultoneously depress both
keys (10), ond push  f he boseboord bock
ogoinst the body.

Pleqse note especiolly: During oll these
operotions ovoid pressing on the releqse
button which rises out of the edge of the
boseboord during opening, ond outomotic-
olly disoppeqrs ogoin on closing.
                                                      - 1 3 -                                  www.orphancameras.com
View original page 14Page 15 · Read text
Settingthe ShutterSp,eedqnd Aperture
The VITO llo  is ovqiloblewith either the Pronlo or the Pronlor-Svsshutterwith
exposurevqlue scqle.Settingthe shutterond opertureon modelswith the Pronto
shutteris describedbelow ond opposite.See poges 16 to lB for directionsfor
settingthe Prontor-Svsshutter.
                                                    "The Pronto shutter co n be set to  B" , 1/25, 1/50, 1/.|00, ond 1/200 second.  lt  is
X-synchronized (see poges 24 lo 27). To set the speed, turn the shutter speed ring
                                              until the red index line is obove the re-
                                     quired exposure time. When set to'Bu
                                       the shutter remoins open os long os the
                                     releose button is depressed.

                                The Pronto shutter must be tensioned
                                      before every exposure   even when set
                                           "B".                                           to    For this purpose pull the tensioning
                                        lever upwords os for os  it will go (see
                                           illustrotion).
                                                               - 1 4 -
                                    www.orphancameras.com
View original page 15Page 16 · Read text
The iris diophrogm of the lens controls the omount of light reochingthe film - ond
thus indirectly the exposure - os well os the extent of the depth of field. The opert-
ure numbers ore 3.5 (moximum operture),4, 5.6,8, 11, ond 16 (smollestoperture).
Rememberthot the lorger the operture number, the smoller the octuol lens opening,
ond vice verso. lt is thus reloted to the exposure time:  if for instonce the correct
shufter setting ot f/5.6 is 1/50 second, the corresponding volue ot f/B will be 1/25
second, ond of f/4  it will be l/.|00 second. For furfher detoils obout operture ond
depth of field, see poge 31.
To set the operture, move the operture lever so thqt the edge lines up with the
index line corresponding to the required
operture number (see illustrotion).
After some experience it becomes reoson-
obly eosy fo estimote the correct opert-
ure-shutter speed combinotion. A photo-
electric exposure meter is, however, more
relioble    especiolly in  difficult  light
conditions or  with  subiects of  extreme
brightness ronge.
                                                       - t 5 -  www.orphancameras.com
View original page 16Page 17 · Read text
The Prontor-SVSshutler with exposure vqlue scole corries shutter speeds from  I to
l/soos€cond, os well os o "B" setting for time exposures.lt is MX-synchronizedfor
flosh (see poges 24 to 27). For oll shots without flosh it is immoteriol whether the
synchronizing lever is set to M or X.
The Prontor-Svs shutter must be tensioned before every exposure   even when
      oB".set to         To do thot, pull the tensioning lever upwords os for os it will go (see                             "8",illustrotion). When set to      the shutter opens on pressing the releose button
ond remoins open os long os the button is kept depressed.
The operture ond speed controls ore coupled. The relotion between exposure time    {
                                 ond lens opening is expressedin terms of                                   "exposure                                                  volues". The exposure volue
                                     required depends on the prevoiling light
                                      conditionswhen toking the pictUre;setting
                                       the exposure volue on the shutter olwoys
                                     provides the correct combinotion of opert-
                                      ure ond exposure time. A series of such
                                       correct combinotions (e. g. 1/dosecond ot
                                                f/5.6, 1/sos€cond of f/8, ,/.tt second of  f/ll)
                                   olwoys corresponds to one qnd the sqme
                                  exposure volue setting.
                                                               - 1 www.orphancameras.com6 -
View original page 17Page 18 · Read text
Setting the Exposure Vqlue
     Pull the operf ure lever slightly outwords, ond
     set it so thot the red index mork engoges in the
     serroted rim  exoctly on  the exposure volue
    number you hod reod off your exposure meter
    (see top  illustrotion).  lf  necessory, turn  thet  shutter speed ring ogoinst the movement of the
    operture lever so  thot the  lotter con engoge
    even the end numbers of  the exposure volue
    scole when oppropriote.
    This setsiust one of the mony.possibleoperture-speed
    combinotions(e. g. l/sosecondof t18,for o exposure
    volue of ll  -  seebottomillustrotion).lf o fostershutter
    speedis required,simplyturn the shutterspeedring to
     thisspeed;thot outomoticollyopensup the lensoperture
     to correspondto the shorterexposuretime. Conversely,
    the shutterspeedring con be usedto odiustthe opert-
     ure, which simultoneouslychongesthe shutterspeedto
     suit. ln-betweenexposurevolueseftingsCIreolsopossible
     for speciollyoccuroteexposureswith colour film.
                                                                         -www.orphancameras.com1 7  -
View original page 18Page 19 · Read text
Setting the Exposure Vqlue (continued)
A given exposure volue setting, however, does nol permit the use of every single
operture ond shutter speed morked on the shutter. On turning the shutter speed
ring either the operture scole or the shutter speed scole reoches the limit of  its
movement. Beyond thot no further operture-speedcombinotions ore then possible
of the sqme exposure volue.
Note: When the speed index (the red line on the shutter speed ring) reoches the                                          "8",feft-hond end of the speed scole of      the shutter opening ond closing is no
longer controlled outomoticolly by  the mechonism. With  the exposure volue
unchonged, expose for 2 seconds in this cose.
If you hqve obtoined the operlure-speed combinqlion from qn exposure meler
without exposure vqlues, the operture ond speed must be set seporotely on the
shutter. First turn the shutter speed ring until the red index on  if  is obove the
required speed morking. Then odiust the operture lever until the pointer indicotes
the qppropriote operture number. The settings ore now coupled to on exposure
volue, ond con be odiusted together qs olreody described.
Apertureond speedsetlingswilhouf on exposuremeter: In principle'ond'opertureproceedos describedobove, but you will hove to esiimotethe-correctshuttersileed             setting.To
ovoid wrong settings,pleose note the order: first odiust the shutterspeed,ond then the
operture.
- 1 8 -                             www.orphancameras.com
View original page 19
Page 20 · Read text
Settingthe Self-Timer
The deloyed oction mechonism(self-timer)
built  into  the  Pronto ond  Prontor-SVS
shutters ollows you to include yourself in
your pictures without hoving to qsk other          "presspeople to        the button" for you.
After setting the shutter speed ond opert-
ure  (or  the exposure volue), ond  the
distonce, tension the shutter in the usuol
woy. On the Pronto shutter then pull the
red self-timer lever sidewoys os for os
it will go (see top  i I lustrotion).
On the Prontor-SVSshuttersimply set the syn-chronizinglever to the green dot morked"V".
On the Prontor-SVS(but not on the Pronto)the
settingof the lever con be chongedogoin if
desiredwithout moking on exposure.
On pressingthe releosebutton,the shutterwill
now open outomoticollyofter o deloy of obout
7 to 10 seconds.Note: The self-timer"B".    connotbeusedwith the shutterset to
                                                       - 1 9 -
                                   www.orphancameras.com
View original page 20Page 21 · Read text
Settingthe Distqnce             You cqn determine the subiect distqnce
                                     by  estimotion,  or,  better  still, with  the
                                          qid  of  qn  qccessory rongefinder. The
                                           Voigtliinder  clip-on rongefinder  is porti-
                                           culorly suitqble for this purpose. lts robusl
                                     design qnd speciol supqrenl conlrqst mir-
                                             ror  ensure  qbsolute  qccurocy  over   tr
                                   meosuring rqnge from  infinity  to 3 feet.

                                 To focus the comero lens, turn the lorge
                                      milled ring corrying the disfonce scole
                                             until the oppropriote distonce  f igure  is
                                   opposite the triongulor A  index mork
                                    (see illustrotion).The scole olso corries
                                  two odditionol morks: I   of obout ll  feet,
                                 ond O  of obout 30 feet. These ore the
                                  shopshot focusing settings (see opposite
                                     poge).
                                                               - 2 0 -                                  www.orphancameras.com
View original page 21Page 22 · Read text
Condid oction shots (e. g. of children ot            SnqpshotFocusinE
ploy) often yield surprisingly live pictures.
On  such occosions do  not woste time
over focusing on on exoct distonce. In-
steod, set the focusing scole to the neor
zone mork V  for subiects between B ond
17 feet,  or fo the for zone mork O  for
subiects between 17 feet ond  inf inity.
You must, however, stop down to of leost
f/5.6 to ensure odequoie depth of  field.

Provided the light is good enough, these
focusing zones ore  very  useful when
photogrophing  sports  subiects, where
distonces moy chonge very suddenly.
                                                       - 2 1  -  www.orphancameras.com
View original page 22Page 23 · Read text
The RopidWinder             One  full movement of the ropid winding
       ond Doublelnterlock lever tronsports the film ond odvonces the
                                            film counter. The spring then returns the
                                        lever to its originol position.
                                The ropid winding lever con of course
                                      olso be worked  in o number of  short
                                movements. In thot cose keep pulling the
                                        lever until  it locks.
                                The outomotic double interlock prevents
                                       the  ropid  wind ing  lever   f rom  being
                                    operoted o second fime before the shutter
                                                  is releosed. At the some time, the shutter
                                  con only be releosed once the film hqs
                                been odvonced.
                                     Note: Do not press the reversing lever (.|6)
                                 between exposures. Otherwise the double
                                   exposure lock comes into oction, ond you
                                      lose o frome.
                                                               - www.orphancameras.com2 2 -
View original page 23Page 24 · Read text
Holding qnd Releosing
For shooting we suggest you  hold  the
comero os shown in the illustrotions on
the right. Keep the eye close to the finder
eyepiece so thot  qll four corners of the
finder field ore cleorly visible.
When  releosing the shutter, hold your
breoth, ond smoothly depress the releose
button os for os it will go- never iob of it.
Short instontoneousexposures (,/rosecond
or  f oster) ore usuolly token with the co-
mero held  in the hond. Avoid  holding
the comerq unsupported for  exposures
longer thon 1/sosecond; prop up your
orms or leon ogoinst something solid.
                                oBoFor time exposureswith the shutterset to
preferoblymount the comeroon o tripod, ond
releosethe shutterby rneonsof o coble releose.
This screwsinto the coble releosesocket(11).
                                                       - 2 3 -                                     www.orphancameras.com
View original page 24Related documents and language editions
From the M. Butkus archive. Original publisher and archive notices are retained.
Check the model and edition against your equipment.
PDF verified 2026-10-10.