Film cameras
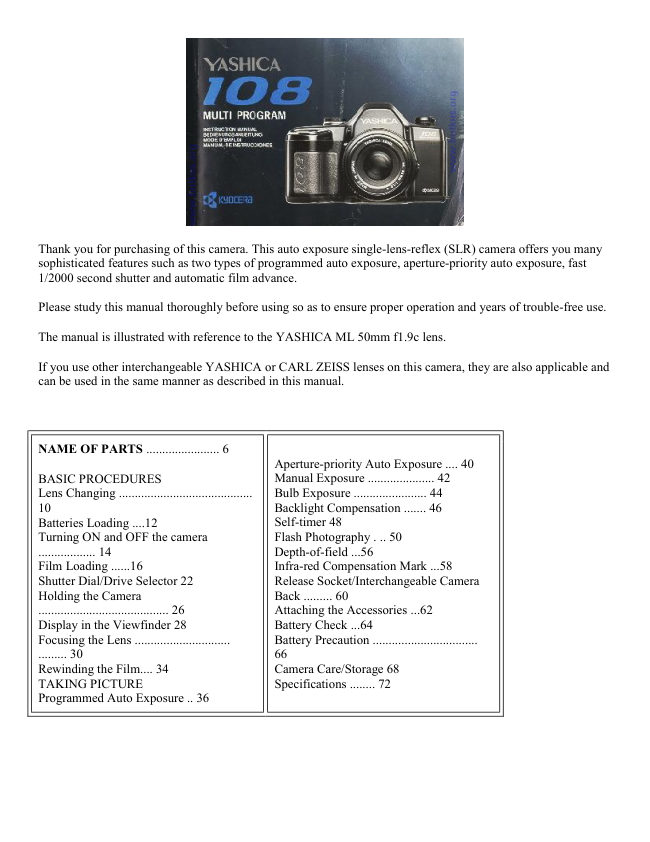
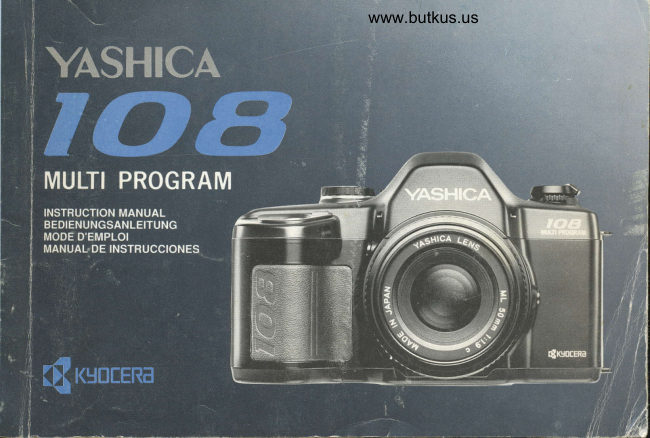
Yashica 108 User manual
User manual for Yashica 108. 18 pages in English. Read the original PDF, download or print a copy without registration.
18 pagesEnglish1.6 MB PDF
Loading your manual…Open PDF directly
Document details
- Brand
- Yashica
- Model / document
- Yashica 108
- Document type
- User manual
- Language
- English
- Pages
- 18
- File size
- 1.6 MB
- Category
- Film cameras
- Document date
- Not specified in catalog
Search available document text
Find a term, then jump to its page in the original PDF. Image-only pages may not be searchable; check the PDF for exact wording and diagrams.
Page 2 · Read text
Thank you for purchasing of this camera. This auto exposure single-lens-reflex (SLR) camera offers you many
sophisticated features such as two types of programmed auto exposure, aperture-priority auto exposure, fast
1/2000 second shutter and automatic film advance.

Please study this manual thoroughly before using so as to ensure proper operation and years of trouble-free use.

The manual is illustrated with reference to the YASHICA ML 50mm f1.9c lens.

If you use other interchangeable YASHICA or CARL ZEISS lenses on this camera, they are also applicable and
can be used in the same manner as described in this manual.


NAME OF PARTS ....................... 6
                                              Aperture-priority Auto Exposure .... 40
BASIC PROCEDURES                 Manual Exposure ..................... 42
Lens Changing ..........................................    Bulb Exposure ....................... 44
10                                         Backlight Compensation ....... 46
Batteries Loading ....12                       Self-timer 48
Turning ON and OFF the camera            Flash Photography . .. 50
.................. 14                               Depth-of-field ...56
Film Loading ......16                          Infra-red Compensation Mark ...58
Shutter Dial/Drive Selector 22              Release Socket/Interchangeable Camera
Holding the Camera                    Back ......... 60
......................................... 26                Attaching the Accessories ...62
Display in the Viewfinder 28                Battery Check ...64
Focusing the Lens ..............................        Battery Precaution .................................
......... 30                              66
Rewinding the Film.... 34                Camera Care/Storage 68
TAKING PICTURE                          Specifications ........ 72
Programmed Auto Exposure .. 36
View original page 2Page 4 · Read text
Lens Changing


< Mounting the lens > First, remove the camera body-cap and lens rear-cap by turning them counterclockwise.
Then align the red dot on the lens with the Lens Mounting Index on the Mount of the camera body, gripping the
lens barrel firmly and turn the lens clockwise until it locks with a click.

· Using a lens cap of snap-on type, attach or remove it from the lens by pressing the two side-tabs.

< Dismounting the lens > While pressing the lens release button, turn the lens counterclockwise as far as it
will go, gently remove it from the camera body-mount Replace caps on the camera body and the lens mount to
protect them.

* When mounting and dismounting the lens, avoid touching the lens , surface and the interior of the body

* Avoid direct sunlight when changing the lens with film loaded in the camera.

Batteries Loading


This camera is battery powered to perform all necessary functions, including film winding, shutter and display
in the viewfinder. Therefore, make sure that batteries are installed correctly before using the camera. It will not
operate without batteries

1. Open the Battery Compartment Cover by pushing it in the direction of arrow.

2 Insert four alkaline AAA-size batteries as indicated by the battery label inside the battery compartment
following the "+" and "" - "" sign illustration.
View original page 4
Page 5 · Read text
www.butkus.us

· Do not force in the batteries. Let them drop-in the battery compartment.

· The batteries packed with the camera are supplied as tester. It can be used only for testing all available camera
functions.

Turning ON and OFF the Camera


                                 The power switch of the camera is turned on
                                   and off by means of the Shutter Dial. If you
                                              set the Shutter Dial at any position other than
                                   "OFF", it will turn on the power switch of the
                                      camera. If you are not taking pictures, set the
                                         Shutter Dial at "OFF" to prevent the shutter
                                   from tripping accidentally and save the battery
                                     power.


Film Loading


Set the Shutter Control Dial to any position other than "OFF", open the Camera Back and load the film.
Open the Camera Back by pushing down the Camera Back Lock while pressing in the button on it. To insert the
film, first fit the recess of cassette to the shaft on the top of the film chamber and push in the film cassette
smoothly.

· Always load and unload film in subdued light.
· Use DX-coded film. If non DX-coded film is used, the camera will set its film speed to ISO 100 automatically.


                                                                 2. Insert the film leader
                                               under the orange mark
                                            "" -- "" and close the
                                          Camera Back. Engage the
                                                          film perforations with the
                                                               teeth on sprocket and insert
                                                            the leader of film in the slot
                                                     under the orange mark "" --
                                                            "" at the end of the film
                                                          channel. Make sure the film
                                                                      lies flat on the film channel
                                                          as shown.
View original page 5Page 6 · Read text
· If the leader of the film is too long, adjust its length by rewinding it back into the film cassette.

3. Slightly depress the Shutter Release and the film will automatically advance to the first frame. If you
depress the Shutter Release, the film will automatically advance and the Exposure Counter will switch from "S"
to "1". After the film has advanced, take up the film slack by erecting the Film Rewind Crank, follow the
direction of arrow and turn it gently as far as it will go. Reset the Film Rewind Crank to the original position
after taking up the film slack. The camera is ready to take pictures. If the Film Rewind Knob turns after you
have depressed the Shutter Release, the film is advancing properly.


< Exposure Counter >


                               The exposure counter advances every time the
                                     automatic winding mechanism operates, and
                                         returns to "S" (Start) when the camera back is
                                    opened, regardless of whether or not there is
                                       film in the camera. The exposure counter starts
                                     with "S", then "1", followed by even numbers
                                  from "4" through "36". The odd numbers are
                                        indicated by dots marked between the even
                                   numbers. The orange-colored numbers "12",
                                    "24" and "36" correspond to the number of
                                     exposures in standard 35mm film cartridges.


The Shutter Dial is used as the power switch of camera, it is also used for seeing auto exposure modes and
shutter speeds in case of manual exposure. Turn and set the dial to your desired exposure position.

< Shutter Dial Setting >


                       "PROGRAM" - standard programmed auto
                                    exposure The camera will automatically select
                                        the correct combination of shutter speed and
                                        aperture from its program according to the
                                        brightness of the subject. "HP" High-speed
                                Programmed auto exposure This mode will give
                                     a priority to a fast shutter speed for providing
                                         correct exposure. This mode is useful for
                                      shooting quick sports scenes or sharp portraits
                                        against a blurred background. It is also good for
                                     avoiding camera shake when taking pictures
                                     with a telephoto lens.


"AV" Aperture-priority auto exposure If you set your camera at the desired aperture, the camera will
automatically control the shutter speed according to the brightness of the subject to provide correct exposure.
This mode is suited for shooting with lens with depth-of-field emphasis.
View original page 6Page 7 · Read text
www.butkus.us

"2000,1000 - 2, 1"
"In the manual exposure mode, choose your desired shutter speed on this dial. "2000" means 1/2000 second,
"1000" means 1/1000 second, , and "1" means 1 second.


"B" Bulb
As long as the Shutter Release is held depressed, the shutter will remain open to expose the film.

"X" Flash synchronizing speed Set the Shutter Dial to "X" it pictures are taken with flash units other than
dedicated flash (CS-140 FLASH or CS-220 AUTO FLASH). The synchro socket of the camera is a direct "X
contact" type and the shutter will trip at 1/90 sec. "OFF" Camera OFF The power switch of the camera is turned
off.

* Intermediate setting are not available on the Shutter Dial index. Do not set in-between positions.

< Drive Selector >


                                With the Drive Selector, you can set the film
                                        drive mode at either "S" (Single) or "C"
                                      (Continuous). Switch it to suit your purpose.
                                    "S" Each time the Shutter Release is depressed,
                                        the shutter trips to expose one frame, then the
                                       film will advance to the next frame, before it
                                          will stop.

                                 "C" As long as the Shutter Release is held
                                       depressed, the shutter will trip in succession to
                                       take pictures one after another. If you take your
                                         finger off the Shutter Release, then the film will
                                   advance to the next frame, before it will stop.


Holding the Camera
To take sharp picture, it is important to hold the camera still. Because the main cause of blurred pictures is
camera shake, it is recommended to learn how to hold the camera and find the best position that suits you. Place
the camera in the palm of your left hand, hold the len's focusing ring so that you can turn it with your fingers;
grip the camera with your right hand and put the forefinger lightly on the Shutter Release. Stick the left elbow
to your body, press the camera lightly against your face and look through the viewfinder. Always depress the
Shutter Release slowly and gently. To accommodate objects of different shapes, the camera can be used both in
the horizontal and in the vertical position. In either case, choose the position that suits you best. Sometimes you
could gain stability and support by leaning against a building or tree when pictures are taken.
View original page 7Page 8 · Read text
Display in the Viewfinder


                                                                       If the Shutter Release is lightly
                                                     depressed when the camera
                                                     switch is on, the relevant
                                                        display in the viewfinder will
                                                               light up or blink for about 8
                                                   seconds showing the following
                                                      shooting information's.


"     " Lights up: When the Shutter Dial is set to an auto exposure mode ("HP", "PROGRAM ", or "AV").


"     " Blink: When the control range of the program is narrow. The lens cannot be adjusted down to the "HP"
or "PROGRAM" mode. In this case, adjust it to its minimum aperture (or the largest f-number).

"    " Lights up: When the exposure is correct in the manual exposure mode.


"    "Blinks: When the Shutter Dial is set to "B" (Bulb).

"   " or "   " Lights up: In manual exposure, when the exposure is over " "   " " or under "   " within 1 EV
relative to the correct exposure.


"      " " or "         "' Blinks: In manual exposure, when the exposure is over "      " or under "      " by
more than 1 EV relative to the correct exposure. In aperture-priority auto exposure (AV), when the set aperture
is not within the camera exposure control range.


"   " Lights up: When it is fully charged on a dedicated flash (CS-140 FLASH or CS-220 AUTO FLASH).


"      " Blinks: When the shutter speed is slower than 1/30 second in an auto exposure mode, this sign is to
warn you of a risk of camera shake In this case, use a flash unit or support the camera with a tripod.
View original page 8Page 9 · Read text
www.butkus.us

Focusing


                           Focusing is done with the split image in the center of the
                              viewfinder, the microprism collar around it, or the
                            surrounding matte screen.

                            <Horizontal Split-lmage Spot>
                         While looking through the viewfinder, turn the focusing
                              ring until the upper and lower halves of the split image
                              coincide. If the image is not in properly focused, the two
                             halves do not coincide.


< Microprism Collar and Matter Screen > Turn the focusing ring until the image on the microprism or mane
screen appears sharpest. If the subject is not in sharp focus, the image on the matte screen unsharp.

·If you are using a "slow" lens or taking close-up with a high magnification, you may not be able to focus
properly. In such case, focus with the surrounding mane screen.

·If you are far-sighted or near-sighted, use an optional FL type diopter lens. There are eight types available, (-5,
-4, -3, -2, O. +1, +2 and +3), which can be attached to the Viewfinder Eyepiece.


Rewinding the Film


After the entire roll of film has been exposed, the shutter will no longer trip. Sometimes the Reflex-mirror
inside the body may stop halfway up. Make sure the end of the film is reached on the camera.

    1.  Press in the Film Rewind Button on the bottom of the camera.

         · It is not necessary to hold the button down. 2. Turn off the battery power of the camera. Erect the Film
      Rewind Crank and turn it in the direction of the arrow to rewind the film.
View original page 9Page 10 · Read text
2. You will feel a slight tension when the film is released from the spool. After making sure the tension has
      been released by turning the crank a bit more, open the camera back and unload the film.

         · If the Reflex-mirror inside the camera stays in the halfway up, reset it with the Shutter Release.

     Do not depress the Shutter Release while the film is being rewound. Take the exposed film for
       processing as soon as possible.


     Programmed Auto Exposure


                                         Set the Shutter Dial to either
                          "PROGRAM" or "HP".

                                                   If you depress the shutter Release lightly,
                                          a green lamp "     " will appear in the
                                            viewfinder, indicating that the camera is
                                                  set for auto exposure.

                                           2. Set me lens aperture to minimum (the
                                       largest f-number)

                                                  If the green lamp in the viewfinder blinks, it
                                means the lens is not stopped down to its
                             minimum aperture. Adjust until the lamp stops
                                         blinking.

                                           3. Focus the lens and compose your picture
                                  Focus the lens by turning it distance ring,
                                compose your picture and shoot.


<Program Auto Exposure Control Diagram>


                             The following diagram shows the combinations of
                                      shutter speed and aperture in the standard program
                               and high-speed program auto exposure modes.

                             <Multi-Program Curve>

                           P - Standard PROGRAM

                       HP - High-speed Program
                              * If the lens is not set to its minimum aperture, the
                              lamp     blinks and the program control range is
                                   narrower.
View original page 10Page 11 · Read text
www.butkus.us


Aperture-priority Auto Exposure


1. Set the Shutter Dial to "AV" If you depress the shutter Release lightly, a green lamp e will appear in the
viewfinder indicating that the camera is set up for auto exposure.

2. Choose the aperture Set to the desired aperture by turning the aperture ring.

3. Focus the lens and compose your picture Focus the lens by turning its focusing ring, compose your picture
and shoot.

<Over "  " / Under "  " exposure Warning in Aperture-priority Auto Exposure> When the Shutter
Release is lightly depressed, the lamp " "***" " or "***" means that the aperture value selected is respectively
on the overexposure or underexposure side beyond the exposure, adjust the aperture unit the lamp no longer
blinks.


Manual Exposure


1. Set the shutter speed the Shutter Dial and the aperture With the aperture ring

2. Check correct exposure If you depress the Shutter Release lightly, the lamp "   " or/ and "   " will light up
or blink (see illustration below) to indicate exposure condition at that time. Adjust your shutter speed and
aperture so as to obtain correct exposure.

         - Blinks Overexposure of more than 1 EV.
View original page 11Page 12 · Read text
Lights up Overexposure within 1 EV.

    Lights up Correct exposure.

  Lights up - Underexposure within 1 EV.


     Blinks Underexposure of more than 1 EV.

3. Focus the lens and compose your picture Focus the lens by turning its focusing ring, compose your picture
and shoot.


Bulb Exposure


                             To take night scenes or pictures of the sky at
                                       night requiring long exposure time, set the
                                      Shutter Dial at "B" (Bulb). Then, as long as the
                                      Shutter Release is depressed, the shutter remains
                                 open to allow long exposure time on the film. To
                                    avoid blurred pictures, mount the camera on a
                                        tripod or put it on a stable base and trip the
                                         shutter with a Cable Switch (optional accessory).


* When the Shutter Dial is set at "B" the lamp "    " will blink in the viewfinder by depress) the Shutter
Release


Backlight Compensation Button


                                                    If you are shooting in an auto exposure mode
                                      ("HP", "PROGRAM", or "AV") and your
                                          subject is black-lighted or situates in front of a
                                           bright window, it will be underexposed and
                                       appears dark in the picture. In this case, trip
                                          the shutter while pressing in the Exposure
                                   Compensation Button. Your subject will be
                                    exposed with an exposure compensation of
                                      +1.5 EV.
View original page 12Page 13 · Read text
www.butkus.us


Self-timer


                                                           If you want to include yourself in a
                                          group picture or a souvenir picture, use
                                                the self-timer. 1. Focus the lens on the
                                                subject and compose your picture. 2.
                                          Depress the Self-timer Button. The Self-
                                              timer LED will turn on and the shutter
                                                  will automatically trip in about 10
                                             seconds. The Self-timer LED will light
                                       up for the first 8 seconds, then will blink
                                                  for the remaining 2 seconds to warn you
                                                    right before tripped of the shutter.


· To stop the self-timer after it has been activated, simply press the Self-timer Button once again.

· If you depress the Shutter Release while the self-timer is running, the shutter will trip immediately.

· Under strong daylight, if you start the self-timer without putting your eye on the Viewfinder Eyepiece, it is
advisable to cover the eyepiece with the Eyepiece Cover. However, you need not attach the Eyepiece Cover in
manual mode.


Flash Photography


                                           If the lamp "   " blinks, the subject is dimly lighted.
                          To avoid camera shake, it is recommended to use a
                                 dedicated flash. (The CS-140 FLASH and CS-220
                    AUTO FLASH are available as optical accessories).

                                             If you use any of these flash units, the lamp "   "
                                    will light up in the viewfinder as soon as the flash is
                                     fully charged.
View original page 13Page 14 · Read text
<Using a dedicated flash>
Set the camera for aperture-priority auto exposure or manual exposure. Choose and set the aperture according to
the instructions in your flash manual. In the aperture-priority auto exposure mode, as soon as the flash is fully
charged, the shutter speed will automatically switch to 1/90 second. If you are shooting manual exposure mode
and the shutter speed has been set to "2000" (1/2000) - "125" (1/125) see, it will switch automatically to 1/90
sec. If it has been set to "60" ( 1/60) sec. or slower, the shutter will trip at the speed that has been set.

<Using an ordinary flash>
Select the manual exposure mode and set the Shutter Dial at "X" or "60" ( 1/60) sec. or slower. Choose the
correct aperture setting according to the instruction in your flash manual

<Slow-shutter flash>
If you choose a shutter speed slower than 1/60 sec. in the manual exposure mode. you can take pictures in a
twilight or night scene with flash. Choose the correct aperture according to the instructions in your flash
manual. While checking the marks " "***" " and " "***" " in the viewfinder, ad just correct exposure by turning
the Shutter Dial. Thus, the subject will look better against a clear background. Because the shutter speed is
slow, it is recommended to mount the camera on a tripod to avoid blurred exposure.

<Daylight flash>
If you are shooting an object with strong backlight, or in front of a bright window, it will appear to be darker
than its background. In this case, if you use flash as fill-in light, the extreme contrast between your object and
its backgrounds will be balanced out. When shooting in the aperture-priority auto exposure mode, the
overexposure warning "***" may blink because the shutter speed automatically switches to 1/90 sec. In this
case, decrease the aperture until this warning light goes out. In the manual exposure mode the shutter speed
must be set to 1/90 sec. (by automatic switching) or " X " on the Shutter Dial. Then, adjust the aperture properly
by checking against the " "***" " and "***" marks in the viewfinder. In this mode, you can use flash as fill-in
light.


Depth-of-field


When the lens is focused on a subject, not the subject itself, but also a certain zone in front and behind of it will
appear as acceptably well focused. This range is called the depth-of-field of a lens and it changes in following
ways:

1. The smaller the aperture, the deeper the depth-of-field, and vice versa.

2. The longer the subject distance, the deeper the depth-of field, and vice versa.
View original page 14
Page 15 · Read text
www.butkus.us

3. The zone of sharpness behind the point on which the lens is focused is larger than that in front of it. Also the
shorter the focal length, the wider the range of depth-of-field, and vice versa.

Certain zoom lenses are not provided with a depth-of-field


Infra-red' Compensation Mark
To take infra-red pictures with B & W infra-red film (by using an infra-red filter), compensation on focusing is
necessary. The point of focus will shift slightly relative to that in normal photography. For this purpose, an
infra-red compensation mark is provided on the depth-of-f ield as normal, then put on the filter, shift that
distance to the infra-red mark and shoot.

· If you use color infra-red film, follow the instruction sheet in the film package.


Release Socket/interchangeable Camera Back


<Release Socket>
This socket may be used to attach remote control units as the Yashica/Contax Cable Switch. It transmits electric
signal from them to operate the shutter

<Interchangeable Camera Back>
You can replace the Camera Back with an Data Back DA-2 (optional accessory) for imprint date or time on
your picture. The Camera Back can be detached by pushing down the Back Cover Release Pin.


Attaching the Accessories

<Stray Light Prevention Adaptor>
A stray light prevention adapter has been supplied with your camera for preventing stray light from entering the
viewfinder when using the self-timer or remote control system. Slip it onto your carrying strap as illustrated,
and use it by fitting it onto the viewfinder eyepiece.

<Attaching the Strap>
Attach the Strap to the camera's Strap Lug as shown.
View original page 15
Page 16 · Read text
<Attaching the Eyecup>
Attach the Eyecup to the Viewfinder Eyepiece as shown. The optional FL-type Diopter Lenses are attached as
shown. The Eyecup can be placed over the Diopter Lens.

Battery Check
The lamps "     ", or "   " and "   " in the viewfinder are also used as battery checking indicators. If the battery
voltage is nominal, the lamps will light up steadily or blink at a constant frequency (6 times per second). If the
battery voltage is low, the lamp will no longer light up steadily or it will blink with irregular interruption. In this
case, the batteries still have enough power for exposing the film remaining in the camera, but you will have to
change them after exposing the entire roll of film. If the battery voltage falls below the specified level, all lamps
in the viewfinder will blink and you cannot trip the shutter. Replace all batteries immediately with new ones
(four AAA size Alkaline batteries).

· Fast blinking - aperture warning

· Slowing blinking - batteries warning

Battery Precautions

· Always replace all four batteries at the same time with new ones of the same type and brand. Never mix new
and old ones.

· Battery performance would be reduced in extreme low temperatures (i.e. 0°C or below). If you are shooting in
extreme cold weather, use new batteries and keep the camera warm before shooting. Even if batteries
performance is reduced temporarily in low temperatures, it will recover once room temperature is resumed.

· Wipe both caps of battery cell clean with a piece of dry cloth before use. Batteries soiled by sweat, oil or
grease will cause poor contact and malfunction.

· If you are going on a long trip, bring spare fresh batteries along with you.

· Do not throw used batteries into a fire or attempted to take then apart because it is dangerous.

· To take full advantage of the outstanding features of this camera, we recommended you to use our
interchangeable lenses and accessories designed for it.

· We are not responsible for the malfunctions and trouble resulting from the use of products by other makers. It
is advisable to use our interchangeable products.
View original page 16
Page 17 · Read text
www.butkus.us

Camera Care/Camera Storage

<Camera Care>
· Do not expose the camera to extreme temperatures (e.g. on a beach in summer or in a parked car under direct
sunlight, etc ) for a prolonged period of time. The camera, film and batteries may be adversely affected.

· After taking picture at the seaside or on mountains, clean the camera thoroughly. Salty air would cause
corrosion, sand and dust would adversely affect the internal precision parts of the camera.

· To remove dust and dirt on the lens and viewfinder eyepiece, use an air blower or a soft lens brush. Wipe off
fingerprints lightly with lens tissue. Remove dust and soil on the mirror surface with a lens brush.

· The lens and viewfinder glass may be clouded if the camera is carried into a warm room from outdoors where
it is cold. Cloudiness caused by condensation disappears quickly. But, it is recommended to avoid sudden
changes internal corrosion.

· If you are going to use the camera for important events such as an overseas trip or wedding ceremony, test it
before hand to make sure it functions properly. It is also advisable to bring spare batteries along with you.


Specifications

TYPE: 35mm auto-exposure Single-Lens-Reflex (SLR) camera with focal-plane shutter.

Picture: 24 x 36 mm

Lens Mount: YASHICA / CONTAX mount.

Shutter: Vertical-travel metal focal-plane shutter.

Shutter Speed: 1/2000 -1 6 SEC. on auto, 1/2000 -1 SEC. (1 2 steps) on manual, X (X-contact) and B (Bulb).

Shutter Release: Electromagnetic release, provided with dedicated cable release socket.

Exposure control: (1) Standard programmed auto exposure, (2) High-speed Programmed auto exposure, (3)
Aperture priority auto exposure, (4) manual exposure, (5) manual flash exposure.

Metering System: TTL center-weight light metering at full aperture. SPD (Silicon Photo Diode) cell.

Metering Range: EV2 - EV19 (ISO 100, f/1.4 lens)

Film Speed Setting: Automatic setting with ISO 25 - 3200 DX coded films, film speed is automatically set to
ISO 100 for non DX-code films.
View original page 17
Page 18 · Read text
Viewfinder: Penta-prism eye-level finder, 92% field-of-view, 0.82X magnification (with 50mm normal lens at
infinity).

Focusing Screen: Horizontal split-image and microprism collar.

Display in viewfinder: Four LED lamps (***, O. *** *** )

Film Winding: Automatic film winding with built-in motor, auto loading and automatic film advance to frame
No. "1", continuous (C) shooting with drive selector.

Film Rewinding: Film Rewind Button and Rewind Crank.

Exposure Counter: Automatic reset, additive type.

Accessory Shoe: Direct X-contact hot-shoe (provided with flash coupling contacts).

Synchro Socket: X-contact only, shutter speed automatically switches to 1/90 sec. synchronizing with
dedicated flash when it is fully charges, or slower speed in manual exposure. " " *** " " lamp lights up when
flash if fully charges.

Self-timer: Electronic Quartz-timer with 10 seconds delay on shutter release with self-timer LED turns on
while self-timer is operating. Cancelable during count-down.

Exposure Compensation: + 1.5 EV exposure compensation is possible with exposure compensation button.

Camera Back: Detachable camera back. Open by release knob, provided with Film Check Window.

Power Source: Alkaline batteries (1 .5v x 4 pcs. of MA-size).

Battery Capacity: About 50 rolls of 24-exposure film with AAA size Alkaline batteries. (According to the
factory testing conditions and standards of YASHICA.)

Dimensions: 149 (W) x 93 (H) x 52 (D) mm [5-7/8(W) x3- 11/16(H) x2- 1/16(D) in.]

Weight: 5009 (Body only without lens, film & batteries.) [1.1 lb.]

· Specifications and design are subject to change without notice.
View original page 18
Related documents and language editions
From the M. Butkus archive. Original publisher and archive notices are retained.
Check the model and edition against your equipment.
PDF verified 2026-10-10.