Film cameras
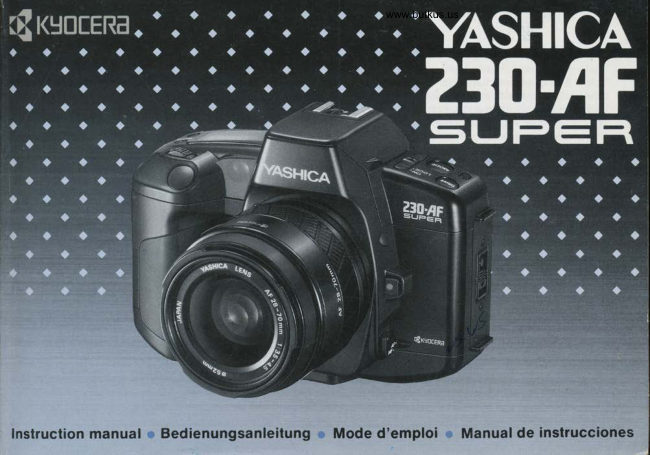
Yashica 230-af Super User manual
User manual for Yashica 230-af Super. 67 pages in German, French. Read the original PDF, download or print a copy without registration.
67 pagesGerman, French5.4 MB PDF
Loading your manual…Open PDF directly
Document details
- Brand
- Yashica
- Model / document
- Yashica 230-af Super
- Document type
- User manual
- Language
- German, French
- Pages
- 67
- File size
- 5.4 MB
- Category
- Film cameras
- Document date
- Not specified in catalog
Search available document text
Find a term, then jump to its page in the original PDF. Image-only pages may not be searchable; check the PDF for exact wording and diagrams.
Page 1 · Read text
www.butkus.us


                                 Mode d'emploiInstruction manual Bedienungsanleitung '
View original page 1Page 2 · Read text
Thank you for your purchase of a Yashica camera.        Besten Dank fUr den Kauf einer Yashica Kamera.
This is a simple-to-use, fully automatic single-lens         Dies ist eine unkomplizierte, vollautomatische
reflex camera that lets you take pictures by simply         Spiegelreflex-Kamera. Sie drUcken nur auf den
depressing the shutter release. Focusing, exposure,        Ausldser. Scharfstellung, Belichtung und
and film winding are all automatic.                         Filmtransport erfolgen automatisch.
By combining  its auto-focus function, exposure           Durch die Kombination von Autofokus-Funktion,
modes, and built-in flash, you can also realize more        Belichtungsfunktionen und eingebautem  Blitz werden
sophisticated image expressions with it.                   Sie damit auch anspruchsvolleren Motiven gerecht.
Before you use the camera, please read this             Lesen Sie vor dem Fotografieren diese
instruction manual carefully through to use  it              Bedienungsanleitung  sorgfdltig durch, um alle
correctly.                                                Funktionen optimal nutzen zu k6nnen.

Though the instructions  in this manual are described with a        Die Hinweise in dieser Anleitung beziehen sich auf eine
50mm Fl.8 AF lens on the camera, the operating procedures       Kamera mit 1,8/50mm-Yashica-Objektiv.  Mit anderen
are the same as described in this manual even if it is               Objektiven erfolgt die Bedienung auf die gleiche Weise.
equipped with other Yashica AF lenses.
View original page 2
Page 3 · Read text
www.butkus.us
   Contents
    Names of Parts                    8    o Flash Photography
    Camera Care and Precautions          14       Flash Photography                        98
     Basic Steps ........                   20       Using the Built-in Flash ........               ........,....... 100                                                                 Using an External Flash ........               ............... 114I     Display Panel & Display in the Viewfinder .........   22     Basic Operation                  29       Taking Pictures with the Built-in Flash Using our     Mounting and Dismounting the Lens .........     30       Optional Accessories                             ......... 116
     Loading the Battery                 32    o Other Functions
     Main Switch                     34       Using the Self-timer                        ...........120
     Loading the Film                   36       Bulb Exposure ..............                               ...... 122
     Holding the Camera                 40      Changing the Camera Back .........          ........124
      Setting the Shooting Modes             42       Release Socket                                  .................. 124
     Taking Pictures                   60    Dedicated Accessories (optional)           ............... 126
'    Advanced. FocusingTechniouesTechniques and Details
       Focus Lock ..........                           70
      AF Supplementary Light .........                 76
        Focusing Screen                             78
        Advanced-autofocus Function                 78
        Deoth of Field .........                         B0
      . Exposure Techniques and Details
         Display of Shutter Speed and Aperture .................. 82
       Programmed Automatic Control/Program Shift ....... 84
        Automatic Compensation of Setting Values
           in Auto Exposure                          BB
        Exposure bompensation ............              90
        Automatic Backlight Compensation ............     98
View original page 3Page 5 · Read text
www.butkus.us


     @


           @ Strap Lug
         @ Pre{lash Selector Switch
        @ Viewfinder Eyepiece
       @ Shutter Curtain
       @ Sprocket
       @ AE Lock Button
       @ Spool
       @ Camera Back Release Pin
       @ fitm Check Window
       @ Camera Back Release Knob
       @ Film Chamber
       @ DX Contacts
       @ Release Socket
       @ Data Back Contacts
       @ Tripod Socket
       @ gattery Compartment Cover
       @ Battery Compartment Cover KeY
       @ fitm Rewind Switch
       @ Camera Back
View original page 5Page 6 · Read text
Merci de faire un don de 2,50 € pour soutenir ce site via E-bay ... www.PayPal.me/butkus


Bitte spenden Sie 2,50 Euro, um diese Website über E-Bay zu unterstützen ... www.PayPal.me/butkus
View original page 6
Page 8 · Read text
www.butkus.us


Attaching the eyecup and diopter lens                oAttach the FL type diopter (optional accessory) suited to your
o See illustration.                                                eyesight as shown. The eyecup can be attached over the diopter
                    a                    rens.
Anbringen von Augenmuschel und Korrekturlinse                        a
                                                       o Befestigen Sie die als Zubehor erhtiltliche Okularkorrekturlinseo siehe Abbildung
                    O                           wie abgebildet. Die Augenmuschel kann daruber befestigt
lnstalaci6n del recept6culo del ocular y lentes        werden.
di6ptricas                                                           arVea la ilustracion.                                                  . lnstale una lente dioptrica del tipo FL (accesorio opcional)
                                        ()                             apropiado a su vision como se muestra. El receptdculo  ocular
Fixation de I'oculaire et de la lentille dioptrique      puede instalarse sobre la lente dioptrica.
 . voir I'illustration.                                                      o
                                                       o Fixez la lentille dioptrique de type FL (accessoire optionnel)
                                                           convenant d votre vision comme indique. L'oculaire peut 6tre fix6
                                                             sur la lentille dioptrique
                                                                                                                               ''                                                                            !"'                                                                                                                                                                                              i '!  ; ";i  ;'t
View original page 8Page 9 · Read text
Camera Care and Precautions

    o Do not leave the camera in hot places (on an ocean          o The liquid crystal display will not appear clear in hot
   beach in summer, in a parked car under direct sunlight,         temperature (e.9. on an ocean beach in summeQ or cold
     etc.) for a long time, because the camera, lilm and battery      temperature (under 0'C), but  it will return to normal in
   may be adversely affected.                                       ordinary temperature.
    rAfter taking pictures at the seaside or on mountains,
    clean the camera thoroughly. Salt air will cause corrosion      < Note on the use of polarizing filters>
   and sand and dust will adversely affect the precision parts     When a polarizing filter (linear type) is used on this
    inside the camera.                                          camera. your picture may be slightly underexposed
   .To remove dust and dirt on the lens and viewfinder          because of the nature of its light metering system.
    eyepiece, use an air blower or a soft lens brush.  lf they                 lf you want to shoot with a polarizing filter, it is
    are soiled with fingerprints, wipe off lightly with lens tissue.     recommended to use a circlear type polarizing filter.
   Remove dust and dirt on the mirror with a lens brush.
   oTo clean the camera body, wipe ofl with a soft cloth.         Remarks on the microcomputer  protection circuit
    Never use organic solvents such as benzine and thinner.          This camera incorporates a safety circuit for protecting
    oThe lens may be clouded  if the camera is brought into a               it against strong static electricity. Though rarely, the   warm room from outside where  it is cold. This cloudiness       camera may fail to operate when this circuit has been   f
      will disappear soon, but it is always good to avoid abrupt           activated. In this case, set the Main Switch to "LOCK"
    temperature changes.                                      and press the Program Reset Button, then operate the
    oThe camera contains high-voltage circuits. Never try to        camera again to shoot.
    disassemble  it by yourself because  it is dangerous.
    o lf you are going to use the camera for important
    events such as an overseas trip or wedding ceremony,
   be sure to test  it beforehand to make sure  it functions
    properly. lt is also advisable to bring a spare battery
    with you.
      . The camera is a precision instrument. Do not drop  it
   down or apply intense shock.


14
View original page 9Page 10 · Read text
www.butkus.us
                                         Kamerapllege und V orsichtsma&nahmen
                           TG
 <Camera Storage>                                    o Lassen Sie die Kamera nicht lange an heiRen Orten
 o Keep the camera away from heat, moisture and dust.          (2.8. Strand im Sommer, geparktes Auto in der Sonne),
Do not store it in a wardrobe drawer containing mothballs     denn Kamera, Batterie und Film kdnnten darunter leiden.
 or in a laboratory where there are chemicals that will             . Reinigen Sie die Kamera grUndlich nach dem Aufenthalt
cause damage to  it.                                                     in leuchter oder staubiger Umgebung, z.B. Meer oder
 .lf you are not likely to use the camera for an extended       Gebirge. Feuchte und salzige Luft kann Korrosion
period of time, remove the battery to prevent damage due      bewirken, Sand und Staub die Funktion mechanischer
to liquid leakage.                                                   Teile stdren.
                                                 oVerwenden Sie zum Entfernen von Staub und Schmutz
 <Battery precautions>                                  von Objektiv, Okular und Spiegel Druckluft oder einen
 oGenerally, the battery performance  is reduced                  Puste-Pinsel. FingerabdrUcke wischen Sie vorsichtig
temporarily by low temperatures (under 0"C). lf you are          spiralformig von der Mitte zum Rand mit einem
using the camera in cold weather, put it inside your             Linsenreinigungstuch ab.
clothing before shooting to keep the battery warm.            o Das Kameragehduses reinigen Sie mit einem weichen
The battery performance reduced by low temperatures  will     Tuch. Nehmen Sie niemals organische Losungsmittel wie
return to normal in ordinary temperatures.                     Benzin oder VerdUnnung.
 .lf battery poles are soiled with sweat, oil or grease, poor     o Wenn die Kamera aus der Ktilte in warme Umgebung
contact may result. Wipe both poles clean with a dry cloth      gelangt, kann das Objektiv beschlagen.Diese Erscheinung
before use.                                                   verschwindet nach kurzer Zeit von selbst, doch sollte man
o lf you are going on a long trip, bring a new spare            abrupte Temperaturwechsel moglichst vermeiden.
battery with you.                                                     . Die Kamera enthdlt Hochspannungs-Schaltkreise.
o Never throw the battery into fire, nor charge, short,          Versuchen Sie wegen der damit verbundenen Gefahr nie,
disassemble or heat  it because  il is dangerous.                 die Kamera selbst zu offnen.
 .  lf the battery is loaded with its plus ( + ) and minus  ( -  )       o Wenn Sie die Kamera ldnger nicht benutzt haben
ends wrong, the camera will not operate.                  und damit wichtige Fotos machen wollen,z.B. auf
oThe 6V lithium battery (2CR5) cannot be recharged.         Femreisen oder einer Hochzeit, empfiehlt es sich,
. Keep the battery out of children's reach.                    vorher einen Testfilm zu belichten, um sich von der
                                                      einwandfreien Funktion zu libezeugen. Vergessen Sie
                                                          die Reserve-Batterie nicht.
                                                                                                               15
View original page 10Page 14 · Read text
www.butkus.us


 < Display in the Viewfinder>             @ Sharp Focus LED (green)
                                                                                                              It turns on when the subject in the focusing frame is in
                                                             sharp focus.
                                   o   (lighting)  : The subject is in sharp focus.
                                          ie$ @inking)  : Focusing is not possible.
                                                      "  In the manual focus mode,  it turns on only when the
                                                                   subject is in sharp focus. But  it does not blink when
                                                                 focusing is not possible.
                        @ Exposure Warning LED (red)
                        @ Camera Shake/lncorrect Exposure Warning LED:  lt
                                                                       blinks intermittently when a slow shutter speed has been
                                                                 selected in the programmed auto exposure, shutter-speed-
                                                                                 priority auto exposure, or aperture-priority auto exposure
                                                mode to warn you that camera shake is likely to occur.
                                                                                                             It blinks continuously when  it is impossible to obtain
                                                                 correct exposure because the subject is not within the
                                                                         c_oupling range of the camera's exposure system.
                        @ Conect exposure indicator LED:  lt turns on when the
                                                           exposure (shutter speed and aperture)set in the manual
                                                           exposure mode is correct. lt blinks  if the exposure is not
                                                                    correct. (For details, refer to page 62).
O Focusing Frame                @ Ffash Mark (" l'|n  green)
Aim this spot at the subject you want to focus on.                             lf you are shooting with the built-in flash or the dedicated
@ Matte Screen                                                     flash (optional accessory), this mark turns on when the
@ Program Mode Mark ("P" in green)                            flash is fully charged. With the built-in flash,  it also blinks
It appears when the exposure mode is set to the             when the shooting distance is not within its effective
programmed auto exposure mode.  lt blinks when the             range. In this case, change the shooting distance so that  it
program is shifted. For details, refer to page 84.                   turns on with steady light.
                                                                  (For details, refer to page 100.)
                                                                                                  23
View original page 14Page 15 · Read text
Basic Operation
 This chapter explains the basic steps lor operating this camera.  lf you read
 these instructions, you will learn how to use  it for normal photography.


C ru n d I egende Bed ien u ngsverfa h ren
Dieses Kapitel beschreibt die grundlegenden  Verfahren bei der Bedienung
dieser Kamera. ln diesem Kapitel lernen Sie, wie die Kamera fr-ir normale
Aufnahmen einzusetzen ist.

Procddure de base
Ce chapitre explique les 6tapes de base permettant d'utiliser cet appareil.
En lisant ces instructions, bous apprendrez ir utiliser votre appareil pour
prendre des photos normales.

Operaci6n bdsica
Este capitulo explica los procedimientos bdsicos para la operaci6n de esta
c6mara. Si usted lee estas instrucciones, aprenderd a utilizarla para la
fotografia normal.
View original page 15
Page 16 · Read text
www.butkus.us
   Mounting and Dismounting the Lens

   < Mounting>                                        < Dismounting>
     First, remove the camera's body cap and the lens' rear         While pushing on the Lens Release Button, turn the lens
   cap by turning them counterclockwise.                          counterclockwise as far as  it will go, then remove  it by
    Then, align the red dot on the lens rear with the red dot          pulling  it out forward. After dismounting the lens, be sure
    (lens mounting index) on the camera's Lens Release             to put the lens cap and body cap on it and the body cap
    Button, push in the lens and turn it clockwise  until  it locks      on the camera.
    with a click.                                            o Do not touch the lens surface and camera interior when
     . Do not press the Lens Release Button when mounting        mounting and dismounting the lens.
    the lens.                                               o lf you are changing the lens when there is film in the
                                                             camera, avoid direct sunlight.


30
View original page 16Page 17 · Read text
Loading the Battery

                                                                                                                          return the                                                  Key    ? Close the Battery compartment Cover and     t  With a coin, turn the Battery Compartment Cover                                                                                                                                                            ".      I on the camera bottom in the direction of the arrow            i! xey from " G " io its original position "e
                                                         then     until the mark " G " is in line with the mark " -  ",
    remove the cover.

                              battery (2CR5) correctly into the     l!  Insert the 6V lithium  4 Battery Compartment as illustrated inside the
       compartment.


32
View original page 17Page 18 · Read text
www.butkus.us
  Main Switch

   The Main Switch turns on and off the camera. lf it is set to     <Checking the Battery>
   "ON", the camera's power switch will turn on.                                lf the battery warning mark " ^ll " does not appear in the
       lf it is set to "LOCK", the power switch will turn off.             Display Panel, it means that the battery has its normal
    o lf you are not using the camera, set the Main Switch to       voltage.
   "LOCK" to prevent the shutter from tripping by mistake.
                                                                 Battery Replacement:  lf the mark " Q " turns on in the
                                                                   Display Panel, it is time to replace the battery. Open the
                                                                      Battery Compartment Cover and replace  it with a new
                                                                      one.
                                                             o Though you can still take pictures even  if the mark
                                                                                on, it is recommended to replace the battery                                                                " !  " tJrnl
                                                            as soon as possible.  lf the battery voltage has fallen below
                                                                                                                       blink or go out and                                                                                               its specified limit, the mark " [  " will
                                                                the camera will no longer oPerate.


34
View original page 18Page 19 · Read text
Loading the Film

    { Set the Main Switch to "ON", open the Camera         Remarks on the shutter curtain     I Back and load the DX'coded film.                      Because the shutter curtain is a precision part, never   Push down the Camera Back Release Knob while pressing                                                              touch it with your finger or push  it wlth the film tip'
    the button on it, and open the Camera Back.                       EmphatiCally, never trip the shutter while the film tip is   To insert the film, first fit the recessed end of the cassette                                                          on the shutter curtain,    to the shaft located on top of the Film Chamber and push
       it in. lt will thus fit smoothly into position.
     . Use DX-coded film. With DX film in the camera, the       oTake care not to touch or soil the DX Contacts and Data    camera's film speed will be automatically set to the speed  Back Contacts.
    of the film you are using.                           .When loading and unloading film, avoid direct sunlight.
    With non-DX film, the camera's film speed will be
    automatically set to ISO 100.


                                                                                                                                                                                                                a
                                                                                                                              B

                                                                                                                                                       a
                                                                                                 W


36
View original page 19Page 20 · Read text
www.butkus.us


                                                and     As soon as you close the Camera Back, the film will    I  Insert the film tip under the orange mark "r"  4 close the Camera Back.                                     automatically advance to the first frame.
   Engage the film perforations with the sprocket teeth and        o lf the film is advancing properly, the exposure counter in
   make sure that the film is not floating up (see illustration)'       the Display Panel will show "1" and the cassette mark
                                                                                         " O-"  will turn on.
                                                                                                                       lf the exposure counter does not move from "0" and the
                                                     mark " O-" does not turn on, the film is not advancing
                                                                         properly. Open the Camera Back and load the film                   o                                                                       correctly again.
                                                 oThe Film Check Window will let you check if there is
                                                                            film in the camera or not.
                     x            ffiffi


       Ffjjj


38
View original page 20Page 25 · Read text
<Shutter-speed.priority  auto exposure mode>Tv          < Zeitvonruahl mit Blendenautomatik > Tv
        lf you set your desired shutter speed, the camera will        Zu der von lhnen vorgewdhlten Zeit stellt die Kamera
     automatically select the aperture required for correct           automatisch die fUr eine richtige Belichtung je nach
    exposure according to the brightness of the subject.              Helligkeit des Motivs notige Blende ein.
    o Set the shutter speed with the Operating Lever.              o Wdhlen Sie die VerschluRzeit mit dem Bedienungshebel
        It can be set in 1-steo increments from B seconds to             vor. Sie kann in ganzen Stufen zwischen von 8 bis 112000
    112000 second.                                        Sekunde eingestellt werden.

           lf you are shooting in the "Av" or "Tv" mode, and  if        Wenn Sie mit "Av" oder "Tv" fotografieren und mit
      the shutter speed or aperture you have set cannot              der vorgewdhlten Zeit oder Blende eine richtige
      provide correct exposure, the camera  will                       Belichtung nicht moglich  ist, verdndert die Kamera die
      automatically make compensation for the exposure            vorgewdhlte Einstellung automatisch, bis eine richtige
      value to provide correct exposure.                               Belichtung erzielt wird.
      (For details, refer to page 88.)                               (Ndheres S. 88.)


48
View original page 25Page 26 · Read text
www.butkus.us


< Manual exposure mode> M                                       In the manual exposure mode, the error from correct
In this mode, choose your desired aperture and shutter         exposure is indicated by the exposure warning indicator  in
soeed.                                                          the viewfinder.  lt turns on to indicate correct exposure,
 o Set the shutter speed with the Operating Lever.             and blinks to warn you that the exposure is not correct. As
 It can be set in 1-step increments from B seconds to            the error increases, the blinking cycle becomes slower.
112000 second, and to "bulb".                                                            lf the error is larger than +2 EV, the blinking cycle does
 . Set the aperture with the Operating Lever while pressing      not change.
the Aperture Setting Button.  lt can be set in 1/2-step          oChange the shutter speed or aperlure until the signal
increments from the lens'open aperture to its minimum         stops blinking.
aperture.


 : ii;:;i;    11l t: t: l::;,:':r r..  r..';jr:;: i:'::1: r::


 1 , ili:1 1trr ti1li1,l';iiir riii,;     ;.;   "
rl:i:iiililir;,;,
View original page 26
Page 33 · Read text
lf the entire roll of film has been exposed, the film will stop       . Remove your finger from the rewind switch if rewinding
winding and the exposure counter and the cassette mark       has started.
" O-" in the Display Panel will blink.                     oThe film can also be rewound in the middle of a roll.
                                                      o Do not switch the Main Switch to "LOCK" (OFF) while
                                                                                  rewinding. t  With the Main Switch at "ON", slide the Film            the film is I Rewind Switch in the direction ol the arrow while
pushing on the button beside  it.                ? Take out the lilm when rewinding  is completed.The mark     appears in the Display Panel and the         e" As soon as rewinding is completed, the motor will stop
film starts rewinding ( " +{" blinks). While the film is            automatically and the number "0" on the exposure
rewinding, the exposure counter  still shows the number of       counter and the mark " O " in the Display Panel will blink.
exposures that have been taken.
View original page 33Page 34 · Read text
www.butkus.us


      . Avoid direct sunlight when unloading the film.              o Evitez les rayons directs du soleil pendant le
    o After the film has been rewound, be sure to unload the      d6chargement du film.
     film. Once the Camera Back has been opened, the               . Lorsque le film a 6t6 rembobin6, toujours d6chargez le
   camera will no longer oPerate.                                        film. Lorsque le dos de I'appareil a 6t6 ouvert, ce dernier
    .Take the exposed film for processing as soon as           ne fonctionne olus.
     oossible.                                               o Faites d6velopper le film expos6 dds que possible.
     . Because the shutter curtain is a precision part, never        o Comme le volet de I'obturateur est une piece de
    touch  it with your finger or push  it with the film tip.               pr6cision, ne jamais le toucher avec les doigts ni le pousser
                                                        avec I'extr6mit6 du film.


    oVermeiden  Sie direktes Sonnenlicht beim Filmwechsel.       o Evite la luz directa del sol cuando descargue la pelicula.
    o Nehmen Sie den Film nach dem ZurUckspulen sofort        o Despu6s de que la pellcula se haya rebobinado,
    heraus. Nach dem Offnen der Ruckwand funktioniert die       asegurese de descargarla.
   Kamera erst wieder mit neuem Film.                        o Una vez se ha abierto el respaldo de la c6mara,  la
     . Beruhren Sie die empfindlichen VerschluRlamellen nicht     cAmara no se oodrd ooerar.
   und l6sen Sie nicht aus, wenn die Filmlasche auf dem            . Puesto que la cortina del obturador es una parte de
    VerschluR liegt.                                                     precisi6n, no la toque nunca con el dedo ni la empuje con
    o Lassen Sie den belichteten Film sobald wie mdglich            la punta de la pelicula.
    entwickeln.


68
View original page 34Page 35 · Read text
]
  Advanced Techniques
     o Focusing techniques and details       Page 70-80
       . Exposure techniques and details       Page 82-98
     o Flash photography  ......... .....                .. Page 98- 116
                                                                              .. Page 120-124
l_ oOther functions   Fu n kti onen fu r Fortgeschrittene
      . Fokussierfunktionen und Details        Seite 71 -81     oBelichtungsarten und Details                ... Seite 82-98
     o Blitzfotografie ...........                  Seite 98- 117
     oSonstige Funktionen               Seite 121-125
*_- Tt.2
        I ecnntques avancees
     oTechniques de mise au point et d6tails  ...... Page 71-81
     .Techniques d'exposition et d6tails      Page 82-99
       . Photographie au flash .........              ... Page 99- 118
     oAutres fonctions                                  . Page 121-125
   Tdcnicas avanzadas
     oTecnicas y detalles de enfoque      P6gina 71-81
     oTecnicas y detalles de exposici6n  ........... Pdgina 82-99
      . Fotograffa con flash                 Pdgina 99- 119
                                                  125       . Otras funciones                 Pdoina 121 -
View original page 35Related documents and language editions

From the M. Butkus archive. Original publisher and archive notices are retained.
Check the model and edition against your equipment.
PDF verified 2026-10-10.