Film cameras
Yashica Electro 35 CC User manual
User manual for Yashica Electro 35 CC. 32 pages in English. Read the original PDF, download or print a copy without registration.
32 pagesEnglish10.6 MB PDF
Loading your manual…Open PDF directly
Document details
- Brand
- Yashica
- Model / document
- Yashica Electro 35 CC
- Document type
- User manual
- Language
- English
- Pages
- 32
- File size
- 10.6 MB
- Category
- Film cameras
- Document date
- Not specified in catalog
Search available document text
Find a term, then jump to its page in the original PDF. Image-only pages may not be searchable; check the PDF for exact wording and diagrams.
Page 4 · Read text
www.butkus.us
     BESCHREIBUNG DER TEILE   DESCRIPTION DES ELEMENTS   DESCRIPCION DE LAS PARTES
        1. Ausloseknopf                 1. D6clencheur                    1. Disparador
       2. Filmaufzughebel             2. Levier d'avancement            2. Palanquita de Avance de
                                                                                                    Pel fcu la       3. Filmz6hlwerk/                du film                                     la
              Batterieprtif lampe            3. Compteur d'images/Lampe       3. Cuenta Exposiciones/
       4. Ausloseknopf-Verriegelu  ng       de contr6le de la pile              Lampara de Comprobaci6n
       5. Fokussierring               4. Verrouillage du                   de las Pilas
       6. Blendenring                      d6clencheur                         4. Bloqueador del Disparador
       7. CdS-Belichtungsmesser-        5. Bague de mise au point              5. Aro de Enfoque
            Fenstpr                     6. Bague de l'ouverture                 6. Aro de Aberturas
          8. Auf nahmeobjektiv           7. Fendtre de la cellule CdS            7. Sensor a CdS
          9.  Zu behor-A uf stec kschu h      B. Objectif de prise de vue              B.  Objetivo
        10.  R rickspu lknopf              9. Griffe porte accessoires               9. Contacto para Accesorios
           (mit Kurbelgriff und         10. Bouton de rebobinage             10.  Perilla de Rebobinado
           R rlckwandverriege  lu ng)            (avec manivelle et                 de la Pelfcula
        11. Synchro-Kontakt                     tirette d'ouverture                   (con manivela de
        12.  Sucherausblick                du dos)                           rebobinado y sujetador
        i3.  Selbstausloser               11. Prise de synchronisation           de la tapa trasera)
                                  12. Fendtre du viseur                11. Contacto de
                                    13. Retardement                         Sincronizaci6n
                                                                                     12. Ventanilla del Visor
                                                                                     13. Disparador Automdtico


                                                                      2
u                                                                                                             .i.irur
View original page 4Page 7 · Read text
KEYSTEPS HAUPTVORGANGE OPERATIONS
        PREPARACION PARA LA FOTOGRAFIA
                            I nstal I and check batter
            Batterie einlegen und L.iberprilfen.
                                  I nstaller et v6rifier la pile
            lnstale la pila de mercurio y compruebe  el
            estado de carga.


         Unlock shutter and remove lens cap.
            Versch luss entsichern und Objektivdeckel
            entferne n.
            D6verrouiller le d6clencheur et retirer
               le capuchon de l'objectif
          Abra el bloqueador del disparador y retire el
              cu brelente.


5
View original page 7Page 8 · Read text
www.butkus.us


Load film.
Film einlegen.
Charger le f ilm
 lnstale el carrete de pelfcula.


 Set ASA  f ilm speed.
ASA Fi lmgeschwindigkeit  einstellen.
R69ler la sensibilit6 ASA du  f ilm
 Ajuste la sensibilidad ASA a la indicada para la
 pel fcu la usada,


                          6
View original page 8Page 9 · Read text
Select exposure symbol.
Belichtungssymbo  I wiihien.
56lectionner le symbole d'exposition
 Seleccione los sfmbolos de exposici6n


Wind  f ilm.
Film aufziehen.
Avancer le fllm
Enrolle la pelfcula (avance la pelicula).
View original page 9
Page 10 · Read text
www.butkus.us


 Focus and compose.
 Objekt einstellen und fokussieren.
 Mettre au Point et cadrer
 Compruebe  la exposici6n y dispare.


 Check exposure and shoot.
 Bel ichtu ng i.iberpri.ifen u nd abdriicken.

Verf ier l'exposition et d6clencher

 Enfoque  la c6mara y componga el cuadro.


                            a
View original page 10Page 11 · Read text
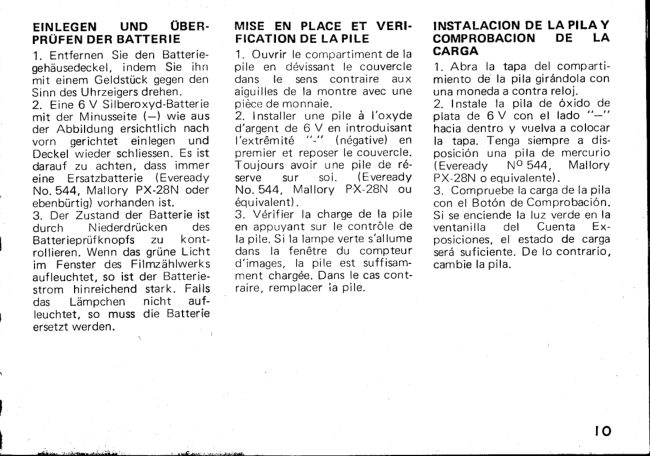
BATTERY LOADING AND CHECKING
1. Open the Battery Compartment Cover by
turning it counter-clockwise with the edge of a
coi n.
2. Load a 6 V silver oxide battery, "-"  (minus)
end in  f irst, and replace the cover. Always carry
a spare battery (Eveready No.544, Mallory
PX-28N or equivalent).
3. Check battery power by pressing the Battery
Check. lf the green light comes on in the
Exposure Counter Window, the battery power is
sufficient. lf not, replace the battery.
View original page 11
Page 12 · Read text
www.butkus.us                                                                                                                                                               ( Fortsetzung)BATTERY (Continued)                     BATTE Rl E
   Always carry a spare battery, especially when       Es ist empfehlenswert, auf liingeren Ausf lLlgen
   going on outings or trips.                        oder Reisen eine Ersatzbatterie mitzufiihren.
  When your camera is not in use for a long     Wenn die Kamera wdhrend einer langen
   period of time, remove the battery and store  it       Zeitspanne nicht gebraucht werden soll, dann
    in a dry, cool place.                                    Sollte die Batterie ausgebaut und an einer
  Do not throw used batteries in a fire. Do not       trockenen und krihlen Stelle aufbewahrt wer-
   attempt to dismantle  it.                                 den.
      lf the battery is not loaded properly, the lamps        Eine ausgbbrauchte Batterie darf niemals ins
    will fail to come on.                                Feuer geworfen oder zerlegt werden.
     lf the battery is not loaded or in case its power       Falls  das   Batteriepriif liimpchen nicht
   has drained to a level below the required        aufleuchtet, so ist der Ladezustand der Bat-
    voltage, the shutter will function at a speed of         terie ungeniigend.
   approx imat ely 1 I 25O second.                          Falls die Batterie vollstdndig leer bzw. nicht
                                                      geladen ist, wird der Verschluss bei etwa 11250
                                                 Sekunde ausgelost.


tl
View original page 12Page 13 · Read text
SHUTTER RELEASE
    The shutter release button of your ELECTRO
    35CC provides two distinctive functions. When
     pressed half-way, it activates the electronic
      exposure check system and turns on the red and
     yellow warning arrows in the finder. Wherr
      pressed all the way down,  it trips the shutter for
       fu lly automatic exposure.
    To prevent accidental tripping of the shutter, the
     Shutter Release Lock is featured around the
      shutter release button.
    To unlock, give the Shutter Release Lock one-
      fourth turn clockwise.
   To lock, turn the lock and align the marking
     with the letter "L" on the camera deck.


t3
View original page 13Page 14 · Read text
www.butkus.us
     FILM LOADING (Always load in subdued lightl
      1. After unlocking the shutter and removing the
       lens cap, pull out the Film Rewind Knob. The
     Back Cover will pop open and the Exposure
      Counter will reset automatically to "S" (start).
      2. Set a 35mm film cassette, right end up, in the
     film chamber and push in the Film Rewind
      Knob. Then, insert the film leader into any one
      of the slots on the Take-up Spool and advance
     the film by manipulating the Film Advance
       Lever.


t5
View original page 14Page 15 · Read text
3. After making sure the perforations on the
               f ilm properly engage the sprocket teeth, close
      the Back Cover by pressing it against the camera
     body until it locks automatically.
      4. Press the Shutter Release Button all the way
    down and then advance the film. Repeat this
      step until the  f igure " 1" appears.in the Exposure
      Counter Window. To advance the  f ilm, give the
      Film Advance Lever one full stroke.
      5. To determine whether the film is advancing
      properly, gently wind the Film Rewind Crarrk-
      handle in the direction of the arrow until a slight
       resistance is felt. As you advance the film, the
     Film Rewind Knob should rotate counter-
      clockwise as  il lustrated.


t7
View original page 15Page 16 · Read text
www.butkus.us
     ASA FILM SPEED SETTING
    To ensure proper function of the electronic
      exposure control, your ELECTRO 3bCC must
        first of all be set according to the speed rating of
      the  f ilm in use. To set the ASA  f ilm speed, move
      the ASA Film Speed Setting Lever and align it
      with the  f igure corresponding to the speed rating
     of the film in use. The ASA speed rating  is
     shown on the box or the instructions which
       cornes with the  f ilm.
     For DIN equivalents, refer to the table on the
      Back Cover.


    ASA   500. .400  . .200. . 100. . 50 ..25            )     lllttl
      DIN   28  2t  24  21  18  15


t9
View original page 16Page 17 · Read text
EXPOSURE SYMBOLS
      After setting your canera according to the ASA
     speed rating of the film in use, select the
      exposure symbol. With this simple step, the
       electronic exposure system of your ELECTRO
    35CC will function to deliver perfect results,
      automatically. Select the appropriate Exposure
     Symbol and align it with the index line by
       turning the Aperture Ring.
     *  SU N or CLOUD symbol    for outdoor                                   -
     * WINDOWphotography.symbol    for indoor and night                           -         photography.
       Symbols   Light Condition Aperture
                   Bright Sun             f 116,t/11,f /8
                                           t/s.6, r/4,t/2.8                 3;3:urff:'""*, "'        -                  FFt-'l    lndoors or Niqht: f|1.8
    When taking pictures at dark location (EV-1 .0)   .
       set the aperture scale to trTl  .
2l
View original page 17Page 18 · Read text
www.butkus.us
     EXPOSURE CHECKING
       1. Advance the  f ilm and cock the shutter by
      manipulating the Film Advance Lever.
      This sets the electronic exposure control of your
     ELECTRO 35CC to "standby" condition.
      2. While sighting your subject through the
       finder, press the Shutter Release Button half-
     way. The absence of both the red and yellow
      arrows signifies that hand-held photography is
       possible. All you need do to obtain a perfect
       picture is to focus and press the Shutter Release
      Button all the way down.
    NOTE: To minimize natural drain of battery
      power, avoid keeping the shutter cocked when
     your camera is to be left unused for any length
       of time.


23
View original page 18Page 19 · Read text
EXPOSUR E CH ECKI NG (Gontinued)
      3. When 'the Shutter Release Button is half-
       pressed and the RED arrow comes on, it is an
        indicat,ion of over-exposure. Turn the Aperture
      R ing In the direction of the arrow u ntil  it
       disappears. lf it fails to turn off, use a neutral
       density filter.
      4. The appearance of the YELLOW arrow
       signifies too little light for hand-held photo-
      graphy and                    signals that the exposure will be                     .1-130     made at      sec. or slower shutter speed. Turn
       the Aperture Ring in the direction of the arrow.
        lf the yellow arrow fails to disappear, use a
       tripod for  f irm support of your camera. Whether
     the yellow arrow disappears or not, precise
      exposure will be determined and set auto-
       matically.


z)
View original page 19Page 20 · Read text
www.butkus.us
     FOCUSING AND COMPOSING
      1. Sight through the Viewfinder and turn the
      Focusing Ring in either direction until the two
      images in the tinted focusing area form one clear
       image.
      2. Compose your picture within the bright
      trimming frame. The marks within the frame is
       for parallax correction when shooting subjectat
      close range. Center your subject in the area
      outlined bV these marks when photographing at
       short ranoe.


                                                                 out of focus           in.focus


27
View original page 20Page 21 · Read text
FILM UNLOADING
 1. After the last exposure, oo not attempt to
advance the film further as it mav tear or come
 loose, making it impossible to rewind it into the
cassette.
2. Before opening the Back Cover, the film musr
lre rewound into its cassette. press the Film
Rewind Release Button on the base of the
camera.
3. Fold out the crank-handle on the F ilm
Rewind Knob and turn it in the direction of the
arrow until a slight resistance is felt. Continue
winding until you feel it turning freely. Then,
open the Back Cover, remove the film cassette
and send it out for processing.
View original page 21
Page 22 · Read text
www.butkus.us
DEPTH OF FIELD
Depth of field is the area in front and behind the
subject on which the camera is focused, within
which all objects also appear acceptably sharp in
the picture. lt varies with the aperture and is
more extensive    :
a) when the lens is stopped down
b) when the camera is focused on a distant
   subject
c) in the background rather than the foregro-
   und.
The COLOR-YASH INON DX 35mm f/l.8 tens
of your ELECTRO 35CC provides an extensive
depth of field. By taking full advantage of this
feature, you can obtain perfect results with a
minimum fuss over focusing. Refer to the
Depth-of-Field Table on Page 50.                                             f /16
                                                         t/1.8
View original page 22Page 23 · Read text
TIPS FOR BETTER PICTURE.TAKING
    The sophisticated electronic system of your
    ELECTRO 35CC will provide perfect automatic
      exposure setting under virtually all light con-
      ditions,  f rom bright outdoor situations to
       candlelight dimness. When shooting against light
      or when photographing open r..n.i rid.r uridnt
       sunlight, etc., better results can be obtained by
      mak ing exposu re compensatio n.
      1. Snow scenes or beach scenes.under briqht
       sunlight
    To prevent over-exposure, reset the ASA Film
     Speed Setting Lever to 1b0 or 200 when a film
      with a speed rating of ASA 100 is in use.
     2. Backlit subjects
    To bring out greater details of the subject when     shooting against light, reset the Film Speed   $ffi
     Setting Lever to ASA 50 when a film with a
      speed rating of ASA 100 is in use.
    When the main subject is the point of interest,
      use the largest aperture suited for the prevailing
        light. lf a greater depth of field is required, stop
     down the aperture as required.
     Use the lens shade to ward off extraneous light
33  when shooting outdoors.
View original page 23Page 24 · Read text
www.butkus.us
       SE LF.TIME R
          lf you wish to include yourself in the picture,
        use the Self-timer and proceed as follows  :
        (a) Advance the film, (b) move the Self-timer
       Lever all the way down and (c) press the Shutter
      Release Button. The shutter will be tripped
       about B seconds later.


     CABLE RELEASE
    To prevent camera shake when making ex-.     ,iiiiiiliilll1iiiirl       posures at 1l3O sec. or slower speeds (indicated
      by the yellow arrow in the finder), mount the
      camera on a tripod and trip the shutter by using
       a cable release.
      Mount the cable release in thesocketprovided on
       the Shutter Release Button.

35
View original page 24Page 25 · Read text
FILTER
      Because your ELECTRO 35CC features a CdS
       sensor directly over the lens, any type of filter
      mounted over the lens will cover the sensor, thus
       eliminating the necessity for compensation of
         filter factor.
       All types of Yashica Filters for color and B&W
      films are available. Use them selectively to
       ensure the best possible results.
     Your ELECTRO 35CC accepts 52mm screw-in
       type  f ilters.


37
View original page 25Related documents and language editions
From the M. Butkus archive. Original publisher and archive notices are retained.
Check the model and edition against your equipment.
PDF verified 2026-10-10.