Film cameras
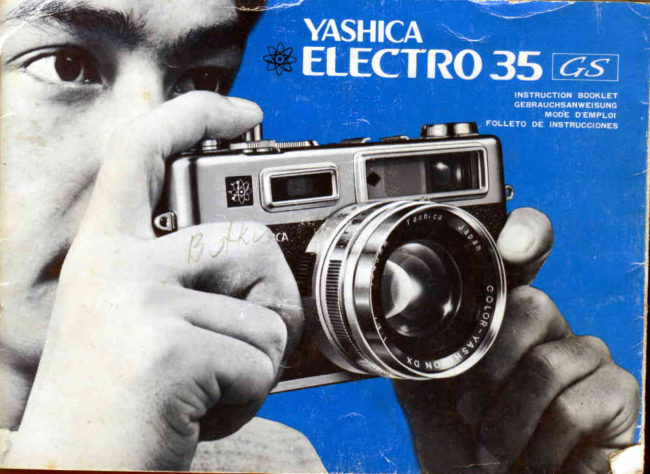
Yashica Electro 35 GS User manual
User manual for Yashica Electro 35 GS. 34 pages in English. Read the original PDF, download or print a copy without registration.
34 pagesEnglish2.3 MB PDF
Loading your manual…Open PDF directly
Document details
- Brand
- Yashica
- Model / document
- Yashica Electro 35 GS
- Document type
- User manual
- Language
- English
- Pages
- 34
- File size
- 2.3 MB
- Category
- Film cameras
- Document date
- Not specified in catalog
Search available document text
Find a term, then jump to its page in the original PDF. Image-only pages may not be searchable; check the PDF for exact wording and diagrams.
Page 4 · Read text
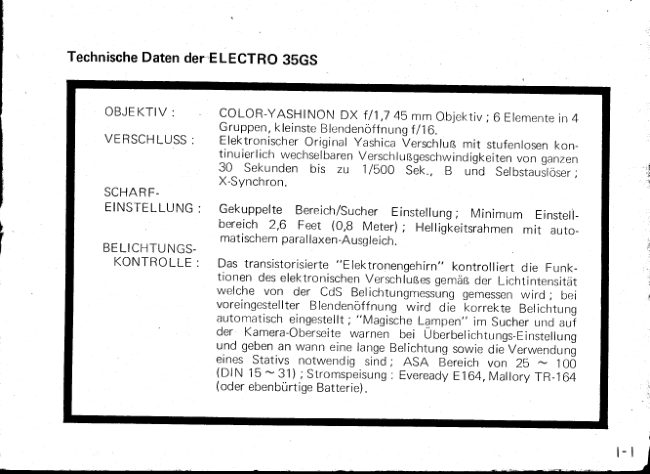
TechnischeDaten der ELECTRO 35GS

    OBJEKTIV :     COLOR-YASHtNONDX t/1,745 mm Objektiv;6 Elemenrein 4
                                kleinsteBlendenoffnungf/16.                    Qruppen,
    V E R S C H L U S S : ElektronischeroriginalyashicaVerschluBmit stufenlosenkon_
                           tinuierlich wechserbarenVerschluBgeschwindigkeitenvon ganzen
                    30 Sekunden bis zu 1l5OO Sek., B  ,iO  Setbstausloser;                    X-Synchron.
    SCHAR F.
     E I N S T E L L U N :G Gekuppelte Bereich/SucherEinstellung;Minimum Einstell-
                      bereich 2,6 Feet (O,B Meter); Helligteitsrahmenmit auto_                    matischemparaI laxen-Ausgleich.    BELICHTUNGS-
      K O N T R O L L E : Das transistorisierte"Erektronengehirn,,kontrolliertdie Funk_
                       tionen des elektronischenVer.schLB",gemdnder Lichtintensitdt                    welche von der_.CdS                                      Belichtungmessung                                                 gemessen                                                                      wird ; bei                                                                 "t<orre[te                       voreingestellter                                    ilen.denbffnung                                                    wird oi6                                                                        Beliclrtung
                      a.utomatischeingestellt; "MagischeLampen,,im sucher und auf
                      der Kamera-oberseitewarnen bei Uberbelichtungs-Einstellung
                   und gebenan wann eine langeBelichtungsowiedie"Verwenduni
                      eines Stativs notwendig sind; ASA dereich von 2b N 100
                     (DlN 15 - 31) ; Stromsp-eisung: EvereadyE164,MalloryTR_164                      (oderebenburtigeBatterie).

                                                        tl
View original page 4Page 5 · Read text
Description
                      Film Rewind Crank/BackCover ReleaseKnob

                                            2 Viewf inder
                                 3 AccessoryShoe
         a Hand-HeldExposureWarningLamp &
         Over-ExposureWarningLamp
         5 ASA F ilm SpeedSettingR ing
          6 F ilrn Advance Lever
 z Film ExposureCounter
8 Shutter ReleaseLock Lever
 9 ShLrtterReleaseButton
     10CdSCellWindow
        11 FocusingRing
          12Self-Timer
 13E xposure Control R ing
       14ApertureRing
                          l bTaking Lens


                       www.orphancameras.com
View original page 5Page 6 · Read text
F                                                                        *       Fr


 '1.    Riickspulknopf/Riick-            1. Manivellede r6embobinage/    1. Palanquitapara el
    wandverriegelung                   T,irettepour ouverture du dos     reenrollado/Pasadorde la
 2. Sucherausblick                   2. Fendtre du viseur                tapa trasera
 3. Zubehor-Aufsteckschuh         3. Griffe porte accessoires        2. Visor
 4. WarnlSmpchenfiir Stativ-        4. Lampes Magiques               3.  Portaaccesorios
   gebrauch und Uberbelichtung   5. Bouton de r6glagede            4. L6mparasindicadoras
 b. ASA Einstellskala                cellule(ASA)                    5. Disco de sensibiilidadesASA
 6. Filmaufzughebel                6. Levierd'avancementdu f ilm    6. Palancade avance
 7. Filmziihlwerk                    7. Compteur de vues              7. Contador de tomas
 B. Ausloseknopf-Verriegelung    B. Levier du verrouillagedu       B. Palancatrabadora del
 g. Ausloseknopf                  bouton de d6clenchement       obturador
10. CdS-Belichtungsmesser-Fensterg. Bouton de d6clenchement     9.  Disparador '                                                                                                 ' l O .1 1 . F o k u s s i e r r i n g                                  F e n d t r e d el a c e l l u l e C d S     1 0 . V e n t a n i l l as e n s o r aC d S
12. Selbstausloserhebel         1 1. Baguede distances          11. Mando de enfoque
13. Belichtungseinstellring      12. Retardement                12. Auto-Disparador                                                                          '13.14. Blendenring                 13. Baguede pr6s6lection          Reguladorde la exposici6n
15. Aufnahmeobjektiv             14. Bague des ouverturesde       14. Reguladorde abertura
                                 diaphragmes                 15. Objetivo de toma
                                   15. Obiectif de Prise de vue
View original page 6Page 7 · Read text
Here's the Secret to Perfect Exposure!
       Using revolutionarysolid-state"Electronic Com-
        puter Brain", which measuresthe light with com-                           ;$
         puter-like  precision, the  Yashica-engineered
         electronicshutter providesan infinite range of
        in-between speeds from a  full 30 seconds to
        1/500sec. lt will function at, let's say, 1l1B7 sec.
         or 16.2secs.,if the subjectbrightnessrequiresit.
       The  electric contact points of  the electronic
       componentsare finishedin gold to provideexcel-
         lent conductivity of  electricity for  foolproof
        operation. You can, therefore,take vivid color
         pictures even in  candle-lightdimness or  near
        darkness-withoutF lash!


                                 i


www.orphancameras.com
View original page 7Page 8 · Read text
i t e y S t e l t s l o r . C o l o r P h o t < - l ( j r a t l l l y
Hauptvorgdngebei Farb-Photographie
Pour R6ussir de Bonnes Photos en Couleur
Procedimientos para tomar fotos en colores

 1    | nsr:rIit ntrvt'roll of iilrll . .                                                                                                                                                                ,ffi
 1  E i n c n r r e u e n F i l m e i n l e g e n
 1      l v i r : t I r { )( ] n p l a c c L tn e ca rto u c:lle clc f ilrrl
     c o L r l r : r r r
 1  C o l o c l u e u n n u € l v o r o l l o d c p c - l i c u l a

2 . S e t t l r e A S A  f i l m s p e c db y  t u r n i n g t l r e A S A  f i l m
   spercclscttingdial.
 2  D i e A S A  F r l m e m p f i n d l l c h k e i t  d u r c h  d r e h e n   d e r  A S A
    F i l n r e r n p fi n d l r c h k e i t s s k a l ae i n s t e l l e n
 2. F l e q l e r rl ' e r p p a r c i l s u r    l a  s e n s i t - r i l i t rdi u     f i l r n r r t i l i s e
    (carlran cJt:rr:qlargr:)
   R c r ; u l e  l a s e n s i b r l r d a dd e  p e l i c u l a A S A  q i r a n d o e l d i s c o
       r t : c l ul a d o r d e s t - 'nsibI ird a d .

 3. Set tlre exposurecontrol ring to "AUTO".
 3  D e n    B e l i c h t u n g s k o n t r o l l r i n g    a u f   " A U T O "  e i n s t e l l e n
 3 . A m e n e r    l a b a g u e d e re g la g e d ' e xp o sitio n e n p o sitio n
         , , A U T O " .
3  B e g u l e c l m a n d o d e c o n t r o l d e e x p o s i c i o n a " A U T O   "
View original page 8Page 9 · Read text
4. Set the desired exposure symbo I  to  the index
           mark.
            4. Das gewrinschteBelichtungssymbolauf Mark ieru ng
                      ( 1 ) einstellen.
            4. Aligner  sur   l'index  le  symbole d ' e x p o s i t i o n c h o i s i
            4. Regule el simbolo de exposiciona la m a r c a  f n d i c e ( 1 ) .


        5. Now, focus and click the shutter.Living color
          picturesareyours!
          5. Fokussierenund auslosen   lebende Farbaufnahmen
             sind das Resultat !
           5. Plus qu'a  mettre au  point  et  a d6clencher.Vous
            obtiendrez  ainsi  de magnif iques photos cou leurs,
              v ivantes.
         5 . Altora, enfoque  y  apriete  el  dis- parador. iLas fotos
           en colores vivos son suyas!

www.orphancameras.com
View original page 9Page 10 · Read text
Loading Battery

1.  U nscrew the Battery CompartmentCover with
   the edgeof a coin.


   Drop in the mercurybattery (MalloryTR164,
   EvereadyE164 or equivalent)as illustrated.lf
    the battery is not loaded in position,the elec-
    tronic shutterdoesnot functioncorrectly,evenif
    the greenlamp lights.
View original page 10Page 11 · Read text
Notes on Mercury BatterY

 lt is advisableto carrva sparebattery.
When the camerais not in use Ior a long period of
time, removethe battery and store them in a cool,
dry and safeplace.


CheckingBatterY

 It is necessaryto check the battery power before picture-taking,becausesuff icient battery power
is required to obtain the correct exposure.
Pressthe Battery Check Button on the back of the camera body. When the green lamp lights in
the Exposure Counter Window, the battery power is sufficient. lf  not, the battery should be
reolaced.


                www.orphancameras.com
View original page 11Page 12 · Read text
L o a d i n g F i l m

i .  P u l l u p F i l m R e w i n d C r a n k / B a c kC o v e r R e l e a s e
    Knob, and the back cover will pop open. The
    Film Exposure Counter is automaticallyset to
      " S "  ( S t a r t ) .

2.  Load the f ilm in the cameraand push down the
    F l l m R e w i n d C r a n k / B a c kC o v e r R e l e a s eK n o b
    Thread the end of the  f ilm leadersecurelyinto
    a n y s l o t o f t h e T a k e - U pS p o o l .

3.  Make certain that the perforation in the f ilm are
    threaded securely on the sprocket teetll. Then
    close the Back Cover securely.


You shoulcl load a         subd ued
 d i r c c t s L r n l i g h t .
View original page 12Page 13 · Read text
4.  Advance the  film,  press the  Shutter Release
    Button and repeat this pro:edure until the figure
     "1" appearsin the Exposure Counter Window.
    The exposure counter registersautomatically the
    exoosedf ramesof the f ilm.


Checking the film advance
Check the Film Rewind Crank as you advancethe
 film.  lf   it moves as illustrated,the film is properly
 loaded.Swinqs the Film Advance Leveruntil it stops.


                    www.orphancameras.com
View original page 13Page 14 · Read text
Unloading Film

1   After the lastexposure,the f ilm must be rewound
     into  its cassettebefore removing it   f ronr the
   camera.Avoid winding the Film AdvanceLever
   when a resistanceis felt. And do not force to
   advancethe film as it may tear or come loose
    from the cassette,makingit impossibleto rewind.

2.  Pressthe Film RewindReleaseButton on the base
    of the camera.


    Flip up the FoldingFilm RewindCranKand turn
       it in the directionof the arrow.When you reach
    the end of the film, you will feel a slight
    resistance.Continueturning the Crank until you
    feel the film'pulling away from the slot of the
    Take-upSpool.
   Openthe BackCoverand removethe f ilm.
View original page 14Page 15 · Read text
Fcr Correct ExPosure

   T u r n  t h e F i l r n S p e e d S e t t i n g R i n g a n d s e t t h e
   desiredASA guide number oppositethe indicator
    linc (- ) Otltcrwise,the correct exposurecan not
   be obtaincd


    Set the Exposure Control Ring to AUTO posi-
         t r o n


   Choosethe desiredExposureSymbol by turning
    the Aperture R ing.                           V
                                  AUT()

      S y r n b o l s   C o n d i t i o n s     Apertures
                  BrightSun      1 6 1 1l 1B
               Heavy Overcastor                        a ^  )                        5.6/412.8                Open Shade
                      ffi-l                      I n d o o r s       2111


                  www.orphancameras.com
View original page 15Page 16 · Read text
4. When the Film Advance Lsrer is wound, the
        meterswitch is set to ON positionautomatically.
        Caution: The Shutter ReleaseLock Levermust
           be unlocked.

       6   Gently pressthe Shutter ReleaseButton.When
       no warningarrowslight in the viewfinderor on
        the top of the camerabody, pressthe Button all
        the way down to makethe exPosure.


    ASA Rating                                         Caution : When the camera is not  in
     The ASA rating denotes the degreeof light sensitivity         use, do  not  leave the  shutter
       of the film emulsion and is clearly indicatedon the         cocked.  lf   it  is  left cocked, the
     box or the instructionwhich comeswith the f ilm.             electronic exposure control system
                                                                                      is set to ON position, which causes
                                                                   the drainage of the mercury bat-
                                                                           tery.
tl
View original page 16Page 19 · Read text
F o c u s i n g
      To focus,set the small rhombus in the middle over the
       subject and turn the Focusing Ring until the two
      imagesoverlapand form one clear image.


     Useof Bright Frame
      The imageseen within the luminousviewframewill be
       reproduced on the film. The subject at short distance
        (2.6 feet or 0.8 meter) should be composed in this
       frame providingautomatic parallaxcorrection


l4                       www.orphancameras.com
View original page 19Page 20 · Read text
i    B   AUT0  ..v
       D i t i . [, i t t t t   i - t t , i i l
                                                                                   1 6  l r . 8  5 6 4
      When you focus the camera on a subject, there is a
         certain distance in  front and back of the subjects
         within which other objects will also appearsharp' This               U1l . 5 52 3 6 m7 m l 0  2 0 *      f t
           is known as the "Depth of Field" and it varieswith
         the aperture. The smaller the aperture,the greaterthe
        Depth of Field.
       The Depth-of-FieldScale will be found on the lens
          barrel. With  the camera focused on 2 meters, the
        deoth of  f ield indicated by the scalefor an aperture of
          f/16 is f rom 1.4 metersto 3.8 meters.


                                                                                           F 1 6


                                                                                F 1.7

r5
View original page 20Page 21 · Read text
For color pictures:Color films havelittle exposure
        latitude. Carefulexposuresetting is. required.Your
     ELECTRO35GS guaranteesthe correctexposureat
         all times. However, it  is recommendedto shoot
       colorphotosin soft,diffusedsunlight.
        In the picture-takingof backlightedsubjectsor by
      usinga filter, it is necessaryto adjustthe ASA rating
        of the f ilm in usefor correctexposure.


r6                       www.orphancameras.com
View original page 21Page 22 · Read text
The useof f ilter is advisablefor clear,cripspicturesin
         blazir,3sunlight,snowsceneor summerbeach.etc.
      Make compensationfor filter factor by adjustingthe
        Film SpeedSettingDial when, for example,anND2
           filter is usedor you take a pictureof the backlighted
         subject,in concertwith an ASA 100 f ilm, set the Dial                                          1\         to "50" insteadof " 100."                                                                                                              fi
        For open views: Open views, such as distant lano-        scape,seaor snowscenesusuallyhaveblazingsunlight.                            !'
        For better results,it  is recommendedto adjust the
      ASA rating of the film in use to "160" or "2O0"
       when,for example,the ASA 100 film is used.Also,it
           is advisableto usea lenshood to cut off the harmful
          reflectedlight for morecrisppictures.


t7
View original page 22Page 23 · Read text
F lash Pictures

     1.  With the electronic  shutter, Vour E LECTRO
      35GS automaticallygiveslong exposurein dim
          light. However,when you want to take picturesof
       moving subjectsin dim light, the use of a flash
       gun is recommended.


t8                     www.orphancameras.com
View original page 23Page 24 · Read text
2   Set tlrc flaslr rtr.rrk,/'/to the trianglemark (Y) UV
          turning the Exposure Control Ring. The shutter
        speed is se;ttrrrtomaticallyat 1/30sec. and both
          elr:ctronicflaslr unit and flashbulbscan be used.


      3.  Obtirirrtlte carn€jra-to-subjectdistanceby turning
                   t h e F o c u s r n gR i n g a n d d i v i d et h e g u i d en u m b e r o f
           thr: electronicf lash or  f lashbulbsby the distance.
        The  f igure thus obtained is the correct aperture,                     1 6 i l   g        2 g 2
        which should be set on tlre cameraby turning the                                                                            l l 8 1
         Aperture Ring. Rememberthat the guide number
            is differentfor each f ilm speed.


r9
View original page 24Page 25 · Read text
When a long cxposure is required to achieve special
        effects, set the E>lposureControl Ring to "B" and
       press the  shutter release btltton. The shutter will
       remain open for as long as the shutter releasebutton is
       kept depressed.For such time exposure, the camera
      must be mounted on a firm support such as a tripod.
      When using slower shutter speedsthan 1/30 sec. or B
        setting,the camera must be mounted on a firm base
       such as a tripod. Also, it is safestto releasethe shutter
        with the irelp of a cable releaseto avoid shakingthe
       camera. This cable release screws into the socket
       orovidedin thc releasebutton.


20                      www.orphancameras.com
View original page 25Related documents and language editions
From the M. Butkus archive. Original publisher and archive notices are retained.
Check the model and edition against your equipment.
PDF verified 2026-10-10.