Film cameras
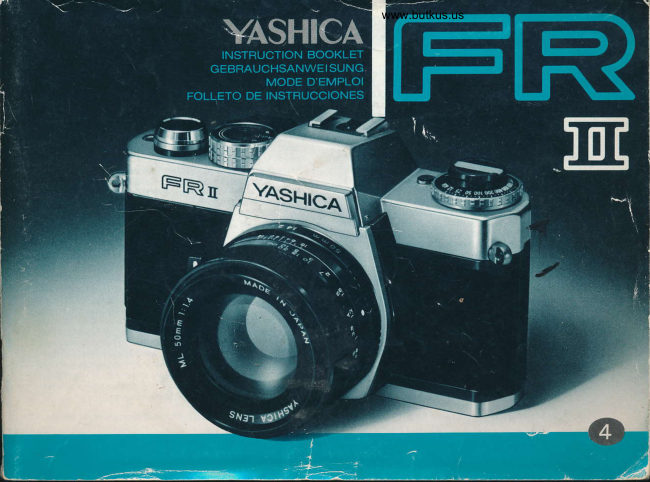
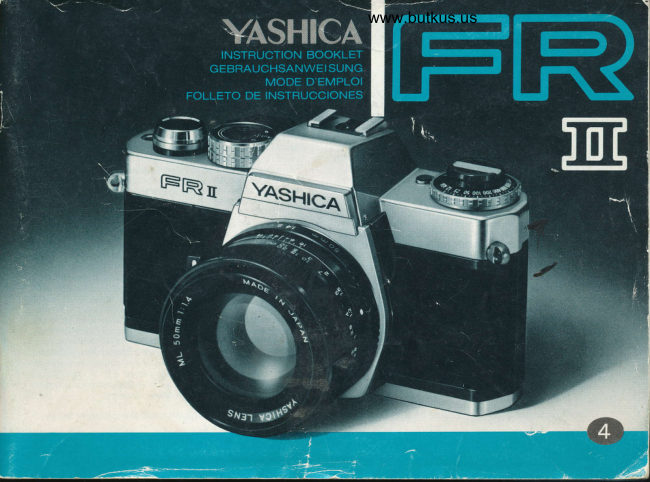
Yashica FR II User manual
User manual for Yashica FR II. 21 pages in French. Read the original PDF, download or print a copy without registration.
21 pagesFrench3.5 MB PDF
Loading your manual…Open PDF directly
Document details
- Brand
- Yashica
- Model / document
- Yashica FR II
- Document type
- User manual
- Language
- French
- Pages
- 21
- File size
- 3.5 MB
- Category
- Film cameras
- Document date
- Not specified in catalog
Search available document text
Find a term, then jump to its page in the original PDF. Image-only pages may not be searchable; check the PDF for exact wording and diagrams.
Page 2 · Read text
Congratulations on purchasing the FR 11. This camera was designed with maximum ease of operation in mind
and features fully automatic exposure control. Silicon photo-diode metering has been employed for
instantaneous exposure readout and an exposure compensation dial is provided for adjustment in special
lighting situations.

However, the FR 11 doesn't stop at being merely one of the finest automatic SLR cameras on the market. It is
part of a whole system of Contax and Yashica accessory equipment to make possible and endless variety of
uses. To begin with, it features the Contax/Yashica mount for accepting a wide range of Yashica and Zeiss T*
interchangeable lenses. It's feather-touch electromagnetic shutter release, in addition to making possible blur-
free pictures, also enables use with a variety of remote control release systems such as cable switches and the
wireless Infrared Controller Set. In addition, its electromagnetic release system permits use with the highly
advanced RTF 540 electronic flash unit. And when both the RTF 540 and the Yashica Winder are used jointly
with the FR 11, it is capable of sequential flash up to 2 frames per second. These are just some of its uses. Be
sure to look into the countless other advantages and special uses for your FR 11 to enable you to enjoy hour
after hour of virtually unlimited photographical enjoyment.

* FR is a licensed trademark of Cine Magnetics, Inc.


                                         Shooting Posture . . .
Specifications ... ... ..
                                        Automatic Exposure . . .
Description of Parts ....
                                       Exposure Compensation
How to Mount and Remove the Lens .
                                              Self Timer ........
Battery Installation ......
                                           Flash Exposure . .
Battery Checking .......
                                      "B" (Bulb) Exposure/Release Socket .
Film Loading ..........
                                              Infrared Photography . .
Film Rewind ........
                                      Depth of Field .......
Shutter Control Dial . . .
                                     Ambient Temperature . .
Viewfinder . .
                                    Camera Care . . .
Focusing .........
                                            Precautions ....
View original page 2Page 3 · Read text
www.butkus.us


Type: TTL metering fully automatic exposure 35 mm SLR camera

Standard Lenses: Yashica Lens DSB 50 mm f/1.9, Yashica Lens ML 50 mm f/1.7, Yashica Lens ML 50 mm
f/1A, Yashica Lens ML 55 mm f/1.2 (each with automatic diaphragm).

Lens Mount: Contax/Yashica mount.

Negative Size: 24 x 36 mm

Shutter: Electronically Controlled horizontal run focal plane shutter. Shutter speeds automatically varied
between 4 sec. to 1/1000 sec. at AUTO setting, Bulb setting (B) for long exposure and electronic flash
synchronization setting (I) for manual operation.

Self Timer: Built-in lever type; releases in 7 sec.

Shutter Release: Feather-touch electromagnetic release release socket on camera body for auxiliary shutte;
release.

Exposure Meter: TTL aperture-preferred fully automatic exposure control. Center-weighted full aperture light
metering via SPD cell.

Exposure Check Button: Push Button/slide type; lockable with film advance lever slightly wound.

Exposure Range: Between EV 1 - 18 with f/1.4 standard lens using ASA film.

Exposure Compensation: +2 EV

ASA Filrn Speed Settings: ASA 12 - 3200

Power Source: 6 V silver oxide battery (Eveready 544 Ucar 544, Mallory PX-28 or equivalent).

Viewfinder: Through-the-lens reflex viewfinder; shows a field of approx 92% of the actual picture area with an
image magnification of 0.87X. Shutter speeds indicated by pointer from 1/1000 sec. - 1 sec.

Focusing Screen: diagonal split-image centerspot with microprism collar.

Film Advance: single-frame advance via film advance lever with 140 degree full stroke, or multiple short
ratchet stroke advance; frame count registers on exposure counter. Sequential film advance to 2 fps with
optional Yashica Winder unit.

Film Rewind: via film rewind crank.

Back Cover: Standard back opens by lifting out on film rewind crank.

Other Features: Battery confirmation lamp; lens release button, memo holder, direct X contact accessory shoe.

Size and Weight: 142.5 x 87 x 50 mm 650 grams (body only)
View original page 3
Page 5 · Read text
www.butkus.us


20. Viewfinder Eyepiece
                                        27. Motor Drive Coupling Terminal
21. Sprocket Wheel
                                        28. Tripod Socket
22. Exposure Check Button
                                        29. Film Drive Coupling
23. Film Take-Up Spool
                                        30. Film Rewind Release Button
24. Release Socket
                                        31. Battery Compartment Cover
25. Camera Back
                                        32. Memo Holder
26. Film Pressure Plate


HOW TO MOUNT AND REMOVE THE LENS


How to Mount the Lens
After removing the camera body cap, set the lens in the
mount by matching the red dot on the lens barrel with that on
the camera body. Then, while gripping the lens barrel firmly,
give it a right turn until it self-locks with a click

The method of mounting is the same with all lenses. Improper
mounting will result in poor focus and/or exposure.
View original page 5Page 6 · Read text
How to Remove the Lens
While keeping the lens release button depressed, turn the lens
barrel all the way to the left and lift the lens straight out of the
lens mount.

· Avoid touching the linkage systems on the camera body and
the lens.

· Avoid direct sunlight when interchanging lenses.

· To remove or reset the lens cap, press the knobs on both
sides of the cap. The lens cap can be set even when a filter is
in use.


BATTERY INSTALLATION


                           Make sure the battery is installed properly. Without
                                      the battery, the shutter system and the exposure
                                       control of Your Yashica FR 11 will not function.

                                           [1] Open the battery compartment cover on the camera
                                      base by turning it in the direction of the arrow with the
                                    edge of a coin. ~

                                           [2] Install the battery properly by matching its polarity
                                      with the diagram.


                                           [3] After ascertaining that the battery is installed properly,
                                          tighten the battery compartment cover securely.

                                                  · Always use a 6 V silver oxide (Eveready 544, Ucar 544,
                                    Mallory PX-28 or equivalent) or 6 V alkaline (Eveready
                                      537, Ucar 537 or equivalent) battery.


Webmaster: these batteries are special order batteries but are available.
View original page 6Page 7 · Read text
www.butkus.us


BATTERY CHECKING


The shutter will not function when batteries are low. To
prevent this, check the battery on the following occasions.

· When inserting a new battery

· When the camera has been left unused for some length of
time.

· When otherwise necessary.

To Check: Press the battery checker button. If the battery
confirmation lamp illuminates the exposure counter window
on the top right hand side of the camera, battery power is
sufficient.
If the lamp fails to light, replace the battery.
(When using a new battery, check first to see that it has been
inserted properly before replacing.)

· The battery confirmation lamp also functions to illuminate
the exposure counter in poor lighting conditions.


FILM LOADING


Avoid direct sunlight when loading film. Always use a
standard 135 film cassette (12, 20, 24 or 36 exposure load).

[1] Open the camera back by pulling the film rewind knob all the
way out. As soon as the camera back is opened, the exposure
counter will reset to 'S' (start) position.

[2] Install the cassette in the film chamber and push the film rewind
knob back in. If it fails to return to its original position
immediately, twist back and forth in either direction while pushing,
until it slips in place.

[3] Insert the tip of the film into one of the slots of the take up
spool as illustrated. Avoid inserting the film too far.
View original page 7
Page 8 · Read text
[4] Slide the film advance lever out past the ridge of the
camera with your thumb and advance the film slightly until
the sprocket teeth properly catch the perforations on the
edges of the film.
Close the camera back and press until it locks in place. m
Fold the film rewind crank out and turn gently in the
direction of the arrow to take up film slack.

Before advancing the film, set the shutter control dial
either to the "B" or to the flash synch (I) setting. Film
wind-on may also be performed on AUTO provided it is
done in bright light with the lens cap removed. Otherwise
attempts to advance the film on AUTO for film wind-on will
be hindered be excessively long exposure.


[6] Wind the film advance lever and trip the shutter alternately
until the exposure counter reaches '1' (The film rewind knob
will rotate counterclockwise when turning the film advance
lever if the film is advancing property.)

· Film may be advanced either by winding the film advance
lever with one full turn or several short strokes. The
electromagnetic release will not function, however, until the
lever is completely wound.

· The film may also be wound on automatically by using the
Yashica Winder unit which is sold as an optional accessory.
Detailed instructions for use of the winder are given in the
winder instruction booklet.

Exposure Counter
The exposure counter registers the number of exposed frames
and is calibrated from 1 to 36 for frame indication, with the
numbers 12, 20, 24 and 36 in red to indicate the last frame or
respective film rolls. Counter automatically resets to "S" (start)
when the camera back is opened.
View original page 8
Page 9 · Read text
www.butkus.us


Memo Holder
The memo holder on the rear of the back cover is handy for
exposure information. Insert the end of the film box to
remind yourself what type of film you are using and how
many exposures are on the roll.

Setting the film Speed
The ASA film speed rating denotes the degree of sensitivity
of the film to light. After loading the camera, always make
it a point to set the ASA film speed to assure proper
exposure.

To Set: Lift the ASA film speed ring (surrounding the
exposure compensation dial) and turn it until the figure
corresponding with the speed rating of the film in use
aligns with the orange index. Various ASA film speeds
ratings are as follows.


FILM REWIND


When the exposure counter registers the
number equivalent to the exposure load of the
film in use, avoid advancing the film forcibly.
If the perforations of the film tear or the film
pulls away from the cassette, it will become
impossible to rewind the film.

[1] Push in on the film rewind release button on
the camera base. It is unnecessary to keep this
button depressed all the while during film
rewind.
View original page 9
Page 10 · Read text
[2] Fold out the film rewind crank and turn it in
the direction of the arrow to rewind the
film. Pressure will ease up somewhat when the
end of the film leaves the tape-up spool. Wind a
little further until the crank rotates freely,
indicating the film is completely rewound into
the cassette. When you are sure the exposed film
is completely rewound, open the camera back
and remove the film roll.

· When the film fails to advance, push the film
rewind release button and rewind.

· Make sure the exposed film is rewound into the
film cassette before opening the camera back.


SHUTTER CONTROL DIAL


Shutter speeds are fully automated with the
Yashica FR 11. For normal shooting without
flash the control dial is set to AUTO.
Including AUTO, the dial has the following
three settings.

AUTO . . . For automatic shutter speed control.
Auto exposure control with the FR 11 is
aperture preferred: When you preset the
number, the camera automatically selects the
correct shutter speed. The speed the camera
selects is indicated in the viewfinder by pointer
index.

    flash synchronization . . . Set the dial to
this setting to synchronize the camera for use in
conjunction with an electronic flash unit. (See
page 56.)

(B) . . . The "B" (bulb) setting is used for
exposures in excess of 1 sec. (See page 60.)
View original page 10Page 11 · Read text
www.butkus.us

VIEWFINDER


                                                             [1] split-image

                                                             [2] Microprism Collar

                                                             [3] Shutter Speed I ndex

                                                             [4] Shutter Speed Pointer

                                                             [5] Overexposure Zone

                                                             [6] Long exposure Zone


Split-image Microprism
This camera features a dual focusing spot for easy focusing which consist of a diagonal split image center with
a microprism collar. (See page 34 for focusing details.)

Shuter Speed Pointer
When the exposure check button is depressed, the pointer will indicate the shutter speed to accord with the f-
number in use. Exposure is correct if the pointer registers between the 1/1000 sec. and 1 sec. extremes of the
index. (See page 40 fo; exposure setting details.)

Overexposure Zone
When the pointer climbs into this zone, the shot will be over-exposed. For adjustment, refer to page 40.

Long Exposure Zone
When the pointer is in this zone light will be sufficient for up to a 4 sec. exposure. (See page 40.)


FOCUSING


Turn the focusing ring while observing the
subject in the split-image center spot,
microprism collar or matte area of the
viewfinder.

Split-image Center Spot Precise focus is
secured when the images in the diagonal split-
image center spot are brought into alignment.
View original page 11Page 12 · Read text
Microprism Collar and Matte Area When the
multiple glitter disappears in the microprism
collar or when the image appears clear and
sharp in the matte area, precise focus is secured.

· The method of focusing remains the same
regardless of whatever lens or accessory is in
use.

Eyesight Adjustment To permit adjustment of
the viewfinder to the eyesight of the individual,
eight types of diopter lenes (-5 to +3 diopters)
are available.


SHOOTING POSTURE

To obtain good results, it is important that the camera be held steady. Erratic
movement of the camera at the critical moment of exposure constitutes the
most common cause of poor (blared) photographic results. Before attempting
to take your first series of photographs, familiarize yourself with all functional
controls. As illustrated, the camera can be held in either horizontal or vertical
posture, depending on your photographic requirement. In either case, support
your camera firmly with your left hand, with your left elbow held close against
your body. Avoid gripping the camera body too firmly with your right hand
and press the magnetic release button gently.

· For extra steady support, the trunk of a tree or wall of a building or other
structure can be used most effectively.

· When using a telephoto lens or when making exposure at a slow shutter
speed, the use of a tripod is recommended.


AUTOMATIC EXPOSURE


Your Yashica FR II features fully automatic through the-
lens electronic exposure control. By simply presetting the
film speed and lens aperture, its exposure control system
varies the shutter speed continuously according to subject
brightness to assure correct exposure under any light
conditions.

[1] Turn the shutter control dial to AUTO, and set the
exposure compensation dial to 1 X.
View original page 12
Page 13 · Read text
www.butkus.us


[2] Preselect the lens aperture by setting the required f-
number to correspond with the index. The following table
serves as a guide for selecting the appropriate f-number
under different lighting conditions when using ASA
100film.


     Light Condition                F-stop

  Outdoors under bright
                                    16, 11, 8
         sunlight

   Outdoors (overcast)               5.6, 4, 2.8

     Indoors or night
                                          2, 1.4
      photography


[3] While sighting through the viewfinder, slide the
exposure check button to the right. If exposure is
adequate --between the 1/1000 and 1 sec. shutter speeds-
-focus, compose the picture and release the shutter.

· For shutter speeds below 1/30 sec. pictures will blur'
unless utmost precaution is taken to prevent camera
shake. This can be avoided by resetting the aperture ring
to a wider lens opening which will give a faster shutter
speed.

· When shooting at a slow shutter speed is necessary,
brace the camera firmly or use a tripod.

· When the pointer is in the overexposure zone,
correction can be made by stopping the lens aperture
View original page 13Page 14 · Read text
down to give less exposure (i.e., f/8 to f/11 or f/16, etc.).
A neutral density filter may also be employed for
exposure adjustment.

· When the pointer is in the long exposure zone, unless
extend exposure is desired, open the lens aperture (f/8 to
f/5.6 or f/2.8, etc.) to obtain a faster shutter speed. Long
exposures (up to 4 seconds) may be made in this zone if
a tripod is used.


As the FR II uses an aperture-preferred automatic
exposure control system, shutter speeds may be varied by
adjusting the aperture ring. Check, beforehand, that the
shutter control dial is set to AUTO and the exposure
compensation dial to 1X.

[1] Depress the exposure check button and check the
shutter speed in the viewfinder.

[2] With the exposure check button engaged, turn the
aperture ring until the pointer aligns with the desired
shutter speed.

The following table serves as a guide for preselecting
shutter speeds:


           Subject                    Shutter Speed

     Fast-moving objects              1/1000, 1/500 sec

Landscape and general outdoor
                                    1/250, 1/125 or 1/60 sec.
         photography

  indoor or night photography          1/30 sec. or slower
View original page 14Page 15 · Read text
www.butkus.us


Exposure Check Button
 In addition to providing instantaneous exposure
readings, the exposure check button may also be locked
to give longer readings. To lock the check button, pull the
film advance lever out past the edge of the camera to the
point where it catches (see illustration) and slide the
check button all the way to the right until it locks. To
unlock the button, push the film advance lever all the way
in toward the shutter control dial.

· Once the button has been lock, the film may be wound
without disengaging the lock mechanism.

· Always make it a point to unlock the button after setting
exposure to avoid excessive battery drain

To prevent battery power drain, make it a rule to switch
off the Check Button when in locked position by
returning the film advance lever fully each time after
exposure checking.

When using some Contax accessories such as the Infrared
Control Set, the Check Button should be in the switched
"off" position.


EXPOSURE COMPENSATION


                                    For normal shooting, the exposure compensation
                                             dial should be set to 1 X. When shooting backlit or
                                           spotlighted subjects, or when special effects are
                                            desired, exposure compensation is required.

                                    The exposure compensation scale has four click stop
                                                settings (2, 4, 1/2 end 1/4) in addition to 1X. It can
                                              also be used at in-between settings. Operate the dial
                                    by rotating it until the required compensation factor
                                              aligns with the black index mark. Always remember
                                               to return the dial to 1X when exposure compensation
                                                       is no longer required.
View original page 15Page 16 · Read text
For Backlit Subjects
When shooting against the light or when photographing
subjects against a window or bright snow scene, the main
subject will be underexposed. To compensate for this and
bring out the details of your subject, set the exposure
compensation dial to either "2" or "4".

The "2" setting doubles the amount of light reaching the
film:
Thus a shutter speed of 1/250 sec. will automatically lower
to 1/125.

The "4" setting quadruples the amount of light reaching
the film:
Thus a shutter speed of 1/250 sec. will automatically lower
to 1/60 sec.

The top photo was made employing 4X exposure
compensation. The bottom photo was made without
exposure compensation.


Spotlighted Subjects To prevent overexposure of the main
subject resulting from the intensity of spotlighting, it is
necessary to reduce the amount of light reaching the film by
setting the exposure compensation dial to 1/2 or 1/4.

The "1/2" setting reduces the amount of light reaching
the film by one-half: Thus a shutter speed of 1/250 is
automatically increased to 1/500 sec.

The "1/4" setting reduces the amount of light reaching
the film by one-forth: Thus a shutter speed setting of 1/250
is automatically increased to 1/1000 sec.

The top photo was made with 1/4 exposure compensation;
exposure compensation was not employed for the bottom
photo.
View original page 16
Page 17 · Read text
www.butkus.us


SELF TIMER


When you wish to include yourself in the picture, mount
the camera on a tripod and trip the shutter with the aid
of the self timer.

[1] Advance the film and secure precise focus.

[2] Shift the self-timer lever on the front-face of the camera
body all the way in the direction of the arrow (see
illustration).

[3] Push the self-timer start lever in the direction of the
arrow to activate the self-timer. The shutter will be tripped
after a delay of approximately 7 seconds.

· When using the self timer for shutter release, slide the
rubber eyecup over the viewfinder as illustrated to prevent
exposure inaccuracy due to excess light entering through the
viewfinder. Then, fold the rubber rim of the eyecup down
over the finder.


· If the film advance is incomplete, the self-
timer will be activated through manipulation of
the self-timer start lever but it will not trip the
shutter. In such a case, manipulate the film
advance lever to complete the film wind.

· If after activating the self-timer you wish to
suspend the self-timer exposure, simply reset
the self-timer start lever manually to its original
position.

· The magnetic release button will function
normally even when the self-timer is charged.
View original page 17
Page 18 · Read text
FLASH EXPOSURE


An electronic flash unit greatly aids in making
correct exposure for night and indoor
photography, and is useful for providing fill-in
light for outdoor photography as well. The FR
II's accessory shoe is equipped with a direct X
contact for X flash synchronization. Only
cordless direct X synchronization flash units
may be employed.

[1] Slide the flash unit firmly into the camera's
hot shoe. (There is no hazard of electrical shock
as the contact is active only when the unit is
properly mounted.)

[2] Set the camera's shutter control dial to the
flash synchronization      setting.


[3] Focus and then read off the camera-to-subject distance
indicated on the distance scale of the lens. The correct f-
number to accord with the subject distance may be
computed by dividing the flash unit's guide number by that
distance. For example, at a distance of 5 meters with a
guide number of 20 (ASA 100 in meters), the correct f-
number is f/4: GN 20 / 5 (distance in meters) = f/4.

· When the guide number is given in feet, see that the flash-
to-subject distance is converted to feet.

· For further details on flash photography refer to the
instruction manual for the respective flash unit.

· The Contax RTF 540flash unit with a built-in
electromagnetic shutter release can also be employed with
the FR II. For operating details, refer to the RTF 540
Instruction Manual.
View original page 18
Page 19 · Read text
www.butkus.us


"B" (Bulb) Exposure
For exposures longer than one second, set the shutter speed
control dial at the "B" setting. As the shutter will remain
open for as long as the electromagnetic release button is
depressed, always use a tripod to prevent camera
movement. Use of the Cable Switch (sold as an optional
accessory) is also convenient when shooting at the "B"
setting.

Release Socket
The electromagnetic shutter system of the FR 11 makes
possible use of the camera with various remote release
systems and accessories. For such purposes, a release
socket is provided to the right of the exposure check button
to serve as an auxiliary release and accessory input
terminal. The release socket receives the electrical signals
for accessories such as the Infrared Controller Set, assorted
Cable Switches, the RTF 540 flash unit's integral release
system.


INFRARED PHOTOGRAPHY


In case of infrared ray photography using the infrared
ray film in combination with the red filter, focus must be
secured in the normal manner and then compensated
accordingly in order to obtain sharp images. The
Yashica ML and Zeiss T*lenses feature R index
permitting ready compensation of focus.

First, secure focus in the normal manner without using
the filter. Then, read off the subject distance and align it
with the R index. After making this compensation,
mount the filter over the lens.

· Always use the red filter when attempting infrared ray
photography.

· For correct exposure setting, refer to the instructions
accompanying the infrared ray film.

If you are interested in IR, go digital.
As of 2020 someone was making IR film.
View original page 19
Page 20 · Read text
DEPTH OF FIELD


When a lens is focused on a given subject, objects in the
foreground and background will appear acceptably sharp
in the picture. The extent over which all objects will be
reproduced acceptably sharp in the picture is called the
depth of field.

In the photo taken at f/1.4, the foreground and
background objects appear blurred.

The depth-of-field scale on the lens barrel will show the
extent of the depth of field at different aperture settings.
In case the standard 50 mm lens is stopped down to f/16
and focused at 2 meters, this scale will indicate that all
objects within the range of about 1.5 and 3 meters will
appear acceptably sharp in the picture.

· With a specific lens, the depth of field varies according
to the following;

[1] It increases as you stop down the lens.

[2] It is more extensive in the background than in the
foreground.

[3] It is more extensive as you focus on a distant subject.


                                 Your Yashica FR 11 is tested to provide faithful! function
                                            in ambient temperature ranging from + 45° to-s° C. In
                                      extremely low ambient temperature, however, give
                                     utmost precaution to the following matters:

                                                   · A battery which may function properly in normal
                                     ambient temperature may not provide the required
                                     performance in extremely low temperature. If the battery
                                        confirmation lamp fails to come on, replace the battery
                                      with a new one or use the battery adapter set available as
                                    an optional accessory.

                                                   · Avoid exposing your camera to excessive temperature
                                             fluctuation.
View original page 20Page 21 · Read text
www.butkus.us


                            When your camera is brought into a warm room suddenly
                                               after exposing it to cold outdoor temperature or vice
                                           versa, small droplets of water may accumulate on the
                                             internal mechanism. If left in this state corrosion may set
                                                  in, causing serious malfunctions. Protect your camera
                                   from excessive temperature fluctuation as much as
                                           possible.


· Do not expose your camera to excessive heat. Never leave it in direct sunlight or in the glove compartment,
trunk or on the rear seat shelf of your car. Exposure to excessive heat may adversely affect the film emulsion,
battery and/or camera systems and cause exposure inaccuracy. If it is accidentally exposed to heat, leave the
camera to cool to normal temperature before attempting to use it.

· Knocks and jolts, as well as exposure to humidity and sea breeze are counted among the common causes of
malfunction. To obtain maximum service, take good care of your camera and avoid rough handling.

· Do not keep the shutter charged when your camera is to be left unused over any great length of time. If
possible, take the battery out of its compartment.

· Never expose your camera to sudden changes in temperature, because the electrical contacts may corrode, thus
causing malfunction due to poor electrical contact.


Precautions
· Before installing the battery in the battery compartment, wipe both ends with a clean, dry cloth. Oily smears
on the battery ends may caused poor contact.

· In case your camera is to be left unused over a great length of time, take the battery out of its compartment.

· When going out on a long trip, take along a couple of spare batteries.

· To avoid hazards, do not attempt to dismantle the battery or throw it into an open fire.
View original page 21Related documents and language editions
From the M. Butkus archive. Original publisher and archive notices are retained.
Check the model and edition against your equipment.
PDF verified 2026-10-10.