Film cameras
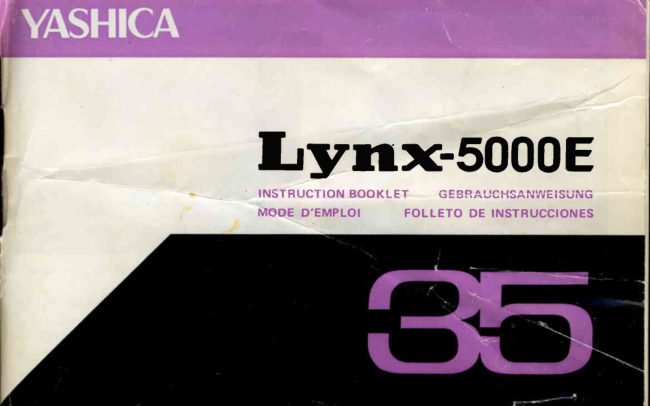
Yashica Lynx-5000e User manual
User manual for Yashica Lynx-5000e. 31 pages in Spanish. Read the original PDF, download or print a copy without registration.
31 pagesSpanish2.2 MB PDF
Loading your manual…Open PDF directly
Document details
- Brand
- Yashica
- Model / document
- Yashica Lynx-5000e
- Document type
- User manual
- Language
- Spanish
- Pages
- 31
- File size
- 2.2 MB
- Category
- Film cameras
- Document date
- Not specified in catalog
Search available document text
Find a term, then jump to its page in the original PDF. Image-only pages may not be searchable; check the PDF for exact wording and diagrams.
Page 2 · Read text
IJyltX-5000E
I N S T R U C T I O N B O O K L E T   G E S R A U C H S A I . J W E : S U N G
NTOOED'EMPLOI     FOLLETO DE INSTRUCCIONES
View original page 2
Page 3 · Read text
After  loading the  film, set the figure              Preselect the  desired shutter speed.
equivalent to the ASA speed rating of
the  film   in  use  in  the ASA  speed
indicator window.


                    www.butkus.us
View original page 3Page 5 · Read text
Open the battery compart-
                                                                 ment   lid  by  turning    it
                                                                          counter-clockwise.  As  il-
                                                                                  lustrated, install two mer-
                                                                           cury batteries so that their
                                                                             plus (+) side faces towards
                                                                    you and close the  lid se-
                                                                              curely.
                                                              Use two 1.4V mercury bat-
                                                                                    teries (Mallorv RM64OR or
                                                                  equ ivalent).
Precautionson Handling the Mercury Batteries
1. To prevent unnecessarydrain of battery power, the electric current is supplied only over the
   duration the activator button  is depressed.
2. Do not throw used mercury batteries into trash cans, in the fire or waste receptacles.
3. Do not dismantle mercury batteries or leave them where children can get accessto them.
4.  Ordinarily, a set of mercury batteries will provide sufficient power for about one and a half years,
   but  it  is advisable to make replacement before the battery power is completely exhausted.
5. The mercury batteries should be replaced if the red "UNDER"  and "OVER"  lampsfail to turn on,even
   when you turn the aperture ring in either direction.

                           www.butkus.us
View original page 5Page 6 · Read text
1 . The rear cover will pop open when the rear      2. Pull out the film rewind knob, place the film
   cover lock on the camera base is moved in the         cassette into the film chambe'r and return the
   direction of the arrow and then presseddown.          rewind knob to its original position.
View original page 6
Page 7 · Read text
3. Draw out some length of                             4. After ascertainingthat the sprocket teeth pro-
   cassetteand introduce the tip of the film leader        perly engage the  perforations along on  the
    into one of the slots on the take-up spoo[.                film,  manipulate  the  film  advance lever.
                                         When it is determinedthat the f ilm is advancino
                                                          properly, close the rear cover.

                           www.butkus.us
View original page 7Page 8 · Read text
5. All the while during film loading, the exposure   6 . When the counter shows the figure "1",  Vou're
   counter will registerthe letter "S"  (Start).  Re-      now ready to shoot your first frame. Manipula-
    leasethe shutter and wind the film advancelever        tion of the  f ilm advanceleverthen automatically
    alternately until the figure "l"  appears in the        registerscount of exposures.   lf the film rewind
   counter window.  (The exposure counter of the        k nob  rotates when  the   f ilm advance lever is
   Lynx-5gg6E automatically resets to "S" when      wound, it is an indicationthat the f ilm is advanc-
    the rear cover is opened.)                             ing properly.  Make sure the  f ilm advance lever
6                                                                        is given a f ull stroke until it goesno f urther.
View original page 8Page 9 · Read text
1. Do not wind the film forcibly, becauseit may    2. Push the film rewind button on the cameraDase.
   tear or come loose from the cassette,making  it       (This button pops out when the film advance
   impossibleto rewind.                                 lever is manipulated, resetting the mechanism
   Avoid winding the Film Advance Lever when a        for smooth film wind.)
   resistanceis felt.  And do not force to advance
   the film as it may tear or come loose from the
   cassette,making it impossibleto rewind.
                            www.butkus.us
View original page 9Page 10 · Read text
3. Fold out the cranr-handle on the film rewind   4. When the crank-handlerotatesfreely without any
   knob and turn  it  in the direction of the arrow.      resistance,open the rear cover, pull out the re-
   A slight resistancewill be felt when the f ilm pulls     wind knob and take out the f ilm cassette.
     off the take-up spool, but continue winding the
    crankhandle.

8
View original page 10Page 13 · Read text
3. TURN THE APERTURERING WHILE PRESSING      VIEWFINDER FIELD
    THE ACTIVATOR BUTTON                                                        <OYER
       Sight through the viewfinder while rotating the aperture
           r i n g a n d y o u w i l l s e e t h e  " O V E R " o r  " U N D E R "    i n d i c a r o r
      lamp.  The point where the lamps turn of f indicatescorrect
      exposuresetting.


                                                           UIIOER>


l l
                             www.butkus.us
View original page 13Page 16 · Read text
When  shooting snow  or  beach scenes with  a
                                                                      filter over the lens, compensation for
                                                                                         ""poruL
                                                must be made according to the exposure factor of
                                                        the  f ilter in use l2X in caseof Y2 fillerl.  With the
                                                Lynx-5000E, this exposure compensation is ac-
                                                  complished through ad.iustmentof the aperture set-
                                                                                                           t i n g .
                                                                                               lf the correct exposuresetting under the prevailing
                                                                light condition is f/1 6 at 1125Osec.,exposurecom-
                                                  pensation when using a filter with a factor of 2X
                                                  should be made by turning the aperturering by one
                                                        setting to  f 111. With a 4X  f ilter, the aperture set-
                                                              ting must be adjusted by two stops to f/8.
  Note:  In the above circumstanceafter adjustmentshave been made, disregardthe red "OVER"  indicator
 lamp which will turn on and pressthe shutter button.   lf lightingcondition changesjust prior to making an
 exposure,make exposureadjustmentall over again.

L 4
View original page 16Page 17 · Read text
When shooting against light or photographing a
                                                          subject near a window, or against an excessively
                                                               bright background such as snow-covered land-
                                                       scape, the prime subject is liable to appear ex-
                                                       tremely dark (under-exposed)if exposure is set in
                                                         the normal manner.
                                                To obtain sparkling results in such cases(See low-
                                                              er photo), approach your prime subject and take      Exposure set in the normal manner
                                                   exposure reading by seeing to   it that the bright
                                                                     light in the background is warded off from the
                                                                     light acceptor.
                                                                  In case the prime subject cannot be approached,
                                                        proper compensation must be made by adjusting
                                                          the lens aperture. (See page 18)
                                                        Note:  See f ootnote on page 16.

l5    Exposurereading taken by approachingthe
      prime subject                www.butkus.us
View original page 17Page 19 · Read text
Th e  vie wf inder of the Lynx- 5000E  incor por ates a
               b rig h t  fram e  outlining  the exact ar ea which  will
               b e re p ro duced on the  f ilm plane.
                        It a lso featur cs autom atic par allax com pensation.
                 In  o th e r   r vor ds, the viewf inder  fr am e m oves dia-
               g o n a lly  in accor dance with  the focusing  r ange to
           ma ke co mpensation  for the  sl ight differ ence bet-
            ween  the  f ield covered by the viewfinder  and that
                 of the camera lens.  Regardless of  th camera-to-
               subject range, theref ore, the picture you compose
               with in  this  fr am e  will be  r eor oduced on the   f ilm
               p la rre .


www.butkus.us
View original page 19Page 21 · Read text
Mount the flash unit on the accessoryshoe  I  of the
         Lynx-5000E. Plug the PC cord of the unit into the
                     f lash contact (2\ of the camera,and you're ready f or
           flash photography.

         The exposure in flash photography should be deter-
         mined in accordancewith the guide number of the
            flaslr bulb or electronic flash unit in use (refer to
                          i n s t r u c t i o n ss u p p l i e dw i t h t h e b u l b s o r u n i t ) .

          (The correct aperture setting is obtained by dlviding
          the guide nurnberby the distancefrom the flash unit
            to you r subject.)


www.butkus.us
View original page 21Page 23 · Read text
\.                 USE OF CABLE RELEASE
                                    \                        To prevent erratic movement during exposure, it
                                                                        is advisableto mount the camera on a tripod and to
                                                 use a cable releasewhen shooting at 1/30 sec' or                                rnI                         slower shutter speeds. Mount the cable releasein
                                                        the threaded socket on the shutter releasebutton'


                                BULB EXPOSURE
                                         When the shutter speedcontrol ring is adjustedto B
                                                           (bulb) setting,the shutter will remain open over the
                                                       duration the shutter release button  is depressed.
                                                       This B setting is used when long exposure of more
                                                     than one second is required, and  is effective in
                                                     shooting night scenes, fireworks, etc.

21,,                             www.butkus.us
View original page 23Page 24 · Read text
By u sin g the self- tim er , you can put your self  in the
p r c t u r e .
,1     Set the sync selector lever to "X".
€     Char ge  the  shutter  by  winding  the  film
      advance  lever.
 3    S et the  self - tim er by m oving  the  self - tim er
         le ver  located  on  the  bottom   of  the  lens
       b ir r r el  in  the  dir ection  of  the  ar r ow   ( See
         lo w er  left  photo) .
S e cu re focus   ( if you  ar e  all alone, focus on  the
sp o t wh er e you plan to stand) , pr ess the shutter  r e-
lease button,   set  yourself   at  the  predetermined
p o sitio n without  delay and face the cam er a.
Th e se lf -tim er  tr ips the shutter appr oxim ately  7 to
B seconds af ter the shutter release is pressed.
View original page 24Page 25 · Read text
By depth of field,  it is meant the range over which
                                                       objects in the foreground and background appear
                                                    acceptably sharp when the camera lens is focused
                                               on a subject at a given distance.
                                            The depth of field becomes more extensive when
                                                     the lens aperture is closed to a smaller opening and
                                                      likewise increasesin proportion to the camera-to-
                                                     subject distance.
Aperture   set  at   fl 1 .A  Aperture  set  at      f 116    The depth of field can be determined by referring
Objects  in the   back-  Objects  in  the   back-      to the table on the following page or by directly
ground appear blurred  ground appear sharply
and out  of  focus.      focused.                    reading off the depth-of-f ield scale engravedon the
                                                     lens barrel.
                                                                 ln case the camera lens is focused on a subject at a
                                                      distance of two  meters and the correct aperture
                                                        setting is f/16, the range indicated by the figure
                                                    "16" on both side of the index (1) is thedepth of
                                                                 field.   In other words, all objects within the range
                                                             of about 1.3 meters to 5 meters will appear accept-
                                                    ably sharp on the film plane.
                           www.butkus.us
View original page 25Page 26 · Read text
YASHICA LENS SHADE
                                              The use of the lens shade is recommended when
                                                   shooting subjectsagainstlight. Your Lynx-5000E
                                                   acceptsa 54mm slip-on type lens shade.


                               YASHICA F I LTE RS
                                            Use 46mm screw-in type filters with your Lynx-
                                               5000E.   Yashica filters for either color or black-
                                              and-white photography are available.


24
View original page 26Related documents and language editions

From the M. Butkus archive. Original publisher and archive notices are retained.
Check the model and edition against your equipment.
PDF verified 2026-10-10.