Film cameras
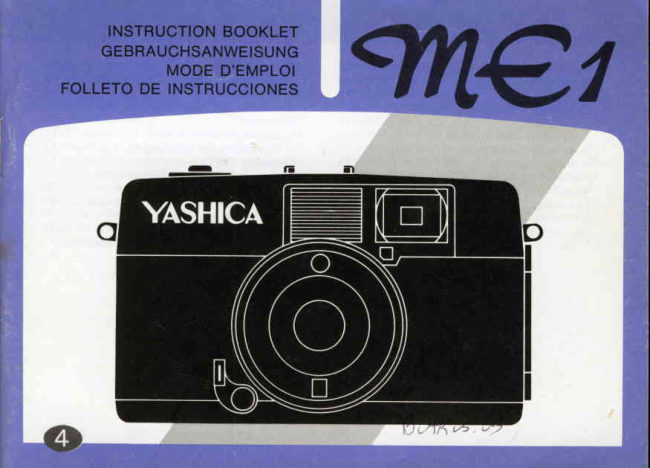
Yashica ME1 User manual
User manual for Yashica ME1. 23 pages in English. Read the original PDF, download or print a copy without registration.
23 pagesEnglish2.0 MB PDF
Loading your manual…Open PDF directly
Document details
- Brand
- Yashica
- Model / document
- Yashica ME1
- Document type
- User manual
- Language
- English
- Pages
- 23
- File size
- 2.0 MB
- Category
- Film cameras
- Document date
- Not specified in catalog
Search available document text
Find a term, then jump to its page in the original PDF. Image-only pages may not be searchable; check the PDF for exact wording and diagrams.
Page 6 · Read text
One 1.35V  mercury  battery  (Eve'
ready EP-675R, UCAR  EP-675R,
Mallory RM-675R  or equivalent)  is
used  for  the  automatic  exposure
system of this camera.
O Open the battery compartment
cover by inserting a fingernail in the
slot and pushing the cover in the
direction of the arrow.
@ Place the battery on the plastic
strip  with  the plus and minus  ter-
minals positioned as indicated  in-
side the battery  chamber. Pull the
plastic strip to remove the battery.

Checking the Battery
Remove the lens cap and point the
camera toward a light source. If the
battery  is exhausted, the indicator
needle in the viewfinder  will be in
the red underexposure zone and the
shutter button  will lock. In this in-
stance, replace the battery with a
new one.
View original page 6
Page 9 · Read text
Rotate the film advance dial and
                              ss  the  shutter  release button
                                  eral times until the number  " 1"
                         appears in the counter window.   If
                                   ttre fim  rewind knob  turns in the
                              direction of the arrow, the film  is
                          advancing correctlY.
                                                     .  The shutter release will lock  if
                          pressedwith the lens cap in place or
                                  in the dark. Either point the camera
                          toward a light source or do not use
                             the "Auto"   setting when winding
                                    film.


               @ Set the  film speed control  ring
                                 to the ASA rating of the film being
                           used. Make sure the ring stoPs at a
                                 click position as this setting deter-
                         mines proper exposure.


www.orphancameras.com
View original page 9Page 11 · Read text
Viewfinder
                             @ Picture areaframe
                             @ Parallax correction frame
                             @ Overexposuremark
                             @ Correct exposurerange
                             @ Indicator needle
                             @ Underexposuremark
                             @ Focus symbol indicator window


Entire frame for  l,  il,         Parallax correction fram     The area shown by the picture area
I symbols                                           frame is that actually photographed.
                                              So make sure the subject is within
                                                                    this frame. Use the parallax correc-
                                                                  tion frame when making close-ups
                                                              at the ! symbol(l m).


                         www.orphancameras.com
View original page 11Page 12 · Read text
t  Checking the Exposure
Remove the lens cap and set the auto ring to "A"  (refer to the automatic exposure section) and
point the camera toward the subject.

           e  Exposure     is        @ fne  subject  is        @ Wtren the nee-
            correct as long as                 too  bright  when                 dle enters the red
            the indicator nee-                 the needle enters              underexposure
            dle  is within  the                 the  red  overex-              zone  at the  bot-
            correct  exposure                posure  zone   at               tom,  the  shutter
           range. Just press                the top.                         release locks. The
            the  shutter  but-                                                  subject    is   too
            ton  to  take  the                                                    dark. When  this
             picture. The shut-                                             happens,  switch
              ter speed is slow                                                from auto to flash
         when  the yellow                                               photography.
          zone is indicated.
          Use a  tripod  or
            hold  the camera
              firmly      when
           shooting  in   this
           range.
View original page 12Page 13 · Read text
The cause of most bad photographs
                                   is camera shake. To  obtain  clear,
                          sharp pictures the camera must be
                           held firmly. Hold the camera firmly
                            with both hands and press both el-
                      bows against the body, then release
                           the  shutter  gently. Practice until
                        you can release the shutter without
                        any camera shake at all in both the
                              vertical and horizontal positions.


www.orphancameras.com
View original page 13Page 14 · Read text
Use auto photography  in daylight
and  outdoors   for  impressionistic
scenery shots while on trips, during
leisure activities, snapshots, etc.
O  Set the auto ring to the "A"  po-
sition.
@ Next,  focus the camera, center
the subject in  the viewfinder and
press the shutter release. Both the
aperture and shutter speed are de-
termined automatically for beauti-
 ful,  correctly exposed shots every
time.

Snapshotsand commemoration
photographs
 Set the focusing ring to the green
   ii  symbol (3 m). If the weather is
 clear, the area from about 2 m to
 infinity  will be in focus. This allows
you  to take sharp photos without         x the need of focusing each time.
View original page 14
Page 15 · Read text
Shooting Backlit Subjects
                              Backlit subjects are apt to be under-
                       exposed with  automatic exposure
                         cameras. To  avoid  this, approach
                            the subject while  looking through
                            the viewfinder, press the shutter re-
                           lease button halfway down to lock
                           the exposure indicator needle, and
                             return  to  the  original position  to
                     make the exposure by pressing the
                             shutter release button  all the way
                        down.  If the subject cannot be ap-
                        proached for any reason, just point
                           the  camera down  to  avoid  the
                              bright  areas and  proceed  as de-
                           scribed above.


www.orphancameras.com
View original page 15Page 17 · Read text
Q  Clip the CS-10 on the camera
                        accessoryflash shoe (hot shoe).


             @ Focus the camera and set the
                         auto ring to the correct aperture for
     a               theto thefocustablesymbolon pgaeused32byor referringthe one
                        on the flash unit  itself.
                  II
               / r a


www.orphancameras.com
                                                                                                     *,i8iri"
View original page 17Page 19 · Read text
Daylight Flash Photography
                          Flash photography  is not restricted
                            only  to indoor or night use. Better
                             overall effect can often be obtained
                         by  using flash outdoors  in  situa-
                             tions such as those listed below.

                  O  For backlit or sidelit subjects.
              @ When shooting in heavy shade or
                        where  there  are  harsh shadows
                       on the subject.
                               (9) For portraits in early morning or
                                late evening.
                         o  For  daylight flash photography,
                        use one  of  the  following  focus
                       symbols: 2,   l,     ii


www.orphancameras.com
View original page 19Page 20 · Read text
Use the self-timer when you wish to
include yourself in the picture. Just
advance the film, turn the self-timer
lever as far as it  will go and press
the shutter release. Approximately
8 seconds later, the shutter will re-
lease giving you  plenty  of time  to
get into  the picture. (Also usable
for flash photography.)
View original page 20
Page 21 · Read text
Do  not open the back cover until
                            the  full length of the exposed film
                         has been rewound  into  the  car-
                                tridge.

                  Q  Pressthe film rewind releasebut-
                            ton on the bottom of the camera.
                   O  f'otO out the rewind crank and
                              turn  it in the direction of the arrow.
                       The resistance of the film  will  de-
                          crease when the film end disengages
                          from  the  take-up sprocket. The
                         back cover can then be opened to
                        remove the film.
                          o   If  the film advance dial will not
                      move at the end of the film, or at
                        any other time, do not Press the
                            shutter  release button.  Instead,
                           press the film rewind release button
                        and rewind the film. The film may
                             tear if wound forcibly.


www.orphancameras.com
View original page 21Page 22 · Read text
rffi

 Type:  35mm EE camera with programmed      Focusing:   Rotating  helicoid  with  distance
 shutter.                                          scale and four focus symbols (lm,  1.5m, 3m
 Lens:   Yashica Lens, 38mm  F2.8; angular      and  infinity);  focus symbols visible in view-
 field 59"; minimum focus  I m.                          finder.
 Shutter:  Program14edbehind-the-lens shutter       Film advance:  Film advance dial: automatic
 Ol60  to 11360 sec.). Built-in  self-timer with       resetting accumulative counter; crank film re-
 approx. 8 sec. delay.                               wind.
 Exposure control:  Fully automatic exposure      Safety device:  Shutter release button  locks
 with  "Top-Eye"  CdS sensor; EV range EV9      when there is insufficient  light for exposure.
 (l/60  sec. at F2.8) to EVlT (11360 sec. at      Other features:  Aperture scale provided for
 Fl9); ASA range 25  -  500; operates on one       flash photography;  hot shoe for  flash synch
 1.35V mercury battery (Eveready EP-675R,      included; 46mm  filter threads; hood diameter
 UCAR EP-675R, Mallory RM-675R or equiv-     48mm, slip-on type.
 alent).                                   S i z e : l l 8 x 7 2 x 5 4 m m .
 Viewfinder:    Bright  frame  viewfinder  with       Weight: 280 grams,without battery.
 parallax correction frame; shows correct expo-
 sure, overexposure and underexposure; magni-
 fication 0.52X.
View original page 22
Page 23 · Read text
a  Avoid  exposing your camera to excessive      Battery Handling Precautions
heat. When left in the sun, glove compartment             .  Wipe the battery ends with a soft cloth to
or trunk  of your  cat, etc., the film emulsion,      remove sweat,  oil,  etc., which  could cause
battery  andfor camera systems may be ad-      poor contact.
versely affected by the heat. In case of acci-      o When the camera is not to be used for an
dental exposure to heat, cool to ambient tem-      extended period, remove the battery.
perature before using.                             o  Always  cafiy a spare battery when making
a  Always  clean  the  camera  carefully  after       a long trip.
using at the beach, hiking, etc. Dampness may             .  When replacing the battery, always take
result in corrosion and sand can damage the       the old one with you to your camera store or
camera's precision mechanism.                         electrical store to be sure to obtain the same
.  Remove dust and  dirt from  the lens and       type.
viewfinder  eyepiece using a blower  or  lens            .  Do not throw old batteries into fire or dis-
tissue.                                           mantle them. This is dangerous.
.  Always replace the lens cap when not using
the camera.

                                                                        I
                                                               F
                                                                                                                                                                                                                                                      i
                                                                                                                                                                                               l
                        www.orphancameras.com                                                                 ITI                                                                           *l
View original page 23Related documents and language editions
From the M. Butkus archive. Original publisher and archive notices are retained.
Check the model and edition against your equipment.
PDF verified 2026-10-10.