Film cameras
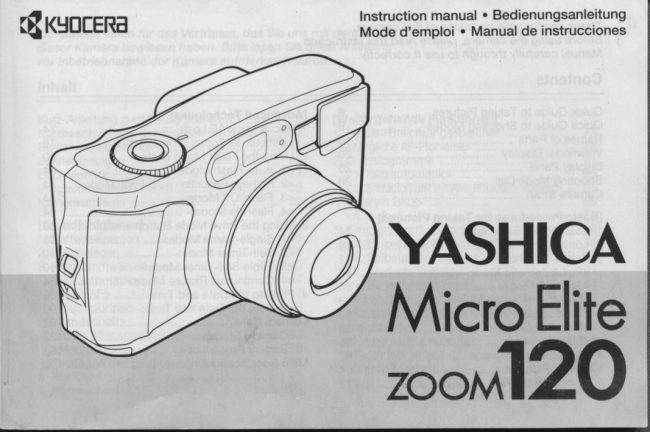
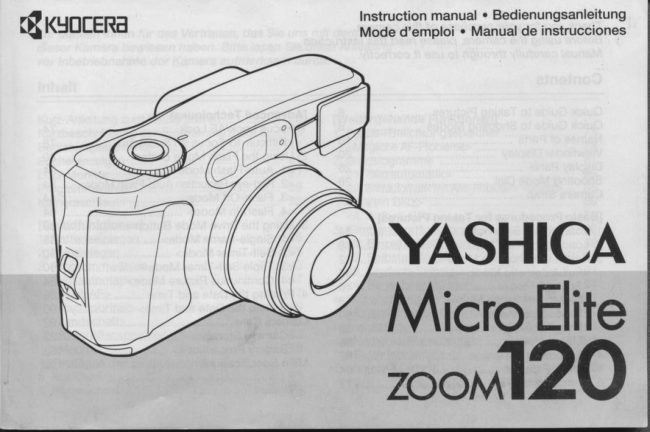
Yashica Micro Elite Zoom 120 User manual
User manual for Yashica Micro Elite Zoom 120. 54 pages in German, French, Spanish. Read the original PDF, download or print a copy without registration.
54 pagesGerman, French, Spanish4.7 MB PDF
Loading your manual…Open PDF directly
Document details
- Brand
- Yashica
- Model / document
- Yashica Micro Elite Zoom 120
- Document type
- User manual
- Language
- German, French, Spanish
- Pages
- 54
- File size
- 4.7 MB
- Category
- Film cameras
- Document date
- Not specified in catalog
Search available document text
Find a term, then jump to its page in the original PDF. Image-only pages may not be searchable; check the PDF for exact wording and diagrams.
Page 1 · Read text
Instruction manual . Bedienungsanleitung
Mode d'emploi . Manual de instrucciones


 MSHICA
 MicroElite
 zooMl   20
View original page 1
Page 5 · Read text
Quick Guide to Shooting Modes
The shooting mode dial should be set to match the kind of picture-taking desired (see page 42-60).
       Full Automatic€ii,I                            r;        ::  I  Mode  !            P3:l$iltxlo*',,      il'Hlsl""?Portra*         2        3
      Use for snapshots and          Use this mode when you         Use this mode when you
       other normal picture-            wish to focus on one             wish both nearby and
       taking (multi-auto-                  part of the subject"                  distant subjects to be in
       focus shooting).                                                            clear focus (slow-syn-
                                                                       chro shooting).

                                                                                                                                                                aaI
View original page 5Page 10 · Read text
@Macro Area Frame                    @Red LED
     When using the macro mode for photography      @Green LED
        at distances of about 0.6 m or less, the area of
       the frame actually reproduced  in photographs
          will change as shown in the illustration.              The lens barrel may be visible in the lower right corner
       Since at very short distances, there will be             of the viewfinder, but  ft is not reproduced on film.
       substantial disparity between the range of the
       viewfinder image and that of the actual repro-
      duced image, the focus lock function should
      be used to focus on the desired subject area.
       For details on use of focus lock, see page 74.


                Actually reproduced area.
                Tatsdchl ich er-faBter Motivbereich
            Zone reproduite en realite.
             Area realmente reproducida

22                                       www.butkus.us
View original page 10Page 12 · Read text
(For purposes of explanation, the accompanying  illustra-    C Exposure Gounter/Self-Timer Remaining
 tlon -shouzs the display panelwith  all indicators displayed;       Time
 in practice, the panel actually displays only those indica-
 fors necessa4/ at the time.)                                          @Flash Mode Indicators
                                                        Auto-flash mode: " l** "
                                                  Red-eye reduction auto-flash mode: " tm "                                                     Flash-offmode: "O"
                                                    Flash-inmode: "I"

                                      OSpot AF Indicator
                                         @Drive Mode Indicators
Zur Erkldrung werden in der Zeichnung alle Anzeigen des         Self-timermode: "S"
                                                                                                   EJJ " Displays dargestellt. ln der Praxis sind nur die jeweils               Triple self-timer mode: " $
aktuellen Anzeigen zu sehen.                             Continuous picture mode: " EJJ "
Pour faciliter les explications, I'illustration montre le moni-
teur de contr)le avec affichage de toutes les indications    @ Battery Warning Indicator
possibies. Dans la pratique, seu/es /es indications neces-
saires appararssent au moment voulu.
A modo de aclaracion,  la ilustracion adjunta muestra el panel
de informacion con todos los indicadores activados. En la                   lf the entire display panel blinking, a camera malfunction
pr(tctica,  el panel mostrara en realidad unicamente  aquellos             is indicated. Consult your nearest service station for
indicadores que sean necesaflos en ese momento.                     repairs.
                                   www.butkus.us
View original page 12Page 14 · Read text
Auts-lllumination Function                        Beleuchtu ngsa utomati k-Funktion
    When shooting under low-light conditions,  if         Wird einer der folgenden Vorgdnge beim
     one of the following operations is performed,           Fotografieren  bei wenig Licht ausgefi.ihrt, wer-
     the shooting mode dial, the dial pointer, and        den Programmwiihler, Einstellindex und LCD-
     the display panel will automatically be illumi-         Monitor automatisch beleuchtet. Die
      nated. The illumination  will go off automatical-       Beleuchtung erlischt automatisch nach ca. 4
       ly after about 4 seconds in order to conserve        Sekunden, um die Batterie zu schonen:
     the battery:                         O Nach Einschalten des Hauptschalters
   CWhen the camera's power switch is set to       @Bei einer Betdtigung von Programmwdhler,
       oN.                                                             Blitz- oder Filmtransportknopf bei
    @Witn the camera's power switch already             eingeschaltetem HauPtschalter
       turned on, when the shooting mode dial,         OBei Antippen des Auslosers bei eingeschal-
        flash mode button, or drive mode button            tetem Hauptschalter
        are operated.
    @Witn the camera's power switch already
       turned on, when the shutter release button
           is pressed halfway and released'


30                                     www.butkus.us
View original page 14Page 15 · Read text
Gamera Strap                           Gourroie de I'appareil
      Attach the strap as shown in the illustration.        Mettez la courroie en place selon I'illustration.


                                       Strap adjuster
                                 T rag e r i e m e n - Ve rste I I u n g
                                 Boucle de la courroie
                                 Regulador de la correa

     Kameraschlaufe                        Correa de la cflmara
       Befestigen Sie die Schlaufe wie abgebildet.        Acoplar la correa seg0n se indica en la ilus-
                                                                tracion.


32
View original page 15Page 16 · Read text
Basic Procedures fo, Taking Pictures

Grundfunktionen

Opdrations de bsse pour la prise de uues

  dtodos bcis    psra            ogra.  os


                 www.butkus.us
View original page 16Page 17 · Read text
..rl.q6                                                                                                                                                                                                                                              ol'i ldleqtdl o                                                                             ;]E


  For models equipped with data back, be ':r*S       @lnsert two new 3V Lithium GR-2 batteries
  sure to set the date and time whenever first 9       with polarities oriented as shown in the
  loading a new battery. See the "Printing the  .j         illustration, then close the cover.
  Date and Time" section below.              O After loadino batteries, set the shooting mode
                                                                     dial to the " E  " (full automatic mode) posi-eBe sure that the shooting mode dial (main           tion;  if the " q:= " (battery warning mark) indi-
  switch) is set to the "OFF" position, then           cator does not appear in the display, the bat-
  open the battery compartment cover.                tery voltage is correct.
Open the compartment cover by pressing in the                                     o The main batteries also provide the powerdirection of the arrow shown.
                                                  source for the camera's data mechanism.
View original page 17Page 18 · Read text
!  i!lr.4r@


                         (\K                                               Time to replace fiaf/enes
                 AK                                                      Batterien ersetzen
                         P/es bonnes                                      Ples usees a remplacer
                 OK                                           Fs necesario sus#tulr las bafenas.

<Replacement  of Lithium Batteries>                display will disappear and the camera will not
When the " e   " (battery warning mark) appears     operate at all.
in the display panel,  it is time to change batter-    o Load new batteries as soon as oossible after
ies. Set the shooting mode dial to "OFF", and          removing old batteries; if new batteries are not
replace the batteries with two new ones.                   installed within a certain period of time, the
Even after the " e   " mark begins appearing in         data memory contents will be lost and it will
the display panel,  it may be possible to use the       be necessary to set them again.
camera for some time, but batteries should be     o Whenever you have changed batteries, be
replaced as soon as possible after this point.            sure to check the data memory contents to be
When battery drain voltage drops below a limit-         sure they are correct.
ing level, the " e   " mark will blink or the entire
                                 www.butkus.us
View original page 18Page 19 · Read text
Fi I m co m partm enU Fi I mfach
                                                               Compartiment du film/Alojamiento de la peliculaWffi


 Camera back release knob
 Ruckaandentriegelung
 Bouton de venouillage du dos de I'appareil
 Palanca de apeftura del respaldo de la cdmara

Use film identified with the DX code, and rated      CSliOe the camera back release knob down-
for speed in the range ISO 50-3200. ISO 400         ward to open the camera back.
film is particularly recommended for use when
shooting flash photography.                @As shown in the illustration, insert the film
                                                       cartridge inside the camera, bottom end
o Correct exposure  will not be produced when             first.
  the film used has a speed rating outside the      o Avoid direct sunlight or other bright light when
  range ISO 50-3200. Film without the DX             loading and removing  film.
  code, and films slower than ISO 50 will be
  automatically set to ISO 100; films faster than
  ISO 3200 will be set for ISO 3200.
View original page 19Page 21 · Read text
Rotate the shooting mode dial so that the
                      rr mark is aligned with the dialgreen  rr !
pointer.

This turns on the camera power and sets the
shooting mode to "full automatic"; the camera is
now ready to take pictures.
In addition to the Full automatic mode, the fol-            Dialpointer
lowing shooting modes can also be used in                 EinstellindexRepdre du sdlecteur
accordance with your picture-taking needs. Set           lndicador del dial
the mode as desired by rotating the shooting
mode dial to the appropriate position.
o When the shooting mode dial is set to any
   position other than "OFF", the camera power
   is automatically turned on; the lens cover
  opens and the lens extends to its normal
  shooting position, allowing pictures to be
  taken.
View original page 21Page 22 · Read text
I When the shooting mode dial is set to the
  "OFF" position, the lens retracts, the lens
  cover closes, and the camera's power is
  turned OFF.
o Set the shooting mode dial to the "OFF" posi-
   tion whenever you are not actually taking pic-
   tures; this helps prevent accidentally pressing
  the shutter release button, and also preserves
   battery power.

 To prevent damage during use or when car-
  rying, this camera is equipped with a protec-
  tive device which automatically causes the
  lens to be retracted to its wide-angle position
  (38 mm) whenever the camera switch is
 turned ON but the camera is not operated for
  about five minutes or more.
 (When the shooting mode dial is set to macro
  mode, the lens will automatically return to the
  telephoto position (90 mm)  if the shutter
  release button is depressed halfway.)


                                   www.butkus.us
View original page 22Page 23 · Read text
"      <Full Automatic Mode>                                         r' fl  " <Spot AF Mode>     This="mode is optimum for snapshots and other      Use this mode when you wish to focus on a par-
     normal photography. The multi-auto-focus (AF)         ticular part of the subject. Focusing is per-
    mechanism allows correct focusing through a       formed based on that paft of the subject in the
    wide range of angle of view, and is appropriate       focusing frame alone.
     for normal photography. The multi-AF feature      o The display panel shows " EIEIB  ".
     also provides correct focus even when the sub-    o  lf the part of the subject you wish to focus on
     lect is somewhat outside the focusing frame.                is not located in the focusing frame, use the
                                                             focus-lock function to focus on the correct
                                                               part of the subject. See the section "Focus-
                                                       Lock" (page74).
46
View original page 23Page 24 · Read text
.* " <Nighttime Portrait Mode>    "
    Use this mode in dark locations outdoors when
    you wish to correctly expose both foreground
    subjects and background scenery.
      In the " F  " lFullAutomatic) mode, distant
    scenery tends to be underexposed (appear
    darker)than foreground subjects; in the
    Nighttime Portrait Mode, however, a slower
     shutter speed (slow synchro) is automatically
     selected to provide proper exposure to the
    background, while foreground subjects are illu-
    minated by the electronic flash. In this way,
    both foreground subjects and more distant
    background scenery can be exposed correctly.
   o Since slow shutter speeds are selected in
       dark locations, use of a tripod is recommend-
      ed to avoid camera shake.


48                                      www.butkus.us
View original page 24Page 25 · Read text
" tln <Landscape Mode>
Select this mode when photographing daytime
distant scenery, in order to produce sharper
outdoor shots.
o In this mode, the flash-off mode is set auto-
   matically, regardless of lighting conditions,
  and the display panel shows the " @ " mark.
  The flash will not operate, even in dark loca-
   tions.
o  lf the red LED lights below the viewfinder eye-
  piece when the shutter release button is
  depressed halfway, the shutter speed select-
  ed is too slow for safe hand-held photogra-
  phy. In this case, use of a tripod is recom-
  mended to prevent camera shake.
o Focus will be locked on infinity (-), regardless
   of the location of the subject, and the green
  LED will light.
View original page 25
Page 26 · Read text
"
      In this mode, the camera lens zooms automati-
      cally to maintain the same subject size, even  if
     the camera-to-subject distance changes. This
    mode is convenient  for photographing quickly
    moving subjects such as small children, without
     the need for operating the zoom lever. Merely by
     pressing the shutter release button, the subject
    image is kept at the same size.
   o Focus is performed by the Spot AF method;
       the " EEIB " mark appears in the display.
       Regarding the Spot AF mode, see p. 46.

   eWnen the shooting mode dial is set to" Ei\n "
      (lmage Lock Zoom Mode), the zoom lens
         initially moves to the telephoto (90 mm)
       position.
              lf you wish to change the image size, operate
       the zoom lever to compose the image in the
       desired size.


52                                      www.butkus.us
View original page 26Page 27 · Read text
@Point the focusing frame at the subiect,        @Zielen Sie mit dem Spot-AF-MeBfeld  auf
  and depress the shutter release button           das Motiv und tippen Sie den Ausl<iser an.
  halfway.                                 Wenn die Entfernung eingestellt ist, leuchtet
  When focus is set on the subject, the green           die grtine LED, und die BildgroBe  ist gespe-
  LED lights;the subject image size is locked at          ichert. Nehmen Sie jetzt den Finger wieder
  the current setting. Once the LED lights,          vom Ausl6ser.
  remove your finger from the shutter.             o Wird nach dem Speichern der Zoomhebel
  r The image lock will be released  if the zoom             betdtigt, erlischt die Speicherung.
     lever is operated manually after the image
     size is locked.                             @Drticken Sie den Auslciser zum
                                                    Fotografieren ganz herunter.
@Press the shutter release button fully to            Selbst wenn sich die Aufnahmeentfernung
  take the picture.                                            iindert, fdhrt das Zoom automatisch auf die
  Even  if the subject distance changes, the lens         richtige Brennweite fur die gespeicherte
   will zoom to automatically produce the same          BildgrdBe.
  image size selected with image lock.             o Achten Sie immer darauf, daB der gewun-
  o Be sure the part of the subject is in the              schte Teil des Motivs im MeBfeld bleibt.
    focusing frame.
View original page 27Page 28 · Read text
o The image lock zoom mode should be used         I Der BildgrdBenspeicher  eignet sich nur zum
        generally within the following range of dis-            Fotografieren innerhalb der angegeben
       tances.                                               Arbeitsbereiche.
       Note that the correct image size may not be         Motive auBerhalb des angegebenen
      produced  if this distance range is exceeded.          Entfernungsbereich  werden u.U. nicht in der
     With the image balance shown                           gewUnschten GroBe abgebildet.
       in the illustration, image lock is                                Der Arbeitsbereich des BildgroBensperbhers  betrdgt bei der
     performed on the subject's                                   Abbildung einer Person in voller GroBe etwa 3,5 - 11 m.       entire bodyi
     About 3.5-11 meters.
      With the image balance shown                                Der Arbeitsbereich  des BildgroBenspeichers betriigt bei
       in the illustration, image lock is                                   der Abbildung des Oberkorpers einer Person etwa 1,5 -
     pertormed on the subject's                           4m.
     upper torso:
    About 1.5-4 meters.
                                        o Zum Speichern einer anderen BildgroBe
   o To reset image lock, perform the operation          wiederholen Sie das Verfahren ab Schritt O       again beginning with step e.
                                                      Beim Rtickspulen des Films fiihrt das Objektiv
     When rewinding  film, the lens automatically retracts         automatisch in seine 38mm-Weitwinkel-Position
        to its wide-angle (38mm) position; in the current                zurlick; in diesem Programm jedoch kehrt das
      mode, however, after the film is changed, the cam-           Objektiv nach Auswechseln des Films, SchlieBen
       era back is closed and the shutter button is                 der Kameraruckwand und Antippen des Auslosers
      depressed halfway, the lens will return to its previ-           wieder in die vorige Einstellung des
      ous image lock setting to allow you to continue               BildgroBenspeichers  zurUck, so daB Sie sofort weit-
        shooting.                                                       erfotografieren konnen
56                                        www.butkus.us
View original page 28Page 29 · Read text
" l!? " <Macro Mode>
Under normal conditions. the minimum camera-               Minimum shooting distance of about O,4 m
to-subject distance is about 0.6 meters. By                          Kilrzeste Aufnahmeentfernung von ca. 0,4 m                                                                        Distance de prise de vues minimum:
using the macro mode, however, this distance                     0,4 m environ
can be reduced to about 0.4 meters, allowing a                     Distancia de disparo mlnima de aprox. 0,4 m
subject size of about 85 x 125 mm to  fill the
viewfinder area.
o When'the macro mode is selected, the lens'
  zoom setting  is automatically locked at the 90
 mm position, and focusing is performed by the
  Spot AF method (" @   " appears in the dis-
   play panel). The lens cannot be set to a dif-
  ferent zoom setting when this mode is select-
  ed.
o The shooting distance will be in the range
   infinity (-)to about 0.4 m.
o The continuous mode cannot be used when
  shooting in macro mode.
View original page 29Page 31 · Read text
317Lil    rl-l
            Wide-angle                     Telephoto                Wide-angle                     Telephoto
            Weitwinkel                        Tele                         Weitvvinkel                        Tele
            Grand-angle                      T6t6                     Grand-angle                        T6t6
           Gran angular                      Telefoto                Gran angular                       Telefoto
     While looking at the subject through the                Close-Range Picture Area Frame
     viewfinder. move the zoom lever to the " fl]l "         N ah a u fn ah m e - B  i I dfel d ra h m en
     (telephoto) or " EIn " (wide) side to zoom             Champ de l'image en prise de vues rapprochde
     the lens and compose the image as desired.            Recuadro del area de la imagen "primeros planos"
   o The shutter cannot be operated while zoom-
        ing the lens.                                                                           I,    Actually reproduced area
   o When shooting at distances of less than about                                           i     Tatsachlich erfaBter       1 m,  if the lens is set to the telephoto position,                                t-   Motivbereich       the image actually reproduce on film will be as                                   t,   Zone reproduite en realite.
      shown in the illustration. Compose your pic-
        ture carefully to be sure that the subject within
62     the range shown.
View original page 31Related documents and language editions
From the M. Butkus archive. Original publisher and archive notices are retained.
Check the model and edition against your equipment.
PDF verified 2026-10-10.