Film cameras
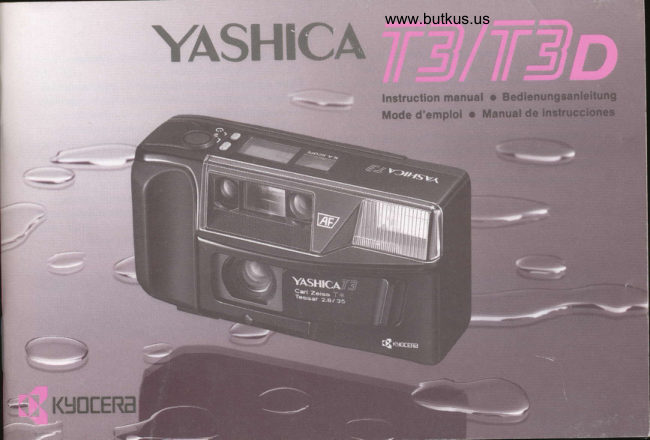
Yashica T3 / T3d User manual
User manual for Yashica T3 / T3d. 43 pages in English. Read the original PDF, download or print a copy without registration.
43 pagesEnglish9.5 MB PDF
Loading your manual…Open PDF directly
Document details
- Brand
- Yashica
- Model / document
- Yashica T3 / T3d
- Document type
- User manual
- Language
- English
- Pages
- 43
- File size
- 9.5 MB
- Category
- Film cameras
- Document date
- Not specified in catalog
Search available document text
Find a term, then jump to its page in the original PDF. Image-only pages may not be searchable; check the PDF for exact wording and diagrams.
Page 2 · Read text
Thank you for your purchase of a Yashica T3/f3D.       Wir danken lhnen, daB Sie sich ftii die Yashica
This compact 35 mm lens-shutter camera is fully        T3/T3D entschieden haben.
automatic and has a water-resistant  construclion.  lt           Diese kompakte 35-mm-Kamera mit ObjektiwerschluB
fealures a high-resolution Carl Zeiss T* lens and a           zeichnet sich durch vollautomatischen  Betrieb und eine
quick-charging auto flash to let you take beautiful        Wasserdichte Konstrukiion  aus. Sie ist mil einem
pictures everytime, angwhere.                         nochauflosenden  Carl Zeiss T--Objektiv und einem
In addition,  it is equipped with an "N.A. Scope" (newly   eingebauten  Blltzgeriit mit kurzer Aufladezeit
developed angle finder) to enable you to take piclures at      ausgestatfet, damit lhnen .jederzeit und tiberall
different angles.                                        nervorragende Aufnahmen gelingen.
Please read this booklet carefully through before using    AuBerdem verf0gt diese Kamera Uber einen neu
it.                                                         entuickehen Winkelsucher ("N.A. Scope"), der es
                                                     hnen ermoglicht, Aulnahmen mit verschiedenen
                                                     Winkeln zu machen.
                                                                              3itte lesen Sie diese Bedienungsanleitung  vor
                                                          nbetriebnahme der Kamera sorgfaltig durch.
  This booklet contains the insfructions for use of bolh       Diese Anleitung enthdlt Bedienungshinweise  fLlr die
  the Yashica T3 and T3D. The instructions for use         zwei Modelle Ymhica T3 und T3D. Die
  are the same {or the tuo models, except that the          Anweisungen sind fur beide Modelle gleich, auBer
 T3D has a dalinq unit.                             daB die T3D eine Datenaulomatik  besitzt.
View original page 2Page 4 · Read text
Venmo @mike-butkus-camera  Ph. 2083
PayPal Name  Lynn@butkus.org      www.PayPal.me/lynnbutkus
View original page 4
Page 5 · Read text
lO Shutter Release
                  €) Self-timer Button
          O  Flash Mode Button
               0  Display Panel
                  lO Viewfinder
        @ t',te* Angle Scope
                              ("N.A. Scope")
                  lD Flash
                  G) Camera Back Release Knob
          O crp
                  (E lmage Detecting Windows
                           [)  Light Sensor
         @ Carl Zeiss Lens
         @ Lens Barrier
         @ Self-timer Lamp


                                                              Digitally signed by Mike Butkus
                                              DN: cn=Mike Butkus, o=Butkus camera manuals,
                                                    ou=butkus.org, email=mike@butkus.org, c=USMike Butkus     Date: 2022.12.11 16:41:29 -05'00'
View original page 5Page 7 · Read text
This camera uses a longJife, high-performance  lithium
      baltery.

     I  Op"n the Battery Compartmenl Cover.
   Open the Battery Compartmenl Cover by inserting a
    coin into the slot in  it.

            the Banery.   f  uaa
       Install the battery with the plus (+) and minus (-) ends
     conectly as illustrated inside the battery compartment,
     lhen close the cover until  it locks with a click.
   o When loading the battery, be sure lo place it on lhe
     white ribbon. Thus, it can be easily taken out by pulling
      this ribbon when you change lhe batfery.

     Be sure lo use a 5 V lithium battery (2CR5). Other
        batteries cannof be used.


10
View original page 7Page 8 · Read text
www.butkus.us


    Use DX-coded  film. The camera will automatically set
      itself for the speed of the film loaded in it, and advance
     the film into position for the first shot. Alwags load and
    unload film in subdued  lighl.

     I Op"n the Camera Back.
   To open it, just push up the Camera Back Release
    Knob toward "A"


            DX Contacls:
               Do not touch the DX contacts with your finger,
                 and keep them always clean.
                 DX-Konlakte:
                     Bertihren Sie die Dx-Kontakte  nichl und halien
                     Sie sie steis sauber.
                 Conlacts DX;
               Ne touchez pas les contacls DX avec les doigts
                        et veillez  ir ce qu'ils soienl toujours propres.
                 Contactos DX:
               No toque los contactos DX con el dedo, y
                   mantdngalos siempre limpios.
12
View original page 8Page 10 · Read text
www.butkus.us


    {  Clo." the Camera Back.
    Close the cover and push  it in until  il locks with a click.
    As soon as you close  it, you will hear the motor running                                       l
    and the film will aulomatically advance into position for
    the first slrof.  lf the film is advancing properly, the
    exposure counler in the Display Panel will show "1 ".
   The film transpori mark "-.o" will also appear in the
     display panel. Now, you are ready lo take your first
      Drcrure.o  lf the film is not advancing properly, the exposure
    counter will not move from "0" and the film hansDort
    mark "<O" will blink. In this case, reload the film
     conectly.
     . The Film Check Window will let you see al a glance
        if there is film in the camera or not.


16
View original page 10Page 11 · Read text
Frame your subject in the center of the viewfinder and              i!;i|!l
    depress the Shulter Release. The camera will let you                    ;it|!;l
     lake beautifu I pictu res au tomatical Iy, because expos u re,                  ;!itt;,ii
     focusing, film advance and rewinding, and flash                                       :it:;,i1i     activalion are all automalic.          G
     Opn" the Lens Barrier.             [-Tl-o     I
   When the Lens Banier is opened, the camera's power
     switch will lurn on and the mark " G " will appear in
     the Display Panel.
   o The shutler will not trip unless the Lens Barrier  is
      fully open.
   o  lf you are not taking pictures, close the Lens Barrier
     to protect the lens.
                                                                                                                                                                                                                               4{.:.i


                                                    www.butkus.us


l8
View original page 11Page 12 · Read text
www.butkus.us


   lLook through the Viewfinder and Frame Your Picture.
   You can choose your framing according to the distance o{ your subject as follows:
 @ Picture Area Frame:  lf your subject is about    @ Parallax Correction Marks:  lf your subject is
      1 .2 m or more away from lhe camera, compose your        approximately betuveen 0.5 and 1.2 m away from the
     picture within this frame.                                   camera, compose your piclure wilhin the parallax


   o The picture area covered by some prints may be smaller than that covered on the negative. Therefore,   if you frame
    an important object near the edge.of the picture frame, take care to leave an enough margin toward the edge.
20
View original page 12Page 13 · Read text
?  4i-  the Focusing Frame ((g) at rhe     rr  Subjerl You Want lo Shoot.
    When you press the Shutter Release about halltwav
    down, the lens will focus itself on the subiect and a
     green lamp will turn on in the viewfinder. Also, an auto.
     focus mark GE will appear in the display panel.
   o  lf the green lamp and EII mark blink, you are too
     close lo your subject. Change the shooting distance.
      .    lf the subject is not bright enough for correct
     exposure without flash, a red lamp in the vieulinder and
    a flash mark "El" in the display panel will turn on when
     the lens is focused on it, to let you know thal the flash
      will aulomatically fire to provide correct exposure.
     /  Depress the Shufler Release to Take    '? Your Piclure.
    You can take correctly exposed pictures anytime,
    anywhere because the flash will aulomaticallv  fire in dim
      light situations.
     After the shutter. has tripped, the film will aulomaticallv
    advance to the next frame as soon as you take vour
     finger off ihe Shutter Release. Now, you are ready to
     take your next piclure.
22
View original page 13Page 14 · Read text
www.butkus.us


< Flash Activation )                         4 fiu5lrice6 des Blitzes >
lf the flash is to fire, the red lamp in the viewfinder as      Wenn der Blitz vollstiindig aufgeladen ist, leuchtet die
well as the flash mark "ll"  will turn on when the             rote Lampe im Sucher auf. und die
Shutter Release is pressed about halfi,vay down. After the      Blitzbereitschaftsmarke "ll"  erscheint auf dem Monitor,
flash has fired, the flash will recharge itself in about 0.6     wenn Sie den Ausloser halb eindrticken. Nach Auslosen
second (not including the film winding time). While the     des Blitzes ladt slch das Blitzgeriit in ca. 0,6 Sekunde
flash is recharging, do not depress the Shutter Release       auf (Filmtransportdauer nicht mitgerechnet). Drucken Sie
because the red lamp and the "U" mark are lighting.         nicht auf den Ausloser. wzihrend die rote Lampe und die
                                                 Marke " l!"  eingeschaltet sind, weil dadurch dero Be careful not to cover the flash reflector with your        Ladevorgang des Blitzgeriites abgebrochen wird.
fingers.
o When taking picture with the camera in vertical           r Achten Sie darauf, den Blitzreflektor nicht mit den
position, always hold  it with the flash side up.                 Fingern zu verdecken.
o You can take flash pictures within the range of 0.5 to   o Bei Aufnahmen mit vertikal gehaltener Kamera  ist
3 meters (lSO 100).                                          darauf zu achten, daB sich das Blitzgeral oben befindet.
                                  o Blitzau{nahmen sind innerhalb eines Bereichs von
                                                       0,5 bis 3 m moglich (lSO 100).
View original page 14Page 18 · Read text
www.butkus.us
     Pour profiter au maximum du N.A.               Para sacar el m6ximo provecho del N.A.
     Scope, pratiquez simplement Ia tenue de         Scope, haga prdcticas sosteniendo la
       I'appareil dans diverses postures de             cdmara en diferentes posluras de manera
     manidre  ir pouvoir d6clencher aux angles       que pueda disparar en los iingulos
      d€sir6s.                                        deseados.


  High-angle Viewing
  Anvisieren mit hohem Winkel
  Vue d'un angle haut
  Visi6n de iingulo alto

The N.A. Scope is also convenient for taking pictures
behind the crowd.    *
Der N.A. Scope lst auch sehr praktisch, um Auf-
nahmen hinter einer Menschenmenge*          zu machen.
Le N.A. Scope est 6galement pratique pour prendre
des    ohotos            derridre                une
                                  foule.*
El N.A.      Scope             tambi6n                      es                         conveniente para tomar     Taken without the N.A. Scope        Taken with the N.A. Scope
                                               Aufnahme ohne N.A. Scope        Aufnahme mit N.A. Scope
fotografias desde la parte de atr6s de una multitud.       Pris sans le N.A. Scope                 Pris avec le N.A. Scope
                                                                 Fotografia tomada sin el N.A. Scope   Fotograft'a tomada con el N.A Scope

                                                                                                                31
View original page 18Page 20 · Read text
www.butkus.us


    When the swcified number of exposures is completed,
     the camera will automafically rewind the film into its
     casselle and slop.
   <Take out the Film)
     After the entire roll of film is exposed, the film will start
     rewinding  itself and the mark "4"    will appear in the
     display panel.
    Make sure lhe Exposure Counter shows "0" and fhe
    mark " O " blinks, then open the Camera Back and
     lake out the film.
   e Send fhe exposed film for processing as soon as
     Dossible.
    ( Rewinding the film in mid-roll >
    Push the Film Rewind Butlon with a coin or something
     similar. The film will be automalicallv wound back info
       its cassette. fhen stoo.


34
View original page 20Page 21 · Read text
www.butkus.us


    The Yashica f3/T3D  is a water-resistant  camera. You      Le Yashica T3IT3D est un appareil 6tanche. Vous
    can take pictures with  it in the rain or on an ocean          pouvez prendre des photos avec lui sous la pluie ou sur
    beach without fear of getting the camera wet.             une plage sans vous soucier du fait que I'appareil soit
                                                                mouilld ou pas.                *     Bei der Yashica T3/T3D handelt es sich um eine                    *
    Wasserdichte Kamera. Daher konnen Sie mit dieser         Las Yashica T3/T3D son cdmaras impermeables. Se
    Kamera Aufnahmen im Regen oder am Strand machen,     pueden tomar fotografias con ellas en condiciones de
    ohne jegliche Sorge, daB die Kamera naB wird.                  lluvia o en la playa sin temor de que el agua las afecte.


    Ocean Beach                              Ski Resort                                    ln the Rain
     Strand                                        Ski-Ausflugsort                         lm Regen
    Sur la plage                                  Station de ski                          Sous la pluie
    En la playa                          En una estaci1n de esqui               En condiciones lluviosas
36
View original page 21Page 22 · Read text
However. this camera is not an underwater camera.   lt         Toulefois, cet appareil n'est pas un appareil sous-marln.
cannot be used for takinq underwater Dictures or washed           Il ne peut dke utilis6 pour prendre des photos sous I'eau
 under pressurized water.                                      et ne doit pas 0tre lav6 avec de I'eau pressurisee.
                     *                                *
 Diese Kamera ist jedoch keine Unterwasserkamera. Sie     De todas formas. esta no es una citmara submarina. No
 darf daher nicht fur Unterwasseraufnahmen verwendet        se puede utilizar para tomar fotografias bajo la superficie
oder unter Druckwasser qewaschen werden.                  delqagua ni se puede lavar con agud a presion.
                               t'^io
                                             oq-!:
                                                                    o
                                                              o

Underwater Shooting  (no!)                           Washing under Pressurized Tap Water (no!)
U n terwassera u fna h m e n  ( n ei n ! )                      Waschen unter Druckleitungswasser (nein!)
Prise de vues sous l'eau (Non!)                       Lavage avec de I'eau du robinet pressurisde (Non )
Disparos bajo la superficie del agua (ino!)             Latado con agua a presion (;no.!)
                                                                                                                                                             J/
View original page 22Page 23 · Read text
www.butkus.us


    Caution                                               Vorsichtshinweise
    r The camera interior  is not water-resistant. When       o Das Innere der Kamera ist nicht Wasserdicht. Achten    I
     loading or unloading  film, or changing the battery,            Sie daher beim Einlegen und Entfernen von Film
    guard against water or dust getting in the camera               darauf, daB kein Wasser und Staub in das lnnere oer                                                'l
      interior.                                             Kamera gelangt.
   o Wipe off droplets on the camera body and lens       o Wischen Sie Wassertropfen an Kameragehause und
    immediately with a dry piece of soft cloth and clean the        Oblektiv sofort mit einem trockenen Tuch ab und
    camera thoroughly. The camera will not give you              reinigen Sle die Kamera danach grundlich. Pertekt
     perfect pictures unless you give  it proper care.                   belichtete Aufnahmen werden nur bei sorgfaltiger Pflege
   o  lf there is sand or water around the rubber packing        der Kamera erzielt.
   when you opened the Camera Back or Battery         o Wenn sich beim Offnen der Kameraruckwand oder
    Compartment Cover, clean the packing carefully so that      des Batteriefachdeckels Sand oder Wasser an oder nahe
    packing  is not damaged or stripped off.                       der Cummidichtung befindet, reinigen Sie dle Dichtung
         lf the rubber packing  is damaged or stripped off, contact        sorgfaltig, damit sie nicht beschadigt wird und sich nicht
    your local Yashica Service Station.                                        lost.
  o  lf the camera is soiled with sand or seawater. wash off    Wenn die Cummidichtung beschiidigt  ist oder sich
      lightly with a piece of soft cloth moistened with enough        gelost hat, wenden Sie sich bitte an lhre Yashica-
    water. After that, wipe off droplets with dry cloth and           Kundendienststelle.
    clean  it thoroughly.                          o Wenn die Kamera mit Sand oder Salzwasser
                                                                verschmutzt  ist, waschen Sie diese Verschmutzungen
                                                                  mit einem mit ausreichend Wasser angefeuchteten
                                                            weichen Tuch ab. Danach wischen Sie dle
                                                                 verbleibenden Wassertropfen mit einem trockenen Tuch
                                                         ab und reinigen die Kamera grUndlich.
38
View original page 23Page 24 · Read text
lf the subject you want to shoot is not in the center of
    the viewfinder, or il the subject is dilficult to focus, as
    mentioned below, use the focus lock to get sharp
     pictures.
   I  f;Lrl" focusins frame and Lock the
    Aim the focusing frame at the subject you want
     to {ocus on and lock the focus by depressing
     the Shutter Release halfiruay.

    ]  Recompose Your Picture with  & the Shutter Release Depressed Halfway,
   and Press il All the Way Down 1o Take Your
    Picture.
    As long as lhe Shutter Release is depressed halfiruay, the
    focused point is locked. lt will not shift even  if you move
     the camera. The focus lock is released if vou take vour
     finger off the Shutter Release.

q
View original page 24Page 25 · Read text
www.butkus.us


< Subjects Dif{icult to Focus >                < Motive, die sich schwer fokussieren
In the following cases, use the focus lock because the        lassen >
camera's auto-focusing system does not operate             Verwenden Sie den Fokussierspeicher in den folgenden
properly for these ob.iects.                                          Fallen, da das Autofokus-Syslem der Kamera bei diesen
O When there is a strong light source such as sunlight       Motiven nicht einwandfrei arbeirer.
on or around the focusing frame (Fig. A).       @ Wenn sich eine starke Lichtquelle, beispielsweise
@ When the subject is fireworks, flame, smoke or a          Sonnenlicht,  auf oder in der Nahe des
similar object which has no concrete form.                    Fokussierrahmens befindet (Abb. A).
@ Shiny or glossy objects such as a car body or water  @ Feuerwerk, Flammen, Rauch oder zihnliche Motive
surface.                                            ohne konkrete Form.
(O Objects wifh small reflections such as human hair   @ Clanzende oder stark refleklierende Oberflachen,
(Fig. B).                                                             beisoielsweise  die Karosserie eines Aulos oder
@ Objects behind a glass window.                             Wasserflachen.
@ Extremely small objects.           @ Schlecht reflektierende Objekte wie z.B. Haar (Abb.
                                                                            B).
                    @ Wenn sich das Motiv hinter einer Clasfltiche
                                                                            befindet.
                   @ Bei sehr kleinen Moliven.
View original page 25Page 26 · Read text
lf the subject is backlighted or stands against a bright
     background, use the daylight flash technique to take
     perfectly exposed pictures.
       S.t tf'" Daylight Flash Mode.     I
     Press the Flash Mode Button to show the mark "[l t"
      in the Display Panel.
   J  Depress the Shutter Release to Take  & Your Picture.
    The flash will fire, and both the subject and its back-
    ground will turn out beautifully exposed.
    r The daylight flash mode is canceled each time a
     picture is taken.  lt is also canceled when the lens barrier
       is closed.

   The daylight flash is also useful:
  Q When the subject's face is dark in the shade of a
      tree, or illuminaled by sunshine filtering through follage.                                          Taken wilhoul  flash.
  @ When the subject is dimly lighted early in the                                          Oh ne Blitz aufgenommen.
    morning, in the evening, under an overcasl sky or on a                                          Photo prise sans flash.
                                                                                          Tomada sin flash.     rainy day.

44
View original page 26Page 27 · Read text
www.butkus.us


        lf you want to take twilight scenes or mood pictures
    indoors, set the camera for long exposure and shoot
     without  flash.

     I  S"t the Long Exposure Mode.
     Press the Flash Mode Button twice until the mark
                                       Panel.     " F J" appears in the Display
   z) Depress the Shutter Release to Take
  4 Your Picture.
   The flash will not fire even  if the subject is dim. The
    camera will automatically prolong the exposure time up
    to 1 second to accomodate for the brightness of the
     subject. Taken with existing light, the picture will appear
     in a natural mood as you see with your eyes.
   o To take long-exposure pictures,  it is recommended  to
    mount the camera on a tripod to avoid camera shake
    because shutter speeds are extremely slow.
   o The long exposure mode is canceled each time a
     picture is taken.  lt is also canceled when the lens barrier
      is closed.


46
View original page 27Page 28 · Read text
If you want to include yourself in a souvenir  pictlJre,
    use the self-timer.

       Set the Sel{-timer Mode.  1I
    Press the Self-timer Button. The self-timer mark " g; "
     will appear in the Display Panel.
   o Mounl the camera on a tripod or place  it on. a stable
     base.
   J Aim the Focusing Frame at the Subject  &  and Depress the Shutter Release.
   The Self-timer Lamp will blink and the shutter will hip
     after 1 0 seconds.


48
View original page 28Related documents and language editions
From the M. Butkus archive. Original publisher and archive notices are retained.
Check the model and edition against your equipment.
PDF verified 2026-10-10.