Camera accessories
Yashica Winder for FR cameras User manual
User manual for Yashica Winder for FR cameras. 13 pages in English. Read the original PDF, download or print a copy without registration.
13 pagesEnglish1.8 MB PDF
Loading your manual…Open PDF directly
Document details
- Brand
- Yashica
- Model / document
- Yashica Winder for FR cameras
- Document type
- User manual
- Language
- English
- Pages
- 13
- File size
- 1.8 MB
- Category
- Camera accessories
- Document date
- Not specified in catalog
Search available document text
Find a term, then jump to its page in the original PDF. Image-only pages may not be searchable; check the PDF for exact wording and diagrams.
Page 2 · Read text
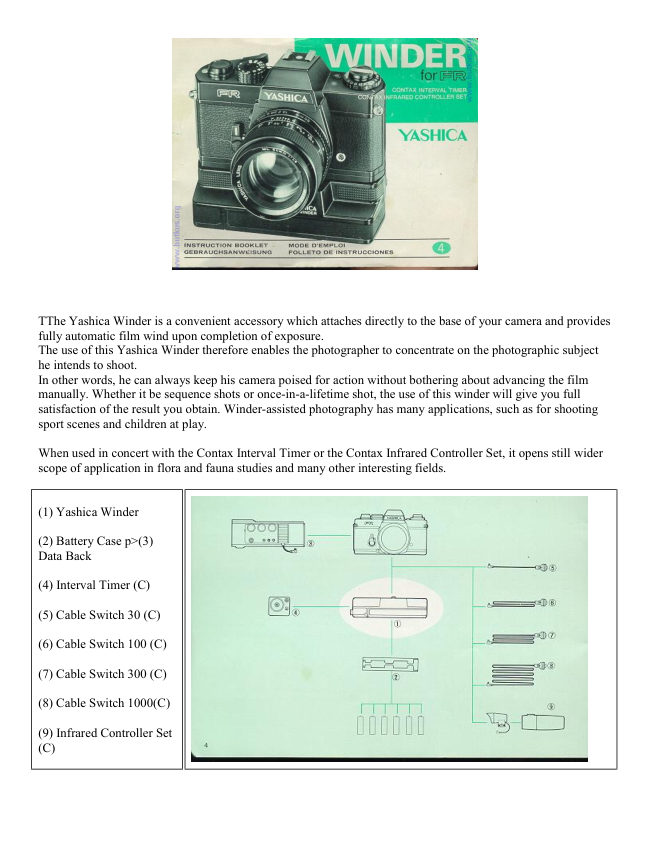
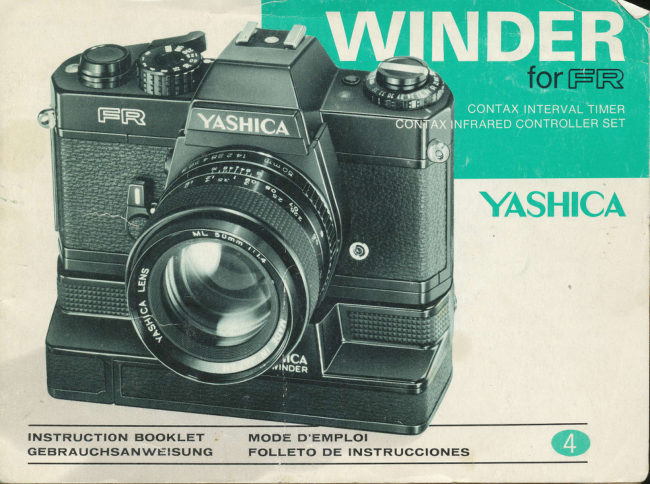
TThe Yashica Winder is a convenient accessory which attaches directly to the base of your camera and provides
fully automatic film wind upon completion of exposure.
The use of this Yashica Winder therefore enables the photographer to concentrate on the photographic subject
he intends to shoot.
In other words, he can always keep his camera poised for action without bothering about advancing the film
manually. Whether it be sequence shots or once-in-a-lifetime shot, the use of this winder will give you full
satisfaction of the result you obtain. Winder-assisted photography has many applications, such as for shooting
sport scenes and children at play.

When used in concert with the Contax Interval Timer or the Contax Infrared Controller Set, it opens still wider
scope of application in flora and fauna studies and many other interesting fields.


(1) Yashica Winder

(2) Battery Case p>(3)
Data Back

(4) Interval Timer (C)

(5) Cable Switch 30 (C)

(6) Cable Switch 100 (C)

(7) Cable Switch 300 (C)

(8) Cable Switch 1000(C)

(9) Infrared Controller Set
(C)
View original page 2
Page 3 · Read text
www.butkus.us


** Indicates Contax brand accessories

· Film drive speed: Continuous automatic film drive at maximum speed of 2 frames per second (shutter speed
setting from 1/1000 to 1/60 sec.). At slow shutter speed settings, the film drive system is activated only upon
completion of exposure. (Single frame film drive feasible by controlling fingertip pressure on magnetic release
button.)
· Power source: 6 AA size batteries (preferably alkaline cells). Battery case provided for easy
battery installation.

·Functional check: If motor activates and test lamp comes on when test button is depressed, it means the winder
is functioning properly. The same procedure is employed for battery power checking.

·Battery life: Up to 20 cassettes of 36 exposure load film per replacement of manganese batteries; up to 50
cassettes of 36 exposure load film per replacement of alkaline cells.

·Other features: Film end display (test lamp doubling as film end display comes on when full length of film has
been exposed); camera's exposure counter used for registering count of exposures; film rewind release lever for
manual film rewind without removing winder from camera body; release socket; interval timer socket; tripod
socket.

·Size and weight: 142.5 x 50 x 38.5 mm; 290 grams w/o batteries.


DESCRIPTION OF PARTS


                                                                                                                                                                                                                                                                    Digitally signed by Mike Butkus
                                                                                                                                                                                                   DN: cn=Mike Butkus, o=Butkus camera manuals, ou=butkus.org,
                                                                                                                                                                                                          c=US                              Mike Butkus                 email=mike@butkus.org,Date: 2023.05.18 14:33:54                                                                                                                                                                                                                                                                                           -04'00'
View original page 3Page 4 · Read text
HOW TO MOUNT THE WINDER


                            TThe Yashica Winder can be attached to the
                                camera base directly. When mounting it, make
                                     sure the ON/OFF Switch is set at "OFF".

                               1 Open the battery compartment by pressing the
                                      battery compartment lock release. br>
                               2 Match the camera setscrew with the camera's
                                      tripod socket and turn the head of the setscrew on
                                      the battery compartment side in a clockwise
                                motion until the winder is fixed securely. Make
                                     sure the handle on the setscrew head is folded in
                                    before closing the battery compartment.

                                ·The camera base must seat flush with the surface
                                     of the winder. If there is a gap between the base
                                and the winder surface, mount the winder all over
                                   again to ensure proper coupling of the
                                 winder/camera system.
View original page 4Page 5 · Read text
www.butkus.us

BATTERY INSTALLATION


                              Always use six AA size batteries, preferably
                                       alkaline cell Is.

                                   Place the six AA size batteries in the battery case
                              by matching their polarity with the diagram on the
                                       case. The film winder will not function if the
                                         batteries are installed with their polarity reversed.

                                           Install the battery case in the battery compartment
                                  with the polarity diagram facing out. Then, close
                                      the battery compartment securely.

                                ·The battery compartment will not close properly
                                     unless the handle on the camera setscrew head is
                                    folded in.


FUNCTION CHECK


                                            After installing the battery and giving the
                                            film advance lever a full wind, set the
                               ON/OFF switch at "ON" and check
                                        whether the film winder will function
                                            properly or not.

                                 To check, press the test lamp cover. If Or
                                         produces a whirring sound and then the
                                                     test lamp comes on, it is an indication that
                                              the film winder is functioning properly.

                                             In case the motor fails to produce a
                                           whirring sound, battery power drain is
                                              indicated and therefore the set of batteries
                                      must be replaced.
View original page 5Page 6 · Read text
·If functional check is carried out prior to
film advance, one frame will be wound up.

·Functional check can also be conducted
without attaching the winder to the
camera. In this case, install the battery, set
the ON/OFF switch at "ON" and press the
test lamp cover. If the film drive stud
rotates and then the test lamp comes on,
proper function of the winder is indicated.

·The foregoing procedure is also
employed for battery power checking.


                              Film Loading
                             Load the film in the normal manner by referring to
                                    the instructions accompanying the camera.

                               ·The camera's exposure counter will register count
                                    of the number of exposures. Therefore, make it a
                                      rule to check the exposure counter before starting to
                                  shoot your series of photos.

                              Film Rewinding
                         When the film winder comes to a stop and the film
                               end display comes on, it is an indication that full
                                    length of the film has been exposed.
                           To rewind the film, first reset the ON/OFF switch
                                      to ''OFF" and then push the film rewind release
                                     lever up in the direction of the arrow. Next, fold out
                                    the film rewind crank-handle and rewind the film
                                  according to instructions accompanying the camera.
                           As is the case with the film rewind release button
                              on the camera base, it is unnecessary to hold the
                                     lever up all the while during film rewinding.
View original page 6Page 7 · Read text
www.butkus.us


                               BBefore loading the film into the camera, take a
                                 couple of blank shots to determine whether the
                                Yashica Winder is functioning properly or not.

                                      (1) Set the ON/OFF switch at "ON". br>
                                      (2) After setting the exposure, composing the
                                     picture and securing precise focus, press the
                                magnetic release button. Each time the film is
                               advanced the test lamp will come on.

                                For single frame film advance, release your
                                       fingertip pressure immediately after exposure is
                               made.

                               ·The film advance lever can be manipulated for
                              manual film wind even when the film winder is
                                    attached to the camera so long as the ON/OFF
                                  switch is set at "OFF".

                             Even when the ON/OFF switch of the film winder
                                            is reset to "OFF", the camera's film advance system
                                      will be in wound state; therefore, if the camera is to
                                             left unused over any great length of time, trip the
                                      shutter and keep the camera uncharged.


USE OF TRIPOD/CABLE SWITCH


·A tripod socket is provided on the base of
the film winder. When using a telephoto
lens or shooting at a slow shutter speed,
make it a rule to mount the camera on a
tripod.

·To prevent erratic movement of the
camera at the critical moment of exposure
or to make exposures by positioning
yourself at some distance away from the
camera, plug the cable switch into the
release socket on the camera body.
Exposure will be made and the film
advance will operate continuously and
automatically as long as you keep the
pushbutton end of the cable switch
depressed.
View original page 7Page 8 · Read text
By using the Contax Interval Timer in
concert with the Yashica Winder, a series
of exposures can be made automatically at
an interval ranging from 1 sec. to 120 sec.
This combination is particularly effective
in flora and fauna studies, surveillance
photography and other specialized
purposes.

DESCRIPTION OF PARTS/p>

1. Interval Scale
2. Release Socket
3. Interval Selector
4. ON/OFF Switch
5. Mounting Pin

··Interval settings 1, 2, 4, 8, 15, 30, 60 and
120 sec. in 8 click stop settings

·Power source Uses the power supply of
the Yashica Winder

·Method of mounting Plugs into the
interval timer and release sockets of the
Yashica Winder

·Other features ON/OFF switch br>
·Size & weight 38 x 43 x 18 mm; 45
grams


OPERATING STEPS


                               The Contax Interval Timer is used by plugging
                                         into the sockets of the Yashica Winder. Before
                                     shooting the series of photos with the aid of the
                                 Contax Interval Timer, take a couple of blank
                                       shots to determine whether the interval timer and
                                      film winder systems function properly. If the test
                                lamp of the film winder comes on each time
                                            after the film is advanced, it means that the
                                   systems are functioning properly.
View original page 8Page 9 · Read text
www.butkus.us


                                           1. Before mounting, make sure the ON/OFF
                                     switch of the winder and that of the interval
                                      timer is set at "OFF". br>
                                           2. Plug the Contax Interval Timer into the
                                          interval timer and release sockets of the film
                                   winder by properly matching the mounting pins.
                            Make sure the interval timer is pushed all the
                             way in.

                                           3. The socket provided directly over the
                           ON/OFF switch of the Contax Interval Timer
                                         will be switched off as soon as the ON/OFF
                                     switch is set at "ON". When using this socket,
                                          therefore, make sure the ON/OFF switch is reset
                                         to "OFF".


4. Set the ON/OFF switch of the film
winder at "ON". Turn the interval selector
of the Contax Interval Timer and align the
required interval setting with the "SEC"
index. Always see to it that the selector is
set properly at the click stop setting. The
timer will not function properly when
adjusted to an in-between setting. br>

5. Check the exposure, compose your
picture, secure precise focus and then set
the ON/OFF switch of the Contax Interval
Timer at "ON".

When thus adjusted, the Contax Interval
Timer will function at the preset interval
to trip the shutter auto" matically. Film
wind will of course be accomplished
automatically through activation of the
Yashica Winder. To suspend the series of
time-lapse photography, reset the ON/OFF
switch of either the Contax Interval Timer
or the Yashica Winder to "OFF".
View original page 9Page 10 · Read text
·By resetting the ON/OFF switch of the
Contax Interval Timer to "OFF", you can
immediately resume normal film-winder-
assisted photography.


HOW TO USE THE CONTAX INFRARED CONTROLLER SET


                               The Contax Infrared Controller Set is a remote
                                          controller unit which trips the shutter through
                                    emission of infrared ray pulse. When used in
                                       concert with the Yashica Winder, it provides a
                                 wide scope of use.


                                    Description of Parts

                                 A. Transmitter

                                          (1) Pulse emitter

                                          (2) Pushbutton Switch

                                          (3) Battery Compartment Cover

                                    B. Receiver

                                          (4) Connector Cord


Note To install the battery, open the battery compartment cover and place the battery in the battery
compartment by properly matching its polarity with the battery contacts.

·Effective range Up to 15 meters

·Power Source Receiver unit operates on power from the camera battery; transmitter unit uses one 9 V 006P
battery (Eveready 222, Ucar 222, Mallory 1604 or equivalent)
See this link on a Wein Air replacement battery.
View original page 10Page 11 · Read text
www.butkus.us

·Method of mounting Receiver unit clips on the camera's accessory shoe and its connector cord must be
plugged into the release socket

·Directionality of transmitter unit 43° at 5 m; 20° at 8 m; 6° at 15 m

·Directionality of receiver unit 30° throughout the effective range

·Size & weight Receiver unit 45 x 30 x 56 mm, 40 grams

Transmitter unit 95 x 35 x 26 mm
85 grams w/o battery


                                 (when used in concert with the Yashica
                                 Winder)

                                      Before loading the film into your camera, take
                                       a couple of blank shots to determine whether
                                          the Contax Infrared Controller will function
                                        properly or not.


                                              1. Make sure the ON/OFF switch of the film
                                     winder unit is set at "OFF".

                                              2. Slide the receiver unit all the way into the
                                        camera's accessory shoe. The receiver unit can
                                    be rotated through 360 degrees even when
                                  mounted on the accessory shoe.


                                              3. Plug the connector cord of the receiver unit
                                        properly into the release socket of your
                                      camera.
View original page 11Page 12 · Read text
4. After checking the exposure, composing
your picture and securing precise focus,
set the ON/OFF switch of your Yashica
Winder at "ON".

5. Position yourself some distance away
from your camera and, while pointing the
pulse emitter of the transmitter unit toward
the sensor of the receiver unit, press the
pushbutton switch. This will automatically
trip the shutter and the winder unit will
automatically advance the exposed frame.

·When the Contax Infrared Controller is in
use, the winder will advance the film
single frame at a time.

·Make sure the pulse emitter is directed at
the sensor of the receiver unit and not at
the camera itself. (See illustrations.)

·To prevent battery power drain, avoid
keeping the pushbutton depressed over
any length of time.


The receiver unit can be rotated through 360 degrees while mounted on the camera's accessory shoe. Position it
properly according to your requirement. For best results, make sure the pulse emitter of the transmitter unit is
precisely aligned with the sensing axis of the receiver.
View original page 12
Page 13 · Read text
www.butkus.us


·When shooting with the aid of the Contax Interval Timer or Infrared Controller set, make it a rule to set your
camera on a tripod.

·The Contax Infrared Controller may sometimes activate when it receives infrared ray from sources other than
the transmitter unit. Avoid triggering an electronic flash unit or using a gas lighter close to the receiver unit.

·Like all battery-operated units, remove the battery (or batteries) when the Yashica Winder, or Contax Infrared
Controller Set is to be left unused for any great length of time. Replace batteries when required.

·When installing battery (or batteries), make it a habit to wipe the contacts with a clean, dry cloth. Oily smears
on the contacts may cause poor electrical contact.

·To prevent hazards, avoid throwing used batteries in open fire or dismantling them.
View original page 13
Related documents and language editions
From the M. Butkus archive. Original publisher and archive notices are retained.
Check the model and edition against your equipment.
PDF verified 2026-10-10.