Film cameras
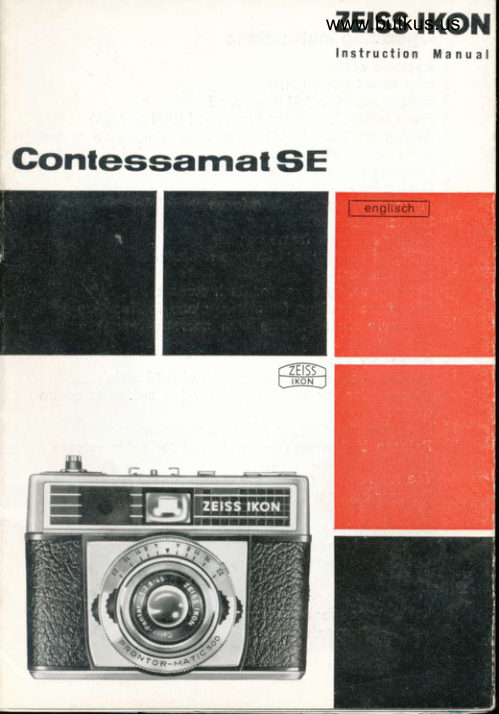
Zeiss Ikon Contessamat SE User manual
User manual for Zeiss Ikon Contessamat SE. 17 pages in German. Read the original PDF, download or print a copy without registration.
17 pagesGerman2.9 MB PDF
Loading your manual…Open PDF directly
Document details
- Brand
- Zeiss Ikon
- Model / document
- Zeiss Ikon Contessamat SE
- Document type
- User manual
- Language
- German
- Pages
- 17
- File size
- 2.9 MB
- Category
- Film cameras
- Document date
- Not specified in catalog
Search available document text
Find a term, then jump to its page in the original PDF. Image-only pages may not be searchable; check the PDF for exact wording and diagrams.
Page 2 · Read text
In your
owninterest...
 ,  we recommend that y,ou read these instructions
carefully. Unfold the inner leaves of the cover so that
you can keep a constant check on the positions of the
various controls Before you load the first filnr, be
thoroughly familiar with your CONIESSAMAT SE You can


readily obtain advice and information free of charge on
all photographic problems from your photo-dealer, or from
the Photo Customer's Service Department (Fotoberatung)
of ZEISS IKON AG, Stuttgart, Postfach 540, West Germany
View original page 2
Page 5 · Read text
Operatin g instructions
   I Aperture scale
 2 Fitm speed scale (DlN)
 3 Setting mark for DIN film speed
 4 Press button for setting film speed (DlN or ASA)
 5 Setting mark for AUTO (:  automatic exposure control),
    aperture and shutter speed
  6 Distance (focusing) scale
    Shutter speed scale
    Finger-grips for adjusting focus     7II Shutter-speed setting ring
 10 Setting mark for frame counter
 1l  lndicator window for film type reminder disc
 12 Flash contact
 13  Rotating safety coyer for flash contact
 11 Film-plane marking (reference plane for focusing scale)
 15 Exposure meter needle with aperture figures and red
    warning fields
t6 Accessory shoe
17  Distance-setting mark and depth of field scale
18 Finger grips for selecting AUTO (:  automatic control)
    or aperture
19 Knob for adjusting the film-type reminder disc
20 Release button with screw thread for cable retease
   The reference numbers 21-33 refer to the illustrations on
    the rear cover flap.
21  Setting mark for ASA film speed
22  Film speed scale (ASA)
23 Catch for opening camera back
24 Rewind fork (must engage with bar in film-cartridge
    core)
25 Locking knob for releasing the rewind crank
26  Viewfinder eyepiece
View original page 5Page 7 · Read text
27  Rapid-wind lever
 28  Film transport roller with sprocket wheels for engaging
     in perforations of film
 29  Flange of take-up spool
 30 Take-up spool with slot and lug for securing beginning
    of film
 31  Axle of rewind crank (must rotate when film is advanced)
 32  Retractable rewind crank
 33  Tripod bushing


Loading and unloading
Standard 35 mm cartridges    black-and-white or colour -
giving 20 or 36 exposures can be used in the CONTESSA-
MAT SE.
Loading the film
(See also illustration on rear cover flap)
Never load the camera in direct sunlight but only in the
shade.
Open camera back by pressing catch 23 downwards.
Fit the rewind fork 24 into the base of the film cartridge so
that the bar across the recess in the cartridge core engages
in the slot in the fork. Then move locking knob 25 In the
direction of the arrow until rewind crank 32 springs out
(thus disengaging clutch of film transport roller 28).
Guide the beginning of the film leader tongue into slot 30
of the take-up spool and hook the 3rd. perforation hole over
the lug in this slot. Wind on the film by turning the spool
flange 29 until the sprocket wheels of the film transport
roller 28 engage the perforations on both sides of the film.
View original page 7Page 8 · Read text
www.butkus.us
After closing the camera back rotate the rewind crank in
the direction of the arrow until a resistance is felt: the film
is then wound tightly within the cartridge.
Then push the rewind crank back into its recess until you
hear it click home.
Setting the film speed - extremely important! (Fig. 1)
Use the AS,A or DIN film-speed rating printed on the  fil;rr
carton.
Depress button 4 and rotate the setting ring 9 so as to move
the setting marks 21 and 3 until they line up with the appro-
priate figures on the respective film-speed scales 22 (ASA)
or 2 (DlN).

Film-type reminder disc
Set this by means of knob 19. lts sole purpose is to assist


                                                                    Fig.  I
View original page 8Page 9 · Read text
your memory; the following symbols will appear in the in-
  fzEsgrEbEtempty            5 Colour reversal film!rdicator IwindowCamera 11:
      2 Black-and-white  film             Daylight type
      3 Colour negative film        6 Colour reversal film
      4 Colour reversal film              Artificial light
           Clear-flash type
Checking the film advance and setting the frame counter
Swing rapid-wind lever 27 right up to its stop and release
the shutter by pressing button 20.
The axle 31 of the rewind crank (marked with a red dot)
should then rotate in the opposite direction to that shown
by the arrow. This allows you to check that the film is being
wound on correctly; the red dot can also be observed
through the hole in the base of the eveready case. After
swinging the rapid-wind lever for a third time, the white mark
10 on the milled ring of the frame counter disc should be
set to the number of exposures provided by the film you
are using (e.g. to 36).
Ther frame counter always shows the number of frames  still
to be exposed. After the last exposure (when the frame
counter indicates "1"), it will not be possible to operate the
 rapid-wind lever 27; the film should then be rewound.
Unloading the film
 After the last exposure, release the rewind crank 32 by
 means of locking knob 25 and then turn the crank in the
 direction shown by the arrow until a gentle resistance is
 felt, indicating that the film has come off the take-up spool'
Now open the camera back and take out the film cartridge'
Always keep the take-up spool and film track perfectly clean.
View original page 9Page 10 · Read text
www.butkus.us


Fig.2             sharp    unsharp
Taking pictures
Setting the distance (focusing)                                 I
Hold the camera up to your eye and turn the finger grips I
until the two semi-circular images visible in the centre  of
the viewfinder field line up accurately, so that the image
can be clearly seen. The lens is thus focused automatically
to the subject distance. This distance can then be read off
from scale 6, against the setting mark 17.
Aperture and depth of field
Every photographic lens will form a sharp image of objects
only at a limited range in front and behind the distance
setting of the lens. This range called "depth of field" is in-
creased with smaller lens stops; its ranges (at various lens
stops) are shown on the depth-of-field scale 17.
Example (see Fig. 3):
       Distance setting 20 ft
       Depth of field at  f 18
      from9ftto-
 5   6


                                                                        Fig. 3
View original page 10Page 11 · Read text
Always remember:
    Large aperture (t/2.8) means Limited depth of field
     Small aperture (t/22) means Maximum depth of field
 For exacting photographic work, accurate depth-of-fierd
 values will be found in the table on the rear cover flap.
 Selecting the shufter speed
 To set the shutter speed turn ring 9 by means of the two
 finger-grips and set the desired shutter speed against the
 setting mark 5.
 The correct shutter speed depends on the movement of the
 subject. The faster the subject is moving, the shorter should
 be the exposure time. The figures on scale 7 represent
 fractions of seconds (60 means r/eo second, etc.).
When set to "B" the shutter will remain open for as long
 as the release button 18 is depressed. The B setting cannot
be used when the automatic exposure control is engaged.
Using the automatic exposure control
The word AUTO :  "Automatic" must be locked against the
setting mark 5. select the shutter speed (intermediate speeds
should not be set; "B" cannot be selected when the auto-
matic control is engaged). Hold the camera up to your eye
and point it toward the subject.  lf the exposure-meter pointer
(above the viewfinder field) remains within the green field,
then the light is sufficient for taking a picture and you can
then press the shutter release. (see also section "Exposure
Meter".)
The automatically-selected lens aperture (f/number) can be
read off both in the viewfinder (Fig. a) and in the meter win-
dow 15 on the camera body.
lf the light is too bright or too dim the exposure meter
pointer will remain within one of the red warning fields,
which indicate that the photograph will be incorrectly ex-
posed. Readjust the shutter speed, until the pointer swings
into the green field. lf the light is unsuitable for an auto-
View original page 11Page 12 · Read text
www.butkus.us
                 Bed warning fields
                 Exposure-meter pointer
                                                                          I


Fig. 4                Aperture scale
matic exposure under any circumstances, the meter needle
will remain within the red field even when the shutter speed
is adjusted. Remedy: use flash (see page 12).
By rotating the shutter speed ring 9, any desired aperture
can also be pre-selected for use with the automatic exposure
control. This however can only be done when the shutter
speed is set to one of the click-stop settings.
Releasing the shutter
Hold the CONTESSAMAT SE as shown on the front page
of this instruction booklet. To take a picture, depress the
release button 20 gently and smoothly - never jerk it. Every-
thing which you can see within the bright line frame of the
viewfinder will be recorded on the film. When taking pictures
at 3-4 ft distance, keep the top of your subject below the
two notches in the viewfinder frame. At slower shutter speeds
than r/ro sec, the camera should be placed on a tripod. The
shutter can be left tensioned for long periods of time with-
out any harm.
Disengaging the automatic exposure control (Fig. 5)
Turn the aperture scale 1 marked "Manual" round to the
setting mark 5 by means of the two control grips 18. By
switching over to manual control, it is now possible to se-
lect any aperture and shutter-speed setting desired, either
independently of the exposure meter or as indicated by  it.
You can, for example, correct the exposure (preferably by

10
View original page 12Page 13 · Read text
altering the aperture setting) in either direction and by any
 amount.
 When the camera is switched to "Manual", the exposure-
 meter coupling is disengaged (the needle therefore remains
 within the red field). This is a safety precaution designed to
 make errors impossible. Whenever the needle is visible
 within the green field, then you can be certain that the auto-
 matic control is in operation.


                                                  www.butkus.us


                                                                         Fig. 5
The exposure meter
is calibrated for normal conditions and will indicate the
correct exposure accordingly.
 It will therefore be necessary to apply a correction to the
meter reading when photographing open landscapes with
dark foregrounds and large areas of sky, or low-contrast
subjects (under overcast sky) on colour reversal film and
particularly with all types of back-lighted scenes.
This correction can be made by any of the following methods:
1. The meter reading is measured only from the darker por-
   tions of the subject, either by holding the camera close
   to .these areas or by pointing the camera towards the
  darker foreground. By giving a gentle pressure on the
  release button, the meter reading can be "held" until the
  camera is re-positioned so as to cover the desired picture

                                                                           11
View original page 13Page 14 · Read text
www.butkus.us
   area. Finally, press the release button right down to take
   the picture.
2. Read off the aperture setting indicated by the normal
   exposure-measuring technique, then switch over to "Man-
   ual" and re-set the aperture to a larger f/stop (normally
  1 stop larger, e.g. indicated aperture f/8, set aperture
   to f/5.6).
3. The film speed can be set to a lower figure (1 stop slow-
  €r :  3 DIN or half the ASA rating), then measure the
  exposure normally.
                                                                                                                                                                                                      I
Using filters
The majority of filters necessitate increasing the exposure:
this "filter factor" is usually marked on the rim of the filter
mount (2 x, 4 x etc.).
When using filters, the film-speed setting on scale 2 or 22
should be reduced as mentioned below:
For filter factor                      Reduce DIN setting
                                             (scale 2) by
    1x                        O DIN
    2x                          3 DIN
    3x                          5 DIN
    4x                          6 DIN
    5x                          7 DIN
    6x                          8 DIN
    7x                          8 DIN
    8x                          9 DIN
The film-speeed setting on the ASA scale (22) should be
reduced by the same number of scale divisions as indicated
for the DIN scale.
Do not forget to re-set the setting mark 3 or 21 after re-
moving the filter.
View original page 14Page 15 · Read text
Taking pictures with flash
      (disengage the auto-control)
     The ZEISS IKON IKOBLITZ 5 "cordless" flash unit can be
       directly plugged into the flash contact 12 after turning the
      safety cover 13.
      Other types of flash unit should either be fitted in the acces-
      sory shoe 16 or attached by means of a bracket to the tripod
      bushing 33. Plug the cable into the flash contact'12, and fit
      the flashbulb into the flash unit. The shutter is X-synchro-
      nized. The fastest shutter speed suitable for use with ex-
      pendable flashbulbs is 1/go sec; electronic flash can be used
      at any speed from ]/eo to r/soo sec.
    The aperture setting depends on the flash guide number
     and on the subject distance; you will find more detailed in-
      formation in the instruction manual provided with your flash
        unit.

     Care of the CONTESSAMAT SE
     Dust the spool chambers and the inside of the camera back
     from time to time with a soft brush. The lens should be
     cleaned only when it is absolutely necessary, by wiping it
      carefully with a soft, well-washed linen cloth (not wash-
       leather); first remove all dust with a fine brush.
   A serial number is engraved in the back of every CONTES-
    SAMAT SE. Make a careful note of this number in order to
     be able to establish your ownership in the event of loss or
      misappropriation.
I


i

 I
IILIt              {
   *r    In the interest of technical development changes may be
lfij    made without further notice.
l*                                                            13
View original page 15Related documents and language editions
From the M. Butkus archive. Original publisher and archive notices are retained.
Check the model and edition against your equipment.
PDF verified 2026-10-10.