Film cameras
Zeiss Ikon Contessamat User manual
User manual for Zeiss Ikon Contessamat. 17 pages in English. Read the original PDF, download or print a copy without registration.
17 pagesEnglish1.4 MB PDF

Loading your manual…Open PDF directly
Document details
- Brand
- Zeiss Ikon
- Model / document
- Zeiss Ikon Contessamat
- Document type
- User manual
- Language
- English
- Pages
- 17
- File size
- 1.4 MB
- Category
- Film cameras
- Document date
- Not specified in catalog
Search available document text
Find a term, then jump to its page in the original PDF. Image-only pages may not be searchable; check the PDF for exact wording and diagrams.
Page 3 · Read text
In your own inleresl . . .
       . we recommend thoi you reod these
instructionscorefully. Unfold the inner leoves
 of the cover so thot you con keep o constont
check on the positions of the vorious
 controls.Before you lood the first film, be
thoroughly fomilior with your CONTESSAMAT.


You con reodily obtoin odvice ond inf ormotion
f ree of chorge on oll photogrophic probtems
from your photo-deoler, or from the
Photo Advisory Service (Fotoberotung)of
ZEISS IKON AG., Stuttgort, Postfoch540,
West Germony.


                  www.orphancameras.com
View original page 3Page 5 · Read text
0perating i nstructions
         t  Setting ring for AUTO (AutomoticExposureControl)
      ond operturevolues(scole9)
     z  Lockingcqtchfor settingfilm speed
       r  Setting mqrk for AUTO (outomoticexposurecontrol)
       ond operlure
      4  Dislance (focusing) scole
      5  Shutter-speed setting mork
      6  Shulter-speed scqle
      7  D.istonce-setfing ring
      8  Shutler-speed selting ring
           I   Aperture scole
          t 0  Setting mqrk for frome counler
          t l  Exposure meler pointer with f/stops ond red worning
         fields
    12 Film-plone mork (referenceplone for focusing scoie)
     t3  Releqse bufton
     t4  Setting dot for ASA film speed scole
     l5  Accessory shoe
     to  Distonce-setling mork ond depth-of-field scqle
     l?  Setting dot for DIN film speed scole
    tB  Knob for odiusiing film-type reminder disc
     l9  Indicolor window for film-type reminder disc
    20  Flqsh contoct
   The reference numbers 2l-33  refer to ihe illustrotions on
    the reor cover flop.
    21  Film speed scole (ASA)
,.   22  locking knob for releosing the rewind cronk
I,  zs Cotch for opening comero bock
    24  Rewind fork  (must engoge with  bor  in film-cortridge
        coreJ
    25  Tripod bushing
    26  Retrqctqble rewind crqnk
     2t  Viewfinder eyepiece
    28 Axle of rewind crqnk (must rotote when film is
       odvonced)
    29  Film tronsporl  roller with sprockef wheels
         for engoging in perforotions of film


                               www.orphancameras.com
View original page 5Page 6 · Read text
30  Ropid-wind lever
    3t  Flonge of loke-up spool
   32 Toke-up spool with slot ond lug for securing beginning
        of film
   33  Film speed scole (DlN)
  Loadingandunloading
   Stondord 35 mm cortridges -  block-ond-whiteor colour -
    giving 20 or 36 exposures con be used in the CONTESSA-
   MAT.

    looding  the film
   (Seeolso illustrotionon reor cover flop)
   Never lood the comero in direct sunlight but only in the
   shode.
   Open comero bock by pressing cotch 23 downwords.
    Fit the rewind fork 24 into the bose of ihe film cortridge,
   so thot the bor ocross the recess in the cortridge core
   engoges in the slot in the fork. Then move locking knob 22
    in the direction of the orrow until rewind cronk 26 springs
    out (thus disengoging clutch of film tronsport roller 29).
   Guide the beginning of the film leoder tongue into slot 32
    of the toke-up spool ond hook the 3rd perforotion hole
   over the lug in this slot. Wind on the film by turning the
   spool flonge 3l  until the sprocket wheels of the film trons-
    port roller 29 engoge the perforotions on both sides of
   the film.
    After closing the comero bock rotote the rewind cronk in
   the direction of the orrow unlil o resistonceis felt: the film
    is then wound tightly within the cortridge.
   Then push the rewind cronk bock into  its recess until you
   heqr  it click home.
    Seiling the film speed -  exlremely imporlont!
   Use the ASA or DIN film-speed roting printed on the film
    corion.
   Depress cotch 2 ond rotote the setting ring 8 so os to sel
   the setting dots l7 ond l4 ogoinst the oppropriote figures
   on ihe DIN scole 33 or the ASA scole 2l respectively.

I
View original page 6Page 7 · Read text
Film-type reminder disc                                  .|8.
Sei this by meons of knob      lts sole purpose is to ossist
your memory; ihe following symbols will oppeor  in fhe
 i n d i c o l o rw i n d o w 1 9 :
     ps!r  fz       flt [s  [o
 I Comero empty       4 Colour reversol film cleor flosh
2 Block-ond-whitefilm  5 Colour reversol film doylight
3 Colour negotive film 6 Colour reversolfilm ortificiol light
Checking lhe film qdvonce ond setting the frome counler
Swing ropid-wind lever 30 right up lo  its sfop ond releose
the shuiter by pressing button l3 downwords.
The oxle 28 of the rewind cronk (morked with o red dot)
should then rotole in the opposite direction to thot shown
by the orrow. This ollows you to check ihot the film is being
wound on  correctly; the red dot con olso be observed
through the hole in the bose of the evereody cose.
Afier swinging the ropid-wind lever for o third time, the
white mork l0 on the milled ring of  the frome counier
disc should be set to the number of exposuresprovided by
the film you ore using (e. g.  to 35). The frome counter
olwoys shows the number of fromes  siill to be exposed.
After the losi exposure (when fhe frome counter indicoles
"1"), il will noi be possible io operote ihe ropid-wind lever
30; the film should then be rewound.
Unlooding the film
After ihe  lost exposure, releose the rewind cronk 26 bV
meons of locking knob 22 ond ihen turn the cronk in the
direction shown by the orrow  until o gentle resistonceis
felt,  indicoting that  the  film  hos coml   off  the toke-up
spool. Now open the comero bock ond ioke out the film
cortridge.
Alwoys keep the toke-up spool ond  film  trock perfectly
c l e o n .


                        www.orphancameras.com
View original page 7Page 8 · Read text
I
Takingpictures
Setting the distonce (focusing)
Rotole the setting ring 7 beoring the distonce scole 4 uniil,|6.
the required distonce in feet is opposite the setting mork
Aperture ond depth of field           6u,lko9.o,7
Everyphotogrophic lens will form o shorp imoge of obiects
only ot o limited ronge in front ond behind the disionce
setling of the lens. This ronge colled "depth of  field"  is
increosed with smoller lens stops; its ronges (ot.|6.vorious
lens stops) ore shown on the depth-of-field scole
Exomple(see Fig. 1),  Distonce setting 20 ft
                   Depth of field ot f/8
                     from l0  ft to oo


        'lFis.

Alwoys remember:
   Lorge operture (fi2.8)meons limited deplh of field
   Smoll operture (f122)meons Mqximum deplh of field
For exocting photogrophic work,  occurote depth-of-field
volues will be found in the loble on the reor cover flop.

Selecting the shutter spe#"
Turn the setling ring 8 until ihe setting mork 5 is opposiie
the required shutter speed.
The correct shuiter speed depends on the movement of the
subiect.The foster the subiect is moving, the shorier'16   should
be the exposure time. The figures on scole    represent
froctions of seconds (60 meons 1/oosecond, etc.).
                                                        7
View original page 8Page 9 · Read text
When set to "B" the shutterwill remoin open for os long
os the releosebufton'13is depressed.The B settingconno-t
be usedwhen the outomotic exposurecontrol is eng-oged.


                                                          Fig. 2

Using the qutomotic exposurecontrol (Fig. 2)
Turn the Milled settingring I to bring the settinqmork 3 in
line with the word ,,AUTCf'(:  outomotic).Seleit the shut-
ter s_peed.-Inlermediote speeds should not be setl ,,B,, con-
not be selected when the qutocontrol is engoged.


              Red wornino fields
               Exposure-me{-..pointer
                                             r


                  Aperture scole              F i s . 3
8                                          -aa[: "

                        www.orphancameras.com
View original page 9Page 10 · Read text
lf the light is too bright or too dim then the exposuremeter
pointerwill remoin within one of red worning fields,which
indicotesthot the photogrophwill be incorrectlyexposed.
Reodiustthe shutterspeed,until the pointer swings into the
green field.
 lf the light is unsuitoblefor on outomoticexposureunder
ony circumstonces,the meter needlewill remoin within the
red field even when the shutterspeed is odiusted.Remedy:
use flosh (seepoge 11).
By rototing the shutterspeed ring 8, ony desired operture
con olso be pre-selectedfor use with the ouiomotic expo-
surecontrol.This howevercon only be done when the shut-
ter speed is set to one of the click-stopsettings.

Releosingthe shutter
Hold the CONTESSAMATos shown on the front poge of
this instruction booklet. To toke o  picture, depiesi the
releose button l3 gently ond smoothly   never ierk  it.
Everythingwhich you con see within the brightline'frome
of the viewfinderwill be recordedon the film.-Whentoking
pictures.ot 3-4   ft distonce, keep the top of your sublecl
below the two notchesin the viewfinderfrome. The shuiter
con be left tensionedfor long periodswithout ony horm.
                         7


F i g . 4

Disengoging fte oulomqlic exposure control (Fig. a)
Turn the milled ring'l so os to set the white mork 3 ogoinst
the desired f/No. on operturescole 9.

                                           #.
                                                               -t'S
View original page 10Page 11 · Read text
The exposure-melerpointer will now remoin within the red
      field  (both  in the viewfinder ond  in the externol meter
    window).
    The exposure meter is thus disengoged in order to ovoid
    erroneousreodings..Shutter-speedond operlure settings con
    oe selecTeclos deslred.

    The exposure meler
      is colibroted for normol conditions ond will  indicote the
     correct exposure occordingly.
        It will therefore be necessory to opply o certoin correction
      to the meter reoding when phoiogrophing open londscopes
     with dork foregrounds ond lorge oreos of sky, or low-con-
      trost subiects (under overcost sky) on colour reversol film
    ond porticulorly wiih oll types of bock-lighted scenes.
     This correction moy be mode by ony one of the following
    methods:
      '1.
      The meter reoding is meosured only from the dorker
       portions of  the subiect, either by holding the comero
       close to lhese oreos or by pointing the comero towords
       the dorker foreground. By giving o gentle pressure on
       the releose bution, lhe meter reoding con be "held" until
        lhe comero is re-positioned so os to cover the desired
       picture oreo. Finolly, press the releose bulton right down
        to loke the picture.
     2. Reod off the operlure setting indicoted by the normol
      exposure-meosuring lechnique, then switch over lo "Mo-
       nuol" ond re-set the operture to o lorger f/stop. (Nor-
       molly    l  stop  lorger, e.  g.  indicoted operture  f/8, sei
       operiure lo  f 15.6.)
     3. The film speed con be set to o lower volue  (l stop slo-
      wer  :  3 DIN or holf the ASA roting), ond the exposure
       then meosured normolly.
       This method is porticulorly recommended when toking o
       series of pictures under sihilor conditions, i. e. under-on
       overcost sky.
    Using filrers
    The moiority of filters necessitoteincreosing ihe exposure:
            l 0


                              www.orphancameras.com
                                                                                                                           - - "        - . t u - -         -  -I
View original page 11Page 12 · Read text
lhis "filterfoctor" is usuollymorkedon the rim of the filter
   mount(2 x, 4 x etc.).
   When usingfilters,ihe film-speedselting on scole 2'l or 33
   shouldbe reducedos mentionedbelow'                   '          For filter foctor     Reduce DIN setting
                                  (scole33)by:
                               ] x                  0 D I N
               2x                 3 DIN
               3x                 5 DIN
               4x                 6 DIN
               5x                 7 DIN
               6x                 8 DIN
               7x              B DIN
               8x                 9 DIN
   The film-speedsetting on the ASA scole (2'l) should be
   reducedby some numberof scole divisionsos indicoied
    for the DIN scole.
    After removingthe filter do not forget to re-setihe setiing
   dot l4 or 17 to the previouslyselectedspeed roting (first
   releosingcotch2).

    Toking pictures with  flssh
   The flosh unit is either fitted into the occessory shoe 15 or
    oitoched by meons of o brocket to the iripod bush 25. Plug
    the coble into the flosh contocl 20, ond only then  fit the
    floshbulb info the flosh unit. The shutler speed should be
    sei to 1/sosec when using floshbulbs; with electronic flosh
   ony speed moy be used. The shutier is X-synchronized.
   The operture setting depends on the flosh guide number*
   ond on ihe subiect dislonce; you will find more detoiled
    informotion in the instruction monuol provided with your
    flosh unit.


    *(The "Guide number" is the product of operture x distonce in feet.)
                                                                                                                               il
I
View original page 12Page 13 · Read text
Accessories
Key: @  -  Diometer of mount in mm, S =  Screw-in mounl,
G = Yellow, GR  :  Green, A   :  Push-on mouni, O = Oronge,
R = R e d
Ever-reody cose                                  20.7524
Sporls cose                                  23.0103
Shoulder pod for ever-reody cose                     20.7698
Colour filters G  - GR - O  - R - UV,
 '|l k o l o r B - C o n d F , A 2 7                                 20.r000
  sel of  filters (G, GR, O, UV) 0  27, with cose          20.7071
Lens cop                                         20.0602
Lens hoods
Flexible, S 27                                      20.0713
(neednot be screwedoff for closingthe ever-reodycose)
Leothercontoinerfor lenshood @ A 28.5ond 3 filters@ S 27
or for lens hood @ A 28.5,1 filter Q S 27
ond I Proxor lens A 28.5                           20.7841
ZEISSPROXARlenses
Q A  28.5, for close-up pictures
    from 40 to 20 in. opprox.  (f   :     I  m)               20.0800
    from 20112to 131/z in. opprox.  (f   :   0.5 m)          20.0801
    from 131/zto  l0  in. opprox.  (f   :  0.3 m)             20.0802
'l   from 8tl+ to 61/r in. opprox.  (f  :  0.2 m)              20.0803
  set of Proxor lenses with  depth-of-field
colculolor ond contoiner                             20.707A
ZEISS PROXAR doublet lens, for close-ups
down  to 31/z in., Q 27                                    20.0804
CONTAMETER
porollox-compensotingrongefinderfor close-ups,for use with
ZEISSPROXARlens f  :  0.5 m
(subiect-distonceronge 20-12 in.)                     20.1641
Other occessories
Coble releose wilh time-exposure lock                    20.0281
IKOBLITZ 5 "cordfype" copocitor floshgun
     for copless floshbulbs                              22.0002
    for N o 5 b u l b s o n d M  5 o n d M  2 5 b u lb s          22.0003
IKOBLITZ L copocitor floshgun for copless floshbulbs      22.0U4
12


                          www.orphancameras.com
View original page 13Page 16 · Read text
Cqre of the CONTESSAMAT
     Dust the spool chombers ond the inside of the comero bock
     from time to time with o soft brush. The lens should be
     cleoned only when  it is obsolutely necessory,by wiping  it
     corefully with o  soft, well-woshed linen cloth (not wosh-
     leother) first remove oll dust with o fine brush.
    A seriol number is morked on the bock of every CONTES-
    SAMAT. Moke o coreful note of this number in order to
     be oble to estoblishyour ownership in the event of loss or
   m isopp ropriotion.


       ln the  interest of  technicol development chonges moy be mode
      without ony further notice.
                                                                                             t 3

       I
--t L -
View original page 16Related documents and language editions
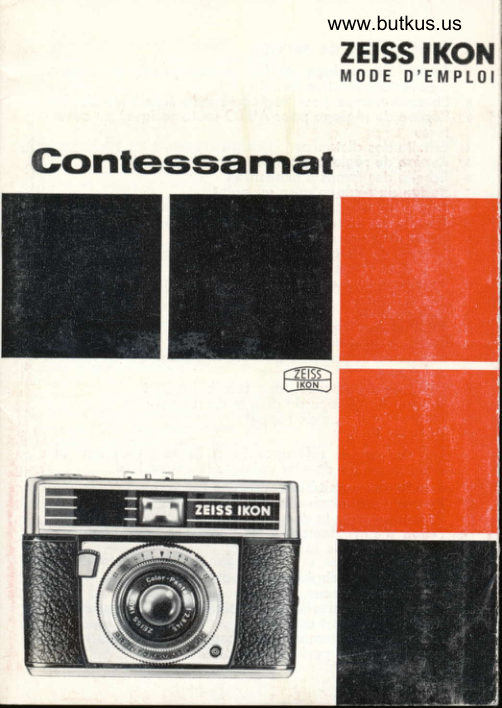
From the M. Butkus archive. Original publisher and archive notices are retained.
Check the model and edition against your equipment.
PDF verified 2026-10-10.