Film cameras
Canon ELPH LT 260 / IXUS Z50 User manual
User manual for Canon ELPH LT 260 / IXUS Z50. 52 pages in Spanish. Read the original PDF, download or print a copy without registration.
52 pagesSpanish3.0 MB PDF

Loading your manual…Open PDF directly
Document details
- Brand
- Canon
- Model / document
- Canon ELPH LT 260 / IXUS Z50
- Document type
- User manual
- Language
- Spanish
- Pages
- 52
- File size
- 3.0 MB
- Category
- Film cameras
- Document date
- Not specified in catalog
Search available document text
Find a term, then jump to its page in the original PDF. Image-only pages may not be searchable; check the PDF for exact wording and diagrams.
Page 2 · Read text
l)<USZso


E  Instructions    E  uoo" d'emptoi
   g*oi"nrngsanteitungEl                                      ll  tstruzioni
El Instrucciones    El Instruqoes
                             www.orphancameras.com
View original page 2Page 3 · Read text
HandlingPrecautiols ffi
        1. This camera is not resistantto water,and should not
        be used outdoorsif it is rainingor snowing.lf it is
         accidentallydroppedin water,contactan authorized
       Canon servicefacility.Keep the cameraout of salt
         spray and excessivehumidity.lf used at the beach,         '
         clean it thoroughlyafterwardwith a dry cloth.
        2. Storethe camera in a cool, dry, dust-freeplace.Be
         sure to keep the cameraout of directsunlight,and
       away from "hot spots"such as the trunk or rear
        windowshelf of a car.Avoid placeswhere mothballs
         are used,and use a desiccantin excessivehumidity.
       .   3. Do not attemptto disassemblethe camerayourself,
         sincethere is high-voltagecircuitryinside.
        4. The batterymay explodeor cause burns if
   ..*'1'    disassembled,recharged,shorted,exposedto high
         temperatures,or disposedof in a fire.
        5. Use a blower brush to removedust and sand from
i         the lens and insidethe camera.Do not applyany'           fluidsto the lens or body.Takethe camerato an
         authorizedCanon servicefacilityfor a more
         thoroughcleaningif necessary.
        6. Film passingthroughX-ray examinationsat an
           airportmay be exposedand ruinedeven when
         loadedin the camera. Requesta differentmethodof
          inspectionto avoid damage.
        7. Color reproductionmay be adverselyaffectedif the
           film is left in the camerafor a long time.Always
         developexposedfilm promptly.


     El-z
                                  .:.-..!:.:     @",.    ..",*jgrffi                 .s  ,:-
View original page 3Page 4 · Read text
HandlingPrecautions
                                tr
This device complieswith Part 15 of the FCC Rules. Operation
is subjectto the followingtwo conditions:(1) This devicemay
notcause harmfulinterference,and (2) this devicemust accept
any interferencereceived,includinginterferencethat may
causeundesiredoPeration.
Do not make any changesor modificationsto the equipment
unlessotherwisespecifiedin the instructions.lf such changes
or modificationsshouldbe made,you could be requiredto stop
operationof the equiPment.
This equipmenthas been testedand found to complywith the
limitsfor a class B digitaldevice,pursuantto part 15 of the
FCC Rules.These limitsare designedto providereasonable
protectionagainstharmfulinterferencein a residential
installation.This equipmentgenerates,uses and can radiate
radiofrequencyenergyand, if not installedand used in
accordancewith the instructions,may cause harmful
interferenceto radiocommunications.
However,there is no guaranteethat interferencewill not occur
in a particularinstallation.lf this equipmentdoes cause harmful
interferenceto radioor televisionreception,which can be
determinedby turningthe equipmentoff and on, the user is
encouragedto try to correct the interferenceby one or more of
the followingmeasures:
. Reorientor relocatethe receivingantenna.
.Increase the separationbetweenthe equipmentand receiver.
. Consultthe dealeror an experiencedradio/TVtechnicianfor help.
This digitalapparatusdoes not exceedthe Class B limitsfor
radionoiseemissionsfrom digitalapparatusas set out in the
interference-causingequipmentstandardentitled"Digital
Apparatus",ICES-003of the IndustryCanada
Cet appareilnum6riquerespecteles limitesde bruits
 radio6lectriquesapplicablesaux appareilsnum6riquesde Classe
B prescritesdans la normesur le mat6rielbrouilleur:"Appareils
Num6riques",NM8-0036dict6epar l'lndustrieCanada.
 ?    |   The (€ Mark is a Directiveconformitymark of the
  \    \,   EuropeanCommunity(EC)


                       www.orphancameras.com                                 tr-:
View original page 4Page 5 · Read text
Thank you for purchasing this Canon product.
 Beforetaking pictures,please read these instructions
 carefullyfor a thoroughunderstandingof how the
cameraoperates.

Table of Contents
These instructionsare dividedinto four sections:
 Introduction,BasicOperations,AdvancedOperations,
and AdditionalInformation.When first usingthe
camera,be sure to read the instructionsfrom the
Introduction.                                                                                                    a t         |                 . : 1     i
  Convention
  Thefol|owingconventionisusedintheseinstructions:             vou shouldobservewhenusingthe        I
  0     Uil:fft
                                                                                                                     , t1               l:l
        Additionalinformationon usingthe camera.  E
                         'or "See page 1".                                     :

a      Introduction
  I     HandlingPrecautions          ....................2
      Tableof Contents                         ........4                              rJ      AdvancedPhoto SystemQuick Reference....6
      QuickReference.                      .........8
      Nomenclature..............        ................10
       Attachingand Usingthe Strap...........:..........13                                                                                                                                 IIt      Holdingthe Camera           ....................14

     f;k Basic Operationst-     i;: Ll_JLoadingthe Battery           ................15     E Loadingthe FilmCartridge......................16      YiIt1
        AbouttheFilmCartridges..............................17
     E Turningthe PowerOn ..............................18
          tr Checkingthe BatteryPower ....................18     E Choosingthe PrintType ..........................19 It
     E Usingthe Zoom            ......................20
El-q                                                                                                       tI
View original page 5Page 6 · Read text
E taking Pictures in Auto Flash Mode  ........21
                 Green/OrangeIndicators             ............22
                 TakingPicturesthrougha Window..................23FI
                 Close-upPhotography           ...........,....24
              E Removing the Film Cartridge....................25
                    FilmCartridgeProcessing            ............26
                  HandlingFilmCartridgesAfterExposure........26

            Advanced Operations    3l  r@ ChangingtheFlashMode......................2
                        (l) RutoFlash..........       ...........'...'..28
                @(t)Auto FlashwithRed-eyeReduction......29
  ,                 Red-eyeReductionFunction................30
                                  t FlashON (ForcedFlash)Mode..................31
ii             @ftasnEO    f OFFSlow-synchro(Suppressed(NighttimeFlash)Portrait)Mode..........32
                           Mode................     ............33lilt           UsingFocusLock..........        ..............34
            U Usingthe Self-timer.................................
           DATElmprintingthe Dateand Time ..............36
                    SelectingtheDateFormat           ......37
                    Settingthe Dateand Time....................38ilt+
                   ip lmprintingTitles......         ................40
                  SelectingtheTitleLanguage          ......40
                 SelectingtheTitle           ......................41tlill.L
li             SettingH SettingthetheCustomPrintFunctionsQuantity ......................44......42              RealtimeReleasePhotography....................46 ryii
I r              Additional Information
l    4l  Troubleshooting.........
                    andAnswers...............................lil            Questions                       .................47ll . l              Specifications.............    .................50   l \r'|
Ilil
                               www.orphancameras.comlli.,*,                              tr-s
View original page 6Page 8 · Read text
Photo SystemQuick Reference                                                                                                                                                                                                   t:t!i!:.lgl#    .,

 ;   Simple film cartridge loading. (-+ 16)
        . Unlikeprevious135 (35mm)film, there is no need to   |
    open the back cover and pull the film leaderacross.


 \   A choice  of print types  (--+ 19)
2)    You can choosefrom three printtypes.
            . C print:Classicprint
            . H print:Wide-angleprint
            . P print:Panoramaprint


 ;  A variety of data (lX information) is recorded
)   magneticallyon the film surface.       . Allthe informationdescribedat leftcanbe recordedon
     the film.
        . The exposureinformationis used in the printingprocess
      to produce better quality Prints.


    Exposed  film cartridges can be processed  for
     printing  at Advanced Photo System  certified
    shops. (+  26)
        I  Afterdeveloping,the shop will returnyour pictures,
      alongwith an index print,and the film cartridgewith
       the film inside.
        . When orderingreprintsfrom a certifiedshop,just match
      the lD on the back of the print or on the index print
     sheetwith the lD on the film cartridge,and specify
     which printsyou want.

                   www.orphancameras.com                                        El-t
View original page 8Page 10 · Read text
Quick Reference
                            tr               Choose the print type.
                    (-+ le)
                                  t Theviewfinderscreen
                  cnanges.


                 Press the zoom button
m        trl            to set the subject size.
                      (-+ 20)


                   Position the AF frame
                  over the subject and     7                   take the picture. (-+ 21)
                                   t Theflashfires
                     automaticallyin low-light
                      conditions.


              When you have finished
                   the film and it has
                 rewound, remove the
                     film cartridge.(-+ 25)
                                   . Checkthatframecounter
                  hasreturnedto "0"andthe
                                     !  iconis blinkingbefore
                  youopenthefilmcartridge
                 compartmentcover.
                                               . Remove the film cartridge
                      and close the film cartridge
                       compartment cover.
              www.orphancameras.com                            tr-q
View original page 10Page 11 · Read text
Nomenclature
 Viewfinderwindow


      tAF         sensor


 Shutter button
  (-> 21)


                                Red-eyereduction/
                                       Self-timerlamp


                      Light-meteringsensor


E-to
View original page 11Page 12 · Read text
Nomenclature
                                 trForfurtherdetails,referto the page indicated.
Greenindicator(-> 221

Orangeindicator(+ 221
Mainswitch (+ 18)              Viewfinder(+ 12, 19)
FlTitle selectionbutton          LCD panel
(+ 40,44)
                                      Printtype selectionlever
Battery                          (+ 19)
compartment                                                        [!!  Wide/[f ]Telecover(+ 15)                            zoom button(+ 20)


 rr!  Film rewind
button(+ 25)                            mount
                                             (+ 13)
l<O Flash mode                         Film cartridge
button (+ 271                        compartmentcover
                                    crank(+ 16, 25)DAIEbutton
(+ 36, 38)                          Filmcartridge
                                compartmentcover
N) Self-timerbutton
(+ 35)                              Tripod socket
SEtECtbutton                      Printquantityspecification
(+ 38, 40,42,44)             buttonQ a2)
                             Sff button(+ 37,38, 43, 44)
-AF     is an abbreviationfor Auto Focus.
                    www.orphancameras.com            El-t t
View original page 12Page 13 · Read text
LCD Panel (normallydisplaysonlytherequiredinformation)
 Titleimprintingindicator             Two-sideddate imprinting
 Date/Titleno./Print                     indicator
 quantity/Custom functionno. indicator .EEI Red-eyereduction    EE:T8E
 indicator
 Flash OFF                                    Self-timerindicator
 (suppressedflash)                                        Slow-synchro indicator                                             (nighttimeportrait)
 Flash ON (forced                              indicator
 flash) indicator
                                   Framecounter
 Batterylevelindicator                  Film cartridgeindicator
 E-J  (on)    The batteryis fullycharged.
 E    (on)    Preparea new battery.
 --d:- (blinking)Installthe new battery.(+ 15)
Viewfinder Frames
            Close-upFrame
            When taking pictures at distances between
               0.45 and 1.0 m (1.5 and 3.3 ft.),composeyour
                  picture below this frame. The area above this
               frame will not appear in the picture. (--+Za)


                          Picture Frame
                    Composeyourpicture
                                 within this frame (H print).
                                  (-+ 19)
          AF Frame
                Positionthis frame over the subject.(-->21,34, 46,)
                up AF Frame
             Use this frame for close-upsubjects(0.45 to
                1.0 m/1.5 and 3.3 ft. from the camera).(-+ 2a)
El-tz
View original page 13Page 15 · Read text
Holding the Gamera
 To avoid obscuring the image with your fingers
 and to ensure a clear sharp image, take care to
 keep your hands, hair and the camera strap away
 from the areas marked with a. below.

                                                                                    . Flash
                                                                                    . AF emitter

                                                                                    . Lens


 Holdthe cameraas shownbelowwhen taking
 oictures.


  al   Dust or soilingon the AF emitter/sensoror lens causes
 v7   focusingdifficulties.Wipe soiledareasclean before
       takingpictures.
El-t+
View original page 15Page 18 · Read text
Loadingthe Film Cartridge
                                tr
About the Film Cartridges
. Use 1X240cartridgefilm.
. Youcannotuse conventional
 135 (35mm)film in this camera.
. Use film cartridgesthat show the
 Q (unexposed)visualexposure
 indicator.


 Checking the Photography Data
                                           . Slidethe main switchto OFF.
                                           . Pressthe t@  button.
                                          t  The informationshown below
                      appearson the LCD panel.


Filmsensitivity(lSO speed)

                      Film type
                         In    : Colornegativefilm
                                  Ir    : Color reversalfilm
                   bL   : Blackand whitefilm
                                   - - : O t h e r f i l m


          lf you load a film cartridgeshowing the [J (exposed),(f     [  (processed)or  ]  (partiallyexposed) indicator,"0"
     appearson the frame counterand the !  icon blinks.
     Replacethe film cartridgewith one that shows tne O
     (unexposed)indicator.
    You will hear the cameramotor runningeven when no
      film cartridgeis loadedin step 3.E

                     www.orphancameras.com                               El-tz
View original page 18Page 19 · Read text
[!lTurning the Power On
                         Slide the main switch to ON.
                                               t  The lenscoveropensand the lens
                       and flashare set for shooting.
                                               . lf you slidethe switchto OFF,the
                           lens and flash both retract,the lens
                         coverclosesand the camera
                          switchesoff.


      Takecare not to obstructthe lensor flashwith your fingers. 0
  l=l  When you switch the camera off, the display on the
   lJl  LCD panel does not disappear.
E Checfing the Battery Power
Checkthat the batteryicon@  appearson the LCD
panelwhen you switchthe cameraon.
 GEI (on)    The batteryis fully charged.
 G    (on)     Preparea new battery.
 rqd   (blinking)Installthe new battery.(-+ 15)
A new battery generally has sufficient capacity for
eight 25-shot film cartridges (basedon Canon's
StandardTest Methodwith normaltemperaturesand
with the flash used for 50% of shots).At low
temperatures(-10"C/14'F),the batterycapacityis
approximatelyone third of normalcapacity.
           . UseoneCR2lithiumbattery.   [-f|  lJl    . Alwayscheckthe batterycapacitybeforeusingthe
      camera.
           . lf youaretravelingor intendto takemanypictures,
       takea supplyof sparebatteries.The batteriesmaybe
         difficultto obtainat yourdestination.
           . lf youtakea numberof consecutiveshotsusingthe
        flash,the batterypowermaydropoff temporarilyand
       preventthe LCDpanelfromdisplayingdatacorrectly.
             lf thisoccurs.switchthe cameraoff andwaita few
      minutesbeforeswitchingit on again.
El-ta
View original page 19Page 20 · Read text
E Choosingthe PrintType                                                        tr
Withthis camera,you can chooseany of 3 print
formatsto suit your subject:C print,H printor P print.

                      Turn the print type
                         selection  lever.
                                             t  The vieMinderscreenchanges
                        as shown belowwhen you
                            selecta print type.
                                             . You can selecta differentprint
                          type for each shot.
                                             t  The black areas in the
                           viewfinderdo not appearon
                           the orint.
        Viewfinder             Printed photo


                                 2 P


  f   l     . When you take picturesat distancesbetween 0.45
  It    and 1.0 m (1.5 and 3.3 ft.), the area above the close-
      up frame is not photographed.(-+ 12,2al
           . For P prints, becauseof the large variationbetween
        the area visible in the viewfinderand the area actually
       photographed,shots should be taken from distances
        of at least2 m (6.6 ft.).

                    www.orphancameras.com                           E-ts
View original page 20Page 21 · Read text
E Usingthe Zoom
You can use the El  Wide/tll Tele zoom buttonto
changethe size of your subject.


   liril Wide-angle(26 mm)              [f  ] Telephoto (52 mm)
Use this settingfor large-      Use this settingfor pictures
scaleimagessuch as          where you want to zoom in
sceneryand group pictures.    on your subject,such as
                                  portraits.

                  Pressthe hTllwide/[l] ren
               zoom button.
    c     o      o
      o     Q                        l  l                                              . Pressing[|] zooms in on your
                           subject while pressing lTr-il
                     zooms out for a wide-angleshot.


      Take care not to obstructthe lens with your hands. 0
            . When you switchthe cameraon, the lens is initially   l=l  ql         sel to wide-angle(26 mm).
            . lf the camera is left unused for approximately4
       minuteswith the lens extendedto the telephoto
         position,the lens automaticallyretractsto the wide-
       anglepositionas a protectivemeasure.
El-zo
View original page 21Page 22 · Read text
ETating Picturesin Auto FlashMode                                                       tr
Theshutterbuttonhas a two-stepaction.
Thefirststepsets the focus and exposure,while the
secondstep releasesthe shutter.
In low-lightconditions,the flash fires automatically.
                                                        i   Set the focus.                                                    . Positionthe AF frame over                                               I
                             the subjectand pressthe
                              shutterbuttondown
                              halfway.
                                                    t  The green indicatorlights
     AF frame            when the subjectis in
                               focus.
                                                    . The  I icon appears on the
                     LCD panelwhen the flash
                                      is set to fire automatically.
                                                    . KeePthe shutterbutton
                           pressed down halfway.


                     Compose  the shot and
                           take the picture.
                                                    . Pressthe shutterbutton
                       down fully.
                                                    . Press the button down
                              gentlyand smoothly.
                                                    t  The shutteris released.
                                 2
 ()   There is a very short delay betweenthe shutter button     being pressed and the shutter releasing.ln general,
     you should continueto hold the camera still until you
     hear the sound of the film windingon, which indicates
      that the shot has been taken.
          . Pressingthe flash down sets the flash mode to Flash
      OFF. (-+ 32)E          . You can use the CF1 custom functionsettingto set
       the camera to RealtimeRelease mode, in which the
       shutter is releasedinstantly.(--+44, 46)

                       www.orphancameras.com                                 El-zt
View original page 22Page 23 · Read text
;.:rry,     ui+iffi     ft*e flffiffiesfE#
 [*=| Green/Orange Indicators ql  Whenyou pressthe shutterbuttondownhalfway,the
      indicatorslightor blinkto showwhetherthe camerais

                        Green indicator
                                        Lit:   Camera ready to shoot
                                    (subjectin focus).
                              Blinks: Proximitywarning

                        Orange indicator
                                      Lit:   Flash fully charged.
                              Blinks:Camera shake warning
                                           (in (D flash mode)


El-zz
View original page 23Page 24 · Read text
Taking Pictures in Auto Flash Mode  tr
         . When the green indicatorblinks,move away from thea l
!t     subjectuntil the indicatorstops blinkingand then
      pressthe shutterbuttonagain.
     The table below shows the proximitywarningrange.
        Film Tvpe       WarninqRanqe
         c/H      25 to 45 cm (0.8to 1.5 ft.)
          P      25 cm to 2 m (0.8 to 6.6 ft.)
         . The green indicatormay light even at distancesof
      less than 25 cm (0.8 ft.). Take care not to get too
      close to the subject.
         . When the orange indicatorblinks(camerashake
      warning),use a tripod or other means to hold the
     camera steady.
         . Taking Pictures through a Window
                       When you are taking
                                picturesthrougha
                            window,hold the camera
                           20 to 40 cm (0.7 to 1.3
               /              \           ft.) from the glass and
                             shoot at an angle to the
                                 glass.
                                                         lf you are too far from the
                          windowor shoot directly
                                    at the glass,the camera
                        may focus on the surface
                                    of the glass ratherthan
                           on the subject.
                                 2


                    www.orphancameras.com                                EI-zt
View original page 24Page 25 · Read text
TakingPicturesin Auto FlashMode

Close-up Photography
Whenyou are shootingat distancesof 45 cm to 1 m (1.5
to 3.3 ft.),the area visiblethroughthe viewfinderdoes not
matchthe area actuallyincludedin the shot.The area
abovethe close-upframewill not be includedin the
photograph.
For takingpicturesat distancesof 45 cm to 1 m (1.5to 3.3
ft.),followthe stepsbelow,usingthe close-upAF frame.
                                              .l   Set the focus.
                                                    . Positionthe close-upAF frame                                                I
                            over the subjectand pressthe
                              shutterbuttondown halfway.
                                                    t  The green indicatorlights
                        when the subjectis in focus.
                                                    . Keep the shutterbutton  Close-uo AF frame
                           presseddown halfway.

                     Compose the shot and
                           take the picture.
                                                    . Comoosethe shot so that the
                             sublectis belowthe close-up
                          frame and take the picture.
     Close-uoframe                 . Do not changethe distance
                         betweenthe cameraand the
                              subiect.


                                    visible in the viewfinder
                           not photographed.

    Area actuallyphotographed(insidedottedline)

      For P prints, becauseof the large variationbetween the  l=l
  lJl   area visiblein the viewfinderand the area actually
      photographed,shots shouldbe takenfrom distancesof
       at least2 m (6.6 ft.).
El-zq
View original page 25Page 26 · Read text
E Removingthe Film Cartridge                                                        tr
Thefilm rewindsautomaticallywhen it reachesthe end'
Theframecountercountsdown as the film rewinds.When the
filmis fully rewound,the frame countershows "0" and the  t
iconblinks.
. Youcan use the CF3 custom functionsetting to preventthe
 camerafrom automaticallyrewindingwhen it reachesthe end
  of the film. (-+ 44)

                        Check that the   !   icon                                               ;
                                                 I   is blinking.
                                                      . lf the !  icon is not
                                 blinking,pressthe E
                               button.(--; 11)


                                              \   Open the film cartridge
                                            /,   compartment   cover.
                                                      . Turn the crankto open the
                            cover and take out the film
                                  cartridge.
                                                      t  The !  icon on the LCD
                             paneldisappears.
                                                      t  The visualexposure
                                 indicatoron the film
                                  cartridgehas changed to
                                      [J (exposed).
To remove the film cartridge in mid-roll            2
                                              . Pressthe rr!   button.(-+ 11)    ON  OFF
                                              . When you removethe film
                            cartridge,the visualexposure
                             indicatoron the cartridge
                      changesto [J (exposed).


                       www.orphancameras.com                               El-zs
View original page 26Related documents and language editions
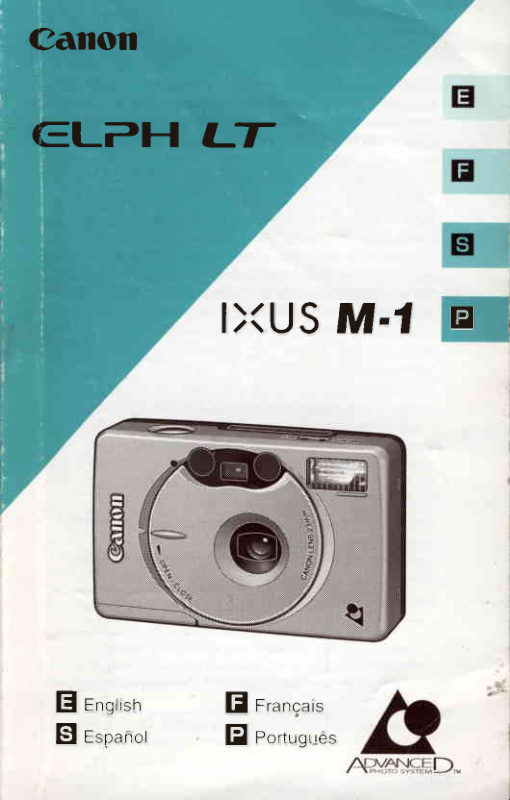
CanonPDF
Canon ELPH LT / IXUS M-1
User manual
46 pages · EnglishRead →

CanonPDF
Canon Sure Shot Zoom XL
User manual
40 pages · EnglishRead →

CanonPDF
Canon point and shoot camera
User manual
27 pages · EnglishRead →
CanonPDF
Canon Other Languages
User manual
41 pages · FrenchRead →
CanonPDF
Canon point and shoot camera
User manual
72 pages · French, PortugueseRead →
CanonPDF
canon prinma junior hi
User manual
28 pages · French, SpanishRead →

CanonPDF
canon snappy tx
User manual
20 pages · French, SpanishRead →
CanonPDF
Canon Sure Shot Tele / Top Twin
User manual
34 pages · Not specifiedRead →
From the M. Butkus Camera Manual Library. Original publisher and archive notices are retained.
Check the model and edition against your equipment.
PDF verified 2026-10-10.