Film cameras
Canon Sure Shot Zoom XL User manual
User manual for Canon Sure Shot Zoom XL. 40 pages in English. Read the original PDF, download or print a copy without registration.
40 pagesEnglish3.6 MB PDF

Loading your manual…Open PDF directly
Document details
- Brand
- Canon
- Model / document
- Canon Sure Shot Zoom XL
- Document type
- User manual
- Language
- English
- Pages
- 40
- File size
- 3.6 MB
- Category
- Film cameras
- Document date
- Not specified in catalog
Search available document text
Find a term, then jump to its page in the original PDF. Image-only pages may not be searchable; check the PDF for exact wording and diagrams.
Page 4 · Read text
(D trlainSwitch
                       @ neOLamp(Flashshooting/Camerashakewarning)
                       @ Creen Lamp (AF in-focus/Tooclosewarning)
                                     @VieMinder


(DBack Cover

                                   @ FilmCheckWindow


                                   @ Grip Lock

                                                                            0) tripod Socket
                               @ RemoteControlRelease,Switch
                       @ SignalTransmitter
                       @ ControlButton
                       @ RemoteController
                       @ ReleaseTimingSelector
View original page 4Page 5 · Read text
Table of Contents
HandlingPrecautions...............        .......13        5. Self-timerPhotography.............................49
I.   ShootingPreparations........,......................17        6. InfinityShootingMode            ............51
    1 . N e c k s t r a o . . . . . . . . . . . . . . . .     . . . . . . . . . . . . . . . . 1 7   7. Close-upShooting....        ............,..53
     2. Checkingthe Battery           ..............17 m . Advanced Picture Taking Operations..... 55
     3. Holdingthe Camera           ...............21     1. Flash-onMode                           ......55
     4. ShutterButtonAction            ..............23      2. Non-flashMode                      ....57
     5. Checkingthe DisplayPanelInformation...25      3. Slow-syncMode.....          ................59
     6. Loadingthe Film           .....................27   4. lntelligentFramingZoom Mode................61
     7. AutomaticFilm Rewinding           ......31        5. RemoteControlShooting....            ....65
        Mid-rollRewind......        ..............31     6. RemoteControlZooming....              . .69
tr.  Basic Picture Taking Operation...............33    Iv. Date lmprint Function..............................73
     1. Settingthe ExposureMode               .... 33        1. Selectingthe lmprintFormat.....................75
     2. Settingthe FilmWindingMode................35         2. Settingthe Date and Time           ......77
     3. Zoom Operation                     ....35
     4. TakingPicturesin Auto Mode.,................37
        ShootingDistanceRange for Automatic
       FlashPhotography           ...............39
      Greenand Red Lamp............................41
      FocusLock.........         .................43
         DifficultSubiectsfor Autofocus..............45
                              www.orphancameras.com
View original page 5Page 6 · Read text
HandlingPrecautionslO                               @*
I  tl ff  i, camera is not resistantto water, and     4) The batterymay explodeor cause burns if
| , g . t t d i s a s s e m b | e d , r e c h a r g e d , s h o r t e d , e x p o s e d ;
I   accidentallydropped in water, contact an        to high temperatures,or disposedof in fire. @
I   authorizedCanonServiceFacility.Keepthe     5) Use a blower brush to remove dust and @
|    ;;;;;;t      of r"tt spray,and excessivehu-      sand from the lens and insidethe camer^. @!(@
|    .iOity.  ft used at the beach, clean it     Do not applyany fluidsto the lensor body. @
             afterwardwith a dry cloth.         Take it to a CanonServiceFacilityfor more ffi|   {'oroughlyi 2; Storethe camera in a cool, dry, dustfree      cleaningif necessary.                         *.:t
I   place. Be sure to keep the camera out of     6) FilmpassingthroughX-rayexaminationsat p;=r                                                     @$I   Oirectsunlight,and away from "hot spots"       airportsmay be exposedand ruined even
I   such as the trunkor rearwindowshelfof a     when loaded in the camera. Request   , @                                                                                                                      "
I   car.Avoidplaceswheremothballsare used      handcheckedinspectionto avoid damage. mr'I   and in excessivehumidity,use a desiccant.    7) Colorreproductionmay be adverselyaffect-
  gl Do .ot attlrnpt to disassemblethe camera      ed  if film is left in the camera for a long '@$
i   vourself, due to the high-voltagecircuitry      time.Alwaysdevelopexposedfilmpromptly,                                                                                                #;I   rnside
I                                                      ffi=I                    %k ewru* d#w're  qffi*@**%%-%%,%ry,_       **                                                            ffi**ffi
View original page 6Page 9 · Read text
S" Fdofdrr?Stfie Camnera
            1) Putthe neckstraparoundyour neckand hold
              the camerafirmly.
            2) Keep your left elbow close to your body.
            3) Lightlyholdthe cameraagainstyour noseand
              look into the viewfinder.


            4) Spreadyour feet about shoulderwidth for a
              steady, naturalstance.


www.orphancameras.com
View original page 9Page 10 · Read text
4. Shutter Button Action
The shutterbuttonactivatesthree functionsde-
pendingon the amountof the pressureapplied.
1) Press halfway for automaticfocus and ex-
  posuremetering.Whenthe subjectis in focus,
  the green lamp, in-focussymbol lightsup.
2) Presscompletelyto take the picture.
3) Press and hold completelyfor continuous
  shooting.(See p. 33)
View original page 10
Page 12 · Read text
.After about five years,the displaypanelmay
 becomehard to read.Takethe camerato the
 nearestCanonServiceFacilityfor the replace-
 mentof the liquidcrystal.Replacementwill be
 at owner'sexoense.

6. Loading the Film
Use only DX-coded film. The camera automati-
callysetsthe filmspeed.(lSO50 - 3200accord-
ing to DX code standard)
1)Slidethe backcoverlatchdown to openthe
  back cover.
2) Insertthe flat end of the film cartridgein first.
3) Carefullypull the film tip acrossonly until it
  reachesthe whiteline marked"FILM,'.
View original page 12
Page 13 · Read text
4) Makesurethatthe film has no slackand close
              the backcover.The cameraadvancesthe film
              automaticallyand stopswhen"1" appearsin
              the frame counter.
                   olf the film does not advancecorrectly,three
                indicatorswill blink in the displaypanel to
             warn you that the film needsto be reloaded.
            The threeindicatorsare,the framecounter,
               the film transportbar marks and the back
               cover indicator", -"     .
                  olf non DX-codedfilm is used,the film speed
                   willbe setto ISO100.Thefilmdoes not load
                automatically,pressthe shutterbutton until
                 "1" appearsin the frame counter.
               .For slidefilm,useonly ISO50, 100,2OO,4OO,
              800, 1600,or 3200.


www.orphancameras.com
View original page 13Page 14 · Read text
7. Automatic Film Rewind
                           The film automaticallyrewindsat the end of the
                                             roll.Duringrewind,the framecountercountsin---ol -JE                              descendingorder.
                                 Filmrewindstopsautomaticallywhenthe film has
                             been completelyrewound.
                                    1) Makesurethat "O   " and 'i ----" areblink- --ol        ;'Li               ing in the displaypanel.
                                    2) Openthe back coverand removethe filmcar-
                                       tridge.

                                Mid-roll Rewind
                              Pressthe film rewind buttonon the top of the
                            camerato rewind beforethe roll ends. Use the
                                 smallprojectionprovidedon the neckstrappad.
  o
View original page 14Page 15 · Read text
2)                                                           II. Basic Picture Taking Operations
                                         1. Setting the Film Winding Mode
  E  ---ol                       There1) Singleareframetwo automaticmode:Thefilmfilmwindingautomaticallymodes:ad-
                                        vancesto the next frame after each picture.
                                            This mode is automaticallyset each time you
                                              set the main switchto "A".
                                              2) Continuous(DJl): The film advancescontinu-
                                           ouslywhen the shutterbuttonis held down.
                                   (Maximum1;2framesper second).Pressthe
                                      shooting  mode   selector  marked
                                                                 " Q)/ l.F.ZOOM"to display" El"  to setthis
                                    mooe.
                                         .The continuousmodecannotbe setwhenthe
                                        remotecontrol is in use.


                            www.orphancameras.com
View original page 15Page 16 · Read text
2. Setting the Exposu re Mode
            Press the exposure mode selector marked ,,!  "
               to set the exposure mode. The symbols change
                in the sequence below:
             oAuto mode: Auto
                 s*itch is set to
               automaticallyin low-lightor backlit conditions.
             oFlash-on mode ( ?   )' See p. 55
             oFlash-offmode (Q)): See p.57
          oSlow-syncmodeits   l, Seep. 59
           3. Zoom Operation
          Look through the vieMinder and press the
         WIDE ffi  or the TELE buttontll   Compose
            the pictureas you like, usingthe power zoom
            function.


WIDE
View original page 16Page 17 · Read text
A wide (39 mm) angle-of-viewis idealfor land-
           scapes,group pictures,and when featuringan
             attractivebackground.With tele (85 mm), you
          can take betterportraitsby makingthe subject
            closerand eliminatingunnecessaryelementsin
           the background.

           4. Taking Pictures in Auto Mode
            1) Put the AF frame over the intendedsubject.
           Be sure that the subjectfillsthe AF frame.
            2) Pressthe shutterbuttonhalfwayto focus the
               subject.Whenthe subjectis in focus,the green
           lamp lightsup.
          oWhenthe red lamp lightsup simultaneous-
i;)t6j(41/ijtr?a/;            ly, the flashfires automatically.
":A(tqadr.i'it'laavI,6.a4:!,tr::        .The subject'seyes may appearred in flash
             photosdue to the lightreflectedfromthe re-
                 tina.To minimizethis,havethe subiectavoid
              lookingdirectlyat the camera.

www.orphancameras.com
View original page 17Page 20 · Read text
Focus Lock
Whenyoursubjectis not in the centerof the pic-
tureframe,usethe focuslockfunction.Focuson
the intendedsubjectremainslockedas long as
the shutterbuttonis held halfway.Thisfunction
letsyou vary compositionby puttingthe subject
off-center.
1) First,put the AF f rameoverthe intendedsub-
   ject, pressthe shutterbuttonhalfwayto lock
  focus.Makesr.jrethe greenAF symbollights
  up.
2) Reframethe pictureas desiredwhilepressing
  the shutter buttqn_lgllrvey,press tne sfrutter
  @hepicture.
View original page 20
Page 22 · Read text
Focusthese subjectsas follows:
1) Autofocuson a substitutesubjectat the same
  distancefrom the cameraas the intendedsub-
   ject,and then recomposethe pictureusingfo-
  cus lock function         .(A), (B), (D), (F)
2) Autofocuson a substitutesubjectat a point
  where the subjectis anticipatedto pass and
  press the shutter button when the subject
  entersthis point, using focus lock function
                                        (E)
View original page 22Page 23 · Read text
5. Self-timer photograPhy1)
                                   The selftimerfunctiondelaysshutterreleasefor    t                               10 secondsto includeyourselfin the picture.
                                              1) Put the AF frame over the subjectand press
                                             the selftimer button. Be sure that the green
                                     lamp lightsup.
                                              2) The red light below the flash startsblinking
                                              slowly and then rapidlytwo seconds before]=                                            the pictureis taken.The time remainingap-
                                          pears in the frame counter.


                             www.orphancameras.com
View original page 23Page 24 · Read text
.To canceltheselftimerbeforethe 1O-second
   delay finishes,press the selftimer button
   again or set the main switchto L.
  .Use the shoulderpad as illustratedfor bet-
   ter cameraposition.
6, Infinity Shooting Mode
Whenshootinglandscapesor a distantsubject,
hold the infinitybuttondown whilepressingthe
shutterbutton.This sets the lens at the infinity
position.Alwaysuse this mode especiallyfor
landscapeswithouta dominantsubjectfor sharp
focus,
View original page 24
Page 25 · Read text
7. Close-up shoating
        Whenthe subjectis in the close-uprange(2,0-3.3
           ru0.6-1m from the camera),the picturerequires
           specialcomposition,Followthe steps below:
            1) Putthe close-upAF frameoverthe subjectand
            pressthe shutterbutton halfway.The green
           lamp should blink slowly(a H).
           2) While pressing the shutter button halfway,
           recomposethe pictureby puttingthe subject
              insidethe parallaxcorrectionmark.
           3) Presscompletelyto take the picture.
            .The dotted linesshow the compositionthat
                  is required.Theselinesdo not appearin the
             vieMinder.


www.orphancameras.com
View original page 25Page 26 · Read text
oAutofocusmay be impossibleon extremely
   small subjects.
   .At a distancechoserthan 2.0 fV0.6m, the
   greenlamp may stop blinking.However,au-
   tofocusis impossible.
III. AdvancedPictureTakingAperations
1. FIash-OnMode ( +  )
The flashfiresfor everypicture.You can get bet-
ter resultsoutdoors,when you want to minimize
shadows,or give a littleadditionallightfor "catch
light" accentsin portraits.
 rThe flash-onmode shootingdistancerange
   is exactly the same as the auto-flashmode,
  see p. 39. Stay within this range for best
   results.
View original page 26
Page 27 · Read text
2. Flash-OttMode  (                 O  )
          Setthe Flash-Offmode to cancelthe flashwhen
         you want to take prcturesof sunsetsor are in
          placeswhereflashuse is not allowed,(i.e.theat-
           ers, museums).


www.orphancameras.com
View original page 27Page 28 · Read text
S" Sfmw-syr?#fuffmde{  ffi  }
The flashfireswith a slowershutterspeed.Use
thismodeto illuminatethe backgroundof a night
scene.
  r Photostakenin this *gq" are susceptiqlg.to
  camera shake.To minimtzethis,.hold the
   cafibra $eadf by ptacingit on a table or use
  a tripod:
View original page 28Page 29 · Read text
4. lntelligent Framing Zoom Mode
         Once you set the shootingmagnification,the
          cameramemorizesit and lets you take pictures
            withthe samesubjectsizefrom a differentshoot-
            ing distanceor angle.
          Takevariouspictureskeepingthe subject'ssize
            the same, but with differentbackgrounds.
            .This modecannotbe usedwiththe remotecon-
               trollerdetachedor continuousshooting.
            .For more flexibilityin varyingsubjectsize,set
            a standardfocal lengthof approx.55 mm be-
            forehand.
             1) Pressthe shootingmode selectorto display
              blinking"
            2) Pressthe TELEor WIDEbuttonfor a desired
              magnification.
            3) Put the AF frame over the subjectand press
              the shutterbuttonhalfway.The" lrl  " lightsup
               to indicatesettingcompletion.

www.orphancameras.com
View original page 29Related documents and language editions
CanonPDF
Canon ELPH LT / IXUS M-1
User manual
46 pages · EnglishRead →

CanonPDF
Canon point and shoot camera
User manual
27 pages · EnglishRead →
CanonPDF
Canon Other Languages
User manual
41 pages · FrenchRead →
CanonPDF
Canon point and shoot camera
User manual
72 pages · French, PortugueseRead →
CanonPDF
canon prinma junior hi
User manual
28 pages · French, SpanishRead →

CanonPDF
canon snappy tx
User manual
20 pages · French, SpanishRead →
CanonPDF
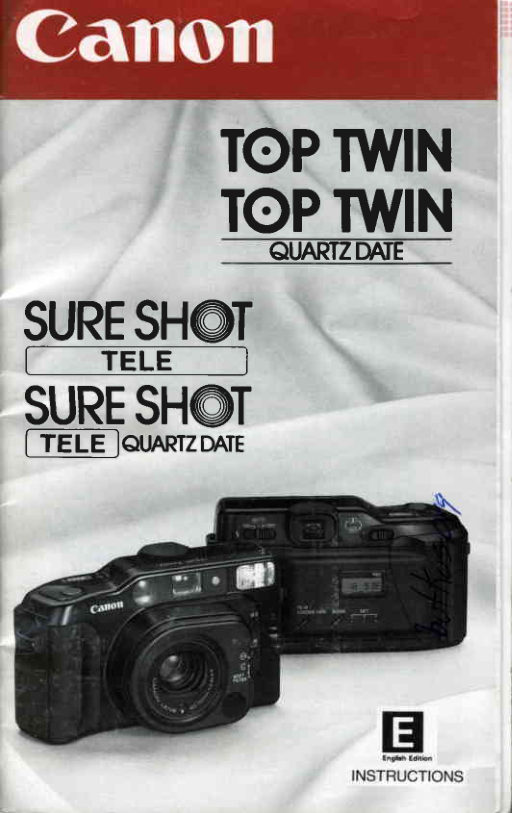
Canon Sure Shot Tele / Top Twin
User manual
34 pages · Not specifiedRead →

CanonPDF
Canon ELPH LT 260 / IXUS Z50
User manual
52 pages · SpanishRead →
From the M. Butkus Camera Manual Library. Original publisher and archive notices are retained.
Check the model and edition against your equipment.
PDF verified 2026-10-10.