Film cameras
CHINON CE-4 User manual
User manual for CHINON CE-4. 47 pages. Read the original PDF, download or print a copy without registration.
47 pagesOriginal document8.5 MB PDF
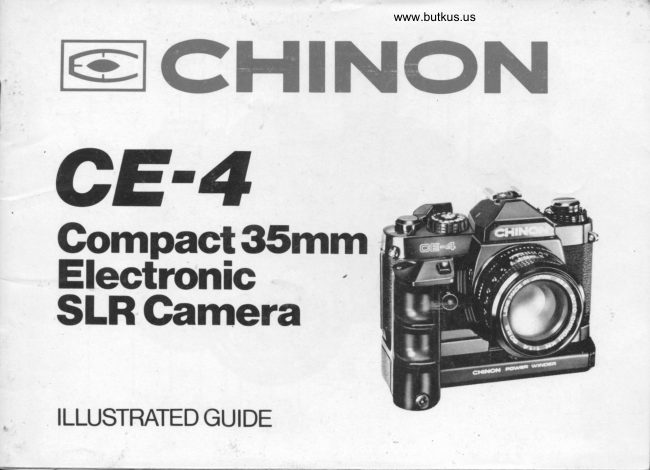
Loading your manual…Open PDF directly
Document details
- Brand
- Chinon
- Model / document
- CHINON CE-4
- Document type
- User manual
- Language
- Check the original document
- Pages
- 47
- File size
- 8.5 MB
- Category
- Film cameras
- Document date
- Not specified in catalog
Search available document text
Find a term, then jump to its page in the original PDF. Image-only pages may not be searchable; check the PDF for exact wording and diagrams.
Page 1 · Read text
www.butkus.us


t".


I ECHINON
 cE-4
  Gompact35mm
                                                                           -  Electronic
  SLRGamera


     ILLUSTRATED GUIDE
View original page 1Page 17 · Read text
icrFrcATtoNs                              www.butkus.us
 6pecrrrcanons oF cHtNoN cE4
Type: 35mm automatic SLR (Single Lens Re-   Vtewftnder Magnlflcatlon: O.87 X with
flex) compact camera with aperture priority  50mm lens set at infinity.
exposure system (AE).                        Vtewftnder Vtstbtltty: 98%.
Plcture Format: 84 X 36mm               Depth of Ffeld Prevlew: By depressing depth
Ftlm Loadtng: Easy film loading by multi-    of field lever.
slot take up spool.                         Exposure Meter: TTL, Center weighted full
Lens Mount Chinonlfavonet Mount.            aperture system employing two silicon blue
Standard Lenses: Chinon SOmm FlL.4,50mm   photo cells located on each side of viewfinder.
Fll.7,45mm F/8.8 (All stop down to F/32).       Brightness of exposure LED's vary depending
Mlrror: I.a4e Qpick return, shockless system.   upon brightness of viewfinder.
Shutter: Seiko MFC electromagnetic metal   Dxposure Prevlew: By depressing shutter re-
focal plane shutter with downward vertical path;   lease half way metering system is activated.
stepless speeds from 8 to 1/1000 sec. on auto-   Manual Exposure System: Complete manual
matic; 13 speeds from 4 to V1OO0 sec. on man-   override capability, match LED system.
ual; "8". Iloth automatic and manual speeds   Memory Lock Built-in exposure memory lock
electronically controlled.                         system.
Shutter Release: Two stage electromagnetic   Dxposure Compensatlon: Built-in + lEV in
type with safety lock and provision for cable   one third stop increments.
release.                                 Exposure fiange: EV-2(F/1.4 @ 8 sec.) to  I
Vtewftnder: Fixed ey e-lev el pentaprism,  c€ll-  EV+ 19(F/22 @ V1OO0) ASA 1OO Somm FlL.4
tral split image with microprism collar and    lens.
ground glass, 16 LED's indicate shutter speeds  ASA Range: 8S3800 (DIN 15-36) with safety
and over/under exlnsure. Over exposure LED    lock.
blinks and under exposure LED will glow when   Fllm Advance: Single stroke in an arc of 1300     r
exposure is -3EV and will flash at-2EV or lower.   with 85o stand off, niotorizedfllm advance with        I                                  cHrNoN POWER WTNDER (Pw-530).
4                                                                                                                                                                                                                                   I
View original page 17
Page 18 · Read text
.q.'".


 MulUple Exposure: Built-in switch which dis'    Battery Test: Built-in with LED indicator.
 etrguges film advance and frame counter. Aute   Body Flntsh: Black.
 muli-catty resets to normal position after each    Accessorles: Chinon Power Winder (PW-
 film advancement. UNLIMITED.                    530), Deluxe carrying case, Chinon Super Mul-
 Ftlm Counter: Automatically indicates number    ti<oated lenses, Power Winder remote control,
 of exposures and resets to "S" when camera     angle finders and many more.'back       is opened. Does not advance during mul-   Body Dtmehstons: 135.5 X 85 X 50.5mm
 tiple exposure.                                  5.33 (W) X 3.34 (Ir)X 1.99 (D)".
 Setf-Ttmer: Electronically controlled at 5 or    Bodl' Wetght: 485 grams ( fZ.fO oz.).
 10 seconds with flashing red LED indicator.
 Two seconds before exposure flashing fre-
 quency of red LED increases. Self-tirner can
 be cancelled even after system has been acti-
 vated.
 Ftlm Rewtnd.: By depressing the rewind button
 and cranking the rewind lever. Rewind button
 automatically resets when the film advance
 lever is turned.
 Accessory Shoe: Hot shoe type with X sync.
 and contact for Chinon dedicated flash.
 Synchronlzatlon: "X" strobe synq at 1/6O sec.
 Flash System: Chinon dedicated flash or most
 conventional flashes.
 Power Source: Three 1.5V Alkaline batteries
 (LR44, A76) or three 1.5V silver oxide
  betteries (SR44, S76, G-l3).
                                                                                                       aD
View original page 18Page 20 · Read text
THE BATTERIES                                        TDE[9l_g-r{Jn

BATTERY INSTALLATION
fnstalltng Batterles
Using a coin, unlock the battery
chamber cover by turning it counter-
clockwise. Place three 1.5V Alkaline                             NOTE: CLEAN THE BATTERIF^Sbatteries (LR44, ,476) or three 1.5V
silver oxide batteries (SR44, S76,   WITH A DRY CLOTH OR PAPER                     BEFORE INSERTING ANDG-l3) in the battery chamber with the                            AT REGULARnegative (-)  side facing downwards   THEREAF*IER                        INTERVALS. MAKE SURE(Fig. 1). Carefully insert the batteries                      THAT THE BATTERIES AREinto the camera body. Replace and                         INSERTED CORRECTLY,  i.e.,tighten the cover securely by turning                          CHECK POLARITY. THE SHUT.it clockwise (Fig. 2).                    TER WILL OPERATD ONLY
                     WHEN BATTERIES ARE COR.
                          RECTLY INSTALLED AND NOT
                            EXHAUSTED.
View original page 20Page 21 · Read text
www.butkus.us
     TESTING     BATTERIES
BATTERY TESTING
Testtng the Batterles
Set the shutter speed selector to
"AUTO" (Fig. 3), and while looking
at the shutter speed indicator scale
in the viewfinder, slightly depress
the shutter release button. If the bat-
teries are in good condition (battery
potential is high enough), at least
one of the indicator LEDs will light
up. If a LED fails to illuminate, the
batteries are too weak and need to be
replaced, they are incorrectly inserted,
or the shutter speed selector is set to
"OF'F" or "B".
View original page 21Page 22 · Read text
.- -
  LOADING THE CAMERA                          GE"4
   FILM LOADING                     Release the shutter if necessary and
                                     advance the film until the sprockets
   Your Chtnon CE-4 can be used.   er^gage with the upper and lower per-
   with any klnd of 35mm film.         forations of the film (Fig. 6). Then
                                         close the carr^era back firmly until   Ftlm Loadtng                                                                   it locks with a click.
    Pull out the film rewind knob until  Now turn the film rewind knob gently
   the camera back pops open (Fig. a).   until all the slack is taken up and
   Then drop a film cartridge into the  the rewind knob stops. Do not force
    film chamber with its protruding end   or further rewind the film. Advance
   facing the bottom of the camera   the film and release the shutter three
     (Fig. 5). Push in the film rewind knob  times (Fig. 7). The rewlnd knob
 I  and slightly turn the knob in either  should rotate counterclockwise as                                                                                                                                ((l'    direction until it catches the film car-  the ftlm ls advanced and the
f'   tridge spool. Insert the trimmed end  marking should appear in the frame
    of the film into a slot of the multi-
    slotted take-up spool. Turn the shut-{    ter speed selector to any setting ex-
    cept "AUTO" or "OFF" and advance
    the film while holding the film lightly
   down on to the transport sprockets.
View original page 22Page 23 · Read text
www.butkus.us
      LOADING THE CAMERA (Cont.)  FRAME COUNTER
                                                                            '    counter window (Fig. 8).            Frame Counter
   Turn the shutter speed selector to                                  Your Chinon CFA is equipped with    the "AUTO" position (Fig. g). A con-                               a frame counter which displays the    venient memo holder is provided on                                                    exposures made and resets\   the back of your camera'. W'henever   number of
   you load new film, just cut off the   automatically upon opening the cam-                                                                     beginnin g the    top of the film box and put it in the   era back. At the very                                           counter shows "S" indicating the start   memo holder as a reminder.                                           of the picture taking process. When
                                       a film is loaded according to the pro-
                                  cedure previously described, the
                                       counter displays "1" indicating that
                                          the camera is ready for the first expG
                                        sure. Every time the film advance
                                           lever is turned the counter will pro-
                                        ceed one stop forward. The numbers
                                24 and 36 are colored in orange to
                                  warn the end of commonly available
                                             films (Fig. 10).
View original page 23Page 24 · Read text
Rid nFILM ADVANCE ASA SETTING                                          [b LE'qJ
                                 'Ftlm Advancement             ASA Settlng
When the film end is reached the  The ASA dial located on top of the
fllm advance lever may stop before   camera is coupled directly to the
the lever is fully turned. Do not force   internal exposure control circuitry
the lever. Stop winding at once and  and the correct exposure factor for
rewind the film. Refer to "IJnloading   the film is automatically set by align-
Exposed Film."                         ing the ASA number of the film you
                                        are using with the index mark on the
                                   camera body (Fig. 11). The ASA num-
                                     ber of the fllm is printed on the film
                                  box or in the instruction sheet packed
                                        with the film. Turn the ASA dial and
    ASA DIN  ASA DIN   thealigngreenthe appropriateindex mark.ASABe surenumberto checkwith
       25-15       400    27     the ASA number whenever you put new                              -          film into the camera.       50-18      800    30                              -
        100 -  21     1600 -  33
        200 -  24     3200 -  36
View original page 24Page 25 · Read text
www.butkus.us
     FOCUSTNG

Your Chtnon CF-4 has three butlt-   asterisks will disappear when the
ln focustng atds.                          focu.s is properly set. You can double
At the center of the viewfinder is the   check the focus setting by the image
split image with microprism collar  on the ground glass.                            You can also focus indirectly. Actu-which is then surrounded by ground                                             ally measure or estimate the distanceglass. When the camera is in focus,                                       to the subject and set the lens focusthe image on these focusing aids be-                                    to the appropriate settingcomes sharpest. While observing the  _r1ng                                              (Fig. 1a).subject through the viewfinder, turn
the lens focus ring until the upper
and lower split images match up to
form a uniform image (Ftg. 18). This
split image focusing is particularly
helpful when the subject is dominated
by vertical lines. The microprism is
also very helpful. When it is out of
focus, the image on the microprism
will be composed of a collection of
asterisks (Ftg. 13). These sparkling
View original page 25Page 26 · Read text
AUTOMATIC EXPOSURE                          GE"4

Automattc Dxposure                speed displayed in the viewfinder by
                                     a red LED (Fig. l7).If the lens F stopYour Chinon CFA features TTL,                                    or the aperture size is too large forcenter weighted full aperture light                                      the lighting condition, the over expo-measuring automatic exposure con-
trol. As long as the shutter speed   sure indicator at the top of the scale                                        will flash (Fig. 18). When this hap.selector is set to "AUTO" vou don't                                      pens, stop down the lens diaphragmhave to worry about the exposure                            by turning the lens F stop ring orfactor (Fig. 15). The sensitive and                                    use a film with a lower ASA number.accurate internal circuitry will com-                                  Another alternative is to use a NDpute the correct exposure for the                                          (neutral density) filter in front of thephotographic condition and control                                            lens. They are available as accessoriesthe shutter speeds steplessly from an                               from your local dealer. If the dis-8 sec. time exposure to a fast li 1000                                    played speed is 1/30 or slower, usesec.'When                                 of a tripod is recommended. Or you      the shutter release button is                              can increase the shutter speed bydepressed half way, the exposure con-
trol circuit is enetgized and will be   opening the lens diaphragm. Use of a                                          flash unit is also suggested. (Refer toin the monitoring stage (Fig. 16). You
can see the computerized shutter   "Chinon Dedicated Flash System").
                                                       www.butkus.us
View original page 26Page 27 · Read text
www.butkus.us                                                                                                                                                                                                                                                         Il

  the computed shutter speed is even  F Stop Selectlon:runger than 8 sec. (semi-darkness                               The following may be used as a guidecondition), the under exposure indi-                                    to determine the lens F stop whencator at the bottom of the scale will
light up and flash when the available   you are using the camera in the auto-
light is less than -2EV (Ftg. 19).        matic mode.                                Sunny day outside  . . . . . . F/S -F/11
                                   Cloudy day outside.  . . . . .Fl4  -F/5.6
                                         Inside (without flash) .. .FlI.4 -I7S.8
View original page 27Page 28 · Read text
SHUTTER RELEASE  RELEASE LOCK                  GE,'4
                                      'Shutter Release and Release Lock
Your Chinon CE4 features a two
stage electromagnetic shutter release
with safety lock. When the shutter
release button is depressed half way,
t}n'e electronic circuit starts function-
ing. When the button is fully de-
pressed, it will trigger the shutter.
Always hold the camera steady and
gently depress the shutter release
button to make an exposure.
The position marked "OFF" on the shut-
ter speed selector is the shutter re-
lease safety lock position. When this
is aligned with the index mark, the
batteries are disconnected from the
circuit and exposure cannot be made
(Fig. 80). This position is also used
when the camera is not to be trsed
for a long time.
View original page 28Page 30 · Read text
coNvENTENT FEATURES t CHANGTNG THE LENS GE"4l,

a   CONVBNIENT FEATURES OF
                                               OR   YOUR CIIII{ON CF*            NOTE: DO NOT REMOVEa                           REPLACE THE LEI\S WHILE    fnterchangeable Lenses        THE CAMERA IS FUNCTION.
    Your Chinon CFI+ is equipped with   ING.
   a Chinon bayonet mount which ac-
     cepts all interchangeable lenses with
    the bayonet mount. To remove the
    lens from the camera body, depress
    and hold the lens lock release lever
   on the camera body (Fig. 34), turn
    the lens counterclockwise as far as it
     will go, and lift it up from the body
     (Fig. 85).            www.butkus.us
View original page 30Page 32 · Read text
DEPTH OF FIELD                                  GE-4
Depth of Freld.                   Depth of Freld Scale:
Depth of field designates the nearest  The depth of field scale indicates
and furthest limits of the area that    (after focusing) the approxim ate area
will be sharp in the picture in front   that will be sharp in the picture. Lo-
of and beyond the subject. Depth of   cate on the depth of field scale the
field is controlled by the f/stop. The   corresponding pair of f/stop figures.
larger the lens opening (f/stop), the  The distance between these two f/stop
shallower is the depth of field. The   figures on the focusing ring will be
smaller the lens opening, the greater   the area of sharpness in your picture
the depth of field will become (Fig. 27   (Fig. 3e).
and 88).
                          NOTE. DO NOT DEPRESS THEVtstble Check tn the Vlewftnder:                         SHUTTER RELEASE BUTTON
Set the lens at a selected lens opening   WHILE DEPRESSING THE DEPTH
on the f/stop ring. Depress the depth   OF FIELD LEVER.
of field lever and obsewe t}r,e subject
through the viewfinder. This will en-
able you to preview the area of sha4>
ness in the picture before shooting.
View original page 32Page 34 · Read text
THE SELF.TIMER                                  GE"4
SELF TIMER                 You will notice the red self timer
                           LED blinking and two seconds beforeYour Chinon CE-4 is equipped with a                                    the shutter releases the flashing fre-two stage electronic self timer with a                               quency will increase giving you orred LED indicator.                                    your audience time to smile. The selfThe built-in self timer electronically                                    timer may also be utilized for releas-delays the shutter release for 5 or 10                                       ing the shutter at low shutter speedsseconds. First select the desired delay                             when a cable release is not available.by rotating the self timer control                                                        If you decided not to use the self'timer(Fig. 30). The camera should be                                    or to change the delay time, you canmounted on a firm support during                                              cancell or reset the timer even after theself timer operation. Now to activate                                          function is iniciated. Just return the dialthe system simply depress the shut-                                            to normal position for cancellation andter release button.                                              reset the delay time again.
Note : If the self timer is to be used with
the camera set at " AUTO " then the  NOTE: CHANGE OF DELAYcamera eyepiece must be covered with   TIME CAN ONLY BE MADE
eyepiece cover supplied as an optional   AFTER CANCELLATION.
accessory. This precaution eliminates
extraneous light from influencing the
meter system.
View original page 34Page 35 · Read text
www.butkus.us
     MANUAL EXPOSURE
MANUAL EXPOSURE
By moving the shutter speed dial off       is indicated in the viewfinder bv
the "AUTO" setting manual shutter     an LED. You will also observe i
speeds can be set. There are two methods     flashing LED in the viewfinder.
of selecting the correct exposure.        By adjusting the shutter speed
                                           until both LED's are coincident, 1. Set the required shutter speed on                                           correct exposure will result. If for   the dial. While depressing the                                                                               it is necessary   shutter release buttbn until the      special purposes                                 to either under or over exnose   metet activates, observe the flash-                                         the photograph, you can do sb by   ing LED in the viewfinder. Rotate                                           rotating the lens aperture ring to   the lens aperture ring until the                                          bring the red exposure LED above   second LDD aligns with the flash-                                    the flashing shutter speed LED,   ing shutter speed LED on the                                              this will result in over exposure.   scale in the viewfinder (Fig. B1).                                         Conversely,  if the red LED expo- 8. Set the required aperture-on the                                   sure indicator is adjusted to a   lens. Depress the shutter release                                        position below the flashing red  button until the meter activates                                      exposure LED under exposure will  and observe which shutter speed                                                result.
View original page 35Page 36 · Read text
MANUAL EXPOSURE (Cont.)                      GE"4
The Manual Shutter speeds can be
used for:
  1. A particular shutter speed that is
    required and beyond the coupling
   range of the meter e.g. 4 sec.
   exposure at 3200 ASA.
  3. Exposure compensation.
  3. "8" ('Time" exposures longer than
    that possible in the auto mode).
  4. Flash synchronization (1/60).
View original page 36Page 37 · Read text
www.butkus.us
       MULTIPLE EXPOSURE
  MULTIPLE DXPOSURDS                              NOTE: YOU CAN MAKE MULTI-
  Another attractive feature of vour   PLE EXPOSURES AS MANY TIMES
  Chinon CE-4 is the built-in unlimited  AS YOU WISH. HOWE,VER, EACH
                               The  TIME THE MULTIPLE EXPOSUREI  multiple exposure provision.
   multiple exposure lever is located   LE,VER MUST BE HELD BEFORE
   in front of the film advance lever.  AND THROUGHOUT THE FILM  When you activate the film advance   ADVANCE,MENT.
  lever simply press and hold the
   multiple exposure lever to the left.
   This lever should be held throughout
   the film advancement. By doing so the
   film advance mechanism and the film
   counter will be disengaged. Only the
   shutter will be charged when the film
   advance lever is activated. Therefore,
   the film will not advance and you can
  make unlimited multiple exposures on
  any single frame.
View original page 37Page 38 · Read text
THE EXPOSURE MEMORY                         GE"4
EXPOSURE MBMORY                  or background (Fig. 34, 35, 36).
                                  Then press the exposure memoryUnder normal circumstances Your                                        button which will instantlY mem-Chinon CF/f camera will produce                                               orize the light value on the subperfectly exposed photographs, due                                             ject (Fie. 37 and 38).to the integrated automatic exposure                                                3. Holding the exposure memorycircuit. However, some lighting con-                                                                                                                                           t                                   button depressed, compose theditions might occur that could mis-                                           subject in the viewfinder as you   1guide the system, such as subjects                                           desire (Fig. 39). Then press the
with a 'very high contrast or strongly       shutter release button all the wayback-lit scenes. In such cases the                                               to take the photograph.exposure memory feature should be                                   The shutter speed indicator (LED) in
used.                                 the viewfinder will flash signaling  1. Focus the Subject. Make sure that                                           while holding the exposure memory   the shutter speed dial is set to                                            button depressed.    the "AUTO" position.
  8. Depress the shutter release button
    half way and measure the light
   on the main part of the subject
   you want to shoot excluding all
    unnecessary light from the side
                                                  35
View original page 38Page 39 · Read text
www.butkus.us
     EXPOSURE COMPENSATION

EXPOSURD COMPENSATION
Your Chinon CE/L camera incorpor-
ates an exposure compensation dial
which can be utilized for special pur-
poses such as bracketing exposures,
compensation for back-lit or spot-lit
situations. If you would prefer darker
or lighter pictures than those obtained
by the automatic exposure, this fea-               (l)-   lEV over
ture is very helpful. You can change                    (2)    2/3EV over
                                                                  1/3IiV overthe exposure factor up to one fuU            (3)--                                                   (4)-   Nornral                                                                    exposurestop either plus or minus in UB BV          (S1-                                                          1/3EV underincrements. Depress the ASA lock               ((i)-  2/3EV undcr            .button and turn the ASA selector dial                   (7)    1EV under
to the desired position (Fig.   0).                          -
                        NOTE: AFTER EXPOSURES
                       HAVD BBEN MADB, BB SURB
                          TO RBTURN THB DIAL TO THE
                          NORMAL EXPOSURE POSITION.
                                                                               --36
View original page 39Related documents and language editions

From the M. Butkus archive. Original publisher and archive notices are retained.
Check the model and edition against your equipment.
PDF verified 2026-10-10.