Film cameras
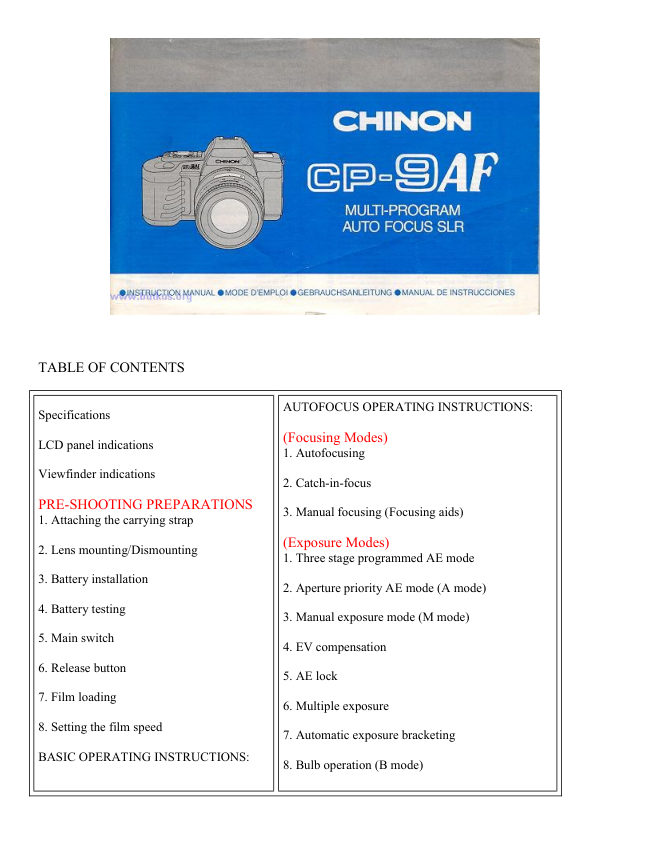
Chinon CP-9AF User manual
User manual for Chinon CP-9AF. 38 pages in English. Read the original PDF, download or print a copy without registration.
38 pagesEnglish1.6 MB PDF
Loading your manual…Open PDF directly
Document details
- Brand
- Chinon
- Model / document
- Chinon CP-9AF
- Document type
- User manual
- Language
- English
- Pages
- 38
- File size
- 1.6 MB
- Category
- Film cameras
- Document date
- Not specified in catalog
Search available document text
Find a term, then jump to its page in the original PDF. Image-only pages may not be searchable; check the PDF for exact wording and diagrams.
Page 2 · Read text
TABLE OF CONTENTS


                             AUTOFOCUS OPERATING INSTRUCTIONS:
Specifications
                                      (Focusing Modes)LCD panel indications
                                                   1. Autofocusing

Viewfinder indications
                                                   2. Catch-in-focus
PRE-SHOOTING PREPARATIONS                                                   3. Manual focusing (Focusing aids)
1. Attaching the carrying strap
                                     (Exposure Modes)2. Lens mounting/Dismounting
                                                   1. Three stage programmed AE mode

3. Battery installation
                                                   2. Aperture priority AE mode (A mode)

4. Battery testing
                                                   3. Manual exposure mode (M mode)

5. Main switch
                                                   4. EV compensation

6. Release button
                                                   5. AE lock

7. Film loading
                                                   6. Multiple exposure

8. Setting the film speed
                                                   7. Automatic exposure bracketing

BASIC OPERATING INSTRUCTIONS:
                                                   8. Bulb operation (B mode)
View original page 2Page 3 · Read text
1. Setting the exposure mode                    9. Time exposure

2. Programmed AE modes                     10. Interval timer

3. Mode reset button                          11. Electronic flash photography

4. Focusing                                   12. Infrared photography

5. Unloading exposed film                    Optional accessories

6. Self-timer operation


Specifications of the Chinon CP-9AF

Type: Micro computer controlled fully motorized 35 mm AF SLR with multi auto exposure modes, TTL strobe
AE system, LCD indicator for camera functions.

Type of film: 35 mm film cartridge.

Film format: 24x36 mm

Lens mount: C-AF mount (mount compatible with K, KA, KAF, RK mount lenses with certain restrictions on
program AE mode usage).

AF system: Phase differential detection with CCD line sensor.

Focusing modes: Single AF, Continuous AF, Catch-in-focus and Manual focusing with focus aid.

AF auxiliary light: Built-in emitting light, automatically activated in low light situations.

Mirror: Motorized large swing back quick return type half mirror.

Finder type: Fixed penta prism type.

Focusing screen: Ground glass with AF frame.

VF coverage: 92% horizontal and vertical.

VF magnification: 0.87x (50 mm at infinity setting).

Dioptric factor: - 1.0 dioptor

VF indications: 18 LEDs in three different colors: 1 /2000-1 /60 sec. (Green LED). 1 /30-1 sec. (Orange LED).
2-8 sec. (RED "down-arrow" LED). Blinking down-arrow LED for under exp. warning.  Blinking 1/2000 LED
for over exp. warning. "P" LED for Normal program. "PA" LED for Action program. "PC" LED for Creative
program. Green "circle" LED lights up when in focus. Flash " "lighting bolt" " LED lights up when flash is fully
charged.
View original page 3
Page 4 · Read text
LCD indications: Picture taking mode, Shutter speed, lSO speed, Film counter, Self-timer time, Bulb time,
interval time, Battery check, F number, EV compensation value, Focusing modes, multiple exposure warning,
end of film indicator, AEB indicator.

Shutter: Electromagnetically controlled focal plane shutter.

Shutter speed: Stepless shutter speeds from 8- 1/2000 sec. for AE modes and 15 steps from 8- 1/2000 sec. in
manual plus B. Long time exposure for AE modes is 15 sec.

Strobe mode: 2 modes: TTL strobe mode and FM mode.

Strobe control: TTL direct metering auto adjusting strobe system for AF-S280 flash and CPU controlled flash-
matric for AF-S120 flash.

Strobe sync.: X sync., with hot shoe is 1/60-1/100 sec. (depends on the light value).

Slow sync.: Possible in Manual exposure mode (1 /60 sec. or slower).

Self-timer: Electronically controlled, 10 seconds. Self-timer operation up to 90 min. LED indication and LCD
panel indicator (subtracted type). Cancellation possible.

Exposure modes: Normal program AE, Action program AE, Creative program AE, Aperture priority AE, Auto
exposure bracketing AE, Manual exposure and Bulb time exposure, flashmatic and TTL flash.

Type of metering: TTL full aperture center weighted average metering for non-flash photography. TTL direct
metering for flash photography.

Photocell: 2x S.P.D. (Silicon Photo Diode).

EV range: EV+1 to EV+20 (F1.4/50 mm, ISO 100)

ISO range: ISO 25-lSO 5000 in 1/3 increments. Automatic ISO speed setting for DX films. Manual ISO speed
setting for non DX films is possible.

AE lock: Possible in all automatic exposure modes.

EV compensation: -4 EV to +4 EV in 1/2 EV steps. Compensation and LCD indication is only possible with
DX films.

Multiple exposure: Built-in switch disengages film advance and counter for unlimited multiple exposures.

Shutter release: Electromagnetic type shutter release.

Release lock: Possible with main switch.

Film loading: Auto loading with built-in micro motor. Auto first frame setting by closing back cover.

Film advance: Auto winding with built-in micro motor. Selectable shooting mode for single and continuous
exposure. Continuous film advanced at up to 2.5 FPS. Shutter release lock built into main switch.
View original page 4
Page 5 · Read text
Film rewinding: Auto rewinding activated by rewind button with auto stop system upon completion of
rewinding.
"B" Time exposure: Exposure time for bulb photography can be set up to 90 minutes, 1 to 60 seconds: 1 to 90
minutes.
Interval timer: Built-in. Can be set up to 90 minutes; 1 to 60 seconds; 1 to 90 minutes.

Mode reset: Built-in.

Power hold: 12 seconds.

Cable release: Attachable

Back cover: User replaceable clip-on type.

Film type window: Built-in.

Battery check: LCD indication on LCD panel.

Power source: 1 x 6V lithium battery (2CR5) or 4 x 1.5 V "AA" alkaline batteries.

Dimensions: 150(W)x90(H)x50(D) mm (6"x3.6"x2")

Weight: 545 9 w/o battery (19 ounces).

ESC contact: Built-in.

Accessories: Chinon 28-70 mm AF zoom lens w/macro, 70-210 mm AF zoom lens, AF-S280 TTL dedicated
flash, AF-S120 dedicated program flash, Infoback III and carrying cases.

LCD Panel Indications


The CP-9AF digitally presents picture taking data on its large LCD display panel.
View original page 5
Page 7 · Read text
Camera speeds are monitored at every half stop on the LCD panel and at every full stop within the viewfinder.
Accordingly, for more refined shutter speed setting, referencing the LCD panel indication is recommended.
F/No. indications are provided at every half stop on the LCD panel.

1. Attaching the Carrying Strap


                                               1 ) Pass each end of the strap
                                                     through one of the strap
                                                 mounting lugs as illustrated
                                                              (Fig. 1). 2) After determining
                                                     a comfortable length, place
                                                          the end of the strap through
                                                          the plastic retainer. Slide the
                                                                plastic retainer toward the
                                                 mounting lug to secure the
                                                             strap (Fig. 2).


2. Lens Mounting/Dismounting

To attach the lens, match the red dot on the camera body with the red dot on the lens (Fig. 3). Insert the lens into
the camera body and turn it clockwise until the lens locks with a click. To remove the lens from the camera
body, depress the lens lock release lever, turn the lens counterclockwise as far as it will go and lift it up from the
body (Fig. 4). Do not remove or attach the lens while operating the camera.

NOTE: Various electrical contacts are incorporated in both the lens and camera. Upon removing a lens, exercise
the utmost caution to avoid scratching, soiling, or finger-marking these electrical contacts. While the camera is
in operation, do not attempt to remove or attach a lens or any other optical device (extension belongs, etc.).

Besides specially designed CP-9AF lenses, other K (any make) or KA (Pentax or Chinon with lens contact
pin) mount lenses may also be mounted on this camera. Note, however, that the use of non-Chinon lenses
should be done with extreme caution to ensure lens/camera compatibility.
View original page 7Page 8 · Read text
Lens Compatibility

               Focusing Mode                                    Exposure Mode

         Auto    Catch-    Manual   Programmed AE  Aperture    Manual
         Focus    in-focus   Focus      (Pa, P, Pc)         Priority AE   Exposure

CP-9AF  Yes     Yes      Yes      Yes            Yes        Yes

PK/A-
       No    No      Yes      Yes            Yes        Yes
mount

K or PK
       No    No      Yes     No             Yes        Yes
mount


3.Battery Installation

The CP-9AF uses four (4) AA size 1.5 V alkaline batteries or one 6 V lithium battery (2CR-5 type).


1 ) Slide the battery compartment cover lock to open the battery compartment (Fig. 5).

2) Place four AA size 1.5 V alkaline batteries in the compartment with plus ( + ) and minus (-) ends aligned as
indicated on the cover (Fig, 6).

3) A 6 V lithium battery (2CR-5 type) can also be used by installing as shown In Rig. 7.

4) Close the compartment cover


4. Battery Testing

Set the main switch to the "S" or "C" position and depress the shutter release button halfway (Fig. 8). Fresh
batteries should be installed in any of the following cases.
View original page 8Page 9 · Read text
When all displays on the LCD data panel blink.

When the shutter release button is depressed all the way down, the shutter will not release and all displays on
the LCD panel and LED indications in the viewfinder will not light up. (make sure the AF light is not blinking -
stating a non-focused subject, camera AF must be solid for shutter to fire when in AF mode !)

(Number of Exposable Film Rolls) The battery life depends on the camera operating manner, battery storage
conditions, temperature and other factors, but may roughly be deemed as follows when starting out with new
batteries:

                   Using the 28 - 70MM AF zoom lens (it uses battery power to focus)


                                                               S-120 / AF
                                          S-120 / AF strobe
                   Battery                                                strobe 50%
                                                           (flip up) not used
                                                                   energized

Alkaline (AA) (remember this book dated
                                       60 rolls             25 rolls
1980 before newer alkaline types)

Lithium (2CR-2)                         70                 30

With 24 exposure films at 20°C (as per laboratory testing).


Whenever possible, avoid using AA size Ni-Cad rechargeable batteries or manganese batteries (UM3). Such
batteries drastically lower the exposure film roll count. Additionally some Ni-Cad batteries have contacts or
other physical differences which may prevent the camera from operating. MY NOTE: The newer rechargeable
alkaline batteries or the Ni-Hg batteries are much better then the old Ni-Cad batteries. The costs of these
rechargeable have dropped. Depending on the amount of film you shoot the standard AA batteries will last a
good number of rolls unless you use the flash constantly. NOTE: A capacitor has been designed into the
circuitry of this camera for a memory backup. The memory backup is effective for about 5 hours after the
removal of the batteries. Beyond that time period, the film counter and other memory contents will be deleted.
When replacing batteries midway through a roll of film, install the new batteries as soon as possible to avoid
losing the exposed frame count. For further details of the memory backup, see last pages.

5. Main Switch
View original page 9Page 10 · Read text
The main switch has four positions, L, S. C and ME. For normal operation, leave it set at either "S" or "C" (Fig.
9).
(S) phases in a single frame mode, where pushing the shutter release button once releases the shutter once.

(C) phases in a consecutive frame mode. When the release button is held down, the shutter can be released
consecutively as quickly as 2.5 frames per second (when manually focused).

(ME) phases in a multiple exposure mode. Set the main switch at its ME position while holding the multiple
exposure lock button down. (See paragraph on page 59 covering the multiple exposure mode).

6. Release Button

The CP-9AF has a dual step electronic release system. Photometnc operations commence when the release
button is pushed halfway down. The shutter is released and the exposure made when the release button Is
pushed all the way down (Fig. 10). (Photometry) When the release button is partially depressed, the metering
circuit is activated. LCD panel indications and LED indications within the viewfinder will be illuminated. This
data will be displayed for 12 seconds after pressure has been removed from the release button. (Release) When
the shutter release button is fully depressed, the shutter will be released. The LCD panel and viewfinder
information will remain on display for three seconds after the exposure has been completed.


7. Film Loading


1 ) Set the main switch to the "S" or "C" position (Fig. 11).

2) Open the back cover by pressing the back cover release button and sliding the back cover release lever
downward. Load or unload a film cassette away from direct sunlight. Do not touch the focal plane shutter.
Avoid bending the film roller or any other springs on the back cover (Fig, 12),

3) Insert a film cassette into the film chamber with the protruding end of the cassette positioned toward the
bottom of the camera (Fig. 13).
View original page 10
Page 11 · Read text
4) Extend the trimmed end of the film up to the yellow leader index. Make sure that the lower perforations of
the film engage the teeth on the sprocket (Fig. 14).

5) Close the camera back firmly until it locks with a click (Fig. 15).

6) The camera will automatically advance the film to the first frame and "1" will appear in the frame counter in
the LCD panel.

With DX film, the ISO number will appear during loading. When loading is completed, the DX mark and the
metered data (shutter speed) are displayed and the film speed is automatically set. The metered data (shutter
speed) remains displayed for 12 seconds. (A)

With non-DXing film, after loading is completed, the data panel will display a blinking ISO mark for 12
seconds as an indication to set the correct film speed. (B)

[DIAGRAMS]

 Film loading in progress. (A)

 Film loading complete. (B)

12 seconds later (C)

NOTE:
If the frame counter still shows "0", open the back cover and reload the him properly. MY NOTE: The camera
will fire but the frame advance numbers will not work. That is your test to see if you loaded it properly.

8. Setting the Film Speed

(When using DX coded film)


The film speed for DX coded film is automatically adjusted and the DX mark appears in the data panel. (Fig.
16)
View original page 11
Page 12 · Read text
(When using non-DX coded film)
Push the AF mode button and /time button simultaneously to set the desired ISO value with the UP/DOWN
button (Fig. 17).
Value of the film used.
Manual film speed settings may be made in increments of 1/3 EV over an ISO range from 25 to 5,000.
The current ISO value setting may be checked at any time by pushing the AF mode and (clock)/time
buttons together Since the film speed will be displayed 12 seconds after the buttons have been pushed,
the ISO value setting may readily be revised by pressing the UP/DOWN button.
To phase out the ISO display and thus activate a picture taking mode, lightly push the release button.
BASIC OPERATING INSTRUCTIONS
1.Setting the Exposure Mode
The CP-9AF features a three stage programmed AE mode, (P. P-Action P-Creative), aperture priority (A) mode,
a metered manual (M) mode and bulb (B) mode.
To set the exposure mode, simply press down the desired mode at the corner of the exposure mode selector One
press on P mode will result in normal "P", another press for "P-Action" and a third for "P-Creative" (Fig. 18).
See Exposures Modes for further details.
[DIAGRAMS]
(A) Programmed Modes
(B) A-Mode
(C) M-Mode
(D) B-ModeView original page 12Page 13 · Read text
* With K mount lenses other that C-AF, P mode settings cannot be made.


2. Programmed AE Modes

In the programmed modes, the camera automatically determines the aperture and shutter speed in accordance
with the ambient lighting conditions and the Luminance of the subject to achieve an exposure. Programmed AE
modes are ideal for general picture taking by eliminating troublesome exposure settings caused by changing
light conditions.


For general snap shots and scenic pictures, the P mode (normal program) is ideally suited.

1) Push the "P" corner of the exposure mode selector until this program mode is indicated on both the LCD
panel and within the viewfinder (Fig. 19).

2) Pushing the "P" corner again and again cyclically switches the mode, enabling you to make any preferred
programmed AE mode setting.

NOTES:
When the shutter speeds on the LCD panel and the "down-arrow " mark within the viewfinder both blink, an
optimum exposure for the current lighting situation has outstepped the AE linked range.

When the required shutter speed is slower that 1/30 second, the shutter speed digital LED within the viewfinder
will change its color from green to orange, as a warning to possible camera shake. Either use an electronic flash
or a tripod to help avoid blurred pictures.

Mode Reset Button
When you want to quickly set the camera to the normal program mode from P-Action, P-Creative, A, M or B.
simply press and release the mode reset button.

1 ) When the mode reset button is pressed and released the exposure mode will be set to the normal program
and "P" LED will light up in the viewfinder (Fig. 21). Any exposure adjustment and self-timer bulb settings on
automatic will be cancelled. Any focus setting will reset to AF.
View original page 13
Page 14 · Read text
2) When the mode reset button is pressed and released, the metered shutter speed in the normal "P" mode is
displayed in the data panel for 12 seconds. When the mode reset button is pressed and released after the self-
timer is activated, the metered shutter speed is displayed in the data panel for one second: the self-timer is
cancelled without exposing a frame and the automatic Exposure Bracketing (AEB) are automatically cancelled
(if it was set).
The auto DX setting is restored to the + / - 0 EV level.
4. Focusing
The CP-9AF can be focused in any of the following modes.
1) Auto focusing.
2) Catch-in-focus.
3) Manual focusing by the use of a focusing ring. ( focusing aid)
(Auto focusing)
1) With the AF mode button held down, push the UP/DOWN button to phase in a single AF mode, "AF" (Fig.
22).
2) Lightly push the release button. Focusing will then be made automatically. As focus is achieved, a green
LED " * " will illuminate within the viewfinder (Fig. 23).
3) While the release button is held partially down, the " * " mark will remain lit and the focusing distance will
be maintained. (Fig. 24)
The shutter cannot be released unless the "*" mark is lit.
(4) Once the auto focus lighting indicator in the viewfinder has been lit, the release button can be pushed all the
way down to take a picture (Fig. 25).
5) After each exposure, the film and the frame counter are automatically advanced.View original page 14Page 15 · Read text
(Focusing Indication within the Viewfinder)
Green LED glowing: AF OK; shutter may now be released.
Green LED blinking: Undetectability alert; shift the AF target to a higher contrast area of the subject. If
the mark continues to blink, refer to "autofocus-defying objects" on page 47.
LED green off: The AF operations are in progress or a manual focusing mode has been selected.
* Do not attempt to turn or restrict the focusing ring during AF operation.
* For further details of the focusing operations, see pages 43 to 49.
* The shutter cannot be released unless the "*" mark is lit.
5. Unloading Exposed Film
When the film in the camera is fully exposed, the number in the film counter remains blinking for 12 seconds.
All other LCD displays will disappear.
[DIAGRAMS]
(A) Film cartridge completed
(B) During rewinding
(C) Rewinding over
1 ) Slide the rewind switch protection cover in the direction of the arrow and push In the rewind button to
rewind the film (Fig. 26).
2) During rewinding, the frame number counts backward showing how many frames are remaining to be
rewound.
3) After rewinding, "O" appears blinking in the frame counter and the rewinding is automatically stopped.View original page 15Page 16 · Read text
4) Open the back cover and remove the film (Fig. 27). Do not open the back cover until the motor stops, even if
"O" appears in the frame counter.
NOTE: If the motor should stop before the frame number reaches "O", do not open the back cover. Replace the
batteries with a fresh set. When rewinding is completed, "O" will blink for 12 seconds. The shutter cannot be
tripped until the rewinding operation is completed and the film cassette removed from the camera.
6. Self-timer Operation
The CP-9AF is equipped with an electronic self-timer with a red LED and a unique "up to 90 minute" feature.
The film is automatically advanced one frame after the exposure is completed.
1 ) Press the /time button to activate the self-timer for a 10 second delay (Fig. 28).
2) Focus and compose the picture and then depress the shutter release button.
The self-timer LED will start blinking. The frame counter displays the remaining seconds until the
shutter will be released.
To cancel the self-timer mode, push the AF mode button.
[DIAGRAMS]
(A) Self-timer function set
(B) Self-timer in operation
(C) Complete
The self-timer mode may also be cancelled by pushing /time button, as long as the self-timer is still in
operation. In this mode, the 10 second self timer mode well be sustained indefinitely Cancellation will also
occur by pushing the mode reset button, but in this case, the exposure mode and other settings will be reset to
the normal exposure program, single AF and "O" compensated ISO settings.
If automatic exposures are used in conjunction with the self-timer, install the eyepiece cover to block any
extraneous light rays that might adversely affect the exposure measurement (Fig. 29).View original page 16Page 17 · Read text
To set the self-timer operation for a particular
length of time, push the UP/DOWN button to
make the necessary setting while firmly holding
the (clock)/time button down (Fig. 30).
Any length of time may be set in one second
increments from 0-60 seconds and in one minute
increments from 1-90 minutes.
The AF illuminator/self-timer LED starts
blinking 10 seconds in advance of the shutter
release and lights steadily for 2 seconds prior to
the actual release of the camera's shutter
To check the film (frame) count in the middle of
a self-timer operation such as may be required
when the self-timer has been set for a long
operation time, push the UP/DOWN button. The
film count will be displayed on the LCD panel.
In the single AF mode, the self-timer operation
will commence after the AF operation has been
completed.
AUTOFOCUS OPERATION INSTRUCTIONS
Focusing ModesView original page 17Page 18 · Read text
The CP-9AF will focus in each of the following methods:
1 ) Autofocusing
2) Catch-in focus
3) Manual focusing (focusing aid)
1. Autofocusing
Either of two Autofocusing modes can be selected, depending on the situation at hand.
(AF <Single AF Mode>) This setting is for normal photography. The camera first focuses the lens on the
subject, the AF lens operation ceases and a green "a" LED glows steadily within the viewfinder. As long as the
shutter release button is held down lightly, the focusing will remain locked in. In this mode, no shutter release
will occur until focusing is complete (Fig. 31).
(CAF <Continuous A Mode>) In this mode, the AF follows the continued movement of the subject. It is best
suited for shooting at a specific instant while tracking a moving target As long as the release button is held
lightly down in this mode, the AF lens will continue to focus on the subject in response to any movement of the
subject. The shutter may be released at any time regardless of whether the subject is in focus or not (Fig. 32).
To select an AF mode, depress the UP/DOWN button while holding the AF mode button completely
down (Fig. 33).
If a lens other than one with a C-AF mount has been attached, only the "CMF" and "MF" modes can be
selected.
(Locked Focusing Photography)
When the picture's subject is outside of the focus frame, follow the steps below for properly focused pictures.
1 ) Select the single AF mode setting with the AF mode and UP/DOWN buttons (Fig. 34).View original page 18Page 19 · Read text
2) Superimpose the focusing frame on the image which is to be sharply In focus. Lightly depress the release
button to activate the focusing system (Check to make sure the "at" LED mark is glowing steadily In the
viewfinder (Fig. 35).
3) Compose the photograph while holding the release button partially down and then push the release button all
the way down to take a picture.
By removing your finger from the release button, the focusing lock will be disengaged, permitting the
above steps to be repeated any number of times without needlessly exposing any pictures.
(Auxiliary AF Illumination)
Even in a dark environment that would normally cause focus difficulty, the CP-9AF automatically assists the
auto focusing operation
1 ) Select the single AF mode (AF) (Fig.
36).
2) When the release button is partly
depressed in a dark environment the
auxiliary AF illuminator automatically
emits a light to enable the auto focus
operations to be completed.
The auxiliary AF illumination light is not
activated either manual focusing mode
(MF/CMF) or in the continuous AF mode
(CAF) or with non auto focusing (C-AF
only) lenses
Despite the addition of the
auxiliary AF illumination light,
accurate focusing Is sometimes
impossible, such as when the target
reflectance Is Inordinately low or
when the distance is overly near or
overlyView original page 19Page 20 · Read text
2.Catch-in-Focus
In this mode, a focus range setting is made in advance. When the subject arrives at that distance, the shutter will
automatically be released to take the picture.
1 ) Select the catch-in-focus (CMF) mode setting with the UP/DOWN button while holding the AF mode button
firmly down (Fig. 37).
2) By turning the focusing ring, choose a shooting range setting (Fig. 38)
3) Compose the picture.
4) Push the release button all the way down and keep it there. (Use a tripod and cable release where required)
(Fig. 39).
5) As the subject arrives at the set range (the prefocused distance) the shutter will automatically be released to
take the picture. (Fig. 40)
When the subject movement is exceptionally fast, the shutter may sometimes fail to be released.
(Autofocus Defying Objects) Auto focusing accuracy can be diminished by low light levels, contrast, size
and/or the physical configuration of the subject. In such cases the green " * " LED will blink in the viewfinder
to alert you of the difficulty.
Subjects or Conditions
The following may not allow proper focus.
a. Low contrast subjects (with little differences between their light and dark areas).
b. Subjects lacking vertical lines.View original page 20Page 21 · Read text
c. Extremely small or finely detailed subjects.

d. Subjects that are intensely backlighted.

e. Subjects that extend from a near range to a far range.

f. Subjects with a continuous repeating pattern.

g. Fast moving subjects.

h. When using a soft focus or other special effects filters.

In any of the cases listed above, manually focus on the subject by using the matte area of the viewfinder screen.

3. Manual Focusing (Focusing Aids)


1 ) Select the manual focusing mode (MF) setting by pushing the UP/DOWN button while holding the AF mode
button down (Fig. 41).
View original page 21
Page 22 · Read text
2) Focus on the subject by turning the focusing ring of the
lens to achieve the sharpest image of the subject in the matte
area of the viewfinder screen (Fig. 42).
In the auto focusing modes (AF/CAF), do not
attempt to forcibly turn the focusing ring while the
auto focus system is functioning.
3) Push the shutter release button lightly down. As focusing
is completed, the green "*" LED will glow within the
viewfinder This confirms focus on the desired subject (Fig.
43).View original page 22Related documents and language editions
From the M. Butkus archive. Original publisher and archive notices are retained.
Check the model and edition against your equipment.
PDF verified 2026-10-10.