Film cameras
Voigtlander Ultramatic User manual
User manual for Voigtlander Ultramatic. 33 pages in English. Read the original PDF, download or print a copy without registration.
33 pagesEnglish2.9 MB PDF
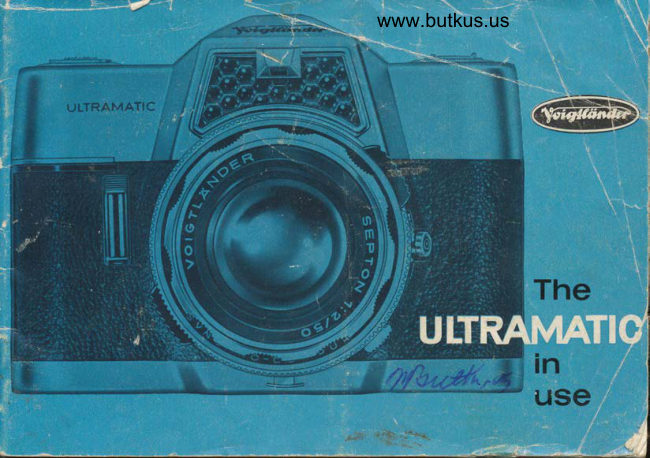
Loading your manual…Open PDF directly
Document details
- Brand
- Voigtländer
- Model / document
- Voigtlander Ultramatic
- Document type
- User manual
- Language
- English
- Pages
- 33
- File size
- 2.9 MB
- Category
- Film cameras
- Document date
- Not specified in catalog
Search available document text
Find a term, then jump to its page in the original PDF. Image-only pages may not be searchable; check the PDF for exact wording and diagrams.
Page 3 · Read text
Right Here    is the most importont piece of odvice of this instruction                  h
                 booklef. We hove prepored  it with o greot deol of core


                                                                                                                                                                                                                                                                                                                                                                                                                                                                                                                                                                                                                                                              r              to show everything in ihe cleorest possible woy. So
              pleose reod this booklei corefully before putting your                      first film in the comero!                                         i
                   First of oll, moke yourself thorougNy fomilior with the
            ULTRAMATIC ond proctise the vorious operotions with
                the empty comero. Remember olso thot the ULTRAMATIC
                   is very robust, but nevertheless on opticol ond mecho-
                nicol precision instrument.  lt therefore requires gentle
            ond sensible treotment. The comero will repoy coreful
               hondling with beoutifully cleor ond shorp pictures for
            mony yeors io come.

        VOIGTLANDER A.G. BRAUN SCHWEIG
View original page 3Page 6 · Read text
www.butkus.us
C Distqnce ring          @  Film speed scqle in DIN    @ Film counter'
    for focusing                                                     with odiustment                  @ Cqble releqse socket      ,                                                                   button tor 20 or 36@ Distqnce scole                  @  Film speed scqle in ASA          exposure cossettes    with depth of field indicotor
                                                                     @) Tripod bushO Control ring           @ Lens cotch
    for outomotic or monuol
    opertUreI      control
                                                                                                                                      Digitally signed by mike
(f  Synchroniser           mike           butkusDN: cn=mike butkus,    for M or X flosh synchron-                                             o=orphancameras, ou=29,
    isotion, qnd self-timer V      butkus    email=mike@butkus.org,Date:-04'00'2019.07.07 13:05:28c=USO Flqsh socket
    for plug from floshgun
€  R"u"rsing lever
    for film rewind knob
e  shutt"r ring
    for setting the shutfer speed
@ R"l"or"
@ Filt"t fqctor disc
    to compensote for filters
@ fih rewind knob
   with film type indicotor
@ Film speed cqtch
   for odiusting film speed scoles                           Fis.  ll
View original page 6Page 7 · Read text
Loading the camera
You moy use ony type of film in your ULTRAMATIC comero.
The usuol doylight cossettes with perforoted 35-mm block-ond-
white or colour film yield 36 or 20 exposures of 24 x 36 mm
eoch. Colour film con be the reversol type for colour tronspo-
rencies, or colour negotive film for colour prints on poper.
Although the cossettes ore light-tight, it is better not to hondle
them in direct sunlight. Alwoys lood or unlood ihe comero in
                                                      be.the shode - even in your own shodow if need
The fitm type indicotor
is intended only to remind you of the type of film octuolly in
the comero.  lt hos no effect whotsoever on the exposure.
To set it:  press reversing lever (6) to the right, ond rewind
knob (10) will spring up. Turn the coloured disc until the sector
with the corresponding film symbol is situoted opposite ihe
engroved mork.
        White = block-ond-white  film
       Blue = colour film for doylight
         Yellow = colour film for ortificiol light
View original page 7Page 8 · Read text
www.butkus.us

Setting the Film Speed                               3200 1600 800 400 200 100 50 .2s 12.     ASA
Moke it o rule to set the film speed
olwoys bef ore  looding the comero,
becouse the outomotic exposure control
depends on this setting. You will find the
film speed morked in ASA or DIN on the
film corton or in the instruction leoflet
occomponying the film.     To set the film speed, press cotch                                              If,I
        (11) ond turn the ring morked with
      scoles (12) ond ('14) until ihe re-
      quired ASA or DIN number is
      opposite the red V index mork.
       l0 ASA: I dot before 12 ASA
      32 ASA' I dot ofter 25 ASA

                              DIN
View original page 8Page 10 · Read text
www.butkus.us

 To open the comero: push reversing lever (6)
 to the right; rewind knob (18) will then spring
 up. Fully pull out the rewind knob (through
the intermediote stop position) ond the co-
mero bock con be opened (see Fig. lll).
Anchor the beginning of the film to the hook
of fhe toke-up spool by o perforotion  hole.
Drow ihe cossette ocross the film irock, in-
sert it info the cossette chomber ond push                                                         Fig. lVthe rewind knob home. Ai the some time,
ensure thot the shoft of the rewind knob
engoges the film cosselte core correctly (see
Fis. lV).
Finolly turn the lower milled ring of ihe
toke- up spool until the full width of ihe
film lies tightly upon the sprocket wheel ond
two of its teeth engoge two film perforotions
(see Fig. V).
Close ihe comero bock by clicking inio the
locked position.

                                                 7
                                                                                                                               Fis. V
View original page 10Page 11 · Read text
Getting Ready for the First Exposure
The film counfer con be sei io one of iwo positions:
for o 36 or 2O-exposure cossette. Accordingly furn
film counter (16) to the left or right, ond the oppro-
prioie number (36 or 20) will oppeor in the window.
     Setting:  When the comero wos opened,
     the counter outomoticolly returned to  the
      zero position f. Now operote the ropid wind-
      ing lever ond the releose button (8) olter-
      notely until ihe film counter indicotes No.36
     or No.20 below the V mork in the window.
      After eoch exposure the counter will show
      the number of exposure still ovoiloble.
 lf the ropid winder is locked lo stort with (when ihe
shutter is still cocked) first press the releose.

The Rapid Winder
cocks the shutter, odvonces the film by one frome
ond olso operotes the film counter. The ropid winder
must olwoys be pulled os for os it will go - only
then will it fly bock outomoticolly.
I
View original page 11Page 12 · Read text
www.butkus.us
Unloading the camera
When the lost exposure hos been mode, the film must be
rewound: Push reversing lever (6) to the right ond the rewind
knob will then spring up; turn the lotter in the direction of
the orrow until q definite resistonce is felt, sufficient to stop
the knob rototing. This ist the signol thot the exposed film
hos been wound bock into the film cosseiie.
Now you con open the comero bock by fully pulling out the
rewind knob, ond remove the cossette from the comero.
When trying to obtoin more thon 36 or 20 exposures on one roll of
film, it moy hoppen thol the ropid winder connot be swung completely
ond thot it blocks. In this cose do not opply force, otherwise you will
teortheperforoiion or moke thefilm end slip out of the cossefte. Proceed
os follows: push reversing lever (6) to the righl, ond the rewind knob will then spring up; furn the
ropid winding lever os for os it will go ond let it fly bock to its originol position. Unlood the
comero os described obove.

Changing Partly Exposed Films
Rewind the portly exposed film os described on poge '14. Remember to moke o note of the number
of the losi exposed frome, ond to re-set lhe fllm speed ond film type if necessory.
When relooding the originol film, first of oll ploce the block lens cop over the lens mount. Then
insert the film in the uiuol woy ond olternotely octuote the rcipjd winder ond the releose button
until the number of the frome you hod noted oppeors in the film counter window  ('16). Advonce the
film once more ond you qre reody for further picture toking. Don't forget to remove lhe lens copl
View original page 12Page 13 · Read text
The Technique of Picture Taking     The ULTRAMATIC comerq hos o universolouto-
                                      molic exposure device,  i. e. you con either
                                        use the "outomoficolly" correct lens operiure
                                          with o pre-selected shutter speed, or you con
                                               tronsfer the correct exposure volue "monuolly"
                                        to o chosen operture. The lotter method hos
                                         the odvontoge thot you con use the comero
                                     under the most fovouroble bolonce of oper-
                                              fure ond shulter speed for o porticulor picture.
                        We moy odd fo the obove odvontoges those
                                        offered by the perfect single-lens reflex sy-
                                           stem. With one look through the viewfinder:-
                                                       . you con see the subiect upright, righf-woy-
                                          round, ond free from porollox, wilh preci-
                                               sely the field of view covered by the film
                                                                                                              f rome;
                                                       . you con occurolely focus with oll  inter-
                                         chongeoble lenses, either by meons of the
                                              opiicol split-imoge rongefinder or on the
                                           ground-gloss screen;
                                                      . you con reod off the outomoiic operture
                                                   indicotion;
                                                      . you con control the odiustment of ihe
                                                shufter speed/operfure combinotion;  equol-
                                                               ly, if, when using o filter, the relevont focior
                                          hqs been compensoted  for.
                                                t0
View original page 13Page 14 · Read text
www.butkus.us
For Automatic Gontrol                              The depth of field indicotor which rides                                                         over lhe distonce scole does not func-
With control ring (3) set ot ihe "A" position            tion with the "A" setting. However the
the correct operture will be set outomoticolly.           operture number indicoted by  the
                                                               pointer in the viewfinder will serve os o
                                                            guide to the exlent of the depth of field.C Setting the shutter speed
   Turn shutler ring (7) uniil the required            But more obout depth of field on poge 17.
    shutier speed clicks into position opposite
   the red mork Y. The shutter speed should
  be chosen occording lo subiect move-
   meni ond prevoiling light conditions.
@ Serting the distonce (focusing)
   os described on poge 14
@ ... and Toking the Picture
   Look through the viewfinder ond frome
    the subiect in the besf possible woy;  if ihe
   operture pointer lies in the white oreo -
    iust press the releose ond the picture  is
    token.
Should this pointer be in one of the two red oreos
it is nol possible to toke o picture becouse of the
light conditions or becouse the preselected shutler
speed is too short. lf possible, select onother.longer
shuiter soeed.
View original page 14Page 15 · Read text
Sometimes it is desiroble to disengoge the
                                                 outomotic exposure control in order io be
                                                  oble io set the shutter speed/operture combi-
                                                    notion personolly. This con hoppen with flosh
                                                     shots or when you wish to use "differentiol
                                                        focusing" for greoter picture impoct.
                      O Chonging lo "Monuol" conlrol
                                                    Turn control ring (3) from the "A" position
                                                      to the ronge of operture numbers. At the
                                               some time the depth of field indicotor will
                                            commence to operote ond the two ied
                                                            pointers will slide over the dislonce scole.
                    @ Setting the distqnce (focusing)
                                                      os described on poge 14.
                    @ Determining lhe depth of field
                                                Set the operture ring to thoi operture
                                                number which shows the desired depth of
                                                                     field on the distonce scole.
                                            The exomple in the illustrotion shows thot ot
                                                      the operture f111, ot o distonce of l6 feet, the
                                                depih of field olreody begins ot l0 feet ond
                                                      extends io 67 feet.
i     'tl-
View original page 15Page 16 · Read text
www.butkus.us
@  ... qnd Toking the Picture
   Look through the viewfinder ond turn the
    shulter ring till ihe needle (in the white oreo)
    poinis to the some operture number to which
   you hove olreody set the control ring  . . . ond
    then toke the picture.


   The white figures on the shutter ring (1/500 -
    1/30 second) ore shutter speeds which, under
   normol conditions, moy sofely be used for
   hond-held shots.With the yellow figuresl/15-
    I second the comero should be firmly sup-
   ported on o iripod, tree trunk, etc., fo ovoid
   unshorpness through comero movement during
    exposure.
   At "8" the shutter remoins open os long os
    releose (8) is pressed. Here, too, o iripod is
    necessory, os well os o coble releose which
   con be screwed into coble releqse socket  (13).
                                                     l3
View original page 16Page 17 · Read text
moy be done in two woys:
o In the splii-imoge rongefinder verficol lines of the
  subiect ore disploced to the left or right (with ihe
  comero held horizontol) or upwords or downwords
  (wiih the comero held upright) os you turn the di-
  stonce ring (see exomple l). The lens is occurotely
  focused when ihe two ports of the imoge register
  precisely ocross the split circle (see exomple  ll).
r The ground-gloss screen is most suitoble for focusing
  subiects without prominentverticol or horizontol lines.
   In this cose turn the distonce ring until the subiecl
  oppeors shorp on the ground.-gloss screen, which is
  orronged oround the centrol split-imoge oreo.
View original page 17
Page 18 · Read text
www.butkus.us


For on exposure we recommend thot you hold the
comero os shown in the iwo illustrotions. The eye
should be os neor io the eyepiece of. ihe view-
finder thot the eniire imoge oreo con be seen in
comfort.


                                        Alwoys press the releose button os smoothly
                                        os possible - never ierk it! The imoge in the
                                            viewfinder disoppeors of the instont of ex-
                                   posure ond re-oppeors immediotely ofter-
                                           words, so thot ih'e subiect con be woiched
                                                         viriuolly withoui interruption.
                                                                                                       l5
View original page 18Page 19 · Read text
Interchangeable Lenses -lnsertion and Removal
A full ronge of Voigtlcinder high-performonce  onostig-
mot lenses, of differenl focol lengths ond opertures, ore
ovoiloble for the ULTRAMATIC comero. These lenses
enoble you to toke ony subiect in the most effective woy.
All interchongeoble lenses ore fitted in o quick-chonge
boyonet mouni ond ore occurotely focused with the
two-woy rongefinder. As the ioking lens it of the some
time qlso the viewfinder lens, you olwoys see lhe correct
view in the finder irrespective of lhe subiect distonce or
ihe focol length of the lens used.
When inserting  o lehs, moke sure thot the red                   ,l't
dot on the lens mount is opposite the red dot on ihe
operture control ring (see illustrotion). Then turn the ring
slightly to the right until it clicks into position ond  it
will be firmly mounted'in the comero.
To r e m o v e the lens, press cotch (15), turn the lens
to the left qnd pull it out of the shutter (see illustrotion).
 16
View original page 19
Page 20 · Read text
www.butkus.us
The depth of field covers thot port of the subiect, in     Aperture and Depth of Field
fronl of ond behind the focused distonce, which is re-


                  scole
                 shorply
                       tion).
View original page 20Page 21 · Read text
Flash!
                                With flosh you con toke the most delightful indoor pic-
                                       iures of the fomily circle or of festive occosions; you     3fr
                             con olso give your outdoor portroits o beoufiful sunny
                                       effect on o cloudy doy, or moke heovy shodows  in
                                           "ogoinst-the-light" pictures iusi thot little lighter.
                               Wiih block-ond-withe film the flosh con be used on its
                                 own, or equolly well combined with doylight or ortificiol
                                              light sources, such os tungsten lomps. For flosh shots with
                                       doylight type or oriificiol light type colour film refer to
                                      the oppropriote instruciion leoflets. ln cose of doubt your
                                    Deoler will be glod to odvise you.
                               Mounting the Flashgun on the Camera
                               The floshgun or the flosh tube of on electronic unit  is
                                        usuolly fitted to the side of the comero by meons of o     ffi   speciol brocket. A seporote occessory shoe con olso be
                                 clomped behind the viewfinder eyepiece mounl; you conk                                    then fit the floshgun on the top of the comero os well.
                                 The illustrotion shows the Voigtlcinder Floshgun in position.
                                 The flosh coble completes the electric circuit between the
                                       flosh unit ond the comero shutter. Push the plug of the
                                          flosh coble into the flosh socket  (5).

     18
View original page 21Page 22 · Read text
www.butkus.us


       Flosh-bulbs ond electronic flosh uniis differ
        in their chorocteristics such os the firing de-
        loy ond light output. To ensure thot the peok
       brightness of the flosh coincides with  the
        instont when the shutter is fully open, there
      ore two types of synchronisotion: M ond X.
       According to the type of flosh-bulb or eleclronic
         flosh, the synchroniser (4) is either left ot the "X"
        posilion or moved to "M" (post o smoll locking
         powl).
      You will find oll the necessory informotion on "X"
      ond "M" os well os on suiloble shuiter speeds;
       with the flosh-bulbs ond with the floshgun or elec-
        ironic flosh unit itself.
       For flosh shots with the self-limer (synchroniser  sei
       to "V"), use only the shutter speeds intended for
       ihe "X" position (see olso poge 20).
      The lens operture required for correcl exposure
      con be obtoined from the so-colled guide number.
       This is usuolly quoted on the flosh-bulb pocking
       or in the leofleis issued with fhe bulb or electronic
     I       flosh unit. To find the correct operlure divide the
     I        opproprioie. guide number by the distonce in feel
       between the subiect ond ihe comero; lherefore: -
   I
'aI         qperlure -  guide nunrber -i  distonce,
View original page 22Page 23 · Read text
Shots with the Self-timer
                                The Synchro-Compur shutter con olso be releosed
                                     through o deloying device (self-timer) with the con-
                                            trol ring set lo Automotic or to ony of the monuol
                                                            setti ngs.
                                                     It is very simple indeed:-
                                       Put the comero on o firm bose, preferobly screwed
                             on o tripod, ond move synchroniser (4) to "V". lf
                              you now press the releose you will hove time lo
                                move to your positioni ofter o deloy of obout l0 se-
                                    conds ihe shutter will be reosed outomoticolly. The
                                         synchroniser then returns itself from the "V" to the
                                  "X" position.

                             Do not use lhe self-timer with the shulter sel to "8".
                                  The synchroniser, once sel lo "V" csnnol be pushed
                                  bqck to the X or M positions by hqnd.


20
View original page 23Page 24 · Read text
www.butkus.us
Voigtliinder Focar lenses
ore obtoinoble in different powers for oll inter-
chongeoble lenses from 40 mm focol length,
from 0.25 io 6.5 diopters; they moy be combined
to o moximum power of '10 diopters, which will
                                                             'l : .|.85.qllow o scole of reproduction of
Simply screw the Focor lenses on the comero
lens mounf . Focus with ihe rongef inder or
ground-gloss screen. The finder of the some time
shows the correct field of view, in full brillionce
right into the corners. The imoge is the right
woy round ond free from ony porollox error.
To moke sure of odequole depth of   f ield for such
close-ups, slop down lo ot leosl t/5.6 of f/8. When
copying documents ond similor originols on operture of
Jl1l or f/15 is odvisoble. The use of Focor lenses does
nol offect the exposure. lf filters ore to be used, screw     A detoiled Focusing Tqble for oll Focor
lhe filter in front of the Focor lens. When using more        lenses ond interchongeoble lenses, in-
lhon one Focor lens, ploce the one with the highest power        cluding doto on scoles of reproduclion,
(engroved with the lorgest number of diopters) immedi-        depth of field, etc. is ovoiloble from
otely in front of ihe comero lens.                            your Deoler.

                                                                                                              21
View original page 24Page 25 · Read text
Voigtlilnder Filters

   ore lrord-coqted ond do not impoir the lens performonce in ony woy. The
   yellow, green ond oronge one con/ of course, only be used with block-ond-
   white films -  ultrq-violet, sky-light ond polorising filters ore s.u.itoble for
   colour  f ilm os well.                                        $t''l&a'6 6'9            Filter                                                                 t"v*u'iu  '                            Foclo r
  Yellow fiher G 1.5 x  Slight filtering effect for outdoor shots such os sports ond       r                          o.iion subieEis                                                        1.5 -2
  Yellow filter G3x    Universol filter for londscopes ond ofher outdoor subiecis;                             iniirpuniobLe for snow piclures                               3
  Green filter GR 4     Liohtens qreen tones in londscopes. Recommended for orti-                                        fic"iol ligh"t portroiture ond for copying of coloured originols     3-4
  Oronge filter OR 5 x  Stronolv culs blue liqht for dromoiic effects. Reduces otmo-                           spheric'hoze in disioni views .                              5
   Ultrq-violet filter UV  Cuis out uliro-violet rodiotion in high mountoins or neor the                       seo. Eliminotes unpleosont blue costs in colour shots.
                           Reouires no exposure increose
                                                                                                                                                       f  i lter ond o weok conversion   Sky-light filter SF   A combinotion of the u. v.                                  filter; it compleiely eliminotes the ultro-violet port of the
                              soecrrum
   Polorising  filter POI  Reduces or cuts out disturbing reflections from shiny sur-   see rpeciol                          foces (spectocles, polished oreos, woler) other thon mefoi    inrtrucfionr

22
View original page 25Related documents and language editions
From the M. Butkus archive. Original publisher and archive notices are retained.
Check the model and edition against your equipment.
PDF verified 2026-10-10.