Sewing machines
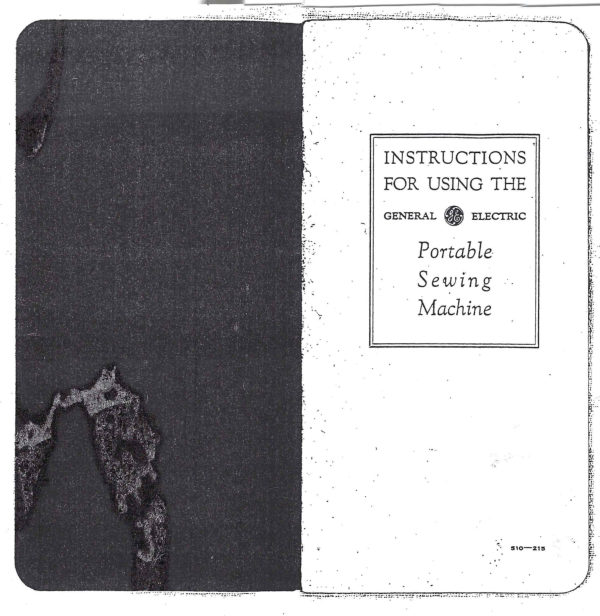
General Electric Portable — User manual
User manual for General Electric Portable. 15 pages in English. Read the original PDF, download or print a copy without registration.
15 pagesEnglish23.3 MB PDF
Loading your manual…Open PDF directly
Document details
- Brand
- General Electric
- Model / document
- General Electric Portable
- Document type
- User manual
- Language
- English
- Pages
- 15
- File size
- 23.3 MB
- Category
- Sewing machines
- Document date
- Not specified in catalog
Search available document text
Find a term, then jump to its page in the original PDF. Image-only pages may not be searchable; check the PDF for exact wording and diagrams.
Page 2 · Read text
[1]


               Conn. Bridgeport,

         COMPANY
  ELECIRIC. I GENERAL


                                  of. care
 take and use to is it easy how and do
 will machine your things marvelous the
 about all learning in pleasure fascinating
 find will you and carefully it Study chine.
Ma- electric I General vour from results
best the get may you how language stood
 under- easily plain, in tells booklet This
         use. your for prepared carefully
 been has instructions and suggestions of
booklet this machine, your from service
 and enjoyment utmost the obtain may
you that order In use. home for signed
modernde- evermostMachinethe SewingpossessElectricnow YOU


     SUGGESTIONS VALUABLE


         Machine Sewing
     Family Portable Electric

General the Using For Instructions
View original page 2Page 3 · Read text
[21


                                                                                 enamel.
                                                 the scratching avoid to Case, the into
                                                  bacK machine the putting when arm. the
                                                     under machine the of bed the on it Diace
                                                     and it for prepared bag cloth the in use,
                                                       in not when rheostat, the keep Always
                                                                      closed. is Case the of lid the
                                                 when latter the ov securely down held
                                                      be will machine the that so tray, the
                                                    underside the and plate spool the tween
                                                     be and pin spool the around paper gated
                          machine the
                                                       corru- of piece the place to sure be ing,
 from also and outlet electric house the
                                                   travel- for Machine the packing When
 trom cord supply the disconnect ways
                                                    arrow the by indicated as Case, ot•the
 al- sewing, hnished have you When
                                                      bottom the across cleat the under recess
                            outlet the into
                                                      the into fit will baseboard the of end theplug the of prongs two the inserting and
off, plug the of part screw the pulling by           that so shown, as downward end left the
                                                    tip case, the in machine the replace To
 outlet current electric baseboard or floor a
                                                           easily. out lift then will it and cut, above
 into inserted be may or socket light tric
                                                 the in shown as uoward machine the of
 elec- any into screwed be can which plug
                                              containsend right thewhichtip trayetc., theattachments,remove theFIRST
 combination round the has wire this of
 end other The6. page 2), (Fig. tion,
 COTICE current marked machine the
of bed the in opening the into plug flat
 the Insert other. the on plug round a and
 end one on plug flat a has cord supply
current other The 4. page (Fig.1.),"Q"marked opening the into cord
 the of end other the plug and floor the
on rheostat the Place rheostat. or control,
 foot the it to attached has cords these
areor machineOnecord. commectioneach with€ piecespackedTwo

        CURRENT ELECTRIC                CASE CARRYING THE IN IT REPLACE
 WITH MACHINE THE CONNECT TO         AND MACHINE THE REMOVE TO HOW

 MACHINE SEWING THE        MACHINE SEWING THE
View original page 3Page 4 · Read text
[51                                   [4]
                        used. be may line            face the that so "", also screw, top the
 vase. ordinary do, they when and year, a                                                     loosen and 1) (Fig."R" plate face the on
least at for attention need not should and                                                      "" screw bottom the remove to necessary
factory the at grease special a with cated            be will it bearing, bar needle lower the
lubri- are These gears. the oil not Do             and connection bar needle the oil To
         hook. the on be may that oil plus                                             important.
 sur any absorb to goods waste o piece            is This shaft. the against in way the all
a on two or minute a sew oiling, this           can oil the of spout the push 2, Fig.
After time. that during times three or two                                                 "Oil marked holes through oiling In
done be should day, all steadily run is                                                                                   machine.
machine        the            if               and machine,                            the use
                                    to           the of base the removing without alstart      you          time               each                    done be should                                   This
 hook. the of surface bearing case bobbin            get to easy are places oiling All 2. Fig..                                                   on plainly indicated places oiling. by
the on old of two or drop a but and out            shown as frequently, parts moving Oil
case bobbin the take hook, the oil To               Stores. Electric General all at purchased
       stitched. being fabric the stain and         lightDe Can bestWhIchtheOil,onlymachineUse sewingCAUTION!
to on drip to likely be will surplus the
used, is oil much too it as, parts these of
each en oil of drops few a only Use                 INSTRUCTIONS OILING

                   3 Fig.
                                                      2 Floure View. Rear


                                                         OIL                                              CONNECTION CURRENT

                                                                       OiL---*
                                        01L


                                 2. Fig.
                                                                 OIL

                                                               OIL
these oiling permit to 3, Fig. in shown                         OIL;
as way the of out swung be can plate
                                                          2 OIL
 MACHINE SEWING THE                          MACHINE SEWING THE
View original page 4Page 5 · Read text
[7]                                   [6]
                    neure that in Shown
 as out, case bobbin the lift and back.                            laKeuD boring
 falls 5) (Fig. "B" retainer case bobbin                         Cover Arm Top
the. until anger the with 4) Fig. "A"                        MotorConnection
 latch retaining the Press hand. left the of                        Winder Bobbin
forefinger and thumb the insert to which                         Regulator
    opening sufficient provide will This                                 Plate Side
 left. the to 1) (Fig. J' "N plate slide the                                Feed
                                                                                  IdLePI Needle
 Pull same. the from loose threads the cut                      Screw Cap Bar Presser
 and machine the in have may you fabric                        Screws FacePlate
anv remove toot. presser the Raise DOint.                              Foot Presser
 highest its at is 1) (Fig. "E" take-up                               Nut Foot Presser
                                                               Screw Clamp Needle
the until hand by machine the TURN                             Guide Thread
                4 rigure                                               Take-up
                                                                       Guidc Thread

                                                                Guide Thread
                                                                     Pin Spoon


                                                                      1 Figure View. Front


   CASE BOBBIN. THE REMOVE TO
                        right. to left from
 needle the of eye the through thread and
"F" guide thread the through down then
"E." take-up the through and up and "D"
guide the then "I," take-up spring the of
loop the into then if lists tension the

g.?."B," suitedguide thehit intointo threadthrees thethe looploop "


view front by shown as simple, very
is threading of method correct THE

                  DESIRENAL
SPOOL THE THREADING OF METHOD

 MACHINE SEWING THE        MACHINE SEWINGHE.
View original page 5Page 6 · Read text
[91                             [8]
                    7 Figure                          is thread the as full, bobbin the wind
                                                Never full. quite not wound, is bobbin
                                                    the until speed moderate a at run and ing
                      D---                  sew- in as foot the with machine the start
                                                  Now 6. Fig. in shown as thumb, the with
                                               it on pressure gentle a keep and finger
                                                   fore- the with thread the hold then vou.
                                           toward hand by times four or three bin
                                                bob- the around end the wind and spool
                                               the from thread some draw Now 6. Fig.
    7). (Fig. arrow the of direction the in           in shown as 1) (Fig. "P" winder the on
 unwind will thread the so case bobbin the          bobbin the place then machine, the of
in bobbin the put Always CAUTION!             Out1) (Fig.is casefoot."I"bobbin thepresserthat seetheandRAISE
                               freely.
turns bobbin the and case the of edge the
                                           6) FIG. (SEE BOBBIN THE WIND TO
 below is rim the until case the into down
it press and case bobbin the of stemthe over bobbin the in hole the PLACE                               o Figure

CASE THE IN BOBBIN THE INSERT TO

                      6 Figure


                                                          out. it pull and finger and thumb
                                              the with rim the grasp can you until
                                                   bobbin the out press case, bobbin the of
                                                    front the in 5) (Fig. "C openings lar
                                         semi-circu- large two the THROUGH
                              sewing                   CASE
 in break and rim the off slip to liable          THE FROM BOBBIN THE REMOVE TO

                          MACHINE SEWING THE MACHINE SEWING THE
View original page 6Page 7 · Read text
[11]                                         10] [

                                                                    : following the do tension
                     fabric. of sides both
                                                    proper the secure To 8. Fig. in shown as
on same the is stitch until slightly sion
                                                    sides both on alike look will it so fabric
ten- top loosen then 10), (Fig. fabric. of
                                                the into evenly drawn being thread the
top the along straight is thread the If                                                    upon largely depends stitching Perfect
 fabric. the of sides both on same the is
stitch until 1) (Fig."C" tension top the                 TENSIONS
tighten then 9 Fig. in as fabric of side der
 un- along straight is thread the If stitch.
examine and cloth of piece a on Sew                                    locked. securely
                                                       and closed is latch the until place in case
     Tension. Top Regulate SECOND.             bobbin the with run or started be never
                                   should machine The CAUTION!
                 adjusted. properly been            position. proper its in not is case bobbin
 has it after it change to necessary rarely          the sure be may you securely lock not
 is it and adjustment, tension case bobbin           will latch the If place. in locked firmly
proper the is This thread. the down slide          is it until latch"B" the close and  Di I
gradually will little, a jiggled when but         plate the of "E" tongue holding the over
 still, held when itself sustain will case the          5) (Fig. "D' part forked its with 5) (Fig.
until slightly 7) (Fig. "A' screw adjust           "A" plate. the against case bobbin the lay
 and driver screw small Use loose. too is        andthen position,take-uphighthetheirhaveat barto needleSURE BE
adjustment down, slips case If thread. by
suspended case Hold inches. six about out                MACHINEpull and 7) (Fig. thread of hold Take
                                         THE IN CASE BOBBIN THE REPLACE TO
Tension. Bobbin the FIRST-Regulate

                                                                   11 page See tension.                10 Figure
                                                   case bobbin the regulating for structions
                                                in- per as tension the ot strength the
                                             test Now "C." hole the through thread
                 9 Figure                         and "B" spring tension the under then
                                                "A, slit the through thread the draw
                                                     instructed, as arrow the of direction the
                                             casein unwindthe inwuinsertedthread thebobbinthattheso TWITH

                 8 Figure

                                                           7) FIG. (SEE
                                          CASE BOBBIN THE THREAD TO •

 MACHINE SEWING THE       MACHINE SEWING TIF
View original page 7Page 8 · Read text
1 13 [                                  [12]

to hand the from slack it leaving hand,
 left the with thread needle the of end
threadedthe hold instructions,is machine tothataccordingsure BEING


     SEWING FOR PREPARE TO

                                                                               stitch. the lengthen
                      .. I Fig.
                                             down and Shorten, TOup it Move
                                                     1). (Fig. "O"iegulatorch,regulator stitchstitchthetheby -Tbr
                                                   regulated is

                                           REGULATION STITCH


                                                                      showing.
                                                    threads of inch one-quarter about with it
                                                       replace darning, for out taken is part this
                                   ation.           change. a make to necessary found
 oper- in mechanism, sewing the injuring         be seldom will it and sewing ordinary
 and breaking and out coming of danger          for adjusted properly part this with you
the against screw clamp the with held          to come will machine Your pressure. the
securely be it that and bar the into go           decrease will left, the to or out, it turning
 will it as far as up pushed be needle the           and increase, will in screw this Turning
that important very is It CAUTION!        1). (Fig. "K" screw cap Dar Dresser
                                                 thisthe byofcontrolledpressure isthefabricof ustmentthe of partad Tear      do. to able be not should you which
bar, the of out needle the pull to trying
 by security its test and needle the on
                                              FOOT PRESSER
 solid down "G" screw clamp the tighten
Now, possible. as far as needle Insert 1).
 (Fig. "G" screw clamp needle the loosen                                                8. Fig.
 and right the toward side flat the with           in illustrated as fabric, the of sides both
hand left the in needle the Hold point.            on alike show stitches the until required,
 highest its at is bar needle the until hand           as forth and back it adjusting loosen, to
by machine the Turn point. sharp a has          1).left (Fig.the to "C"and tighten,nut regulatingto right thethe toTURN
needle;and straighttheis needleadjustthe andsure beINSERTfirst,  T°

                                          TENSION
      NEEDLE THE SET TO                                        SPOOL OR TOP THE ADJUSTING

  MACHIN SEWING THE                          MACHINE SEWING THE
View original page 8Page 9 · Read text
point. sharp a has and straight is used
                                                                                        speed. less
be to needle the sure Be CAUTION!
                                                  giving pressure less speed, greater ing
                        silk. sewing           81V- pressure More rheostat. the on foot
of grade good a and cotton finished soft           the of pressure the by controlled ily
 best the with obtained are results Best            eas- very is machine the of speed HE

                              etc.                   SPEED
     Silk B-C       Coats, Clothing,
 19 # Cotton 40-60 Woolens, Heavy
                        Silk                         you. from away turn slight a
                  Heavy Woolen,            wheel hand the give seams, thick or rial
     Silk A-B      Light Linen,              mate- heavy of because start to fail chine
 17 # Cotton 60-80 Cotton, Heavy        thema- thepressingShould rheostat.by machinethe theon footSTART
                       Linen and
               Silk Weight                    OPERATION •
      Silk A       Medium Goods,
 16 # Cotton 80-100 Cotton Muslin,
       Silk O        Silk Light and                 sew. to ready are you and same the
  14 # Cotton 90-100 Georgette Crepe,           lower foot, presser the under fabric the
 ThreadNeedle      Material              PlacePlace 10.1). peese.(Fig: tag, place and die close

                         Table: following            both Lay 11. Fig. in shown as plate the in
  the to refer sewed, be to fabric the for I              hole needle the through up drawn be will
 needle and thread the SELECTING TN          thread bobbin the and taut thread needle
                                                      the pull Then point. highest its to again
            Needles 15x1 Type Use                    up and down moves needle the until you
      THREADS AND NEEDLES                  from top wheel hand the Turn needle. the

  MACHINE SEWING THE       TIF•SEWINGMACHINE
View original page 9Page 10 · Read text
Felling and Hemming


                                                                                               result.
                                                  work satisfactory directions, to
                                                  accordin and carefull used if and able
                                                obtain- best the are attachments The

                                          ATTACHMENTS


                                                          oil. machine sewing light good with
                                                  01. minutes few a it running after and
                                                       holes oil various the in kerosene of drops
                                                 few a use heavy runs machine the If
                                                                       sewing. while work
                                                   the pulling by or damaged is needle the
                                               of point because or 1), (Fig. nut"I"
                                                   foot presser the with fastened securelv
                                                   being not attachment or foot presser the
                           hemming.            by caused usually is breakage Needle
narrow in as through edge the passing                            bar. needle the in up fully
and hem otwidth desired the goods            set not is needle the because or needle
the folding by teller, and hemmer the             point imperfect or bent a by caused likely
with made be can hem ot width Any              most is it Stitches pares hin izes threade
                      full. just hemmer
the of scroll the keeping and work the            and needle for table See needle: the of
guiding sew, to proceed and down foot             size the for large too thread the or tight
hemmer the Let edge. extreme its enter            too be may tension your Or 1. Fig. tions
will needle the so hemmer the through             instruc- threading See threaded: properly
enough far cloth the draw Shown; as           be not may machine the Or 1). (Fig.
folded hemmer, the in cloth the of edge             tight;screwsecurelyclampandneedlebar needlethe thewithintoenedgo
theInsert cut). (see foot presser the
ofneedleplace andin hemmerfoot presserthe attachthebar;RAISE            wil it as far as up set is it sure be also
                                                   point; sharp perfect a has it -that and
         HEMMING                     examinebent not isbreaks,it. sure makethreadto needletop theTHEI TE

 Attachments of Use For Directions               SUGGESTIONS HELPFUL

                           MACHINE SEWING THE
View original page 10Page 11 · Read text
] [19
                             hand.              Operator One •         Sew and Hemming
right the in goods the holding way, same
the in proceed and hem. narrow a for
as same the cloth the. of edge the duce
intro- hemmer; the by under turned be
will which inch, an of one-eighth about
adding only, fold one turning quired,
re- hem of width the hand) (by goods
the old foot. presser of place in Attach
 goods. heavy on and hemming, wide for
reg;used arethe andto attachmentsbelong hemmersof setwideularTHE

        HEMMING WIDE
            Hemming Wide


                                                      slot the through lace the of end the pass
                                                    and hem narrow a Start time. same the at
                                                 lace on sew and hem a make to operator
                                                    the enable to is slot This hole. round a
                                                      of instead through pass to needle the for
                                                    slot a with made is machine this panies
                                              accom- which feller and hemmer The
                                                                          even. edges with
                                                  pieces two inserting by feller the with
                                              made be also can seams body or curve
                                                for suitable seams French 17. page on
                                                     cut in as sew, to proceed and hemmer, the
                                                  into seam the of beginning the at edges
                    time. every it catch -will             the draw up; edges flat out work the open
needle the that so slot the in well lace the          upper,then the beyond inch about¼
Keep hemming. ordinary in as proceed           projecting edge lower the and right,
 then 18; page on cut in as hem, the of top              the to edges their together, pieces two
 on and hemmer the of back the under            Stitch feller. the also is hemmer THE
it carrying hemmer, the of side the                       FELLING

 MACHINE SEWING THE        MACHINE SEWINGTHE
View original page 11Page 12 · Read text
[201
    screw. clamp needle the under is arm
creasing the works which lever the that
thesee foot;to firmlythe ot placetuckerin bartheDresserATTACH                        edges. the at under tum to
                                                    order in wide. inch an of seven-eighths
                                                   cut be should binding the used, narily
 MACHINE TO TUCKER ATTACH TO                                                  ordi- binder the For used. be can tion
            Tucking                               descrip- any of goods binding, bias For
                                                                  usual. as sew and bar presser
                                                  the Lower neede. the under it draw and
                                desired.             binder the of scrolls the between bound
if time same the at on sewed be can This             be to goods the of edge the Place needle.
 together. edges the stitching usual, as sew            the under back it draw and binder the
Passand binderusual.the asthroughbinderbindingthe theATTACH            of scroll the through binding the Pass
                                                                                foot presser
                                                 needle.the of placethe andin binderbar presserthe Attachthe RAISE
     FOLDS FRENCH MAKE TO

                                                  BINDING
                          drawn.
thanbeingfirmerits preventlittle willa bound,whichbeingbinding,goodsthethe
                                                                               Binding
Holdhold binding.bindingscontinuecontinueanda line,a uno,straightalight so

scallop following the of angle or elbow
 the fold goods, the in needle the with
 machinebindingtheaftestopScarcallops.scallops, the aroundhe round I


        SCALLOPS BIND TO


 binding. bias with case the is as under,
 turned be not will edges the narrower,
 being braid dress the is, difference only
 usingabove.Thewhenexplainedas sameas binding,the PROCEEDbias

            BRAID
   DRESS COMMON WITH BIND TO

 MACHINE SEWING THE        MACHINE SEWING THE
View original page 12Page 13 · Read text
1 23 [


                                                         left the to distance the twice is blade ing
                                                         creas- the then right); the (to figure same
       using. before lightly parts working             the at are scales two the on guides the If
Oil place. in firmly Fasten screw. clamp             tucks. between distance and tuck of width
                                                the adjusting in cOnvenience tor are
needle the of side either on be will fork
                                                  tucker the on scales the on ngures lhe
the of prongs the and foot, the in hole
                                                          seam. or needle the of line the of left thethe of center the through passes needle
the that so adjust place, its in ruffler            to blade creasing the of distance the by
                                                 determined is tucks between space The
It-the putneedle,and footand barpresserpresserthe movethe RAISE


                                                                      Tucking.
    RUFFLER THE ATTACH TO

              Ruffling


         blade creaser the beneath directiv
 is that gauge the inside is made last
tuck the that care tucks.Take sequent
sub- making in crease the at Fold work.
 plain in as sew Then edge-guide. •the
rightagainstthecomestoclothit Drawthe oftop.creasethetheonuntiltucked

be to is that part the spring; blade the
 and blade and arm creasing the between
usealcloth thethe Insertset creasehand. bya amannersir M'annere


       TUCKER OPERATE TO

                                                       distance. this as wide as exactly be will
 thumb-screw. tighten wanted, as adjusted            tuck the seam; or needle the of line the
 When tuck. last the of seam the over            of right the to edge-guide the of tance
 exactly lie will tuck one of crease the            dis- the by regulated is tuck the of                                            width The thumb-screw. the OOSEN Y
 is, that meet; will tucks the and right,
 the to is edge-guide the that needle the of            TUCKER THE ADJUST TO

 MACHINE SEWING           SEWINGMACHINE THE
View original page 13Page 14 · Read text
] 25 [                                    [241


                                                     use gathers, scant he make 1o apart. far
                                                     too lie or other, each upon pile not and
                                                           evenly lie will plaits the that so regulated
     straight. and smooth goods the keep            be should stitch of length the match;
 to careful being sewing, plain in as ceed             to stitch the lengthen then stops, it until
 Pro- guide. second under ruffling," "plain             left the to same turn plaits, wide make
 in as ruffled be to material Place guide.                fullness. of amount desired the have
                                                     you until let the to disc or thumb-screwarse b ed up and indeline on fed Pot
                                                      the turn and stitch the shorten ruffle, full
                                                    very a make 10 sewing. plain in as ceed
   ON SEWING AND RUFFLING                  pro- and bar presser the Drop guide. ond
                                                          sec- under but first over needle, the under
        On Sewing and Ruffling                        smoothly lies it until stiletto, or driver
                                                       screw- small the of aid the with you from
                                                     the pushing blades, blued the
                                             between ruffled be to goods the INSERT
                                              RUFFLER OPERATE TO


                                                                                  Ruffling Plain


                         ruffle. possible finest
 the making thus goods, the catch just
   enough back moves blade blued the
 until right the to disc or thumb-screw ing
 turn- by ruffler regulate and stitch short

  MACHINE SEWING HE         MACHINE SEWING THE
View original page 14Page 15 · Read text
] 26 [

                                                      into attachment the Push you. nearest ing
                                                    open- the in C pin the and
                                                    you, from farthest opening
                                          the Ain point the Place
                                                    openings. two see will you
                                                      foot presser the of right the
                                                    At follows: as position in
                                                  placed is underbraider The
                                                foot. presser regular the
                                                       O: DIace in IOOt raider
                                      prong short the TISE

                                             UNDERBRAIDING


                                                                       smooth. and straight
                                               racing and goods keep to ingcaretul
                                                      be- usual, as proceed and foot, the under
                                                   and blades blued the over facing Place
                                                      on." sewing and "ruffling in as exactly
                                               ruffled be to material and goods PLACE

                                               OPERATION ING
                                             STITCH. ONE AT FACING ON
                                        PUTTING AND ON SEWING RUFFLING,


                                                     straight. garment keep to sure
                                                  Be even. perfectly garment of bottom and
                                  pattern.
                                                   ruffle of bottom make will this ruffle;
the follownag sewing, ordinary in pastias
                                                  the of width the needle the of left the
                                                   to come to it allowing ruffler, the neath
the with up side wrong goods the Place                                                   under- garment Place guide. first over
 toot. presser and needle the undering            and guide second under blades, blued •
com- its insure to end the from projecting
                                                  inch-berweenYr rumtedgatheredbe beto tomatemaledge everPlaceFOld
 enough with attachment the of channel
 the into braid the put to careful be
 place into it pushing Before it. fasten will                    CEMADIEG
 which go, will it as far as openings these           NARROW WITH RUFFLE ON SEWING •

 MACHINE SEWING THE         MACHINE SEWING THE.
View original page 15Related documents and language editions
StandardPDF
Standard Rotary
User manual
16 pages · EnglishRead →
StandardPDF
Standard Rotary (1915)
User manual
16 pages · EnglishRead →
StandardPDF
Standard Rotary (1917)
User manual
17 pages · EnglishRead →
StandardPDF
Standard Rotary Shuttle
User manual
18 pages · EnglishRead →
StandardPDF
Standard Rotary Shuttle
User manual
12 pages · EnglishRead →
StandardPDF
Standard Sewhandy
User manual
16 pages · EnglishRead →
From the ISMACS International. Original publisher and archive notices are retained.
Check the model and edition against your equipment.
PDF verified 2026-10-11.