Film cameras
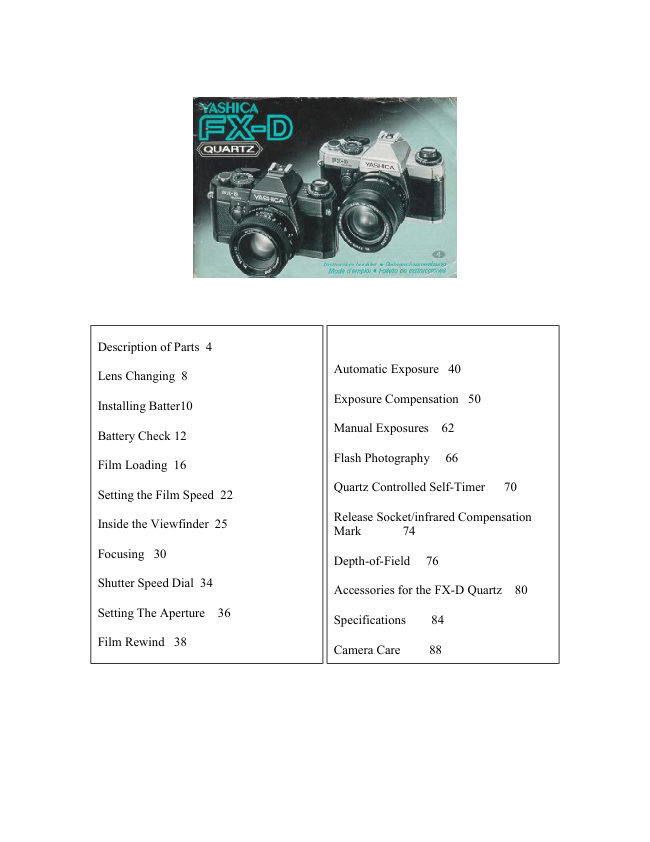
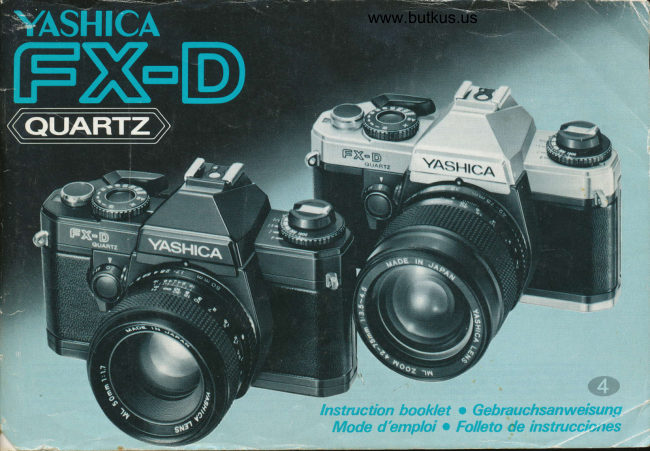
get a Yashica FX-D quartz User manual
User manual for get a Yashica FX-D quartz. 25 pages in English. Read the original PDF, download or print a copy without registration.
25 pagesEnglish1.4 MB PDF
Loading your manual…Open PDF directly
Document details
- Brand
- Yashica
- Model / document
- get a Yashica FX-D quartz
- Document type
- User manual
- Language
- English
- Pages
- 25
- File size
- 1.4 MB
- Category
- Film cameras
- Document date
- Not specified in catalog
Search available document text
Find a term, then jump to its page in the original PDF. Image-only pages may not be searchable; check the PDF for exact wording and diagrams.
Page 2 · Read text
Description of Parts 4

                                        Automatic Exposure 40
Lens Changing 8

                                       Exposure Compensation 50
Installing Batter10

                                    Manual Exposures  62
Battery Check 12

                                           Flash Photography  66
Film Loading 16

                                         Quartz Controlled Self-Timer   70
Setting the Film Speed 22

                                          Release Socket/infrared Compensation
Inside the Viewfinder 25
                                  Mark       74

Focusing 30
                                           Depth-of-Field  76

Shutter Speed Dial 34
                                           Accessories for the FX-D Quartz  80

Setting The Aperture  36
                                              Specifications    84

Film Rewind  38
                                    Camera Care     88
View original page 2Page 3 · Read text
DESCRIPTION OF PARTS


                                                 (11) Film Rewind Crank
(1) Exposure Counter
                                                 (12) Film Rewind Knob
(2) Shutter Speed Dial
                                                 (13) Exposure Check Button
(3) Electromagnetic Shutter Release
                                                 (14) (Auto Exposure)
(4) Film Advance Lever                     Lock Lever/Self-Timer Lever

(5) Shutter Speed Index                          (15) Self-Timer LED

(6) Accessory Shoe                              (16) Lens Release Button

(7) Flash-Ready Signal Contact                   (17) Focusing Ring

(8) Direct X Contact                             (18) Aperture/Distance Scale Index

(9) Exposure Compensation Index                (19) Aperture Ring

(10) Film Speed Dial                             (20) Aperture Mark
View original page 3Page 4 · Read text
(21) Film Chamber
                                                 (28) Camera Back
(22) Film Rewind Stud
                                                 (29) Battery Compartment Cover
(23) Film-Speed-Dial Release Button
                                                 (30) Tripod Socket
(24) Viewfinder Eyepiece
                                                 (31) Winder Coupling Terminal
(25) Cable Release Socket
                                                 (32) Film Rewind Release Button
(26) Film Transport Sprocket
                                                 (33) Film Drive Coupling
(27) Take-up Spool
View original page 4Page 5 · Read text
LENS CHANGING

Mounting the Lens First remove the camera-body cap and then insert the lens mount into the camera-body
mount, matching the red dot on the lens mount with that on the camera body. Then, gripping the lens barrel
firmly, turn the lens clockwise until it locks with a click, bringing the red dot on the camera opposite the
aperture/distance scale index.


                               Removing the Lens While pressing the lens release
                                          button, turn the lens counterclockwise slightly and remove
                                                             it from the camera-body mount. Always keep caps on the
                                   camera-body mount and the lens mount when the lens is
                                                  left off the camera. When using a lens cap of the clip-on
                                           type, attach or remove it from the lens by pressing in the
                                  two side-tabs.

                                                  · Avoid touching camera interior or lens surface with your
                                            fingers.

                                                  · Avoid direct sunlight when removing or mounting the
                                          lens with film loaded in the camera.


INSTALLING BATTERIES

Batteries power all the camera's necessary functions including shutter system, exposure control, etc.
 The FX-D Quartz will not operate without batteries.

Use two 1.5 V silver-oxide batteries (SR44, Eveready S76, Ucar S76, Mallory MS-76 or equivalent) or alkaline
manganese batteries (LR44 or equivalent).
View original page 5Page 6 · Read text
1. Open the battery compartment cover on camera base by
                                        turning it counterclockwise with a coin.

                                            2. Insert two batteries into the battery holder according to
                                          polarity diagram shown on the holder. Then replace the
                                       holder in the battery compartment and firmly secure the
                                   compartment cover.


                              To check battery condition, press the exposure check
                                       button and note the LED (Light-emitting diode) display in
                                         the viewfinder. When the batteries are good, the LEDs will
                                             light steadily or flash at regular intervals as shown in the
                                              illustration below. The FX-D Quartz is designed to give
                                 you advance warning when the camera is about to stop
                                       functioning due to weakened batteries. When the batteries
                                         are weak, the normal lighting pattern will change to that
                                shown on the right side of the following illustration.


BATTERY CHECK


Batteries must be replaced--when the batteries are weak, causing the LEDs to flash in an erratic pattern; or
when the voltage drops below rated level, causing the LEDs to remain unlit even if the battery check or shutter
release button is pressed.
View original page 6Page 7 · Read text
AE LOCK LEVER WARNING

When the "AE-L" (AE Lock) mark is set on the index mark "    ", the power is turned on and the LED in the
viewfinder flashes to warn that the AE Lock is operating. Switch the lock lever in this position, power will
continue to drain unless the lever is reset to the "o": mark.

TO PREVENT UNNECESSARY BATTERY DRAIN,
 always reset the lever to the "0" mark when AE lock function is no longer needed.

Battery Precautions

 Batteries are apt to perform poorly in sub-zero temperatures, causing picture taking difficulties and LED
failure. Keep the camera as warm as possible and carry extra batteries just in case those in the camera should
fail. Batteries affected by such extreme temperatures will recover power after being kept warm for a while.

· When installing batteries, wipe the cell cap and base clean. Oily residue on battery terminals could cause poor
electrical contact.

· Remove the batteries when the camera is not used for extended periods.

· Make it a rule to carry spare batteries with you on long trips.

· Do not throw batteries into a fire or attempt to take them apart. THIS IS DANGEROUS. Also keep batteries
out of reach of small children.


FILM LOADING

Always use a standard 35 mm film cartridge (12, 20, 24 or 36 exposure roll).
Avoid direct sunlight when loading film.


                                             1. Open the camera back by pulling the film rewind knob
                                                  all the way out.

                                             2. Place the film cartridge in the film chamber. Then, push
                                         the rewind knob back in, turning it slightly until it falls
                                           into position, if necessary.

                                             3. Draw out the film leader and insert the tip into any slot
                                  on the take-up spool.
View original page 7Page 8 · Read text
4. Advance the film slightly with the film advance lever
                                              until the perforations on both sides of the film engage the
                                        sprocket teeth. If necessary, trip the shutter for blank shots
                                   and keep advancing the film until both rows of
                                          perforations engage the sprocket. Close the camera back
                                   and press until it locks into place.

                                                  · Use one full stroke of the film advance lever to advance
                                         the film. The electromagnetic shutter release will not
                                        function unless the lever is given a full stroke. The film
                                    advance lever is easier to operate if kept in the standoff
                                          position (20° arc).


When taking blank exposures always be sure to remove the lens cap and point the camera toward a bright area,
or set the shutter speed dial to a fast shutter speed (1/1000, 1/500 sec., etc.). Reset the shutter speed dial to AE
after blank exposures have been made. Otherwise, excessively long exposures will result, hindering film
advance to the first exposure.


5. Unfold the rewind crank and turn it gently in the direction of the arrow to take up film slack.

6. Wind the film advance lever and trip the shutter alternately until the exposure counter reads "1". Now you
can start taking pictures. (Set the shutter speed dial to AE or manual mode.) If the film rewind knob rotates in
unison with the operation of the film advance lever, it means that the film is feeding properly.

Exposure Counter


                                The exposure counter moves each time the film advance
                                          lever is fully stroked, and automatically resets to "S"
                                              (Start) when the camera back is opened, regardless of
                                    whether the camera is loaded or not.

                                The exposure counter starts with "S", then "1", followed
                                 by even numbers from "4" through "36". The odd numbers
                                         are indicated by dots marked between the even numbers.

                                The orange-colored numbers "12", "20", "24" and "36"
                                      correspond to the number of exposures in standard 35mm
                                        film cartridges.
View original page 8Page 9 · Read text
SETTING THE FILM SPEED


                                  While pressing the release button for the film speed dial,
                                          turn the film speed dial until the ASA film speed number
                                           for the film being used lines up with the index mark "X1"
                                       (orange colored). Then, let go of the release button and
                                    check to see that the dial is properly set on a click-stop.

                              The film speed dial must be set to the speed of the film
                                   loaded in the camera to insure proper exposure.
                                The ASA (or DIN) film speed rating is shown on the film
                                      box.

                         Memo Holder with ASA/DIN Conversion Scale
                              To help you recall what kind of film is being used in the
                                      camera, insert film box tab into the handy memo holder.
                                The holder can also be used for keeping notes and data.


The viewfinder of the FX-D Quartz, features TTL (through-the-lens) metering at full aperture for bright, easy
focusing. It also gives other essential information.

Split image Spot/Microprism Collar
A convenient three-way system incorporating a horizontal split-image spot in the center, surrounded by a
microprism collar, and an outer matte field permits rapid, sharp focusing.
View original page 9Page 10 · Read text
Shutter Speed Scale
The figures along the right side of the viewfinder indicate the various shutter speeds. The black figures indicate
speeds from 1/1000 second down to 1 second (for example, "1 " = 1 second, "2" = 1/2 second, ... "125" = 1/125
second, ... "1000" = 1/1000 second, etc.). The red "2" represents 2 seconds; the red "LT", long exposures up to
11 seconds on AUTO; and "B", shutter selector is on B (Bulb), or if selector is on AUTO, it indicates
underexposure. "OVER" at the top of the scale denotes overexposure.


LED Indicators
When the exposure check button is depressed, one or more of the red LEDs (light-emitting diodes) to the right
of the shutter speed scale will light steadily or flash to indicate the shutter speed in use.

The LEDs will remain lit for 10 seconds after releasing the exposure check button. The"    "mark at the top of
the LED display lights green when the camera's exclusive CS-201 auto flash unit is fully charged.


Focusing' with the FX D Quartz is done by using any element of its convenient three-way focusing system
consisting of a split-image spot, a microprism collar and an outer matte field.
View original page 10
Page 11 · Read text
FOCUSING


                                Horizontal Split image Spot
                         When using the split-image spot to focus, turn the focusing
                                     ring until the top and bottom halves of the image merge. If the
                               image is out of focus, the two halves will not merge.

                             Microprism Collar/Matte Field
                           To focus with the microprism collar, turn the focusing ring
                                         until the glittering effect disappears from the collar area, giving
                              you a sharp, clear image when in focus. To focus with the
                                    outer matte field, turn the focusing ring until the image appears
                                  sharp and clear, free of any foggy effect.


                            When using a lens of relatively small maximum aperture
                                             (f/4 or slower), or when undertaking close-up photography,
                                        the microprism collar and the split-image spot are apt to
                                      darken, causing focusing difficulty. In such a case, use the
                                        outer matte field for focusing.

                                   Diopter Lens
                                       Special correction lenses are available for those who find it
                                              difficult to focus with their eyeglasses on. There are 8 types
                                          available: -5D (diopters), -4D, -3D, -2D, OD, + 1 D, + 2D,
                                  and + 3D. Choose the one suited to your eyesight needs.
                                  These lenses should be used with an accessory eyecup.
View original page 11Page 12 · Read text
SHUTTER SPEED DIAL


                                 The shutter speed dial regulates the length of time the light
                                     exposes the film plane. The dial is set by turning the
                                       desired speed reading to the shutter speed index. The
                                          shutter cannot be used at intermediate settings.

                                "AE" (Automatic Exposure)
                                         In the AE mode, the camera will give correct exposures by
                                       automatically controlling the shutter speed for the
                                         prevailing aperture setting and image brightness. To check
                                         the shutter speed selected, press the exposure check button
                                  and note the LED reading in the viewfinder.


"1000" to "1", "X" and "B" Settings The figures such as "1000", "60" and "1" represent 1/1000, 1/60 and 1
second respectively, and adjusting the dial at these figures will set the respective shutter speeds. Light
transmission is halved with each larger number (for example, from "125" to "250") on the scale, and conversely
is doubled with each smaller number. The "X" mark denotes flash synchronization at 1/100 second. "B" stands
for Bulb, which is used to make long exposures under your control.


SETTING THE APERTURE

The aperture ring regulates the amount of light passing through the lens to the film plane. To set the aperture,
align the desired f/number on the ring with the aperture/distance scale index.


                                The amount of light transmission is halved with each larger
                                number (such as from "4" to "5.6") on the scale, and
                                      conversely it is doubled with each smaller number. The
                                        aperture also controls the depth of field, a lens property
                                       giving you varying depth in the plane of focus at different
                                          apertures. The aperture ring can be used at in-between
                                           positions. Except for some special lenses, all Yashica and
                                       Zeiss lenses feature automatic diaphragms. The automatic
                                   diaphragm lens, when mounted on the camera, remains at
                                                full aperture even when the aperture setting is at minimum.
                            When the shutter release is pressed the lens stops down and
                                     reopens immediately after wards.
View original page 12Page 13 · Read text
FILM REWIND

When the exposure counter shows you have completed a roll of film,
always be sure to rewind the film before opening the camera back.


                                          1. Press the film rewind release button on the base of the
                                   camera. Continuous pressing is unnecessary as the button is
                                 an automatically resetting type.

                                          2. Unfold the film rewind crank and turn it in the direction of
                                       the arrow. Keep turning until you feel a light resistance
                                        shortly before the film comes off the take-up spool and
                                     continue turning until the crank eventually rotates freely.

                                               · If the film is wound beyond its last frame, it will be only
                                          partially advanced. When this occurs, press the film rewind
                                        release button and rewind the film. Avoid advancing the film
                                        forcibly or you will tear the film.


AUTOMATIC EXPOSURE


                                  Your FX-D Quartz is an aperture priority automatic
                                     exposure camera. You merely set the lens aperture and the
                                 camera will automatically select the correct shutter speed
                                           for the prevailing lighting conditions. The correct shutter
                                    speed is indicated by the LEDs in the viewfinder. The
                                 camera features center-weighted metering at full aperture,
                                        heavily weighted to measure the light in the viewfinder
                                          center.

                                            1. Set the Shutter Speed Dial on "AE"
                          Now your camera is ready to automatically select the
                                          correct shutter speed using its electronically controlled
                                     metering system.

                                            2. Setting the Aperture
                                  Turn the aperture ring to any desired f/stop. Use the
                                      following table as a guide in selecting the appropriate
                                      f/number.
View original page 13Page 14 · Read text
Lighting condition strong                                 f/number
(Using ASA 100 Film)

Outdoors, bright sunlighttd>           16,11, 8

Outdoors overcast                        5.6, 4

Indoors or night photography            2, 2.8, 2, 1.7,  1.4


                                          2. Focusing and Composing Look through the viewfinder,
                               compose the picture, and focus using the split-image spot,
                                       the microprism collar or the outer matte field.

                             Check the Exposure Center the subject in the viewfinder
                                 and press the exposure check button. If the LED light against
                                 any of the readings from "1000" through "LT", the indicated
                                        shutter speed will give you the correct exposure. If two
                           LEDs light up simultaneously, the shutter will operate at an
                                      intermediate shutter speed between those indicated by the
                                two numbers. (For further details, refer to the section on
                                  "Exposure Check" shown below.)


                                   Press the Shutter Release to Take Picture If the shutter
                                        release is held down after the shutter has tripped, an LED
                                         will light to indicate the shutter speed that was used for the
                                     exposure. And it will remain lit while the finger is pressing
                            down on the shutter release.

                                 Shooting at Particular Shutter Speeds Although FX-D
                                   Quartz is an aperture-priority automatic exposure camera, it
                                  can also be used on shutter priority mode to shoot at any
                                         particular shutter speed. Press the exposure check button and
                                       turn the aperture ring until the LED indicator opposite the
                                      desired shutter speed lights, then press the shutter release.
View original page 14Page 15 · Read text
<Exposure Check>
                              When the exposure check button is depressed, the red
                               LEDs in the viewfinder will light to indicate the
                                              correct exposure, or flash to warn of overexposure
                                           (with an audible warning) or underexposure. The
                               LEDs will remain lit for 10 seconds upon release of the
                                        exposure check button. However, if the shutter is
                                            released while the LEDs are lit, they will go off after
                                             the exposure has been completed.


When Any LED Lights from "1000" Through "LT" exposure will be correct and you may shoot
immediately. If one LED lights, the shutter will operate at the speed indicated on the scale. When 2 LEDs light
simultaneously, an intermediate shutter speed between the two indicated speeds will be used. If "30" or a slower
speed is indicated, there is a danger of camera movement when hand-held exposures are made. In this case, use
an aperture that will give a reading above "30", or use a tripod or other means of steadying the camera during
exposure.


                                When the LED in the "Over" Position Flashes
                                                  the camera is warning of overexposure. At the
                                        same time, an audible warning will sound. Since
                                                  the light is too bright, turn the aperture ring until
                                           "1000" or a lower number is indicated (and the
                                                audible warning stops) before shooting. If the
                                LED continues to flash in the "Over" position and
                                                  the audible warning persists even after you have
                                              stopped down the aperture ring to its limit, use a
                                                   neutral density filter (a light reduction filter) to
                                              reduce light transmission.

                                When the LED in the "B" Position Flashes
                                                  the camera is warning of underexposure. Turn the
                                                  aperture ring to a wider lens aperture until "LT"
                                                 or a faster shutter speed is indicated before
                                                 shooting. (At "LT" or under 1/30 sec. position,
                                                  the use of a tripod is recommended.) If the LED
                                                    in the "B" position still flashes even after you
                                           have opened the aperture fully, switch to flash
                                              photography.
View original page 15Page 16 · Read text
EXPOSURE COMPENSATION

When shooting against the light or photographing against a window or other bright background, the main
subject will tend to be underexposed using the auto exposure system. Conversely, with spotlighted and other
intensely lit subjects, the subject will be overexposed. To overcome lighting problems of this nature as a
effectively as possible, your FX-D Quartz features a choice of two exposure compensation methods: the AE lock
lever, and the exposure compensation scale. Both methods are also useful for intentional over and under-
exposure for special effects photography in addition to exposure compensation.


<Using the AE (Automatic Exposure) Lock Lever>

Set the AE lock lever by aligning the "AE-L" mark with the orange-colored "   " index mark. The shutter speed
in effect when the AE lock lever is set remains stored in the camera's memory system, and the LED in the
viewfinder flashes to indicate that shutter speed. When the shutter release is pressed, the shutter releases at the
memory-stored shutter speed. When the "o" mark on the lock lever is reset to the "   " index mark, the memory
will be cleared and the LED system will stay lit for about 10 seconds.

· To avoid battery drain, always return the AE lock lever to the "o" (orange-colored) mark after using the AE
lock function.
View original page 16
Page 17 · Read text
Examples Using the AE lock
                               For example, suppose the background is excessively bright and
                             you wish to photograph a subject at the side of the picture. Your
                                   subject will be underexposed as shown in photo (1) if you take
                                   the picture using the correct exposure indicated by the camera. In
                                       this case, either center the finder on the subject and set the AE
                                    lock, or walk up to the subject, take a direct exposure reading at
                                   close range and then set the AE lock. Then resume your camera
                                   angle, frame your subject as desired and obtain a properly
                              exposed photo of your subject as shown in photo (2).


Once the shutter speed is locked in, it remains locked in until the AE lock is released. Thus, when using a
winder to take sequential photos of a moving subject as shown in photo (3), lock in the exposure reading and
release the shutter for properly exposed photos regardless of changes in background brightness. In situations
which call for intuition and experience, such as bright backgrounds, backlit subjects, and spotlighted subjects,
you can easily obtain the correct exposure by using the AE lock.


                                <Using the Exposure Compensations Scale>
                                  For normal exposures in the AUTO mode, the ASA film
                                   speed value of the film in use is locked at the "X1" setting.
                             To set the exposure compensation: depress the film speed
                                          dial release button, turn the dial until the speed value of the
                                      film in use lines up with the desired compensation scale
                                       reading. The exposure compensation scale can be used at
                                      intermediate settings and can be click-stopped in 1/3
                                    increments between scale readings.


* Always reset the ASA speed value for the film being used to "X1" when exposure compensation is no
longer needed.
View original page 17Page 18 · Read text
· At some film speeds, exposure compensation settings cannot be used,
as indicated in the table as follows (these settings exceed the camera's
ASA film speed range).


Values "2" and "4" Increase the Amount of Exposure
In situations such as shooting against the light or where your subject is back-lit by a bright sky or beach scene,
or when you want to overexpose intentionally, set the dial at "2" or "4". The "2" setting corresponds to a change
of one f-stop, and the "4" to two f-stops.

Values "1/2" and "1/4" Decrease the Amount of Exposure
In situations where the background is dark because of spotlighting of the subject or where you want to
underexpose intentionally, set the dial to "1/2" or "1/4". The "1/2 " setting corresponds to a change of one f-
stop, and the "1/4" to two f-stops.

MANUAL EXPOSURES

                                   The FX-D Quartz can a/so be used in the manual mode
                                             for shooting at a desired shutter speed, exposures at the
                             B setting, and flash photography at X with flash units
                                          other than the camera's exclusive CS-201 Auto Flash.
                                   For manual exposure, turn the shutter speed dial from
                                           the AE setting to the desired manual shutter speed
                                      number. In the manual mode, the shutter speed selected
                                               will be indicated by a flashing LED inside the
                                           viewfinder. Intermediate shutter speed settings cannot
                                     be used.

                                               1. Turn the shutter dial to the desired manual shutter
                                       speed setting.

                                               2. Press the exposure check button. The LED will flash
                                                 at the shutter speed selected on the shutter speed dial,
                                        while a second LED will steadily light at the camera's
                                  recommended shutter speed for the aperture setting in
                                                 effect. For correct exposure, turn the aperture ring until
                                           the flashing and steadily lit LEDs merge.
View original page 18Page 19 · Read text
3. Now only the flashing LED will be on to indicate correct
                                     exposure. Frame your subject, focus and release the shutter.
                                                 If you wish to shoot at a preset aperture in the manual mode,
                                       reverse the procedure: turn the shutter dial until the flashing
                         LED merges with the steadily on LED. If two steadily lit
                            LEDs remain on, you will have to slightly adjust the f-
                                number for the correct exposure.

                                 "B" (Bulb) Photography
                                   For long exposures of night scenes and astrophotography,
                                           set the shutter speed dial to the B setting. The shutter will
                                   remain open as long as the shutter release button is
                                      depressed, so it will be necessary to use a tripod or other
                                        support, and the exclusive Contax Cable Switch S (optional
                                        accessory), to prevent camera vibration.


FLASH PHOTOGRAPHY

When shooting indoors or at night, or when fill-in lighting is needed for daylight shooting,
an auto flash or flash bulb unit can be used to great advantage.


                            CS-201 Auto Flash unit

                                   In the AUTO mode, you can use the CS-201 Auto Flash unit
                                with the FX-D Quartz for automatic flash photography at a
                            recommended aperture. With the auto flash unit set at AUTO,
                                   the camera automatically switches to the synchro shutter speed
                                   of 1/100 sec., lights up the "an" mark in the viewfinder and
                                    flashes the LED at the 1/125 second mark when the flash unit is
                                      fully charged, letting you know electronically that the camera is
                                ready for flash shooting. Automatic exposure mode is in
                                  operation when the flash unit is turned to "OFF" or when the
                                     flash unit is in the process of charging. For detailed operating
                                      instructions, refer to the instruction booklet which accompanies
                                   the CS-201 Auto Flash unit.
View original page 19Page 20 · Read text
Other Flash Units

When other flash units are used with the FX-D Quartz,
set the shutter speed dial to "X" (shutter releases at
1/100 sec. but LED flashes at "125" in the viewfinder)
or to a shutter speed of 1/60 sec. or slower. The
necessary information displayed inside the viewfinder is
the same as for manual operation. To determine the
flash exposure, follow the instructions accompanying
the flash unit.

· The FX-D Quartz has direct contact type connection
for electronic flash and flash bulb units of the cordless
type.

· With flash bulbs (FP, M and ME types), a shutter
speed of 1/30 sec. or slower is recommended.


  When you wish to include yourself in a group or
   special occasion picture, use the handy quartz self-
   timer. The FX-D Quartz has an electronically
   controlled two-way audiovisual wafting that beeps
   and flashes to let you know not only when the self-
   timer is on but also when it is about to release the
   shutter.em>

   1. First focus the camera, then set the "S-T" mark on
   the AE lock lever to the "I" index mark. The lock
   lever can be set either before or after advancing the
   film.

   2. Check to see that the film has been advanced and
   then press the shutter release. The camera will start
   beeping and the self-timer LED will start flashing
   and will continue to do so for ten seconds before the
   shutter is tripped. To warn you that the shutter is
   about to be released, the audio-visual signals
   accelerate 2 seconds before shutter release.
View original page 20
Page 21 · Read text
When you have finished using the self-timer, always be sure
                                       to reset the AE LOCK LEVER to the "0" mark. If the lever
                                              is left in the "S-T" position, the camera will continue
                                    operating in the self -timer mode.

                                              · Even after the self-timer has been set in motion, it can be
                                      interrupted at any time in the interim by shifting the lock lever
                                       to "AE-L" or to "0".


· When taking pictures with the eye away from the viewfinder eyepiece, such as when the self-timer or any
remote control device is being used, you should cover the eyepiece with the accessory eyecup to prevent
extraneous light from entering through the eyepiece. As shown in the photograph, you can attach the accessory
eyecup, slide it up and then fold it back so as to block the light from reaching the eyepiece. An alternate method
is to look through the viewfinder at the scene to be photographed, and set to the AE lock.


                                         Release Socket
                                           This may be used to attach remote control devices
                                         such as the Cable Switch S. Infrared Controller S.
                                        Radio Controller, etc., or as a contact for connecting
                                              the Auto Bellows or the RTF 540 Auto Flash unit.
                                     The socket receives electrical signals from these
                                              accessories which are used to operate the shutter

                                                         · Do not connect an ordinary cable release
                                           (mechanically operated type) to this release socket as
                                                    this can cause damage to the socket device.

                                         Infrared Compensation Mark
                                      With infrared film (and a red filter) it is necessary to
                                                correct for the infrared rays used for focusing. Both
                                         Yashica ML and Zeiss To lenses have an infrared
                                         compensation mark (R index) on the depth-of-field
                                                scale on the lens barrel (Zeiss Mirotar lenses and
                                    some Yashica lenses do not have this mark because
                                            they do not require any correction). First use the
                                        normal focusing procedure, then turn the focusing
                                               ring until the distance at which you have focused is
                                             opposite the red compensation mark.
View original page 21Related documents and language editions
From the M. Butkus archive. Original publisher and archive notices are retained.
Check the model and edition against your equipment.
PDF verified 2026-10-10.