Film cameras
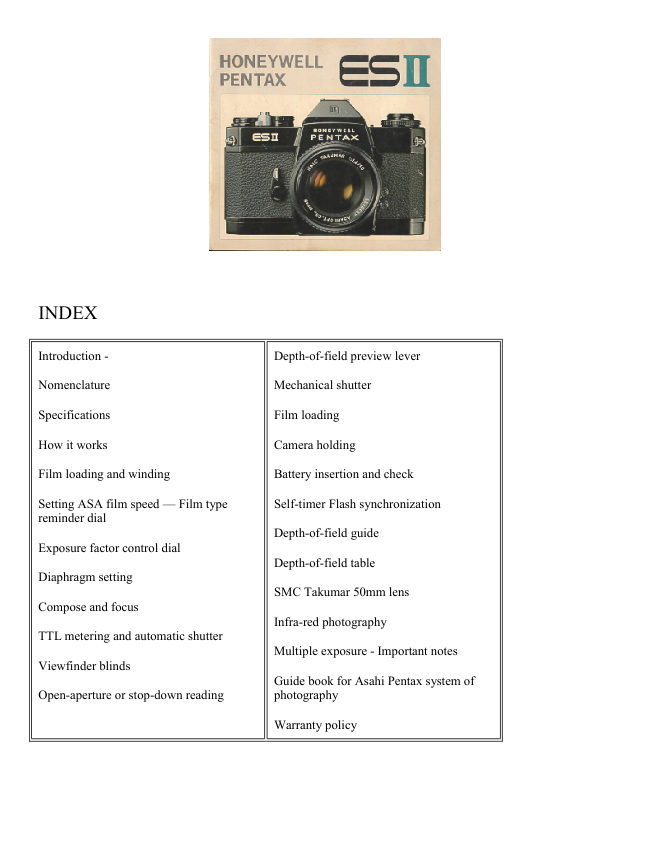
Honeywell Pentax ES II Direct scan User manual
User manual for Honeywell Pentax ES II Direct scan. 37 pages in English. Read the original PDF, download or print a copy without registration.
37 pagesEnglish11.0 MB PDF

Loading your manual…Open PDF directly
Document details
- Brand
- Pentax
- Model / document
- Honeywell Pentax ES II Direct scan
- Document type
- User manual
- Language
- English
- Pages
- 37
- File size
- 11.0 MB
- Category
- Film cameras
- Document date
- Not specified in catalog
Search available document text
Find a term, then jump to its page in the original PDF. Image-only pages may not be searchable; check the PDF for exact wording and diagrams.
Page 3 · Read text
www.butkus.us

ffiffiruffiWWffifuil ffiffiruH&K E5tr

Your Honeywell Pentax ES ll  is the most       Pentax ES ll  is equipped with a Super-Multi-
exciting 35mm SLR camera on the market       Coated Takumar lens. Exclusively developed by
today. lt comes equipped with a through-the-        Pentax, Super-Multi-Coated Takumar lenses re-
lens metering system with focal-plane electronic      duce flare and boost contrast to a degree far
shutter for automatic exposure control. The      beyond what was previously possible in optical
fully automatic electronic shutter operates just        technology. Your pictures will have more detail
like an electronic computer assuring you of       and richer colors than is possible with any other
perfect exposure everytime. This new electronic       system at any price.
shutter lets you shoot automatically at any
speed between 1/1000 and 8 seconds! lf the                                                         ln addition to the exclusive new features of theexact shutter speed should be 11459, 11733 or                                                Pentax ES ll, you'll  f ind many of the refine-11952 seconds, then that's the shutter speed                                        ments that have established Pentax as thethat will be automatically selected. Our patent-                                                         leading  f ine camera maker in the world. The ESed memory device and electronic shutter make                                                                                     ll retains the same traditional compactness andit possible. There's also an exposure control dial                                                             classic feel. lt also is designed for use with thefor intentional over- or under-exposures.                                                       accessories from the Pentax system, including
                                                           all the Takumar lenses ranging from dynamicThe Pentax ES ll  is the automatic single-lens                                                 wideangle to powerful telephoto. The Pentaxreflex camera that works automatically without
                                                  system is ready to grow with you.special lenses. lt operates automatically with
virtually. all Takumar lenses, as well as, bellows,
extension tubes, and other close-up accessories.     The Honeywell Pentax ES ll  is an excellent
The reason is that the automation  is incorporat-       choice in a fine camera. We wish you exciting
ed into body itself, not into the lens. Your       photography in the years to come.


I
View original page 3Page 6 · Read text
SPECIF lCATIONS

                     Type    35mm TTl-metering SLR camera with focal-plane
                            electron ic shutter  f or automatic exposu re control.
                        Fifm and-   Picture Size     35mm film. 24mm x 36mm.
                      Standard Lenses   SMC Takumar 50mm t11.4 and 55mm
                             f/1.8 with fully automatic-    diaphragm. Distance scale: 0.45m (1.5
                              feet) to inf inity. Filter size: 49mm. With depth-of-f ield scale.
                   Shutters     TTL-metering electronic shutter for automatic
                         exposure control * mechanical shutter for manual speed selection.
                        H orizontal ru n   f ocal plane shutter. Electron ic shutter speeds:
                           unlimited variation between 8 and 1/1000 sec. Mechanical shutter:
                       1/60 (X), 11125, 11250,1/500, 1/1000 sec. Shutter button safety
                           lock also serves for Time exposure.
                     Self-timer     Built-in self-timer with interrupt function. Re-
                                                            1 1 sec.                              leases shutter in 5 -
                   Viewfinder     Eye-level pentaprism   f inder with Fresnel lens +
                         microprism. O.B9x magnif ication with 50mm lens. Life-size magni-
                            fication with 55mm lens. -1.0 dioptry. 93% viewf inder coverage.
                      Viewfinder blinds can be closed in automatic shutter mode.
                        Shutter speed calibration, TTL meter needle and battery check
                     mark in the viewfinder screen.
                       Focusing       Jripn the distance scale ring until the subject
                         image in the viewf inder comes into sharp focus. Minimum focusing
                            distance: 0.45m                                     -        (1 .5 feet).
                         Reflex Mirror       Instant return type.
                     Film Advance       Ratchet type rapid wind lever. 10o pre-
                         advance and 160" advance angle.
                                           -                      Film Rewind       Rapid rewind crank. Film rewind button on
                         base of camera body releases film from take-up spool for rewind.ffii       Film Exposure- Counter       Automatic  re-set type.
                                                   -
View original page 6Page 7 · Read text
www.butkus.us


       Cocked Indicator   A red disk appears in a small window
         alongside the shutter release button when the shutter is cocked,
.       and blacks out when it is released.
         Lens Mount    42mm thread (Pentax-mount).
         Flash Synchronization  FP + X contacts for conventional
         flash cord connection. X contact on hot shoe for convenient
<        cordless flash connection.
        Exposure Meter       CdS-activated TTL meter for open-dia-        phragm and stop-down reading. Light measurement range: EV1 - @                           -        18 with ASA 100                              film. ASA speed scale: 20 - 3200.
        Exposure Factor Control Dial       1x for normal exposure. 2x,
          4x, 1 l2x  f or international over- or under-exposure.
                                        -                                              silver oxide batteries (Eveready       Power source    Four 1.5V
       S76E or Mallory MS-76H).
'       Film Type Indicator     D (black & white), f   (cotor        daylight), I  (color tungsten) and EMP. (empty). W
      Dimension   With 50mm lens: width 143mm (5.6") x height
     98mm (3.9") x thickness 93mm ('3.7"1. With 55mm lens: width
  '     143mm (5.6") x height 98mm (3.9") x thickness 90mm (3.5").
 I    Weight    93Og (1 lb. 14 oz.l with 50mm lens.8799 (  1b.12
          oz.) with 55mm lens.6789 (1 lb.6 oz.) without lens.   W


I
Il5
Il;
View original page 7Page 9 · Read text
HOW IT WOR KS

The batteries are packed sepa-
 rately. Be sure to insert them
 into the battery housing be-
 fore operating the camera. For
 insertion, refer to page 20.


1. Load your  f ilm and set ASA       2. Keep this at "1x" for nor-
film speed.                       mal exposure.                        3. Pre-select f/stop.
View original page 9
Page 10 · Read text
www.butkus.us


                                                5. Keep this lever down for open-aperture exposure reading. (Lens
                                           aperture stays fully open, and stops down to pre-selected f/stop as
                                     you depress shutter release.) Move it up for depth-of-f ield preview
                                        or for stopdown exposure reading. (Lens aperture actually stops
                                  down to pre-selected f/stop.)

                                                   6. TTL meter reading. Softly depress shutter button. Electric
                                             circuit is now switched on. Meter needle starts movino and
                                                 indicates correct shutter speed.

                                                   7. Electronic memory device stores exposure reading information.

                                                8. Depress shutter release button completely.
         4. Set shutter speed dial at
       ,,AUTOMATIC".                                                9. Memory device automatically releases electron ic shutter.
                                                                     \


t
View original page 10Page 11 · Read text
FILM LOADING AND WINDING               Avoid direct light when loading your film.


                                     www.butkus.us
1 . Open the back by pu lling      2.Place the film cassette pro-     3. Advance the film by alter-
  out the rewind knob until       perly into the cassette    nately turning the rapid
  the back cover snaps open.       chamber, and push down     wind lever and depressing
                                   the rewind knob. Insert the     the shutter button until
                                   film leader into the slot of      both sprockets engage the
                                     the take-up spool.               film perforations properly.
                                                                 Close the back by pressing
                                                                                                                              it firmly.
4. Cock the rapid wind lever,
  and confirm that the film
  rewind knob automatically        5. The first portions of the film cannot be used for picture taking
  turns counter-clockwise, rn-        as they have already been exposed to light. Generally, two or
  dicating that the film  rs        three blank exposures should be made before taking your first
  properly loaded and is mov-          picture. Therefore, advance the film until the exposure counter
   ing from cassette to take-up        turns to "1", indicating that the first picture is ready to be
   spool. Trip the shutter.                     ta ken.
View original page 11Page 12 · Read text
www.butkus.us
SETTING ASA FILM SPEED
                                                                                                                                                                                                                                                                              I
                           The ASA film speed is given in the data sheet packed with each
                                          roll of film. The higher the ASA number, the more sensitive the
                                          film.

                                          Lift the outer ring of the exposure factor control dial, and turn it
                                      until the same number as the ASA number of the loaded film
                                    appears in the ASA speed indicator window.


  ASA
  DIN   36    33    30    27    24    21    18       ls


FILM TYPE REMINDER DIAL

Use this dial as a reminder of the type of film loaded. To set the dial, pull out the rewind knob softly,
and move the selector to {  for daylight type color film, I  for tungsten type color film, [l  for
black-and-white and EMP. when the  f ilm is not loaded.
View original page 12Page 13 · Read text
EXPOSURE FACTOR CONTROL DIAL
                          !

The scale l4x 2x 'lx 1l2xl indicates exposure factor.


Turn the outer ring of the film type dial, and set 1x against the
orange arrow for normal exposures.


Use this control only when necessary to give intentional over- or
under-exposures within the range of these factors while working
on "AUTOMATIC". For example, set the dial at 2x or 4x when
shooting against the light, and at 1l2x against dark backgrounds.
ln addition, the dial can be set between the indicated positions to
achieve more specif ic exposure control.
                                                            r0
View original page 13Page 15 · Read text
DIAPHRAGM SETTING

 Set the shutter speed dial at "AUTOMATIC".
 Rotate the diaphragm ring to pre-select the desired aperture such
 as follows:
      Fineweather....           ....Il8-f111
      Cloudy weather                           .f 14     15.6                                                     -f
     Indoor                              ...f l2-f12.8


This is a rough guide to acquaint you with the automatic shutter
operation. As you get used to it, you will have your own yardstick
for aperture pre-selection depending on your subject and lighting
conditions.


The shutter speed of the ES  il  is automatically determined at any
speed within the range of 8 to 1i1OO0 sec. according to the
brightness of your subjects.
                                                           l2
View original page 15Page 16 · Read text
www.butkus.us
COMPOSE AND FOCUS

While viewing through the viewfinder, turn the
 focusing ring until your subject comes into
 sharp focus.


Pentax viewfinders have a Fresnel lens with a
microprism center underneath the ground glass.
As you look through the finder, you will see
that the Fresnel lens consits of many concentric
rings which provide the brightest possible image
on the ground glass.


The microprism is the center portion of this
diagram. When your subject is in focus, the
image in the microprism will be sharp and
perfectly clear. lf your subject is not in focus,
the microprism will break the image into many
small dots, much like an engraver's screen. You
can focus your subject on any portion of the
ground glass.


r3
View original page 16
Page 17 · Read text
TTL METERING AND AUTOMATIC SHUTTER

For full-aperture reading, be sure that the stop-down lever is
DOWN.

The broader figures 2, 4 and 8 in the shutter speed calibration
mean 2,4 and 8 seconds respectively. The electronic shutter of the
ES  | | is guaranteed to work properly down to 8 seconds.


After cocking the rapid wind lever, press the shutter release button
lightly to switch on the electric circuit. The meter needle in the
viewfinder indicates the correct shutter speed.

lf the needle does not drop to "1000", stop down the lens
diaphragm.


     CAUTION:
     At slow speeds -  slower than 1/30                                              sec. - put your
     camera on a solid support or use a tripod to prevent
     camera movement.


Depress the shutter release button completely when ready to take
your picture. When the shutter is released and your finger is off
the shutter button, the meter circuit is off and the needle will
return to the top of the scale.
                                                            t4
View original page 17Page 18 · Read text
www.butkus.us


                             Your ES ll  is provided with a shutter lock. To prevent accidental
                                      shutter release, lock the shutter release button by moving the lock
                                           lever to the left. An "L" becomes visible.


                   VIEWFINDER BLINDS

                                        Inside the eyepiece of your ES ll are convenient viewf inder blinds
                                 to shut out stray light which may enter the viewfinder from the
                                              rear.

                         When using a self-timer or working in close-up, macrophotogra:
                                   phy, tripod-mounted telephotography, etc. with your eye off the
                                    viewfinder, close the blinds by setting the shutter speed dial at
                             ,.AUTOMATIC."


t5
View original page 18Page 19 · Read text
OPEN-APERTURE OR STOP-DOWN READING

With the new SMC Takumar lenses with the diaphragm coupling
lever O , mounted directly on the ES  ll camera body, the TTLmeter reads exposure through the full-open aperture for correct
automatic exposure. For open-aperture reading, the stop-down
lever should be DOWN.


                                 With alt other lenses, or when using Extension Tubes, Bellows Unit
                                 or M icroscope adapter, remember always to push up the stop-
                        down lever for  stopped down aperture reading and correct
                                   automatrc exposure.
                             The SMC Takumar 85mm f/1.9 (bottom,  left) and SMC Takumar-
                          Zoom 85mm-21Omm lenses do not have the diaphragm coupling
                                           lever (l  ; therefore, they should be used on the ES  I I for stop-down
                                            read   I n g.
                           CAUTION:
                                       All SMC Takumar lenses up to 3OOmm except the above two are
                                  designed for open-aperture reading, When directly mounted on the
                          ES  I l, they will give correct exposure readings at full aperture. Do
                                not try to take meter readings at stopped-down aperture, as this
                                          will indicate different shutter speeds.
                                Also remember that the TTL metering does not work unless the
                                        shutter dial is set at "AUTOMATIC".


                                      www.butkus.us
                                                                                            l6
View original page 19Page 20 · Read text
www.butkus.us
DEPTH-OF-FI ELD PREVI EW LEVER

The preview lever on the lens should always be set to "AUTO"
when the lens is used on the ES ll. The lever has an interlock that
prevents  it from being set to "MAN" when mounted on the ES ll.
When mounted on a Pentax camera other than the ES or ES ll. the
lever will operate normally.

                  MECHANICAL SHUTTER
                                   In addition to the electronic shutter for automatic exposure
                                     control, the ES ll has a mechanical shutter for speeds: 1/6O X for
                                      electronic flash synchronization,  1 /125, 1 /25O,  1 /5OO, 1/1OOO sec.
                                      plus B (Bulb).
                         To operate at any one of these speeds. just turn the shutter dial
                             from "AUTOMATIC" to the desired speed setting. Now the
                                            electric circuit and TTL meter circuit are off.
                          To make an exposure longer than 8 seconds. set the shutter dial at
                                 B. The shutter will saty open as long as you depress the shutter
                                   button. As you release your finger from the shutter button, the
                                     shutter closes.
                               For extremely long exposures, set the shutter lock by moving the
                                      lever to the left while depressing the shutter button. Alternately,
                                     use a cable relase with a locking device.


t7
View original page 20Page 21 · Read text
FILM UNLOADING

After the final picture on the       Lift the rewind crank up. De-       Pull out the film rewind knob
roll has been taken, the rapid      press the film rewind release      (the back will open automati-
wind lever will not turn, indi-     button and turn the rewind       cally), and remove the film
cating that the  f ilm must be     crank as indicated to rewind      cassette. AVOID DIR ECT
rewou nd.                         the film into its cassette. Re-    LIGHT WHEN LOADING OR
                             wind until the tension on the    UNLOADING THE FILM.
                             crank lessens, indicating that
                               the leader end of the film has
                                 been released from the take-up
                                        spoor.


                                                                                                     to
View original page 21Page 22 · Read text
www.butkus.us
CAMERA HOLDING

As a general rule, your camera should be held more firmly by the left hand which does not release the
shutter. lf you hold your camera with the right hand   the hand which releases the shutter     it may                                                        -                                       -
cause camera movement. Very often, blurred pictures are due to movement of the camera.
When you focus with the camera held horizontally (Position A), hold the lens barrel as illustrated.
Cradle the camera with your left hand thumb and little finger. Turn the focusing ring with your thumb
and index  f inger. When holding the camera vertically, some people release the shutter with the thumb
 (Position B), while others release  it with the index finder (Position C). Position C is more desirable for
fast focusing and shooting. With the Pentax, whether held vertically or horizontally, you see your
subject through the lens, enabling you to compose, focus and shoot with a minimum of time and effort.

Horizontal position A.               Vertical position B.                  Vertical position C.
Hold the camera firmly with     Hold your camera tightly to     Hold your camera tightly to
your left hand, and draw your     your forehead with your left     your forehead with your left
arms close to your body.           hand, and draw your right arm      hand, raise your right arm and
                                       close to your body.             draw your left arm to your
                                                                  body.


t9
View original page 22Page 23 · Read text
BATTERY INSERTION AND CHECK
Four 1.5V silver oxide batteries (Eveready S76E or Mallory       Caution:
MS-76H) oower the TTL meter and electronic shutter of the ES ll.     Do not throw a dead battery
The power circuit is on only when you depress the shutter release                                                                    into fire, as it may explode.button (lightly for meter reading and completely for electronic
shutter) with the shutter speed dial set at "AUTOMATIC". When       Also, keep it beyond the reach
not operating the camera, be sure to keep the shutter dial off the       of small children.
"AUTOMATIC"  settings, or use the shutter lock to prevent waste
of battery power when accidentally touching the shutter release
button.
To insert the batteries, open the battery housing cover on the
bottom of the lens mount by shifting the cover release pin O to
the right with a matchstick or the like.

lnsert four batteries, making sure that each battery correctly faces
the (+) (-) marks inside the housing. Close the cover by first
inserting the two hooks O into the grooves. Push the battery
housing lock pin @ in.

One set of batteries lasts about one year. To check the li{e, set the
shutter dial at "AUTOMATIC", and while looking through the
viewfinder, push the battery check button next to the exposure
factor control dial. lf the meter needle drops to the center notch,
the batteries have sufficient capacity. lf  it does not, replace  all
fou r batteries.


 www.butkus.us

                                                                                      20
View original page 23Page 24 · Read text
www.butkus.us
     SELF-TIMER

                                                                         seconds, depbnding upon how far      The self-timer of the ES ll  releases the shutter after 5  - 11
         anti-clockwise you turn the cocking lever. When using the self-timer, do not depress the shutter release
        button  . . . it will immediately release the shutter without delayed action.

       Turn the cocking lever down 9O'- 180'. Move the self-timer start lever as indicated ... the self-timer
           will start operating.

        This self-timer has a unique interrupt {unction. Even after the self-timer has started to run, you can stop
             it by moving the start lever back to normal position as long as the cocking lever is between 180 and 90   .

       You can re-start the self-timer by turning the cocking lever down again and moving the start lever over.

      Do not leave the cocking lever in "interrupt" position for an extended period, as this may damage the
            spri ng.


'I


  I

 I


        2l
View original page 24Page 25 · Read text
FLASH SYNCHRONIZATION
The Pentax ES ll has FP and X terminals at the front of the
camera body, and an additional X contact in the hot shoe atop the
pentaprism housing. As indicated in the table, set the shutter dial
at 1/60 X for electronic flash, with the flash cord pugged into the
X terminal. Set the shutter dial at 1/60 or faster for FP class flash
bulbs, with the cord plugged into the FP terminal.

                                                                                                                                              't/                                                                  t/                                                                                       t/                                                                                                            t/ shu  |  | Eh srEEU              t/                               /5OO                                                                    /6OX                                           /2SO                    /1OOO                                                              /125
           FP                               o F LASH
 TERMINAL
                                                                 Electronic Flash O

Use the hot shoe flash contact when using a shoe-mount
 electronic flash iike a Honeywell Auto Strobonar with a flash
contact on the foot. In this case, there is no need to plug the flash
cord into the X terminal on the body front.
The hot shoe flash contact turns to "hot" (switched on) only
when you insert a shoe-mount electronic flash. lt remains "cold"
 (disconnected) even when using an electronic flash with its cord
plugged into the X terminal on the body front. This eliminates the
danger of electric shocks.


                                                                                      22
View original page 25Page 27 · Read text
DEPTH.OF-FIELD GUIDE


Depth of field is the range between the nearest and farthest distances which are in focus at a given lens
aDerture.

 lf you want to know how great the depth of field is at a certain aperture, look at the depth-of-field
guide. In the photograph below, the distance scale is set at 5 meters . . . the lens is focused on a subject
5 meters away. The calibrations on each side of the distance index correspond to the diaphragm setting
and indicate the range of in-focus distance for different lens apertures. For example,  if the lens opening
of tl4 is to be used, the range on the distance scale ring covered within the figure 4 on the depth-ot-field
guide indicates the area in focus at that lens opening. You will note from the depth-of-field guide in the
photograph that the range from approximately 4.5 to 6.5m is in focus. Note that as the lens apertures
change, the effective depth of field also changes. For the depth of fields at different apertures and
distances, refer to the next page.


                                                                                                                        Distance(m)A


                                                                                      24
View original page 27Related documents and language editions

From the M. Butkus archive. Original publisher and archive notices are retained.
Check the model and edition against your equipment.
PDF verified 2026-10-10.