Film cameras
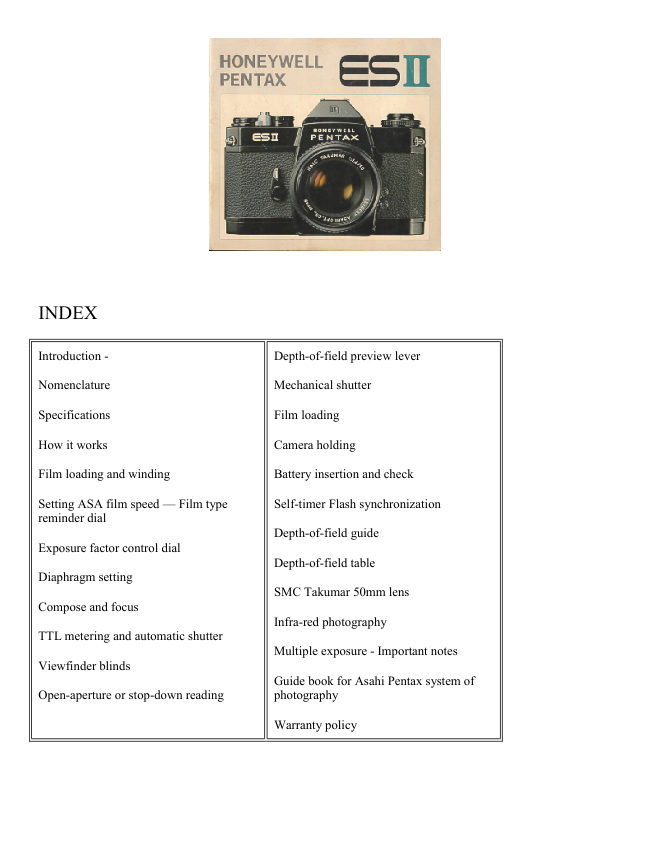
Pentax ES II User manual
User manual for Pentax ES II. 23 pages in English. Read the original PDF, download or print a copy without registration.
23 pagesEnglish3.0 MB PDF
Loading your manual…Open PDF directly
Document details
- Brand
- Pentax
- Model / document
- Pentax ES II
- Document type
- User manual
- Language
- English
- Pages
- 23
- File size
- 3.0 MB
- Category
- Film cameras
- Document date
- Not specified in catalog
Search available document text
Find a term, then jump to its page in the original PDF. Image-only pages may not be searchable; check the PDF for exact wording and diagrams.
Page 2 · Read text
INDEX


Introduction -                                Depth-of-field preview lever

Nomenclature                            Mechanical shutter

Specifications                           Film loading

How it works                         Camera holding

Film loading and winding                   Battery insertion and check

Setting ASA film speed — Film type         Self-timer Flash synchronization
reminder dial
                                             Depth-of-field guide
Exposure factor control dial
                                             Depth-of-field table
Diaphragm setting
                          SMC Takumar 50mm lens
Compose and focus
                                               Infra-red photography
TTL metering and automatic shutter
                                           Multiple exposure - Important notes
Viewfinder blinds
                                      Guide book for Asahi Pentax system of
Open-aperture or stop-down reading         photography

                                       Warranty policy
View original page 2Page 3 · Read text
HONEYWELL PENTAX ESII:
Your Honeywell Pentax ES II is the most exciting 35mm SLR camera on the market today, It
comes equipped with a through-the-lens metering system with focal-plane electronic shutter for
automatic exposure control. The fully automatic electronic shutter operates just like an
electronic computer assuring you of perfect exposure every time. This new electronic shutter
lets you shoot automatically at any speed between 1/1000 and 8 seconds! If the exact shutter
speed should be 1/459, 1/733 or 1/952 seconds, then that's the shutter speed that will be
automatically selected. Our patented memory device and electronic shutter make it possible.
There's also an exposure control dial for intentional over- or under-exposures.

The Pentax ES II is the automatic single-lens reflex camera that works automatically without
special lenses. It operates automatically with virtually all Takumar lenses, as well as, bellows,
extension tubes, and other close-up accessories. The reason is that the automation is
incorporated into body itself, not into the lens. Your Pentax ES II is equipped with a Super-
Multi-Coated Takumar lens. Exclusively developed by Pentax, Super-Multi-Coated Takumar
lenses reduce flare and boost contrast to a degree far beyond what was previously possible in
optical technology. Your pictures will have more detail and richer colors than is possible with
any other system at any price.

In addition to the exclusive new features of the Pentax ES II, you̓ll find many of the refinements
that have established Pentax as the leading fine camera maker in the world. The ES II retains
the same traditional compactness and classic feel. It also is designed for use with the accessories
from the Pentax system, including all the Takumar lenses ranging from dynamic wide angle to
powerful telephoto. The Pentax system is ready to grow with you.

The Honeywell Pentax ES II is an excellent choice in a fine camera. We wish you exciting
photography in the years to come.
View original page 3
Page 5 · Read text
SPECIFICATIONS:

Type: 35mm TTL-metering SLR camera with focal-plane electronic
shutter for automatic exposure control.

Film and Picture Size: 35mm film. 24mm x 36mm.

Standard Lenses: -- SMC Takumar 50mm f/l.4 and 55mm f/1.8 with
fully automatic diaphragm. Distance scale: 0.45m (1.5 feet) to infinity.
Filter size: 49mm. With depth-of-field scale.


                       Shutters: TTL-metering electronic shutter for automatic exposure control
                  + mechanical shutter for manual speed selection. Horizontal run focal
                        plane shutter.
                         Electronic shutter speeds: unlimited variation between 8 and 1/1000 sec.
                      Mechanical shutter: 1/60 (X), 1/125, 1/250, 1/500, 1/1000 sec. Shutter
                        button safety lock also serves for Time exposure.

                        Self-timer: Built-in self-timer with interrupt function. Releases shutter in 5
                               - 11 sec.

                      Viewfinder: Eye-level pentaprism finder with Fresnel lens + microprism.
                       0.89x magnification with 50mm lens. Life-size magnification with 55mm
                           lens. --1.0 dioptric. 93% viewfinder coverage. Viewfinder blinds can be
                        closed in automatic shutter mode. Shutter speed calibration, TTL meter
                        needle and battery check mark in the viewfinder screen.

                      Focusing: -- Turn the distance scale ring until the subject image in the
                        viewfinder comes into sharp focus. Minimum focusing distance: 0.45m
                          (1.5 feet).

                      Reflex Mirror: Instant return type.

                    Film Advance: Ratchet type rapid wind lever. 10° pre-advance and 160°
                      advance angle.
View original page 5Page 6 · Read text
Film Rewind: Rapid rewind crank. Film rewind button on base of
                      camera body releases film from take-up spool for rewind.

                     Film Exposure Counter: Automatic re-set type. Wound Indicator A red
                         disk appears in a small window alongside the shutter release button when
                          the shutter is wound, and blacks out when it is released.

                     Lens Mount: 42mm thread (Pentax-mount). Flash Synchronization FP +
               X contacts for conventional flash cord connection. X contact on hot shoe
                           for convenient cordless flash connection.

                     Exposure Meter: CdS-activated TTL meter for open-diaphragm and
                      stop-down reading. Light measurement range: EV1 -- 18 with ASA 100
                           film. ASA speed scale: 20 -- 3200.


Exposure Factor: Control Dial -- 1X for normal exposure. 2x, 4x, 1/2X
for international over- or under-exposure.

Power source: Four 1.5V silver oxide batteries (Eveready S76E or
Mallory MS-76H).

Film Type:  Indicator (black & white), * (color daylight), 8 (color
tungsten) and EMP. (empty).

Dimension: With 50mm lens: width 143mm (5.6") x height 98mm (3.9")
x thickness 93mm (3.7"). With 55mm lens: width 143mm (5.6") x height
98mm (3.9") x thickness 90mm (3.5").

Weight: 930g (1 lb. 14 oz.) with 50mm lens. 879g (1 lb. 12oz.) with
55mm lens. 678g (1 lb. 6 oz.) without lens.
View original page 6Page 7 · Read text
HOW IT WORKS


                                The batteries are packed separately. Be sure to insert them
                                           into the battery housing before operating the camera. For
                                             insertion, refer to page 20.


1. Load your film and
set ASA film speed.

2. Keep this at "1X" for
normal exposure.

3. Pre-select f/stop.

4. Set shutter speed
dial at
"AUTOMATIC".
View original page 7Page 9 · Read text
5. The first portions of the film cannot be used
4. Wind the rapid wind lever, and confirm that      for picture taking as they have already been
the film rewind knob automatically turns          exposed to light. Generally, two or three blank
counter-clockwise, indicating that the film is       exposures should be made before taking your
properly loaded and is moving from cassette to      first picture. Therefore, advance the film until
take-up spool. Trip the shutter.                     the exposure counter turns to "1", indicating that
                                                   the first picture is ready to be taken.

SETTING ASA FILM SPEED


                    The ASA film speed is given in the data sheet packed with each roll of
                          film. The higher the ASA number, the more sensitive the film.

                           Lift the outer ring of the exposure factor control dial, and turn it until the
                    same number as the ASA number of the loaded film appears in the ASA
                      speed indicator window.


FILM TYPE REMINDER DIAL


Use this dial as a reminder of the type of film
loaded. To set the dial, pull out the rewind knob
softly, and move the selector to * for daylight
type color film, 8 for tungsten type color film, 1
for black-and-white and EMP. when the film is
not loaded.
View original page 9Page 10 · Read text
EXPOSURE FACTOR CONTROL DIAL


                           The scale (4x 2x 1X 1/2x) indicates exposure factor.

                            Turn the outer ring of the film type dial, and set lx against the
                               orange arrow for normal exposures.


                           Use this control only when necessary to give intentional over- or
                                under-exposures within the range of these factors while working
                            on “AUTOMATIC”. For example, set the dial at 2x or 4x when
                                shooting against the light, and at 1/2X against dark backgrounds.
                                  In addition, the dial can be set between the indicated positions to
                                achieve more specific exposure control.
View original page 10Page 11 · Read text
DIAPHRAGM SETTING
Set the shutter speed dial at “AUTOMATIC”.
Rotate the diaphragm ring to pre-select the desired aperture such as
follows:

Fine weather f/8 — f/11
Cloudy weather f/4 - f/5.6
Indoor f/2 ff2.8

 This is a rough guide to acquaint you with the automatic shutter
operation. As you get used to it, you will have your own yardstick for
aperture pre-selection depending on your subject and lighting conditions.

The shutter speed of the ES II is automatically determined at any speed
within the range of 8 to 1/1000 sec. according to the brightness of your
subjects.

COMPOSE AND FOCUS


While viewing through the viewfinder, turn the focusing ring until
your subject comes into sharp focus. Pentax viewfinders have a
Fresnel lens with a microprism center underneath the ground
glass. As you look through the finder, you will see that the
Fresnel lens consists of many concentric rings which provide the
brightest possible image on the ground glass. The microprism is
the center portion of this diagram. When your subject is in focus,
the image in the microprism will be sharp and perfectly clear, If
your subject is not in focus, the microprism will break the image
into many small dots, much like an engraver's screen. You can
focus your subject on any portion of the ground glass.
View original page 11
Page 12 · Read text
TTL METERING AND AUTOMATIC SHUTTER


                       For full-aperture reading, be sure that the stop-down lever is DOWN

                    The broader figures 2, 4 and 8 in the shutter speed calibration mean 2, 4
                      and 8 seconds respectively. The electronic shutter of the ES II is
                        guaranteed to work properly down to 8 seconds.

                         After winding the rapid wind lever, press the shutter release button lightly
                           to switch on the electric circuit. The meter needle in viewfinder indicates
                          the correct shutter speed.

                                 If the needle does not drop to “1000”, stop down the lens diagrapham.

                 CAUTION:

                     At slow speeds slower than 1/30 sec. - put your camera on a solid support
                         or use a tripod to prevent camera movement.

                       Depress the shutter release button completely when ready to take your
                            picture. When the shutter is released and your finger is off the shutter
                          button, the meter circuit is off and the needle will return to the top of the
                            scale.


                        Your ES II is provided with a shutter lock. To prevent accidental
                                shutter release, lock the shutter release button by moving the lock
                               lever to the left. An “L” becomes visible.
View original page 12Page 13 · Read text
VIEWFINDER BLINDS

Inside the eyepiece of your ES II are convenient viewfinder blinds to shut out stray light which may
enter the viewfinder from the rear.
When using a self-timer or working in close-up, macrophotography, tripod-mounted
telephotography, etc. with your eye off the viewfinder close the blinds by setting the shutter speed
dial at “AUTOMATIC.”


OPEN-APERTURE OR STOP-DOWN READING


                      With the new SMC Takumar lenses with the diaphragm coupling lever
                               (1), mounted directly on the ES II camera body, the TTL meter reads
                        exposure through the full-open aperture for correct automatic exposure.
                       For open-aperture reading, the stop-down lever should be DOWN.

                      With all other lenses, or when using Extension Tubes, Bellows Unit or
                       Microscope adapter, remember always to push up the stop-down lever for
                       stopped-down aperture reading and correct automatic exposure.

                     The SMC Takumar 85mm f/1.9 (bottom, left) and SMC TakumarZoom
                  85mm-2lOmm lenses do not have the diaphragm coupling lever (1);
                            therefore, they should be used on the ES II for stop-down reading.
                  CAUTION: All SMC Takumar lenses up to 300mm except the above two
                           are designed for open-aperture reading. When directly mounted on the
                   ES II, they will give correct exposure readings at full aperture. Do not
                             try to take meter readings at stopped-down aperture, as this will indicate
                            different shutter speeds.

                       Also remember that the TTL metering does not work unless the shutter
                             dial is set at “AUTOMATIC”.
View original page 13Page 14 · Read text
DEPTH-OF-FIELD PREVIEW LEVER


                                          The preview lever on the lens should always
                                              be set to “AUTO” when the lens is used on the
                                     ES II. The lever has an interlock that prevents
                                                                              it from being set to “MAN” when mounted on
                                                     the ES II. When mounted on a Pentax camera
                                                    other than the ES or ES II, the lever will
                                                    operate normally.


MECHANICAL SHUTTER

In addition to the electronic shutter for automatic exposure control, the
ES II has a mechanical shutter for speeds: 1/60 X for electronic flash
synchronization, 1/125, 1/250, 1/500, 1/1000 sec. plus B (Bulb).

To operate at any one of these speeds, just turn the shutter dial from
“AUTOMATIC” to the desired speed setting. Now the electric circuit
and TTL meter circuit are off.

To make an exposure longer than 8 seconds, set the shutter dial at B. The
shutter will stay open as long as you depress the shutter button. As you
release your finger from the shutter button, the shutter closes.

For extremely long exposures, set the shutter lock by moving the lever to
the left while depressing the shutter button. Alternately, use a cable
release with a locking device.
View original page 14Page 15 · Read text
FILM UNLOADING


                                      Lift the rewind crank up.
                               Depress the film rewind          Pull out the film rewind knob
                                    release button and turn the        (the back will open
After the final picture on the
                               rewind crank as indicated to      automatically), and remove the
roll has been taken, the rapid
                               rewind the film into its           film cassette.
wind lever will not turn,
                                      cassette. Rewind until the
indicating that the film must be
                                  tension on the crank lessens,    AVOID DIRECT LIGHT
rewound.
                                   indicating that the leader end   WHEN LOADING OR
                                  of the film has been released   UNLOADING THE FILM.
                             from the take-up spool.


CAMERA HOLDING

As a general rule, your camera should be held more firmly by the left hand which does not
release the shutter. If you hold your camera with the right hand - the hand which releases the
shutter — it may cause camera movement. Very often, blurred pictures are due to movement of
the camera.

When you focus with the camera held horizontally (Position A), hold the lens barrel as
illustrated. Cradle the camera with your left hand thumb and little finger. Turn the focusing
ring with your thumb and index finger. When holding the camera vertically, some people
release the shutter with the thumb (Position B), while others release it with the index finder
(Position C). Position C is more desirable for fast focusing and shooting. With the Pentax,
whether held vertically or horizontally, you see your subject through the lens, enabling you to
compose, focus and shoot with a minimum of time and effort.
View original page 15Page 16 · Read text
Vertical position C.
                           Vertical position B.
Horizontal position A.
                                           Hold your camera
                      Hold your camera
Hold the camera firmly                                tightly to your forehead
                             tightly to your forehead
with your left hand, and                           with your left hand,
                         with your left hand,
draw your arms close to                                raise your right arm
                       and draw your right
your body.                                    and draw your left arm
                     arm close to your body.
                                                        to your body.


BATTERY INSERTION AND CHECK

Four 1.5V silver oxide batteries (Eveready S76E or Mallory MS-76H) power the TTL meter
and electronic shutter of the ES II. The power circuit is on only when you depress the shutter
release button (lightly for meter reading and completely for electronic shutter) with the shutter
speed dial set at “AUTOMATIC”. When not operating the camera, be sure to keep the shutter
dial off the “AUTOMATIC” settings, or use the shutter lock to prevent waste of battery power
when accidentally touching the shutter release button.


                                     To insert the batteries, open the battery housing
                                               cover on the bottom of the lens mount by
                                                      shifting the cover release pin (1) to the right
                                               with a matchstick or the like.
View original page 16Page 17 · Read text
Insert four batteries, making sure that each battery correctly faces the (+)
(—) marks inside the housing. Close the cover by first inserting the two
hooks (2) into the grooves. Push the battery housing lock pin (3) in. One
set of batteries lasts about one year. To check the life, set the shutter dial at
“AUTOMATIC”, and while looking through the viewfinder, push the
battery check button next to the exposure factor control dial. If the meter
needle drops to the center notch, the batteries have sufficient capacity. If it
does not, replace all four batteries.


SELF-TIMER

The self-timer of the ES Il releases the shutter after 5 — 11 seconds, depending upon how far
anti-clockwise you turn the winding lever. When using the self-timer, do not depress the shutter
release button . . it will immediately release the shutter without delayed action.


                                                                  Turn the winding
                                                                                lever down 90
                                                                          degrees - 180
                                                                              degrees. Move the
                                                                                  self-timer start lever
                                                                             as indicated . . - the
                                                                                  self-timer will start
                                                                                operating.


This self-timer has a unique interrupt function. Even after the self-timer has started to run, you
can stop it by moving the start lever back to normal position as long as the winding lever is
between 180 and 90 You can re-start the self-timer by turning the winding lever down again and
moving the start lever over.

Do not leave the winding lever in “interrupt” position for an extended period, as this may
damage the spring.

Caution: Do not throw a dead battery into fire, as it may explode. Also, keep it beyond
the reach of small children.

FLASH SYNCHRONIZATION The Pentax ES II has FP and X terminals at the front of the
camera body, and an additional X contact in the hot shoe atop the pentaprism housing. As
indicated in the table, set the shutter dial at 1/60 X for electronic flash, with the flash cord
plugged into the X terminal. Set the shutter dial at 1/60 or faster for FP class flash bulbs, with
the cord plugged into the FP terminal.
View original page 17Page 18 · Read text
Use the hot shoe flash contact when using a shoe-mount electronic flash like a Honeywell Auto
Strobonar with a flash contact on the foot. In this case, there is no need to plug the flash cord
into the X terminal on the body front. The hot shoe flash contact turns to “hot” (switched on)
only when you insert a shoe-mount electronic flash. It remains “cold” (disconnected) even when
using an electronic flash with its cord plugged into the X terminal on the body front. This
eliminates the danger of electric shocks.


                      When not using these
                                 terminals, keep the plugs
                                   inserted.


DEPTH-OF-FIELD GUIDE


Depth of field is the range between the nearest and farthest distances which are in focus at a given
lens aperture. If you want to know how great the depth of field is at a certain aperture, look at the
depth-of-field guide. In the photograph below, the distance scale is set at 5 meters. . . the lens is
focused on a subject 5 meters away. The calibrations on each side of the distance index correspond
to the diaphragm setting and indicate the range of in-focus distance for different lens apertures. For
example, if the lens opening of ff4 is to be used, the range on the distance scale ring covered within
the figure 4 on the depth-of-field guide indicates the area in focus at that lens opening. You will note
from the depth-of-field guide in the photograph that the range from approximately 4.5 to 6.5m is in
View original page 18Page 19 · Read text
focus. Note that as the lens apertures change, the effective depth of field also changes. For the depth
of fields at different apertures and distances, refer to the next page.
View original page 19
Page 21 · Read text
IMPORTANT NOTES


                                                        Always keep the stop-down
                                                                        lever down for open-aperture
                                                                       reading. Also, be sure to
                                                             keep it down when
                                                                    interchanging lenses;
                                                                     otherwise, the automatic
                                                            diaphragm pin of the lens
                                                                          will hit the diaphragm
                                                                         activating lever in the body.
                                                 Move it up only when
                                                               checking the depth of field
                                                                     or using stop-down metering
                                                                      lenses or Extension Tubes,
                                                             Bellows Unit, etc. inserted
                                                            between the lens and the
                                                            camera body.

If you set the shutter dial of the ES II at “AUTOMATIC” and release the shutter, the reflex mirror
will be locked up for safety, if 1) the lens cap is on.
2) the lens is removed from the body.
3) the stop-down lever is down, when using stop-down metering lenses or close-up accessories.

To bring the reflex mirror down, just turn the shutter dial off the “AUTOMATIC” setting, or move
up the stop-down lever.


 The following two lenses will not properly fit
 the Pentax ES II camera body due to different    The length of a tripod's screw should not exceed
 mechanical design and construction:              the normal length of 4.5mm (3/16”). Do not
                                              extend it longer than this length when mounting
  Super-Takumar    50mm       f/1       .4   your camera on a tripod. Forcing longer screws
  Super-Takumar 55mm  f/1.8  (with “1  .8”   into the tripod receptacle of the camera will
   engraved at the left end of the diaphragm ring  damage the mechanism.
  and “16” at the right.)
View original page 21Page 22 · Read text
SPECIAL CAUTION:

Takumar lenses and Pentax accessories are engineered and meticulously produced for Pentax
use. Use of other brands may cause difficulties with the Pentax, for which we cannot assume
any liability.


GUIDE BOOK FOR HONEYWELL PENTAX SYSTEM OF PHOTOGRAPHY The operating
manual for the Honeywell Pentax cameras is merely an instruction book for the proper care and
operation of the Honeywell Pentax cameras. It does not, and can not, deal fully with every
possible application of the Honeywell Pentax System of Photography because those
applications are almost limitless. The following book is therefore recommended to those
amateurs who are eager to learn more about the Honeywell Pentax System of Photography and
photographic technique in general. It is available in English, German, Italian and Spanish
languages, and each can be obtained from your photo dealers or directly from the publishers
listed on the next page.

“THE HONEYWELL PENTAX WAY”  by Herbert Keppler Herbert Keppler has been
associated with the U.S. photographic magazine Modern Photography for over 1 5 years as its
editor and publisher. His column devoted exclusively to single-lens reflex cameras and
photography is very famous throughout the world. He is well known for his objective outlook
on all things photographic and for his healthy mistrust of any theory that he has not tried out in
practice. He has no interest in pushing the products of any particular manufacturer and brings to
the Honeywell Pentax Way a knowledgeable, independent and unprejudiced outlook.

This comprehensive book deals mainly with the following subjects:
OPERATION AND TECHNIQUE: action, aperture, artificial light, camera care, carrying,
choosing films, close-ups, copying, depth of field, developers, exposure, exposure meter, films,
film speed, filters, flash, focal length, focusing, holding, lighting, loading, long-range work,
monocular, multiple flash, perspective, printing, shooting, slide projection, Spotmatic operation,
storing negatives, telescope, tripod, unloading, viewing.
ACCESSORIES: accessory clip, bellows unit, body cover, cable release, cassettes, close-up
lenses, copying unit, exposure meters, extension tubes, focusing magnifier, Leica adapter, lens
cap, lenses, microscope adapter, prescription eyepiece, right-angle finder, slide copier, SPOT
exposure meter.
HONEYWELL PENTAX SUBJECTS: animals, architecture, birds, candid, cinema,
fireworks, flowers, groups, lights, low light, nature, night, portraits, scenic, sports, television,
theater, travel, under water, wildlife.
FINDING DATA: close-up exposure, color temperature, depth of field, extension bellows,
extension tubes, feet-meter conversion, films, film speed conversion, filters, filter equivalent,
filters for color film flash
View original page 22
Page 23 · Read text
WARRANTY POLICY

Your new Honeywell Pentax ES II is warranted for one year against defects in material or
workmanship. This covers either the original purchaser or the gift recipient. Any defect in your
ES II will be repaired or replaced (at our option) and defective parts will be replaced without
cost to you within the 12-month period, provided the camera has not been abused, altered or
operated contrary to instructions. Honeywell will not be liable for damages from delay or loss
of use or other indirect consequential damages.

If your camera should require service, you may send it to the most convenient factory center
listed.

PENTAX INTER NATIONAL WARRANTY

If you intend taking your Pentax abroad during the warranty period, you may obtain a
Honeywell Pentax international warranty card by writing to us. With your request, include your
name, address, camera and lens serial numbers, dealer's name and address, and proof of date
purchased.
View original page 23
Related documents and language editions


From the M. Butkus archive. Original publisher and archive notices are retained.
Check the model and edition against your equipment.
PDF verified 2026-10-10.