Flashes & lighting
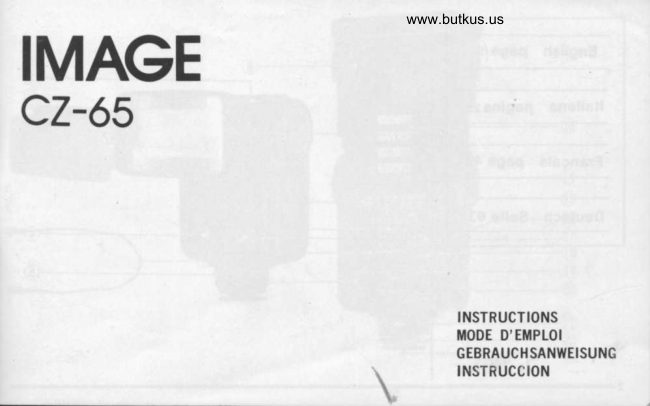
IMAGE CZ-65 User manual
User manual for IMAGE CZ-65. 26 pages in German, Italian. Read the original PDF, download or print a copy without registration.
26 pagesGerman, Italian1.4 MB PDF
Loading your manual…Open PDF directly
Document details
- Brand
- Image
- Model / document
- IMAGE CZ-65
- Document type
- User manual
- Language
- German, Italian
- Pages
- 26
- File size
- 1.4 MB
- Category
- Flashes & lighting
- Document date
- Not specified in catalog
Search available document text
Find a term, then jump to its page in the original PDF. Image-only pages may not be searchable; check the PDF for exact wording and diagrams.
Page 3 · Read text
www.butkus.us


                                                   Digitally signed by Mike Butkus
   Mike Butkus DN:org, cn=Mikeemail=mike@butkus.org,Butkus, o, ou=Butkus.c=US
                                             Date: 2024.11.28 21:58:34 -05'00'
View original page 3Page 9 · Read text
www.butkus.us
English


PARTS DESCRIPTION

      Flash window                      12. AUTO CHECK GREEN LED
     Auto sensor eye                    13. ZOOM position indicator
    Bounce head                     14. Bounce angle indicator
   AUTO/MANUAL 3 oosition                '15. Sliding guide scale for f/stops
     switch                          16. Battery cover
    Synchro cord sockel                 17. Sliding guide scale for distances
     Colour filters (RED and BLUE)         18. T (TELE B5)/S (STANDARD 50)/
    Synchro cord                      w1 (wrDE 1 35)/W2 (W|DE 2 28)
    Zoom head                                      indication marks
    ASA/DlN film speed chart            19. READY LIGHT
   AUTO GREEN/ORANGE  dot         20. ON/OFF switch
    marks                          21. TEST button
   AUTO GREEN/ORANGE             22. Shoe locking screw
     range's line                       23. Hot shoe contact
View original page 9Page 10 · Read text
Venmo @mike-butkus-camera  Ph. 2083
PayPal Name  Lynn@butkus.org      www.PayPal.me/lynnbutkus
View original page 10
Page 12 · Read text
Colour temperature          5700" K (Balanced forwww.butkus.usdaylight type  f ilm)
Flash duration               1/2000th second in MANUAL MODE
                             1/2000-1/40000 second on AUTO MODE

Auto coverage ranges
 AUTO MODE      Film speed         ZOOM HEAD POSITION
 SWITCH
 POSITION       ASAl OO/M   TELE 85   STD 50  WIDE 1 35  WIDE 2 28
                                   1.2-4.4m    0.9-3.9m   0.S3.3m       0.9-2.8 GREEN DOT,         f:5.6                                    A-14ft1      (3-12ft)       (3-1Oft)        (&gft)
                                   1.6-8.9m    1.4-7.8m    1.2-6.7m      1.2-5.7m ORANGE DOT        f:2.8                                          (5.3-29ft)     (4.6-25ft)     (4-22ft)        (4-18ft)

Recycling time              Approx. 10 seconds in MANUAL MODE
                          Approx. 0.5-10 seconds in AUTO MODE
                      when using Alkaline batteries
Power source            2 x 1.5V AA type Alkaline batteries
View original page 12Page 13 · Read text
Battery life                  120 flashes on MANUAL MODE
                            120-2000 flashes on AUTO MODE
                           according to distance (Alkaline batteries)
Weight                    2009 without batteries
Dimension            H145xD43XW73mm


BATTERY INSTALLATION

Ensure that the ON/OFF switch is in "OFF" position.
Slide the battery companment lid in the direction of arrow mark until the lid becomes detached.
lnsert two AA size Alkaline batteries taking care that the positive and negative terminals are correctly aligned as
indicated in the comoartment.

Alkaline batteries are recommended because of their longer life and endurance to a wider temperature  range.
Moreover, their power is superior to that of conventional zinc-carbon batteries and this high output flash unit
requires the maximum energy available.

N.B. Clean the battery and compartment contacts  at regular intervals. Remove the batteries  if the unit is likely to
     be out of use lor a prolonged period.

12
View original page 13Page 14 · Read text
www.butkus.us  ATTACHMENT TO CAMERA AND SHUTTER SPEED SETTING

   This flash unit has a "HOT-SHOE"  contact.
    Insert the mounting foot into the accessory shoe on the camera and tighten "Lock."
I7 A Synchro cord is supplied and this should be used in the 'X' contact socket  if the camera has no "hot shoe."

  Any shutter speed can be set on cameras with between-lens-shutters  although the speed of 1/1251h second  is
,  recommended.
   Focal-plane shutter cameras will have an 'X'shutter speed setting at 1/60th usually (sometimes 1/125th second).
  Check your camera instruction book for the correct electronic flash synchro speed.

  OPERATING INSTRUCTI ONS

   Slide the ON/OFF switch to'ON' position. The RED segment appearing  in the cavity below the switch will serve
   as a reminder that the unit is ON.
  A humming noise will be heard as the unit is turned ON, which will become fainter when the flash unit is
   charged.
   At that time, the READY LIGHT will glow and the unit is now ready for operation.
      lf the flash unit is not likely to be used for a minute or longer, switch  it OFF to conserye the batteries.

                                                                                                                13
View original page 14Page 15 · Read text
When the flash unit is being used lor the first time or after several weeks disuse, allow a few minutes for the
capacitor to become fully charged. The unit may be fired without operating the camera by depressing the white
"TEST" button at the shoe base.

GREEN AUTO CHECK LED

Before taking the picture, TEST the flash and confirm correct exposure with the auto+heck LED.

lf the GREEN AUTO-CHECK LED lights at the same moment as the flash test button is pushed, this indicates
the auto circuit is working at the correct auto distances.

lf the AUTO-CHECK LED does not light GREEN, the distance exceeds the auto distance, Refer to FLASH
OPERATION-COMPUTER  USE.

When shooting out of doors, in daytime, intense illumination may cause malfunction  of the auto circuit and auto
check lamp.

When taking a picture immediately  after the READY LIGHT  is on, suff icient light may not reach to the subject in
auto mode and GREEN AUTO-CHECK LED may not light. Always allow the flashgun a few seconds for full
capacitor charging.
View original page 15
Page 16 · Read text
www.butkus.us
ADJUSTABLE BOUNCE HEAD FOR INDIRECT FLASH

The head of flash unit can be elevated from the horizontal position, for conventional  direct flash photography,  to
a vertical position for bounce flash photography by tilting the flash head.

The light is reflected satisfactorily provided that the ceiling is flat-surfaced,  of average height and not of a dark,
non-ref lective colour.

Bounced flash provides for a more pleasing photograph without ugly background shadows.

lf natural colours are desired when taking colour pictures, check that the reflecting surfaces are as light as
possible. ldeally this surface should be white.

Watch the GREEN AUTO CHECK LED when taking bounceflash photographs  with AUTO MODE SETTINGS.
With MANUAL MODE operation, the camera lens aperture should be opened by about 2-3 stops more than
stated on thef/numberscale. (Fig. 1,2,3)

ADJUSTING THE ZOOM HEAD

The lighting angle mechanism built into this flash unit allows selection of 4 preset lighting positions by a
push-pull action of the flash head.
View original page 16
Page 18 · Read text
(A) STANDARD (soMM) LENS USE                     www.butkus.us
Set the ZOOM HEAD at l          position. At this ZOOM HEAD position, the flash unit has a guide number of
22 in meters (or 72 feet) at 100 ASA with maximum  flash output.

Now, set the UPPER SLIDING SCALE on the back body at the film speed you use (EXAMPLE: ASA100/DlN21,
ASA 400/DlN27  etc.) by ARROW MARK.
Set the other ARROW MARK of LOWER SLIDING SCALE (bottom of 6oft) at'S'position from T, S, W1, W2 in
yellow colour.

Estimate the distance between the camera and subject, and then read the nearest greater reading in feet or
meters on LOWER SLIDING SCALE.
Read the adjacent white figure for f/stop number in the UPPER SLIDING SCALE to determine the camera lens
aperture setting.

FOR EXAMPLE

When you use ASA100/DlN21 speed film at the distance of 7 meters (23 feet), set the aperture of your camera
lensatf/2.8 (Fig.6)
(B) TELE ssMM LENS USE-

Set the ZOOM HEAD at ITELE8i position. At this ZOOM HEAD position, the flash unit has guide number 25
in metres (or 82 in feet) at 100 ASA by full flash power.
                                                                                                                                                                                 't7
View original page 18Page 19 · Read text
Now, set the UPPER SLIDING SCALE on the body back to the correct film speed by ARROW MARK.
Set the other ARROW MARK of LOWER SLIDING SCALE (bottom of 60ft) at'T'position from T, S, W1, W2 in
yellow colour.

Estimate the distance between the camera and the subject, and then read the nearest greater reading  in feet or
meters on LOWER SLIDING SCALE.
Read the adjacent white figure for f/stop number on the UPPER SLIDING SCALE to determine the lens
aperture setting.

FOR EXAMPLE

When you use ASA400/DlN27 speed  f ilm at the distance ol 12 meters (40 feet), set the aperture of your camera
lens at f/4  ( F ig. 7)

(c) wrDE 28MM LENS USE

Set the ZOOM HEAD at  I WID-I2dl position. At this ZOOM HEAD position, the flash unit has guide number
16 in metres (or 52 in feet) at 100 ASA at full flash output.

Now, set the UPPER SLIDING SCALE to the correct film speed by ARROW MARK.
Set the other ARROW MARK of LOWER SLIDING SCALE at'W2'position from T, S, W1, W2 in yellow colour.
View original page 19
Page 20 · Read text
Estimate the distance between the camera and the subject, and then www.butkus.usread the nearest greater reading in feet or
meters on LOWER SLIDING SCALE.
Read the adjacent white figure for f/stop number in the UPPER SLIDING SCALE to determine the camera lens
aperture setting.

FOR EXAMPLE

When you use ASA100/DlN21 speed film at the distance of 2 meters (7 feet), set the aperture of your camera
lens at f/8  ( F ig. 8)

FLASH OPERATION "COMPUTER USED

The built-in photosensitive cell measures the light reflected by the subject and the computer automatically
determines the correct quantity of light required.

The THYRISTOR CIRCUIT is power-saving and allows a greater a number of flashes to be made from a single
charge with minimal intervals between flashes.

Before taking a picture, TEST the flash and confirm the GREEN AUTO CHECK LED whether distance  is in the
automatic operation ranges at the ZOOM HEAD positions, AUTO GREEN/ORANGE  positions, Lens apertures
settinqs.


                                                                                                             19
View original page 20Page 21 · Read text
There are two settings for COMPUTER USE for relative closer ranges at the Green position and for the greater
 distance ranges at the ORANGE position.
And depending on the focal length of your lens. The following chart is a guide for settings on the ZOOM HEAD
 positions, AUTO distance ranges and AUTO SETTINGS att/5.6 or f/2.g:
  AUTO MODE      Film speed         ZOOM HEAD POSITION
  SWITCH
  POSITION       ASAlOO/M   TELE 85   STD 50  WIDE 1 35  WIDE 2 28
                                    1.2-4.4m    0.9-3.9m   0.$3.3m       0.9-2.8  GREEN DOT            f5.6                                           (4-14ft\      (3-12ft)       (3-1Oft)        (3gft)
                               1.&8.9m    1.4-7.8m    1.2-6.7m     1.2-5.7m  ORANGE DOT         t2.8                                           (5.3-2eft)    (4.6-25ft)     (4-22ft)         (4-18ft)

(A) TELE ssMM LENS USE

Set ZOOM Hfno atiTeLE gdiposition. In this ZOOM HEAD position you can take a picture at distances
between 1.2-8.9 meters (4-29 feet) in AUTO MODE (ASA100/DtN21).

At these ranges, you can select one of two AUTO SETTINGS depending the distances.
For closer distance upto 4.4 meters (14 feet). Set front AUTO SELECTOR SWITCH at GREEN position and set
the lens aperture at f/5.6.
20
View original page 21Page 22 · Read text
For greater distance up to 8.9 meters (29 feet). Set  f ront AUTO SELECTORwww.butkus.usSWITCH at ORANGE position and
set the lens aoerture att/2.8.

Refer to SLIDING SCALES on the back of the flashgun body.
Set the ARROW MARK of UPPER SLIDING SCALE at the position of lilm speed (example:ASA100/ASA21).
Set the other ARROW MARK of LOWER SLIDING SCALE at the'T'position from T, S, W1, W2.

Here are some examples:
  1) GREEN AUTO MODE SETTTNG
    'ASA100/DlN21 as the speed of the  f ilm you are using
 .    'l/5.6 on GREEN DOT MARK for the lens aperture setting
   "AUTO RANGE between 1.5m/5ft. (should be 1.2m/4tl accurately) and 4.5m/15ft (should be 4.4m/14ft
       accurately) .shown by GREEN LINE at 'T' position
          . ZOOM HEAD at  I TELE S5l position

  2) ORANGE AUTO MODE SETTTNG
    'ASA100/DlN2  l as the speed of the film you are using
         . t/2.8 on ORANGE DOT MARK for the lens aperture setting
   .AUTO RANGE between 1.6m/5.3ft, and 9m/30ft. (should be 8.9m/29ft accurately) shown by ORANGE
     LINE at'T' oosition
         . ZOOM HEAD at TTELE 85] position (Fig.9)
View original page 22Page 23 · Read text
(B) STANDARD soMM LENS USE

Set ZOOM HEAD at tSTD3O-l position. At this ZOOM HEAD position, you can take a picture at distances
between 0.$7 8m (3-2m) in-TnTo MODE (ASA100/DrN21).

At these ranges, you can select one of two AUTO SETTINGS depending on closer or greater distnaces.

For closer distance up to 3.9m (12ft). Set front AUTO SELECTOR SWITCH at GREEN position and set your
camera lens aperture at f/5.6.

For greater distance up to 7.8m (25ft). Set front AUTO SELECTER SWITCH at ORANGE position and set your
camera lens aoerture att/2.8.

Refer to SLIDING SCALES on body back.
Set the ARROW MARK of UPPER SLIDING SCALE at the oosition of film soeed in use.
Set the ARROW MARK of LOWER SLIDING SCALE at'S'position.

Here are some examoles:
  1) GREEN AUTO MODE SETTTNG
    'ASA100/DlN21 as the speed of the film you are using
          t f/5.6 on GREEN DOT MARK for the lens aperture setting    .AUTO         RANGE between 1ml3.3ft (should be 0.9m/3ft accurately) and 4ml13ft (should be 3.9m/12fi
       accurately) shown by GREEN LINE at'S' position.
    .ZOOM HEAD at [SfD-sO]position (Fi9.10,
22
View original page 23Page 24 · Read text
2) ORANGE AUTO MODE SETTING                      www.butkus.us
     'ASA100/DlN21 as the speed of the film you are using
      't/2.8 on ORANGE DOT MARK for the lens aperture setting
    .AUTO RANGE between 1.5m/5ft (should be 1.4m/4.61t accurately) and 6m/20ft (should be7.8m/25ft
       accurately) shown bv OBANGE LINE at'S' position.
          . ZOOM HEAD at  I STD 50  | position

(c) wrDE 2 28MM LENS USE

Set the ZOOM HEAD at tW-tOe Z Zgl position. In this ZOOM HEAD position, you can take a picture at distances
between 0.95.7m.(3-18ft) in AUTO MODE (ASA100/ DlN21).

Within these ranges, for distance up to 2.8 m (9ft), set front AUTO SELECTOR SWITCH at GREEN position and
set the lens aperture at f/5.6, for distances up to 5.7m (18ft), set at ORANGE position and set the lens aperture at
t/2.8.

Refer to SLIDING SCALES on the back of the flashgun body.
Set the ARROW MARK on UPPER SCALE'Io film speed in use.
Set the other ARROW MARK of LOWER SCALE at'W2'position.
View original page 24Page 25 · Read text
rf'  Here are some examples:
      1) GREEN AUTO MODE SETTTNG
               - ASA100iDlN21  (speed of the film in use)
           'fl5.6 on GREEN DOT MARK for the lens aperture setting
                . AUTO RANGE between 0.$2.8m (3-9ft) as shown by GREEN LINE at'W2' position.
      .ZOOM HEAD atl_W!9E:2 lQl position
     2) ORANGE AUTO MODE SETTTNG
                         as speed of fitm in usell                  '-'fASA100/DlN21            /2.8 on ORANGE DOT MARK for lens aperture setting
      "AUTO RANGE between 1.2-5.7m (4-18ft)as shown by ORANGE LINE at'W2'position
                  . ZOOM HEAD at I WIDE 2 28  I position  ( Fig. 1 1 )

il

  USING COLOTJR FILTERS

   The light absorbed by the filters necessitates an increase in exposure.
   FoT "EFFECT" pictures in colour, it is generally desirable to open the lens aperture, by one or two stops.
   For black-and-white photography, exposure must be increased appropriately and this should be in the order of
   two or three shops.
  A practical test is recommended  to determine a realistic workino value.
View original page 25Page 26 · Read text
www.butkus.usCAUTION

When using this electronic flash unit, please make sure that the rectangular flash reflector corresponds.to the
rectangular picture format, othenryise you will not obtain an evenly illuminated picture.


PRECAUTIONS
1. Should the unit fail to operate for any reason other than depleted batteries please reter to qualified service
    personnel. A high voltage capacitor is incorporated in the unit.
2. Remove the batteries  if the unit is not in use for any period exceeding say 2 or 3 weeks.
3. Keep the unit dry and store in a moisture-free environment.
4. When photographing outdoors or in a large room or hall where there are no etfective reflecting surfaces
    nearby,  it is necessary to set the camera lens at a wider aperture than that indicated  in the exposure table  (1
    or 2/f stops).

Because we continually strive to improve our products we may change specifications without prior notice.
View original page 26Related documents and language editions
From the M. Butkus archive. Original publisher and archive notices are retained.
Check the model and edition against your equipment.
PDF verified 2026-10-10.