Film cameras
Kodak Retina Ia — supplementary pages Manual supplement
Manual supplement for Kodak Retina Ia — supplementary pages. 29 pages in English. Read the original PDF, download or print a copy without registration.
29 pagesEnglish7.2 MB PDF
Loading your manual…Open PDF directly
Document details
- Brand
- Kodak
- Model / document
- Kodak Retina Ia — supplementary pages
- Document type
- Manual supplement
- Language
- English
- Pages
- 29
- File size
- 7.2 MB
- Category
- Film cameras
- Document date
- Not specified in catalog
Search available document text
Find a term, then jump to its page in the original PDF. Image-only pages may not be searchable; check the PDF for exact wording and diagrams.
Page 1 · Read text
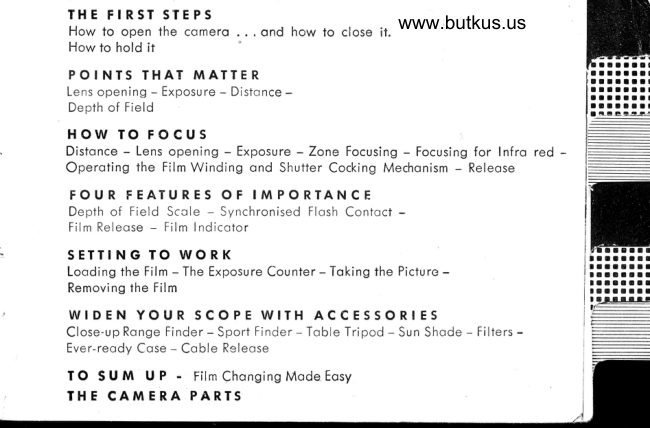
THE FIRST STEPS                                  www.butkus.usHow to open the comero . . , ond how to close it.
How to hold  it
P O I NTS THAT MATTE R
Lens opening - Exposure - Distonce -
Depth of Field
HOW TO FOCUS
Distonce - Lens opening - Exposure -Zone Focusing - Focusing for Infro red -
Operoting the Film Winding ond Shutter Cocking Mechonism - Releose
FOUR FEATURES OF IMPORTANCE
Depth of Field Scole - Synchronised Flosh Contoct -
Film Releose - Film Indicotor
SETTING TO WORK                                                                          tlaaaaatl
Looding the Film - The Exposure Counter - Toking the Picture -                             llraraaarlaatatatlitaaatatlRemoving the Film                                                                                                           lrrarrrlr
                                                                                                                                                               lr;!!!!r!
WIDEN YOUR SCOPE WITH ACCEsSORIE5                                                                                                                                                    i,F-;;::::::l-                                                                                                                                                                                                                         !:
Close-up Ronge Finder- Sport Finder- Toble Tripod - Sun Shode - Filters -                         i-
Ever-reody Cose - Coble Releose
TO SUM UP -  FilmChongingMode.Eosy
THE CAMERA PARTS
View original page 1Page 4 · Read text
www.butkus.us
STEPS

   for horizontol pictures. The ,,Reiino,, body is shoped
   for your grip. The comero nestles firmly ond sofelv
   in both honds. with your right index finger resting
  on the body shutter releose {.l0) on top of ihe body.
   Just lry this o few iimes until you hove got the knock
  of holding the comero correcily. Get used to holding
  the comero even with gloves on, for you ore sure ro
  wont io use your "Retino" in olmost ony ploce ond
  in ony weofher, ioo. Also try gripping the comero
  wiih one hond only in cose you hove to hold onio
  something else with the otner.
View original page 4Page 5 · Read text
P O I N T S T H AI
                     Lens Opening . Exposure Time.
To prcduce o correct negoiive, the film must receive o definite omount of light
through the lens. On o sunny Summer doy more light will poss through the open
lens in o given time thon, for instonce, on o dull Winter ofternoon. So in the lotter
cose we musi keep the lens open for o longer time io get the some omount of
light octing cn the film. In other words, we need more exposure. The shutter with
its vorying speeds will regulote the necessory supply of light.
However, it is not the only meons of doing so. Another control is the lens opening
or lens stop, lt octs roiher like o woter top; the wider you open it, ihe more light
posses in o given time. And the more you close it down, or stop it down - os
fhe photogrophic ierm goes - the less light con come through fhe lens.
The lens stop hos yet onother importont function.  lt not only regulotes the light,
                                                                                                                ,but olso controls the so-colled depth of field. How does it do so?
The lens drows reolly shorply only the subjecis on which it is focused. This utmost
shorpness decreoses groduolly, so thot there is o belt of spoce in front of ond
5
View original page 5Page 6 · Read text
www.butkus.us
MATTE R
Distonce  . Depf h of Field
   behind the focused subiect within which the picture is not yet noticeobly unshorp.
   Thot region is the depfh of field.
    This depth of field increoses os you stop down the lens ond olso with the focusing
   distonce. For instonce, when the lens is focused for 15 feet the depth of field
   extends from obout 9 feet to obout 50 feet ot fl8, ot f15.6 from 20 feet to @ (inf.l
   when focused for 50 feet. And for instonce ot 50 feet the depth qt f/3.5 extends
   Irom 25 feet to o {inf  l.
   These focts ore worth some thought. For the whole secret of o technicolly good
   negotive is the right choice of lens opening, shufter speed ond distonce setling.
   You will soon find the right combinotion to suii your own photogrophywith o little
    proctice. Until then you con mostly monoge with the focusing zones recommended
   on p. ll which provide reody mode ond odequote depths of field for o neor ond
   o distcrnt region of subiects.
                                                                                    7
View original page 6Page 7 · Read text
HOW TO
                The Disfqnce
                           The focusing scole (3) shows distcrnces in feei 3.5;4;5
                       ond so cn to @ (']00 feei or beyond) with their
                             corresponding divisions. The numbers ore white on
                                      blcrck to moke them more eosily reodoble. Opposite
                                    ihis scole, in the cenire of ihe depth of fleld scole (9)
                         you will flnd o heovy block line with cr triongle ot
                                        its end. Turn the focusing knob (4) to bring this index
                       mork opposite the {igure corresponding io  the
                             dislonce of your subiect from the comercr. Your
                                "Retino" is now shorply focused.
                             For neor subiects (remember the shollow depth of
                                   fleld) meosure the disionce between ihe lens ond
Infrq-red Shots                  subiect os occurotely os possible' For more distont
The depth oi {leld scole          subiects you moy estimofe ihe distonce, or poce  it
corries o smoll red dot        {one overcrge poce is obout 2.5-3 feet}. Subiecfsbetween the index mork        more thon 100 feet owoy count os oi infinity (ool.
ond the figure 3.5 or2.8.
You use this dot in block ploce of the index mork when exposing infro-red film.
 In other words, turn ihe focusing knob to bring the red dol opposite the figure for
your subject distonce. For infro-red shois you must use o  suitoble infro-red fllter
in front of the lens.

B
View original page 7Page 8 · Read text
FOCUS                         www.butkus.us
                                 The Lens Openin
     First o few words obout the lens iiself. Your "Retino"  is {ltted with o four-component
    "Retino-Xenor" of t.3.5 or f12.8 moximum lens opening ond o focol length of 50 mm.    This lens is hord-cooted (you con recognise thot by  its bluish vio[et sheen) to
    eliminoie internol reflections ond is speciolly correcied for colour photogrophv. The
    lens is the eye of your comero. Do tcrke core of it.  lf you wont cleor- ond'shorp
    pictures,.your.lens must olso be cle,on. The best moiericl for cleoning  it is o cleori,    soff, liniloss cloth. Sudden chcrnges of temperoture moy condense m-oisture on the
    lens surfoce. Woit until this disoppeors rcriher thon try to wipe it ofi. Above  oll,
    never _ottempt to screw the lens oport. This moy eosily leod to lock of shorpness ond
    loss of quolity in your negotives. And now the Lens Opening. The lower port .l6.of   the shutter cosing corries o scole with ihe figures 2.8 lor 3.51; 4,5.6,8,  ll ond    lhe  . lowest nu,mber \2.8 or 3.5) morks the lorgest Iens opening, ond the highest    nurilDernumber (i.li. e.e. l6)lol Tnethe smcrllestsmoltesl opening.openlng. TheIne openlngo[ening   numbers in between ore so crrronged thot ihe lighl
   the .lens lets through is holved os lou go from eo"ch   number to the next higher one. This meons ihot, other
    ih.ings being equol, yb-u most expose twice os long   when you stop down trom one opening number to
   the next. lf for instonce ihe exposure iime ot   f lS.6 is       second,     ]/.roor/rs second              ot                    y_ou_fill. wouldIn oll theseneed cosesl/so secondthe fllmotwill'stillfi8, or
    receive the some omou.nt of lightr provided the light-
   ing cond.itions remoin the some. To set the lens open-
   ing simply push the lever {5) io the required number.
View original page 8Page 9 · Read text
<
                           The shuiter of your "Retinq"
                                        is o Compur-Ropid qnd offers expolure times (shutter
                                 speeds) of 1,1 | 2,1 | s,                                                                                                                         1 I n,1  I zs,  1 | so, 1 l'rcl, l/zso o nd l/soo second.
                            You will find these volues engroved oswhole numbers
                          on the upper port of the shutter cosing. Thus 2 meons
                                          'l/2,5 meons l/s ond so on. In oddition you will olso
                                  find the letter "B" for exposures of unlimited durot-
                                    ion. To set the exposure time, simply turn fhe milled
                                   shutter speed ring (5) until the dot in the cut-out is
                              opposife the desired time.
                        You con odiust the shutter speeds before or ofler
                              cocking the shutter. But set 1/5ss second preferobly
                             before cocking, since for technicol reosons it  is
                              eosier to do so. To sei l/soo second ofter cocking
requires o little odditionol efforl, olthough it will not horm the comero.
To ovoid blurred pictures, use o tripod or other firm support for exposures longer
lhon l/25 second. The tripod heod screws info the socket (18) underneoth the comero.
A further, quite inexpensive occessory for moking time exposures free of comero
shqke is the "Kodok" coble releqse with locking screw. The coble releose screws
into the threod of the body shutter releose  (10).
You will find on exposure guide ot the end of this booklet. Alternotively, you con
get ihe correct exposure from on electric exposure meter.
l0
View original page 9Page 10 · Read text
www.butkus.us

We mentioned before thot o  technicolly good
 negotive depends on the skilled combinotion  of
 disionce setting, exposure time ond lens opening. You
 will need o little experience to get this right every
 lime. Moreover, you often hove lo shoot without
 spending much time on working out the ideol com-
 binotion (os in sports ond oction shots, photogroph-
ing children ond onimols etc.) it you do not wont
to miss the picture oltogelher. The "Retino" solves
this problem for you wifh its setlings for neor ond
distont focusing zones.
Neor Subiects
Set the focusing scole to the smoll circle between
8 ond l0 feet. Use lens opening f/8. This gives o
deplh of field (zone of shorpnessl from obout 7 to
15 feet.
Distont Subiecls
Set the focusing scole to the smoll circle neor
25 Ieet. Use lens opening f/8. This gives o depth of
field (zone of shorpness)  f rom obout l2 feet to o  (inf.l.
Remember to set the focusing scole to o  (inf.) before
you close the comero.
                                                                                   ll
View original page 10Page 11 · Read text
Operoting the Film Winding

 When you hove set the distonce, lens
 opening ond shutier speed lthe order
 . doesn't motter), work lhe ropid winder.
  Pull it out in one movement, os for os
  it will go, then let  it fly bock. This
 mevement cocks the shutter ond of
 the some time winds the film.
  lf the lever does not fly bock, you
  didn't pull it out completely. The winder
 will stoy put in ony position until film
 ond shutter ore fully wound.
 Now the comero is ieody to shoot. lf
 you know by now how to hold the
 comero (qs described .on rp. 5) your
View original page 11
Page 12 · Read text
www.butkus.us
qnd Shutter Cocking Mechanism
   index finger will be resting in ihe right
   ploce-on the body shutter releose (10).
   Compose the picture in ihe  finde,r,
   gently press the releose, ond you
   hove token the pictu re.
  You will notice how smoothly the re-
   leose works, ensuring pictures free of
   comero shoke.
  When mokir.g time exposures  (shutter
   set to "8"; the shutter remoins open
   os long os you press the body shutter
   releose. Use q coble releose for iime
   exposu res.

                                                                                                t3
View original page 12Page 14 · Read text
FOUR FEATURES OF IMPORTANCEwww.butkus.us
  The Depth of Field Scole
You will hove noticed on. your "Retino" thot the numbers 2.8 lor 3.5) 5.6 etc.
of the lens opening scole ore repeoted opposite the block focusing scole ring, to
the left ond right of the index mork. This is ihe depth of fleld scole  (9).
on  it you con quickly reod off the depth of field for ony subiect disronce ond
lens opening. lf, for insfonce, your "Retino" is focused for 15 feet, then ot f/8 the
ronge of distonces on ihe focusing scole between the two lines morked 8 on the
scole represents lhe depth of field. ln our exomple the one 8-line will be in fhe
middle between 8 ond 10, ond the other opposite 50 on the focusing scole. This
meons lhot with the lens focused for '15 feet ond set fo lens opening f/8 your
depth of field extends from obout 9 to 50 feet.
                                                                                            l5
View original page 14Page 15 · Read text
built into the Compur-Ropid shutter of your "Retino"
enobles you Io moke flosh exposures with the most
up-to-doie flosh equipment in the some woy os you
moy hove seen press photogrophers doing it. "Syn-
chronised" meons thot the flosh goes off in the very
 instont when ihe shutier is fully open.
Screw the flosh gun itself to the tripod socket (18) ol
the comero. Connect the lomp with the shutter by
meons of o speciol coble of the Compur type which
is plugged into the socket (8) on the shutter.
We do not odvise you to fix the flosh gun to the
occessory clip (19). Most flosh guns ore too heovy
for this clip which is designed to toke precision
occesso ries.
For further detoils obout the flosh synchroniser see
the enclosed speciol instruction sheet.
l6
View original page 15
Page 17 · Read text
SETTING
{. Loodinq the Film                                                    i
  Now thot vou know oll the steps ond controls for
   working with your "Retino" let us put in o film'
  Open the bock of your comero by lifting the lock
    for comero bock (]7) ond drow out the rewind knob
     ll5) to iis fullest extent. Then turn the built-in toke-
   up spool towoids the bock of the comero until the
    slit in the spool is ot the top. Threod the irimnred
   end of ihe film proiruding from its coriridge inio
    this slit crs for os possible. Pull the film over the
    film-guides, getting iust enough film out of the
   cortridge to crllow you lo insert the lolter in ihe
   empty fllm chomber. Mcrke sure thot o tooth of the
    tronsport spindle engoges in o perforotion hole of
   the film.
  Now push the rewind knob (15) fully bock into the
   comero body, ot the some time turning it in the
    direction of the orrow. Close the bock ond lock it
   bv folding down the lock  {.]7).
   This woy of looding the film hos proved to be the
    t8
View original page 17Page 18 · Read text
IiI
IGT O WORK                  www.butkus.us
            simplest ond olso the most suitoble should you wont to chonge o portly expose
            film (p.34).


        ll
   +I


                      l
    ...jI ^
              I
       .i,
View original page 18Page 19 · Read text
t "rr"h" -EI_Li_;"i:;_ej;-_q_iii      :"_ -" :-._--::j                                            "'                                                  o window  in                         The ropid winder (7) incorporoles
                                  which you ccrn see numbers ond morkings engroved
                               white on block. This is the exposure counler  ('l3)
                              which shows you how mony fromes on your film
                                ore still unexposed.
                            To set the exposure counter, proceed os follows,'w                                After you hove looded the fllm, turn the milledtuF-diEirF:'l$'  jl                                       ring (,l3) in the direction of the orrow unii I the dio-
                          mond mork Q next to the figure 36 points to the
                                     iriongulor mork A When using 20-exposure  ccrrt-
                                      ridges, set ihe diomond mork 0 next to the {igure 20
                                to the tricrngle A. Now odvonce the film severol
                                  times wiih ihe ropid winder {pressing the shutier'
                                   releose eoch time) until the triongle IA) points to
                             the figu re 36 lor 20). lf the rewind knob tu rns
                                   in the direction opposite to the engroved orrow,
                            you con be sure thot the fllm is correctly looded
                             ond crdvonced.

                                        20
View original page 19Page 20 · Read text
www.butkus.us
       Your comero is now reody foi the first exposure.
       This ingenious exposure counter mechonism hos the following procticol odvontoges:
               l) By shooting three blind exposures you ore sure of o perfect first picture.
             Experience hos shown thot rhe very beginning of the flrm moy eosiry gel
            fogged by light leoking into the mourh of the cortridge.
           2) when ihe exposure counter reoches No. i, o,rd you hove thus mode. the lost
             exposure, the ropid winder qnd shutter releose qre outomoticolly locked. Thus
                                                                             firm. In oddition, yous           ihe comero reminds you thot you hove finished your
            connot occidentolly puil the firm end out of the cortridge. you unrock the
           mechonism ogoin when you turn the milled ring (13) in the direction of
             the orrow.
J.


                                                                                                       21
View original page 20Page 21 · Read text
When you hove exposed the whole film ond the ex-
        posure counier shows No. l, press in the clutch knob (14)
        underneolh the comero. Pull out the rewind knob (15)
       fo ils first stop to ollow eosier rewinding, ond turn
              ii until the clutch knob (14) ceoses to turn'
     To show the rolotion of the clutch knob more
         cleorly, it corries o block dot.
       The whole length of the fllm is now wound bock
        into its cortridge. All you hove fo do now is to
       open the bock of fhe comero ond fully pull out the
        rewind knob. You con then eosily toke out the
         cortridge.
tit,a    n

"flj
View original page 21Page 22 · Read text
www.butkus.us


 t.

I     Do not lood or remove the film in direct sunlight,
       or you moy fog the flrst few exposures.  lf possible,
      rewrop the exposed film in its originol pocking.

                                                            2s
View original page 22Page 23 · Read text
WIDEN YOUR SCOPE


Designed to the high "Retino" stondords of
quolity ond precision, this instrument serves
os o combined view- ond rongefinder.  lt  fits
into the occessory clip of the "Retino" ond
is used in coniunction with o set of supple-
meniory lenses for close-ups from 36 down to
81/2 inch., ot scoles of reproduction from 0.Q55
to 0.225. lt thus opens up o whole new world
for the "Retino" owner.
View original page 23
Page 24 · Read text
www.butkus.us
 WITH ACCESSORIES


     This importont occessory for phoiogrophing
     very quic.k subiects fits into the occessory clip
     of the comero. With it you con sight ond
     follow your subiect in  full size before  it


I      enters the octuol fleld of view. lts position on
I
l.    the comero outomoticolly eliminotes ony lot-
     erol porollox while the verticol porollox  is
     compensoied by moving the viewing operture
     occording to o fltted scole. The finder con be
     folded up while siill on the comero. When
     not in use, it is kept in o leqther cqse.

                                                                                       25
View original page 24Related documents and language editions


From the M. Butkus archive. Original publisher and archive notices are retained.
Check the model and edition against your equipment.
PDF verified 2026-10-10.