Film cameras
Kodak Retina Ia User manual
User manual for Kodak Retina Ia. 38 pages in English. Read the original PDF, download or print a copy without registration.
38 pagesEnglish5.2 MB PDF

Loading your manual…Open PDF directly
Document details
- Brand
- Kodak
- Model / document
- Kodak Retina Ia
- Document type
- User manual
- Language
- English
- Pages
- 38
- File size
- 5.2 MB
- Category
- Film cameras
- Document date
- Not specified in catalog
Search available document text
Find a term, then jump to its page in the original PDF. Image-only pages may not be searchable; check the PDF for exact wording and diagrams.
Page 3 · Read text
&l/f.u.friends with your'Retino".
   lf you do it will bring more fun to
  your hours of leisure ond lend o hond
  with ony iob;  it will never let You
  down. Leorn to explore ond to enlist
  the greot possibilities now open with
  this precision comero ond its superior
  equipment  . .  .
  But first of oll, get well ocquointed
  wirh it.
                  www.butkus.us
View original page 3Page 4 · Read text
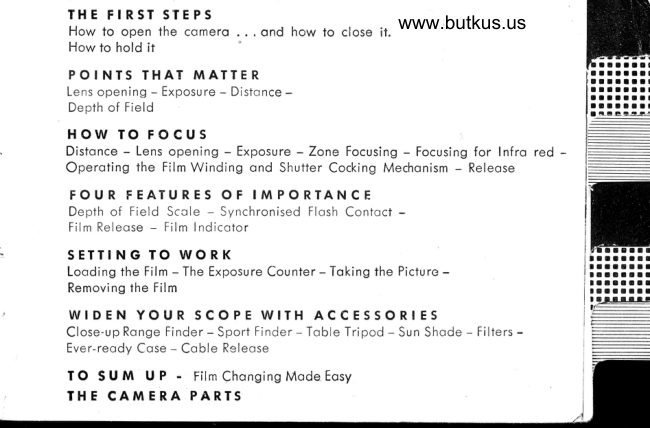
CI rnE FrRsr srEPs
[.  ffo* to open lhe comero  . . . ond how to close it.
I  How to hold  it
  PO I NTS THAT MATTER
    Lens operture - Exposure - Dislonce -
    Depth of Field
  HOW TO FO?f
    Distonce - Lens operture - Exposure - Zone Focusing - Focusing for Infro-red -
   Operoting the Film Winding ond Shutter Cocking Mechonism - Releose                                                                              -".,+.**
  FOUR FEATURES OF IMPORTANCE
   Depth of Field Scole - Fully-synchronized Shutter for Flosh Shols -
   Film Releose - Film lndicotor
  SETTING TO WORK
   Looding the Film - The Exposure Counter - Toking the Picture -
   Removing the Film
  WIDEN YOUR SCOPE WITH ACCESSORIES
    Close-up Ronge Finder - Sports Finder - Toble Tripod - Lens Hood - Filters -
    Ever-reody Cose - KODABLITZ - Coble Releose
  TO SUM UP - Film Chonging Mode Eosy
  THE CAMERA PARTS
View original page 4Page 5 · Read text
TH E FIRST
   How to Open the Comerq
   A slight pressure on the button (1) - the smoller of
     the two buttons underneoth the cqmero - opens the
      fronf. Then drow down the bed corefully until you
     heor it click into position.
vt   Before closing ihe comero moke sure thot the focus-
     ing scole (3) is set to co (inf.). Only then con you
      close the comero. Do not force it.
    The "Retino  I o" con be closed even with o   fi lter
     screwed on.
      And how to Cl
      eleose the bed by simultoneously pressing in the
     two closing buttons (2) on eoch side of the front plote.
         It will now close up eosily. The shutter releose (12) is
      locked once the comero is closed.   www.butkus.us
View original page 5Page 6 · Read text
STEPS
              How to Hofd                                                    iilat3aa6:,:flflffliatacl
                                                                                                        :laaaaaa:
  for horizontol pictures. The,,Retino,,body  is shoped                                                         :flfrfrO;]!!aEaa(:                                                                                                                         :laaara!i                                                                                                                                t3--"          '        ;     f or your grip. The comero nestles firm ly ond sofely
  in both honds, with your right index finger resting
 on the body shutter releose (10) on top of the body.
 Jusf try this o few times until you hove goi the knock
 of holding lhe cqmerq correctly. Get used to holding
 the cqmero even with gloves on, for you ore sure to                                                                llltarraaa!3                                                                                                                           Itroar
 wont to use your "Reiino" in qlmost ony ploce ond                                                     l!atar|!aaaa
 in ony weofher, too. Also try gripping the comero
 with one hond only in cose you hove io hold on to
 something else with the other.
View original page 6Page 7 · Read text
POINTS THAT
                                                                                                                                                                                                             .                     [ens A  erture   Ett"t"t"   Tirne
To produce o correct negotive, the film must receive o definite omount of light through
                                                                                           othe lens. On o sunny Summer doy more light will poss through the open lens in
given time thon, for instonce, on o dull Winier ofternoon. So in the lotter cose we
must keep the lens open for o longer time to get the some omount of lighf octing on
tlre film. In other words, we need more exposure. The shutter with its vorying speeds
will regulote the necessory supply of light.
However, it is not the only meons of doing so. Another conirol is the lens operture or
lens stop. lt octs rother like o woter top; the wider you open'it, tlre more light posses
in o given time. And the more you close it down, or stop it down - os the photogrophic
term goes - the less light con come through the lens.
The lens stop hos yet onother importont function.  lt not only regulotes the light, but
olso controls the so-colled depth of field. How does it do so?
Tlre lens defines reolly shorply only the subiects on which it is focused. This moximum
shorpness decreoses groduolly, so thot there   o region in front of ond behind
                     www.butkus.us
6
View original page 7Page 9 · Read text
The Distqnce
                                 The focusing scole (3) shows distqnces in feet 3.5;4;5
                             qnd so on to o (100 feet or beyond) with their cor-
                                    responding divisions. The numbers ore white on block
                                   to moke them more eosily reodoble. Opposite this
                                         scole, in the centre of the depth of field scole (11) you
                                            will find o heovy block line with o triongle ot its end.
                                 Turn the focusing knob (4) to bring this index mork
                                      opposite the figure corresponding io the distonce of
                                 your subieci from the comero. Your "Retino" is now
                                       shorply focused.
                                      For neor subiects (remember the shollow depth of field)
                                       mecrsure the distonce between the lens ond subiect os      Infro-red Shots                                       occurotely os possible. For more distont subiecis you
    The depth of field scole       moy estimote the distonce, or pqce it (one overoge
\    corries o smoll red dot         poce is obout 2.5-3 feet). Sublects more thon '100 feet \   between the index mork        owoy count os oi infinity  ( *).
    ond the figure 3.5 or 2.8.
    You use this dot in ploce of the block index mork when exposing infro-red  filnr. In other
     words, turn the focusing knob io bring the red doi opposite the figure for your subiect
     distonce. For infro-red shots you must use o suitoble infro-red filter in front of the lens.
      8                       www.butkus.us
View original page 9Page 11 · Read text
The Exposure Time
                             The shutter of your "Relino"
                                              is o Synchro-Compur ond offers exposure times (shutter
                                                                                                                 1/soo sec.                                  speeds) of 1, rlz, tln, tln, rlzs, rlso, rlno, rlzso ond
                            You will find these volues engroved os whole numbers
                          on the upper port of the shutter cosing. Thus 2 meons
                                 1/2,5 meons 1/s ond so on. ln oddiiion you will olso
                                  find the letter "B" for exposures of unlimited durot-
                                    ion. To set the exposure time, simply turn the milled
                                   shutter speed ring (6) until the dot in the cut-out is
                                 opposite the desired time.
                       You con odiust the shutter speeds before or ofter
                              cocking the shutter. But set 1/roo second preferobly
                            before cocking, since for technicol reosons it   is
                                eosier to do so. To set rlsoo second ofter cocking
requires o little odditionol effort, olthough it will not horm the comerq.
To ovoid blurred pictures, use o tripod or other firm support for exposures longer thon
r/s; second. The tripod heod screws into the socket (20) underneofh the comero. A further,
quiie inexpensive occessory for mqking time exposures free of comero shoke is the
coble releose with locking screw. The coble releose screws into the threod of the body
shutter releose (12).
You will find on exposure guide ot the end of this booklet. Alternotively, you con get
the correct exposure from on electric exposure meter.                      www.butkus.us
10
View original page 11Page 14 · Read text
FOUR FEATURES OF IMPORTANCE

                                                                                                                                                                                                                                                                                                                                                         .
                                                                                                                                                                                                       Ill. The Deprh 9_f Field Scqle                                                                                           ,
You will hove noticed on your "Retino" thot the numbers 2.8 (or 3.5) 5.6 etc. of the
lens operture scole ore repeoted opposite the block focusing scole ring, to the left
ond right of the index mork. This is the depth of field scole (ll). On it you con quickly
reod off the depth of field for ony subiect distonce ond lens operture.  lf, for instonce,
your'Retino" is focused for l5 feet, then of f/8 the ronge of distonces on the focusing
scole between the two lines morked 8 on the scole represents the depth of field. In our
exomple the one 8-line will be in the middle betweeh 8 ond 10, ond the other opposite
50 on the focusing scolb. This meons thot with the lens focused for l5 feet ond set to
lens operture fl8 your depth of field extends from qbout 9 to 50 feet.
                                                                                            l5
View original page 14Page 15 · Read text
The Fully-Synchron   i zed Sh utter
                                      The Synchro-Compur shutter of your "Retino" is
                                                   fully synchronized. The follorving pqges willgive
                                             furiher detoils. With this shutter you con moke
                                              flosh slrois with the "KODABLITZ" or on elec-
                                               tronic flqsh unit of oll shutter speeds in iust the
                                   some v/oy qs o press photogropher.
                                      The externol distinguishing feotures of the shut-
                                                 ter qre the green synchronizing lever (8) for the
                                      "X" ond "M" settings (9), ond the flosh socket
                                                        (10). The "KODABLITZ" (see poge 33) is fixed to
\                                           the tripod bush (20) of the comero. The electricol
                                          connection between ihe flosh unit qnd the Syn-
                                         chro-Compur shutler consists of o flqsh coble, the
                                           plug of which is plugged into the flosh socket (10)
                                              of the shutter.
                           www.butkus.us
                                                    16
View original page 15Page 16 · Read text
We definitely odvise you ogoinst fixing o flosh
 gun in the occessory clip (2.|) of the "Retino,,, os
 ttris type of unit is for too heovy for the occess-
 ory clip which is designed to toke precision
 occessories.
A Good Flqsh Shot. .  .
depends on choosing the right lens operture ond
shutter speed for the flosh distonce ond speed
 of the film used.
You con look up the required exposure doro in                                                Eaaaaa.::                                                                                                                 araraa:i::
the tobles enclosed with flosh bulbs ond elec_                                                           lar!a.li::.rtr..:ir                                                                                                              Iraa.aj;::tronic flosh outfits. Also, refer to our toble on                                                          Irraa.llr'
poge 20 which shows whot shutter speeds ore                                                     ,€i
suitoble for which of the ,,X,, ond ,,M,, settings
with vorious types of flosh bulbs ond electronic
flcrsh.

                                                     17
View original page 16Page 17 · Read text
To set your shutter to "X" or "M", simply push
        the synchronizing lever to the oppropriote mork.

        This is the only setting required, since cocking
        the shutter outomoticolly prepores  it for the flosh
        exposure.

       With electronic flosh units which usuolly hove
      no firing deloy, the flosh tokes ploce simulton-
        eously with the releose of the shutter (synchroniz-
        ing lever set to "X").

       The process is different with flosh bulbs os moinly
       used by omoteurs. Here the bottery current first
         ignites on explosive poste within the bulb, ond
www.butkus.usthis in turn fires the octuol flqsh. There is ihus
          t8
View original page 17Page 18 · Read text
o certoin deloy belween the moment of releose
 of the shutter qnd the peok brightness of the
 flosh. The Synchro-Compur shutter therefore in_
 corporotes o mechonism which ollows for this
 firing deloy (synchronizing  lever set to ,,M,,).

 Just three more poinls:
 l. Never use flosh in ploces where there is ony
risk of explosion.
2. The fired bulbs ore hot, so use the eiector on                                                   ettaalallra3aa!
the flosh gun rother thon your hqnds.                                                                                            lar|l.l!aar                                                                                                                                                                          I     l3
3. Avoid shiny surfoces in the bockground (wind-
ows, mirrors, piciures behind gloss, highly
polished fur,niture, etc.) which mighi reflect the
flosh into the lens.
View original page 18
Page 20 · Read text
3. The Film Releqse
 On iop of the comero, next to the shuiter releose,
 there is o smoll butlon (13) of greot imporionce
 It  is. used when chonging portly exposed films (see
  h    <xl
 In cddifion, you con r-ectify ony iomming which moy
 lock the mechqnism of the ropid windei, by simply depressing this button, without losing o frqme 'or
 risking double exposures.  lf, however, pressure on the
 button does not releose the winder, ihis outomoticolly
 tells you thot the exposure counter hos reoched No. l,
 ond. your film is finished. In thot cose proceed os de_
 scribed on p.24.
                                                                                                                                                         cttl!
                                                                                                                                                               lallt             4. The Film Indicqtor                                             alaar                                                                                                                              lta!a
To remind you of whot type of film you hove in your                                                   lrtaaItlaa
ccrmero, the top of the rewind knob (lZ) corries o film
indicotor (18) with doto on oll generolly ovoiloble film
types..Hold the rewind knob with two fingers, ond turn
the inner rodiol ring until the index rork points to the
type of film in fhe comero.
View original page 20Page 21 · Read text
S  E T T  N G
 Loodinq the Fil
  Now thot you know oll the steps ond controls for
  working with your "Retino" let us put in o film.
  Open the bock of your comerq by lifting the lock for
  comero bock (19) ond drow out the rewind knob (12)
   to its fullest extent. Then turn the built-intoke-up,pooi
  towords the bocl< of the comero until the sloi irr the
   spool is ot tlre top. Threod the trimmed end of the film
   protruding from its cossette into this slot os for os
   possible. Pull the film over the film-guides, getting iust
  enough film out of the cortridge to ollow you to insert
   the lotter in the empty film chomber. Moke sure thot o
   tooth of the tronsport sprocket engoges in o perforotion
   hole of the film.
  Now push the rewind knob (17) fully bock into the
  comero body, oi the some time turning it in the direct.
   ion of the orrow. Close the bqck qnd lock it by folding
  down the lock (19).
   Tlris woy of looding the film hos proved to be the
www.butkus.us22
View original page 21
Page 23 · Read text
E:p--q=!*srs- c--e-v-us:-:  -                        {.,,'{t-"**..:---*.l!t-r                                        \'The                                                                                              .. J                                                ropid winder (Z) incorporotes o window in which
                                   you con see numoers ond morkings engroved white
                                     on block. This is the exposure counter (15) which shows
                                       you how mqny fromes on your film ore still unexposed.
                                    To sei the exposure counter, proceed os follows:
                                            After you hove looded the film, turn the milled ring
                                                               (.|5) in the clirection of the qrrow until the diomond
                                     mork Q next to the figure 36 points to the triongulor
                                     mork A. When using 20-exposure cortridges, set the
                                      diomond morkQ next to the figure 20 to the triongle [.
                            Now odvqnce the film severol times with the ropid
                                  winder (pressing the shutter releose or - with the
                                     comero closed - the film releose button (13) eoch time)
                                                   until the exposure counter points to No.36 or 20 re-
                                                 spectively. Once the exposure counter indicoies one of
                                          these two numbers, do not, of course/ releose ony
                                           more, or you will lose on exposure.  lf the rewind knob
                                               turns in the direction opposite to the engroved orrow,
                                     you con be sure thot the film is correctly looded ond
                                           odvonced.
                                www.butkus.us                  24

Ir:::t"'
View original page 23Page 27 · Read text
WIDEN YOUR SCOPE


                              Designed to the high "Retino" stondords of
                                   quolity ond precision, this instrument serves os
                        o combined view- qnd rongefinder. lt fits into
                                   the o.."rrory clip of the "Retinq" qnd is used in
                                    coniunction with o set of supplementory lenses

                                        for close-up from 36 down to 81/z inches, of scoles

                                     of reproduction from 0.055 to 0.225. lt thus opens
                     www.butkus.usup o whole new world for the "Retino" owner.
28
View original page 27Page 29 · Read text
The >Retinq<r Toble Tripod

                                               is o procticol qnd versotile piece of equipment to
                                      widen the scope of, qnd simplify work with the close-
                                          up-focusing ottochment. This universol stqnd is o
                                             useful oid to omoteur qnd professionql olike. The
                                           reseorch worker, the eng ineer ond the scientist con
                                           conveniently ond successf u lly turn it to porticu lorly
                                                  interesting tosks. When used in connection with o set
                                             of three cemented high quolity supplementory lenses,
                                             the toble tripod enobles the "Retino" to moke pictures
                                        up to q scole of reproduction of 0.5; which
                                             opens up the whole field of mqcro-photogro-
                                                phy.Thus [lre "Retino" combined with the tqble
                                    I                                                tripod becomes o close-up ond copying comercl.
                                www.butkus.us
-                                             30
View original page 29Page 31 · Read text
DKodqk<< [ens Hood
                             mqkes oftroctive ogoinst-the-light pictures sofe. But
                                    shots by side-light olso goin in brillionce when you
                                     use the lens hood. No exposure shou ld reo lly be mqde
                                            with out it.
                            The "Retino" lens hood cqn be ottoched to the lens
                              even with q  fi lter screwed on. lt con olso be used
                                      together with supplementory lenses or supplementory
                                        lens ptus fitter.
                       >Kodtlk( Filters
                                    for correct tone reproduction or for specio I eftects
                                ore ovoiloble in pole yellow, medium yellow, green,
                                         oro nge, b lr ), red or os u ltro-vio let protective   fi lter.
                               They ore fitted with screw-in mounts ond qre mqrked
                                 Fl to F Vll UV.
                          www.butkus.us
                                        32

I
View original page 31Page 32 · Read text
This hondy, light-weight, qnd extremefy ver-
      sqtile flosh g un con be fixed to your "Retinq,,


      I
      in q moment. with  it you con even tqke shots+I
     qt the fostest shutter speeds in totol dqrkness.
    The "KODABLITZ" con be used either with
     torch botteries, or with q copocitor unit. lt  is
     fully protected ogoinst short-circuits.
   The "KODABLITZ'will olso toke extension
      flosh holders for obtoining every kind of righting
     effect. Further odvontoges of this exceilent
      u n it ore o bottery cose wh ich opens from the
     side for eosy, chonging of botteries, very tight
    weight, ond on eiector mechonisnt for dsed
     bulbs. suitoble for oll flosh bulbs with boyonet
    cqp (S"C.C. or A.S.C.C.).

                                                33
View original page 32Page 33 · Read text
I
                       The Cqble Releose

                                              corries o locking screw. lt  o llows you to keep the
                                      comero slrutter open for qny length of time without
                                        hoving to press the releose during the whole of the
                                          exposurg.Tlre coble releose is ovoiloble in two sizes
                                                6.4 ond 10 inches long.


                                www.butkus.us
-,
View original page 33Related documents and language editions

From the M. Butkus archive. Original publisher and archive notices are retained.
Check the model and edition against your equipment.
PDF verified 2026-10-10.