Film cameras
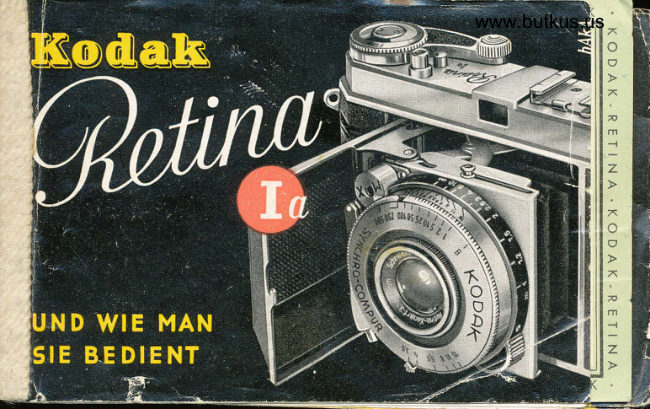
Kodak Retina 1A-GERMAN-1-PAGE User manual
User manual for Kodak Retina 1A-GERMAN-1-PAGE. 19 pages in German. Read the original PDF, download or print a copy without registration.
19 pagesGerman3.9 MB PDF
Loading your manual…Open PDF directly
Document details
- Brand
- Kodak
- Model / document
- Kodak Retina 1A-GERMAN-1-PAGE
- Document type
- User manual
- Language
- German
- Pages
- 19
- File size
- 3.9 MB
- Category
- Film cameras
- Document date
- Not specified in catalog
Search available document text
Find a term, then jump to its page in the original PDF. Image-only pages may not be searchable; check the PDF for exact wording and diagrams.
Page 2 · Read text
it der ,,Retinq" besitzen Sie einer
Komero, die lhnen eine unenibehr-
liche Begleiterin in frohen Stunden
und eine zuverldssige, vielseitige und
 nie versogende Helferin im Beruf sein
will. Nutzen Sie die vielen Moglich-
keiten, die in diesem kleinen Meister-
werk und dem dozu geschoffenen
Zubeh6r slecken   zu lhrer Freude                    -
und zu lhrem Gewinn. In diesem
Sinne empfehlen wir den Inholt die-
ses kleinen Heftchens lhrer besonde-
ren Aufmerksomkeit.
View original page 2
Page 4 · Read text
AN:tlllllilll"
'Ilrlr\iill,l,i :    KoDAK    lll      A.G.
     lllLllrlll  i1l;   trlillll        srurrGART-wANGEN

                                                               I
               HEDETFINGERHEDELFINGERSTRASSES6_62srRAssE 56-62 '!<tsdnJI  L I *?-?     liL
 J6=J                                                          r'soe-e'82'K
View original page 4Page 5 · Read text
www.butkus.us


 t)
't  Koda[s


 a                                                              www.butkus.us
  Synchronising lever set lo "M"                                 Synchronising lever set to "X"
                 The Speed-synchronised
                   FIcrsh Contclct of the
                                    Reti nq'" Ccrmerq                    "Kodclk-
                                         Additionol insfructions for
                                            the Synchro-Compur Shutters
View original page 5Page 6 · Read text
:
         As with ony olher picture,b good flosh shol depends on choosing the right exposure
          time to suit the lens operlure, loking distonce from light to subiect, film speed, ond
          the nolure of lhe light source (in this cose fhe light output of the flosh plus other ,1*           ovoiloble light).                                                                                              )r".                                                                                                 {           Pleqse referlo fhe moker's lileroiure for exposure dqto for porliculor flosh equipment.
           Suitoble shutter speeds ore given in the lqble on p. 4.
          There ore lwo fundqmenlolly different types of flosh equipment:
                 o) Electronic flosh not hoving ony firing deloy.
                  b) Flosh bulbs ond powder c-ortridges w-ifh on oppreciqble firing deloy.              ':
           Accordingly, the Synchro-Compur shutler of your "Retino" Comerq corries lwo syn-           chronising seltings:                                                                             .
                  "X'    for flosh lubes without deloy                    t'Mn - for deloyed firing flosh lomps.                       -        To odiusi your                            shutler lo "X" or "M", simply push lhe synchronising lever lo the
           correcl position.
          Aporl from this oliernotive seliing, the shutter needs no furlher odiuslment. Winding           ihe shutler outomolicolly gets it reody for flosh shots.                                                 r.
            Electronic flqsh tubes flosh immediotely conloct is mode in the shuller, this being
          orronged lo toke ploce when the shutter is fully open. This is known os simultoneous
            releose.
           Flosh bulbs ond flosh powder coriridges, os moinly used by omoleurs, beh.qve dif-            ferenily. Here lhe currenl from o torch bollery igniles on explosive posle which ini.
           lurn fires the octuql flosh. There is thus o certoin deloy belween the releqse of the
            shulter ond the peok of the flosh. This deloy moy be onything between 5 milliseconds ?
                 (5/rooo seconds) ond 30 milliseconds  (30/roo0 seconds)
         Z-.


l.w
View original page 6Page 7 · Read text
www.butkus.us
     The Generol-Electric-Westinihouse floshbulb No. 5 for inslonce, hos o firing deloy
      of 20 milliseconds  (20/rooo seconds). With shutter speed of rlzs second (40 milliseconds)
_      the shutter would slill be open 20 milliseconds ofler the peok, ihus utilising the wohle
      of the flqsh. With o shulter speed of l/roo second (10 milliseconds) however, the shutter
      closes l0 milliseconds before lhe bulb floshes.
    A simple synchronised shutler is therefore useless for synchronising flosh bulbs with
 t    the foster shutler speeds. The shutter must hove o speciol device to ollow for lhe
      unqvoidqble firing deloy of this type of flosh. Such o shutler is known qs s p e e d -
       s y n c h r o n i s e d. The Synchro-Compur shutler of your "Retino" Comero is of this
       speed-synch ronised type.


            Jusi lhree more points:
             I. Never use flosh in ploces where lhere is ony risk of explosion.
           2. The fired bulbs ore hot, so use lhe eiector rother thon your hqnds.
           3. Moke sove thqt shiny surfoces in the bockground (windows, mirrors, pic-
  I              lures behind gloss, highly polished furniture) do not reflecl the flosh into
           the lens.
View original page 7Page 9 · Read text
www.butkus.us
    TO SUM UF          ,%
  It moy be thot oll these technicol cJoto                  {h
  will strike you oi first os o little confusing.
  in foci photogrophy is much simpler thon
  it looks to the beginner. Fundr:meniolly
 there ore only three things to toke  e,
  p iclu re.

       Set distonce, lens openi,rg ond shufierri\\:/   speed. Remember the focusing zones.
@  Windihe shutierthe ropidond winder,odvoncingthusthecocking{llm.                                                                                      i;'
     Compose the picture in the view-
       flnder ond releose the shutter.o
View original page 9Page 11 · Read text
www.butkus.us     TH E CAM E RA PARTS
              I Button for opening comero
l8        2 Buttons for closing comero
         3 Focusing scole
         4 Focusing knob
14        5 Lens opening lever
         6 Shutter speed ring
         7 Film winder ond shutter cocker
              {Ropid wrnder)
         B Socket for flosh contocl
         9 Depth of field scole
          10 Body shutter releose
                 ll  Film releose button
           l2 Viewflnder
           13 Exposure counter
           14 Clutch knob for rewinding
               '15 Rewind knob
           l6 Film indicotor
           l7 Lock for comero bock
           l8 Tripod socket
           l9 Accessory clip
          20 Corrying eyelets
View original page 11Page 12 · Read text
ilm Chonqinq Mode Eos
You moy wont to chonge from one portly exposed fllm to onother (e. g. from
block-ond-white to colour). To ovoid losing ony exposures, note ihese few
odditionol points when looding the film.
Open lhe comero, ond wind the ropid winder. Count off o number of perforotions
from the fllm end-soy 8-ond mork lhis perforotion hole with o nick in the edge
of the fllm. Turn the built-in toke-up sp6ol ogoinst its normol winding directi5nuntil you con insert the film end into the slit. Push in the film so for thot the
morked perforotion hole engoges in o tooth of the tronsport spindle. Moke sure
thot the film rides properly in the poth provided for it. Pulling iust enoUgh filmout of the cortridgd so thclt you con insdrt the lbtter in the em-ply film ch"omber.
Now proceed os described under "Looding the Film" 1p. 18).
Set the exposure counter to the oppropriote O mork lthe one next to No. 36. for o35-exposure cortridge, or the drre next to 20 for o 2O:exposure  cortridge such os
"Kodo chrome").
Press lhe shutter releose, ond wind the ropid winder until the exposure counler
shows No. 36 or No. 20 respectively.
 lf the fllm wos olreody portly exposed, for instonce up to No.5, depress ihe film
releose bution. You con then odvonce the film with the ropid winder without hov-
ing io press the shulter releose. Continue winding on the fllm until lhe required
picture number (the next unexposed frome) oppeors on the exposure counter. The
comero is now reody to shoot ogoin.
The method is reolly much simpler to corry out thon to describe, ond if you moke
o hobit of looding in this woy from the outset, you will never hove ony difficultie,s
in chonging portly exposed films.

34
View original page 12
Page 14 · Read text
it der ,,Retino" besitzen Sie €ine
Komero, die lhnen eine unentbehr-
liche Begleiterin in frohen Stunden
und eine zuverldssige, vielseitige und
nie versogende Helferin im Beruf sein
will. Nutzen Sie die vielen Moglich-
keiten, die in diesem kleinen Meister-
werk und dem dozu geschoffenen
Zubeh6r slecken   zu lhrer Freude                    -
und zu lhrem Gewinn. In diesem
Sinne empfehlen wir den Inholt die'
ses kleinen Heftchens lhrer besonde-
ren Aufmerksomkeit.
View original page 14
Page 15 · Read text
www.butkus.us
 ZUSAMMENFASSUNG                 t%,
ts Wir konnen uns vorstellen, dofi die vielen
-  lechnischen Doten zunochsf einmol eiwos
   -verwirrend wirken, ober seien Sie 0ber-
   ..u-rgr,     ist olles viel eintocher ols es
             "tscheint. lm Prinzip sind es io nur  '  .zunochst
   -drei Dinge, die zu einer Aufnohme ge'
 .  'h6ren,


                                                 35
View original page 15Page 18 · Read text
Filmoustousch leicht gelnoc
        Hqben Sie den Wunsdr,.nur zum Teil belichtete Filme ouszuwechseln  (2. B. Schwqrz-
         wei0-.gegen Fo.r.bfilm),^donn ist o.uOer den in dem Kopitel >Dos Einlegen des Films<
          beschriebenen Hondgriffen zur Vermeidung von Bildverlusten nur n-och folgendes       zu beodtten   t
        Die Komero offnen und Schnellqufzug bet6ligen. Z6hlen Sie nun om Filmonschnift
          eine Anzohl Perforotionslocher     z. B. 8   ob und morkieren Sie dieses Loih'om        Ronde des Films durch einen kleinen-      Knick.- Zum Einf0hren des Films in den SchLirz
                                                 entgegengesefzt             eingebouten                                   diese                        Spule        der                               dorf                                        nur                                                       der Spulridrtuno                                                                                 o;dr;hr               Der Anschnift         werden.                                        ist                            so                                              fief in                                               Spule einzufiihren,                                         die                                                                     dofJ dos -mdrkierte
           Perforotionsloch 0ber einen Zohn der Tronsportrolle zu liegen kommt. Jetzt iietren         Sie den Film ijber den Filmkonol, wobei Sie nur so viel v-on ihm ous der poi;;;;          ziehen, do0 diese in die leere Filmkommer einget0hrt werden konn. Nun verfohren
          Sie, wie im Kopitel rDos Einlegen des Films< Sesdrrieben.
           Jefzt sfellen Sie den Bildzdhler ouf die enlsprechende_ Morke (bei einer Filmpotrone
         von 36 Aufnohmen ouf-die Mgrte vor 36, bei einer Filmpofrdne von 20Authohmen              [2. B. Kododrrome] ouf die Morke vor 201.
          Hierouf -wird ousgelosl und der Sdtnelloufzug bedient, bis der Bildzohler 36 bzw.         Z) onzeigt.I      Wor der Film sdron teilbelidrtet, z. B. bis 5, donn dr0cken Sie einfoch ouf den
          Enlsperrungsklopl,  worouf der Film mif dem Schnelloufzug weiiergesdroltet werden
         konn, ohne den Versdrlu0 ouszulosen. Dies wiederholen sie so oft. bis die oe-
         w0nsdrfe Bildnummer ldos n6chste unbelichtete  Bild) ouf dem Bildz6hler erscheinl.          Jetzf ist die Komero wieder oulnohmebereit.
       Wenn Sie sidr diese Hondgriffe, die in Wirklidrkeit  viel einfocher sind, ols sie sidr
         besdrreiben lossen, von vornherein ongew6hnen, konnen Sie iederzeit ohne die          geringsie Schwierigkeit reilbelidrrete Filme gegeneinonder ousiouschen.

           38
View original page 18Related documents and language editions

From the M. Butkus archive. Original publisher and archive notices are retained.
Check the model and edition against your equipment.
PDF verified 2026-10-10.