Film cameras
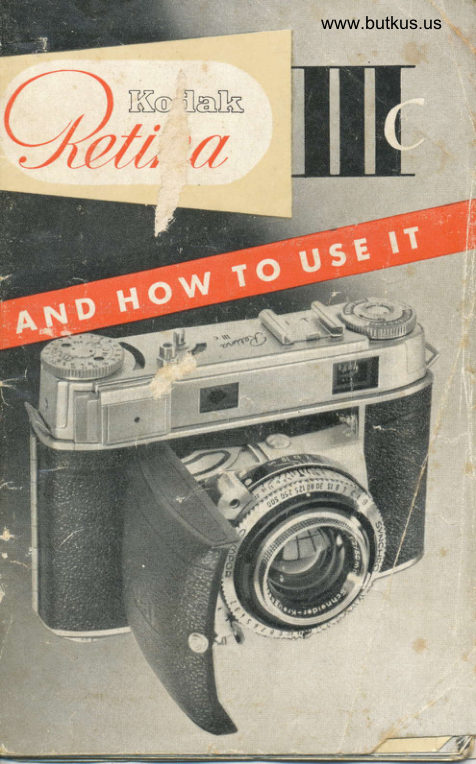
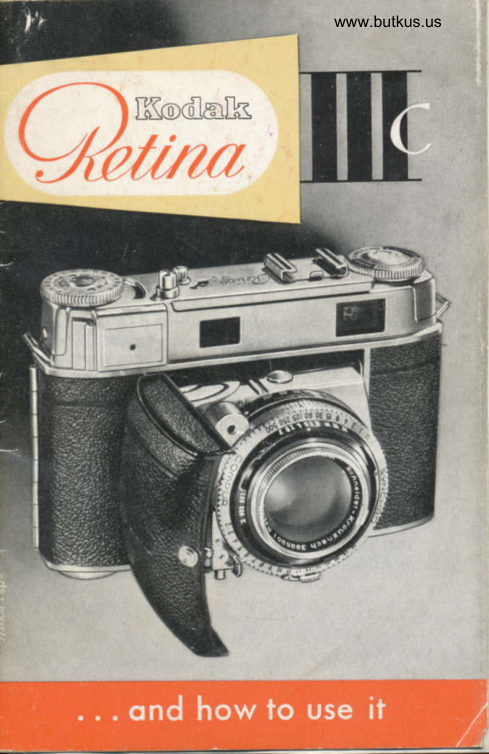
Kodak Retina IIIc User manual
User manual for Kodak Retina IIIc. 33 pages in English. Read the original PDF, download or print a copy without registration.
33 pagesEnglish6.4 MB PDF
Loading your manual…Open PDF directly
Document details
- Brand
- Kodak
- Model / document
- Kodak Retina IIIc
- Document type
- User manual
- Language
- English
- Pages
- 33
- File size
- 6.4 MB
- Category
- Film cameras
- Document date
- Not specified in catalog
Search available document text
Find a term, then jump to its page in the original PDF. Image-only pages may not be searchable; check the PDF for exact wording and diagrams.
Page 2 · Read text
THE K0DAK RETINA lllc


           is o perfected miniolure comero to meet the highest demonds.
            It hos interchongeoble lenses, o coupled rongefinder combin-
      ed with the new viewfinder with reflected line frome, o
          built-in exposure meter, the new Synchro-Compur  shutter with
         light volue seltings ond selftimer, o collopsible lens ponel
       which locks open obsolutely rigidly, os well os o lorge num-
       ber of other technicol refinements.
        This comero will be your componion for mony hoppy hours;
         in your iob, when trovelling, ol home, in every weother ond
        every seoson. You con thoroughly rely on  it.
      The RETINA lllc wos tested occording to the slrictesl ston-
       dords before  it reoched you.  lt combines utmost precision
       with unsurpossed performonce ond thus sotisfies every pos-
         sible requirement for first-closs results. The nome Kodok ie
        your guorontee for thot.


                                                                                  d,

                                                                                                                     1


--\    2
View original page 2Page 3 · Read text
.$                                www.butkus.us


Moke the best use of the mony odvonloges of your comero.
And here is ot once the most importont piece of odvice, Reod
the first port of these instructions (poges 5-12) speciolly core-
fully - whether you ore o beginner or on experienced photo-
gropher - ond proctise the operotions described without o
film in fhe comero. The conlrols of your RETINA work equolly
well with or wiihout film. Then, once you hove moslered the
elementory monipulotion, lood the comero with o film ond
toke your first pictures. The loter sections in this booklet will
give you o number of further tips for successful pictures. So
don't skip thot port of the instructions but follow the odvice
given there. You will soon reolize how eosy picture toking  is
with the RETINA  lll c.
KODAK AG . STUITGART.WAN GEN . GERMANY
         'ffinF    ffi
View original page 3Page 4 · Read text
First get to know the


Contents

    Poge 5     Opening ond closing lhe comero
           6      Holding ihe comero
           7       Setting the distonce                                                                  ,4
         8_9      Finding the light volue                                                                                                                                                                                    ,il,it:E
         l0-l  I       Setting ihe light volue
          12      Tensioning ond releosing
          l3     Opening the comero bock
           14       Inserting the film
          15      Setting the film counter
          16      Setting tlre film speed
               t/      Unlooding the comero
                '18      Depth of field
          19     Zone focusing
          20      Speed-synch ro n izot ion
            2t       Self-timer
       22-23     The interchongeoble lenses, telephoto shots
          24      Wide-ong le shots
       2!.28    Some importont hints
       29-30     RETINA occessories
       30-31     The RETINA feotu;,s
           JI--JJ      Generol view of the RETINA lllc
          36     Some more hints
View original page 4Page 5 · Read text
_..l
   moin points of operotion      www.butkus.us


   Hold the RETINA  in
   your hond ond push
   the button 0)   to-
   words lhe word 'Ko-
   dqk". At lhe some
   time pull open the
   boseboord (2) until  it
   oudibly clicks into
   position. The comero
    is now reody to shoot.
                Opening
   Before you close fhe   Closing
  comero remember to
   set the focusing scole
   (4) to inf. Only then
   con you close the co-
   mero. Simultoneously
 :- Press in the two but-
   lons (5) oi eoch side
   of lhe lens pqnel (3);
   the boseboord (2) will
.  then eosily fold up -
'  even with o   filter
   screwed into the lens.
View original page 5Page 6 · Read text
Hondling is reolly simple:


                           Whenever possible grip
                             the comero with  both
                              honds. The illustrotions
                          show the  position for
                                 horizontol ond  upright
                                       pictures. They ore, how-
www.butkus.us                    ever, moinly intended os
                        o guide; you con, of
                                   course, hold the comero
                                       in other woys, too. So try
                        o few positions to   f ind
                                  which suits you best. And
                        when you hove found
                                   your ideol hold, stick to it!
View original page 6Page 7 · Read text
Setting the distonre          www.butkus.us


Hold the comero in lhe shooting position ond look through
the eyepiece (13) of the combined view ond rongefinder. You
will see the subiect os well os the reflected line frome super-
imposed on it (we sholl hove more to soy obout thot on
poge 26). In the centre of the field of view you will olso
notice o bright diomond-shoped rongefinder field. Uniil
the comero is focused for the correct dislonce, this
field shows port of the subiect with double outlines. To set
the distonce iurn the focusing knob (14) until the outlines of


the double imoge move together ond coincide, so thol only
one imoge is visible. Tlre lens is now occurotely set to the
subiect disionce.
All distonces ore meqsured from lhe subiect to the plone of
the film in the cqmerq. This corresponds opproximotely to
lhe reor upper edge of the chromium ploted top of ihe body.
Proctise focusing in this woy with vorious subiecls ot different
distonces. Close the comero now ond ogoin ond then pretend
thot you hove iust noticed o good subiect ond wont to focus
ihe comero on it. Try the some with the comero held upright.
View original page 7
Page 8 · Read text
An importont feoture of your RITINA:
,i
t;    The light volues
      I      The RETINA  lll c hos q built-in photo-eleclric exposure meter.
        This eliminotes difficult colculoiions ond gives you ihe correct
        light volue. The lotter is o number corresponding to the
      omouni of light required for correct exposure.
        Poini lhe comero ot the subiect, directing  it slightly down-


 www.butkus.us


      words. A block pointer will move in the window (20). Turn
      the meter setting ring (7), lhus moving o red pointer until
      fhe lotter coincides with the block pointer of the exposure
      meter. lf you hove token the reoding wirh the cover  (.19)
       closed, reod off the light volue from the index mork (21 b) *     on the sefting ring  (7).

        8
View original page 8Page 9 · Read text
Setting exposures by light vqlueswww.butkus.us


   tl     lh.e n9!1te1 of the exposure meter does noi move oppre-
  crobry wtth the cover closed, open the cover (19) by gently
  pressing.on the ribbed upper edge. In lhis cose.ioj o-R tt"
  lrght volue opposite the index mork (21 o) for the open
 cover f,f.
 The green numbers on fhe setting ring (Z) show operlure  sett-
  ings for exposure times longerlhon-l iecond, o.
 times ot smoll operlures. For -instonce, if you wont""ooru.,io use
  o.perture f/11 ot o light volue setting of 5, ihe green figure 11
 shows the correct exposure time to be 2 secoids.
 See poge 25 for vorious opplicoiions of the exposure meter.
*E
    V
**."^m
View original page 9Page 10 · Read text
One operotion sets onY


In oddition to the operture ond shutter speed scoles you vill
frobobly hove noticed o red scole with numbers from 2 toiS on the shuller of your comero. This is the light volue scole'
To set o given lighi volue on the shutter, pull ihe operture
lever (8) ;lighrly outwords, ond move it to the oppropriote
light v;lue in ihe shutter speed setting ring (9)' lf this light
uJlu" .or",  outside the limits of the operture scole (ll), turn
the ring (9) uniil the required light volue  is. underneoth the
ope*ur"e tcole. The operiure scole (ll) ond the shutter speed
index (,l2) now show lhe sel operture ond shutter speed re'
spectively.
You cqn' otso set the operlure lever (8) to in-beiween  light
volues (e. g. ll.5).
A furlher greoi odvontoge of the Synchro-Compur  shutler-'s
the outom6tic coupling of operture ond shutter speed' On
 lurning the ring (9) this selects ony of the correct oPerlure'
 speed-combinot-ioni fot o set light volue. When turning the
 ,ing, ur" one finger to keep the operlure lever pressed .ogoinst thJedge, os shown in the illustrotion. On sefting ihe ring                  I
 to o foster shutter speed, lhe operture-speed coupling outo-   '
 moticolly opens the operture, while conversely seiting o    ' " smoller operture oulomoticolly odlusls the shutter to.o slower      t
 speed, Thus the efiective exposure olwoys remoins the -some' -- \i- For insionce, one of the combinqtions for o light volue of
 '12 is r,/60 second ot fi8. lf you now wont to tqke o fost sports , I  .
 shot ot l/soo second, simply lurn the speed setting ring (9) to
 r/5es secoJ. The operture outomoticolly chonges to ll2'8' The
 omount of light reoching the film remoins the some, irrespec'
 tive of whether you olter the shutter speed or lhe operiure'

 '10
View original page 10
Page 11 · Read text
qperture-speed               www.butkus.us                combinotion

   lf you wont to set the exposure withoui reference to lhe lioht
  volue,. moke sure fhot you odiust first the shutter speed o-nd
  then the operture.  lf you do it the other woy round, the ooer_
                                                                    setiing  lhelyi" shutteril::d   soeed.coupting would olrer rhe operiure when
 To set lhe shutter speed, turn lhe shutter speed rinq {9) uniil
 the requrred speed figure is opposite the shutter sp-eeU inde,
  mtrk,(rzJ.,to chonge.lhe operture, pull the opertuie lever  (g) srgnry outwords ond move  ii to the requirdd volue on the operture scole  {ll).


              :ml3:';:::{rir  jt},f!ff #:f l"i*ift            -"o"'ture"      "xirr;r3!,,.,r!                                        rdvir or soeed rins[#h"J, ,1:i li,rjf i,,rl:t Jl?speea co u p ri n s r;,i; ;'.;;i;;i'#5ll  [. t;rl  I g,l!i,T""Jj,;::
                                                         o                                                            J ii; o n' "o,"" n or
                                                                                  "I 3 i'l'[iS i;,t  ll I'Ji::fl  j :i i?"i r'"X",';'"X" il'
                                                                                                ll
View original page 11Page 12 · Read text
Quick winding cnd releosing

    Look throuqh ihe finder eyepiece, sight the subieci,.ond.press    the releosJ button (23). lf the shutter is nol tensroned you
   connot press the button.
   To lension lhe shutler pull out the ropid wi.nding .lever,  (22)    in one movement os tor os-trrr will go. Then let.it shoot bock     ilitJ ijt'liiJiii.i   p*iiio".      it doe-s not move bock.vou did                                                             the,trons-                                               complete,                              on                                       to                                corry                          so                  inough,            o"i t.i    noi orlt                                                                     snurrer'                                               the                                           lensrons                                    fime                         some                   This                       ot the        movement.    oort                                                             on                                               wlnds                     q                                      comero                                    the                                 film in                      hove                                                          -   bnd          orovided               vou         -


www.butkus.us


    the film by one frome ond odvonces the film counier (see    oooe l5t. Now vo, con releqse. You will notice how smooth-       "the ieleose button operotes; this is importont lo ovord      iv
    comero shoke.
    Moke o hobit of operoting the ropid winding lever immedio-     felv ofter every exposure so os io hove your cqmero olwoys
     recidy for octibn. Keeping the. shulier tensroned - even lor
    some iime - does nol horm rl In ony woy.

      12
View original page 12Page 15 · Read text
www.butkus.us    Remember to sel fte film counler


       until lhe diqmond-shoped mqrk I  neor No. 36 on the film
      counter (33) is opposite the notch in the upper edge of the
       film counter window. lf you ore using o 20-exposure cossefte,
       set lo fhe index mork I between No. 20 ond 25. Now worx
      - the ropid winding lever ond press the film releose bulton     '    (26), Ripeot this u-ntil the film iounter indicotes no. 36 or 20 :  - respectively. Ai the some time the rewind knob (27) should   t   rotote ogoinst.the orrow,engroved on it. Thot shows thoi the
|     Illm lS qOVonClng properly.   -.
   /  The film counter olwovs indicotes lhe number of shots still
,'     '  ovoiloble. When  ii hos reoched No.  l  - in other words when,     the whole film is exposed - o lronsport lock comes inlo'     operotion. Neither the rooid windinq Iever nor lhe releqse
      bltton will work further. This previnls fhe film end from:     being pulled out of ihe cossette, which would moke rewindings     imoossible.

                                                                             l5
View original page 15Page 17 · Read text
When the film is finished: Unloodingwww.butkus.us


                   -+::ilfee


     To rewind lhe exposed film depress reversing button (35)..in
         ti" lo." of ihe comero ond holf pull out the rewind knob (27)
       fo g"t ot it more eosily. Then turn the rewind knob in ihe
         dire.-ction of the orrow until the reversing bulton ceoses to
       .o*"-  ff it is eosily observed by the smoll block dot neor the
       rim of ihe button.
     You hove now rewound the film into its cossette' Open the
      comero bock, fully pull out the rewind knob' ond remove
              cossette.l      lhe              lood or untood the film in direct sunlight or slrong     Do nof
                                                            pocxrngi      oJin.iotremoving tintr,ihe exposedor you moyfilm, fogrewropthe firstit infewits origrnolexposures' After
        for full-protecfion  ogoinst the li9ht, unfil you ore reody to
        orocess  ii.
View original page 17Page 18 · Read text
Points for good pictures: Distonce, Depth


Depth of field
To permit instont reodings of the depth of field for ony oper-
ture ond dislonce, o depth of field scole (15) is orronqeq
symmetricolly oround the distonce index (15).
Suppose you hove set the operture to f/8 ond the distonce
to obout 5/2 feet (see olso poqe 28). This is how you reqd
off the depth: To the left of the distqnce index the line mork-


         23 11 11                   r,la-Y .45,6 I 11 16 22              1
View original page 18Page 19 · Read text
www.butkus.usZone focusing for oction


                                                               the                      is.opposite                                          fhe rigit               8ed.with        the figure                                         \1/z                                         feet. To                               6 polnls                                                   to ^of6 leer.                                      tlgure                 lrne                morked                         wrth theIndex onother
This lells you thot with o setting of obout Sli feet ot t/8 you
hove o d'epth of field zone eitending lrom 412 to 8 feet.
Within fhis zone everylhing will be shorp.

Zone focusing


Technicolly good exposures de-
pend.lorge.ly on lhe. skilled. com-
brnotron ot oppropflqte drstonce,
shutler speed, ond operture sett-
ings. However, you moy come
ocross subjecls where you iust
hoven'i lhe time lo work out the
 ideol selting or to use lhe ronge-
finder if vou don't wont to mrss
the picfure {qs in sports ond oc-
tion shots, children ot ploy, etc.).
For such occosions your RETINA
 corries two zone focus seliings:
one for neor ond one for dislont
 sublecfs. With ihese settings you
must however hove odequote
 liqht; the pointer of the exposure
 miter - with the cover cl6sed - should indicote o light volue of
 ot leost l2 (see illustrotion right).
 For neor subiecls set the distonce
 to the smoll iircle neor the l0 feei
 mork, ond the operture to  f/8.
 This oives you o depth of field from -obouf 6,5 to 20 feet. (Top
    i  I luslrotion).
 For more distont subiecls use the smqll circle neor the l5feet
 mork ond on opertur'e of f/8. This gives o depth of field from
 obout 9.5 feet to inf.

                                                                   t9
View original page 19Page 20 · Read text
live shots with flqsh


Your RETINA hos o speed-synchroniz-
ed Synchro-Compur shutter. Thot
meons thot you con toke flosh shots
ot ony shutter speed up to lhe fostest
setting of l/5s6 second with oll ovoil.
oble flosh bulbs ond electronic flosh
 u n its.

The holder of the flosh sockel (25)
corries ihree letters engroved on it:
M, X, ond V.

M ond X ore synchronizing  settings
for flosh while V is the self-timer sett-
ing. The three seitings ore odiusted        Closs             r
by meons of the green synchronizing
lever (24). The flosh is fired on releos-        !                n!
        comeroing the                                   toble                  shutier.                   The                                     IJoE            t6;.= 3         .9:(right)      shows                                  shutier            the                   suitoble                   sE
speedsond lhe required setting of the     o           CJO
synchronizing lever for the different
                                           otypes            The operture      of flosh.                           to
                                         so-used con        be obtoined                    from the                                  be   b*>F                                   =                                         ocolled guide numbers which ore in-
cluded with eoch pockoge of  floshbulbs. Divide ihis guide number by    cXP
the distonce; lhot gives you lhe    I   :;!             'I to l/troperture number lo use. For instonce,
if the guide number is 120 ond you              i><ore 15 feet from the subiect. '120-tl5
                                                                              suit-:  8. In other words you set the oper-    Eo5   ;.:     Nolo ble                                                                   forture lever to f/8.                o   :c.       speed-
                                                              synch ro-
                                                                                n izolionn           e=
View original page 20Page 22 · Read text
Wider srope with the


www.butkus.us   *xffilig

  The siondord lens of the RETINA is o 6-element
           RETINA Xenon C or RETINA Heligon C
  with o focol length of 2 inches (50 mm) ond moximum oper-
    lufe    I  l.
  The interchonqeoble port of the stondord lens con be removed
  from the shutier by iurning the mount io the left os for os  it
   will go. For eosy removol ond sofe storoge we strongly re-
   comm"end ihe speciol contoiner designed foi the stondofu lens.
   In ploce of fhe stondord lens removed, lwo olternotive units
  con be inserted os required,
   o) A telephoto lens, the 3r 6 inch (80 mm)                    RETINA Lonoor-Xenon C f4 or
                    RETINA Heligon C f.4; or
   b) A wide-ongle lens, the 13.6 inch (35 mm)
                    RETINA Curior-Xenon C f 5.6 or
                    RETINA Heligon C fi5.6.
   Preferobly ovoid chonging lenses in brilliont sunshine.

  Telephoto shots
   Before inserling the lens ploce it in position over the mount
  so thot the red dot {17) on the lens rim is exoctly opposite

   22
View original page 22Page 23 · Read text
RETINA telephoto lenses     www.butkus.us


the red dot on the boyonet ring (l7o). Inserl the lens ond
 turn clockwise to lock it securely'
 Before exposing wiih the tqlephoto lens meosure the distonce
 of the subject *ith tt.  rongefinder of your RETINA, ond.reod
 ofi the distonce ogqinsi the index (15) on the focusing scole (4)'
 Then turn the comero towords you ond tronsfer the meosured
 volue to the focusing scole for lhe telephoto lens (37) morked
 in white figures on block. To do this turn the focusing knob
 until the oppropriote dislonce on the telephoto scole is .op-
 posite T-index mork (37o). Do not, however, use the block
 ring {39) on ihe telepholo lens itself for setting the distonces'
 This ring is port of the depth of field indicotor ond serves
 only to show the depth of field ovoiloble.
 The telephoto lens focuses from infinity down to 6r/2feet. With
 the T I supplementory lens fitted over the front, the focusing
 ronge exlends lrom 31/2 to 61/z feel. In fhis cose lronsfer the
 distonce reoding of the rongefinder to the scole (38) morked
 with yellow figures on block.
 When reoding off disionces, you will find the scole morked
 with subdivisions which ore repeoted on the focusing scole
 for the telephoto lens. This focilitotes more occurote lronsfer
 of the reodings to the telephoto focusing scoles (37) ond (38).

                                                                23
View original page 23Page 24 · Read text
Wide-cngle shots


Set the d isto n ce   i n th e some woy os wi th the te lephoto lens' Trq ns-
fer the distonce figure obtoined with the rongefinder to the
wide-ongle distonce scole (36) ond reod off from the mork (36o).
Alwoys be sure lo set the disfonce on lhe correct focusing
scole when using the inlerchongeoble  lenses.
[ike the telephoto lens, the wide-ongle lens corries o deplh
of field indicotor (36b). lts rofoling ring is engroved with o
distonce scole in the some colours os the focusing scole
corresponding lo lhe lens in use. This serves only to show
the depth of field ovoiloble.
Note olso thoi for pictures with the interchongeoble  lenses
the some opirlure ond shrtter speed settings ore used os with
the stondord lens. One point is however imporiont: You con-
nol sel o lorger operlure thdn the lorgest stoP of the op-
 propriole lens (f/4 with lhe telephoto lens ond f/5.5 with tne
wide-ongle lens). Otherwise the picture will be underexposed'
Also moke sure thqt the stqndord lens supplied with the
comero is not inierchonged ogoinsi the stondord lens of
onother RETINA. The seriol number of the stondord lens must
fherefore olwoys correspond lo the seriol number engroved
on the boyonet ring.

 24
View original page 24
Page 25 · Read text
Finolly, o few vofuoble hints  www.butkus.us

  Two woys of using the exposure meler
    The.exposure meter of the   KtttNA lllc con be used
    tn^lwo different woys: for   rettecied light  reodings
   ono - tor  Inctdent liqht
"   reodtnos-ReflecGd light reodinos
   ore tqken from the cd_
   mero position towords lhe
   sublect os _described on   Poge d.    I hrs melhod  is
-  suifoble for  oll  subiecis   wtlhout strong contiosts
   ot trght ond shode ond
   yfpre ,ihere is no spec-    toily dork Or eXCeption-   olly brillionr bockgiound   or surroundtngs  (e. q. skv
   or woter). Do noi ldt di   rect lighr, sky liqht, or  strong  ort;ficiol -   iioht    strike the honeycomb jell
   ot the exposure meler os
   you moy otherwise obto;n
   too .high reodings, leod-  mg to underexposure.
  For incident light reod_
    Ings- fhe comerq is poinl_
  ed.trom the subject tow_
  glql th9 rokins posirion.  wnn rhrs method the dif_
   rusrng screen (18) must ol-
   woys be fitted over the cell
   of fhe exposure meter  ir-
   respective of vrhether the
  cover ts open or closed.
  Alwoys let the direct lioht  irom th"  light  souice  reocn  mefhod.thets porticulorlyscreen. Thissui-
   loote tor determininq the
   f19ht volue in ogoinsi+he-   ,rgnt shots ond snow sub-
   lecrs, os well os close_ups.

                                                                25
View original page 25Related documents and language editions


From the M. Butkus Camera Manual Library. Original publisher and archive notices are retained.
Check the model and edition against your equipment.
PDF verified 2026-10-10.