Lenses & filters
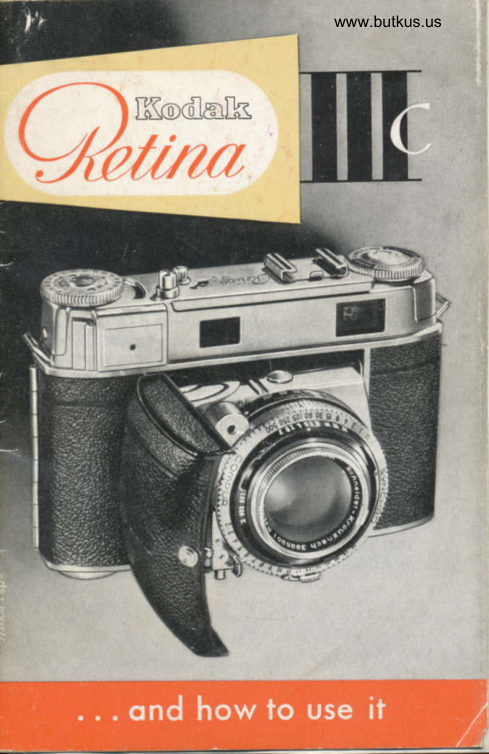
Kodak Retina IIIc w/suppliment and lens information User manual
User manual for Kodak Retina IIIc w/suppliment and lens information. 39 pages in English. Read the original PDF, download or print a copy without registration.
39 pagesEnglish5.7 MB PDF
Loading your manual…Open PDF directly
Document details
- Brand
- Kodak
- Model / document
- Kodak Retina IIIc w/suppliment and lens information
- Document type
- User manual
- Language
- English
- Pages
- 39
- File size
- 5.7 MB
- Category
- Lenses & filters
- Document date
- Not specified in catalog
Search available document text
Find a term, then jump to its page in the original PDF. Image-only pages may not be searchable; check the PDF for exact wording and diagrams.
Page 2 · Read text
THE KODAK RETINA lllc

                      $:!
                :ilil   is o perfected minioture comero to meet the highest demonds.
                It hos interchongeoble lenses, o coupled rongefinder combin-
           t  ed with the new viewfinder wilh reflected line frome, o
                 .il   built-in exposure meter, the new Synchro-Compur  shutter with
                                      :   light volue settings ond selftimer, o collopsible lens ponel
          which locks open obsolutely rigidly, os well os o lorge num-
          ber of other technicol refinements.
           This comero will be your componion for mony hoppy hours;
            in your iob, when trovelling, ot home, in every weother ond
           every seoson. You con thoroughly rely on it.
        The RETINA  lll c wos tested occording to lhe strictest ston-
          dords before it reoched you.  lt combines utmost precision
         with unsurpossed performonce ond' thus sotisfies every pos-
           sible requirement for first-closs results. The nome Kodok is
          your guorontee for thot,


I
h,
View original page 2Page 3 · Read text
www.butkus.us


                                                                                                                                        ..

Moke the best use of the mony odvontoges of your comero,
And here is oi once the most importont piece of odvice, Reod
the first port of lhese instructions (poges 5-12) especiolly core-
fully - whether you ore o beginner or on experienced photo-
gropher - ond proctise the operotions described without o
film in the comero. The controls of your RETINA work equolly      fr'
well with or without film. Then, once you hove mostered the
elementory monipulotion, lood the cornero with o film ond
toke your firsl pictures. The loter sections in this booklet will
give you o number of further tips for successful pictures. So
don't skip thot port of the instructions bul follow the odvice
given there. You will soon reolize how eosy picture toking  is
with the RETINA lll c.
KODAK AG . STUTTGART.WANGEN   . GERMANY
View original page 3Page 4 · Read text
First gel to know the


      Contents

         Poge 5    Opening ond closing the comero
           6    Holding the comero
           7     Seiiing the distonce
           8-9    Finding ihe light volue
             10-l'l    Seiting the light volue
          12    Tensioning ond releosing
               l3    Opening the comero bock
          14    lnserting the film
          15    Setting the film counter
          16    Setiing the film speed
          17    Unlooding the comero
          18   Depth of field
          19   Zone focusing
          20   Speed synchronizotion
                      lt      Je tr-il mer
         22-23  The interchongeoble lenses, telephoto shots
          24   Wide-ongle  shots
         25-28  Some importont hints
         n-n     RETINA occessories
           31 33    Generol view of RETINA  lll c
          34   Some more hints


I
View original page 4Page 5 · Read text
moin points of olerotion         www.butkus.us


 Hold the RETINA in
 your hond ond push
 the bulton (l)  to-
 words the word.'Ko-
 dok'. At ths some
 time pull open the
 boseboord (2) until il
 oudibly clicks into
 position. The comero
  is now reody to shoot.


 Before you close the
 comero, remembar to
 set lhe focusing scole
 (10) lo inf. Only fhen
con you close the co-
mero. Simuhoneously
press in lhe two but-
tons (ll) ot eodr side
of tho lens ponel (16);
the boseboord (2) will
then eosily fold up -even wilh o   filter
screwed into fhe lens.
       rilE
View original page 5Page 6 · Read text
Hondling is reolly simple:


         Whenever possible gnp
         the comero with  both
          honds. The illustrofions
        show the position for
           horizontol ond  upright
            pictures. They ore, how-
            ever, moinly intended os
        o  guide; you con, of
           course, hold the comero
             in oiher woys, ioo. So try
        o    f ew positions to  find
           which suits you best. And
        when you hove found
           your ideol hold, stick to it!
View original page 6Page 7 · Read text
www.butkus.us Sefiing the distonce


 Hold the comero in the shooting position ond look through
 the eyepiece (34) of the combined view ond rongefinder. you
 will see the subiect os well os the reflected line frome super-
 imposed on it (we sholl hove more to soy oboul thot on
 poge m.  ln the centre of the field of view you will olso
 nolice o bright diomond-shoped  rongefinder field. Until
 the comero is focused for the correcl dislonce, this
 field shows port of the subiect with double outlines. To set
 the distonce turn the focusing knob (30) untit the outlines of


the double imoge move logether ond coincide, so lhot only
one imoge is visible. The lens is now occurolely set to lhesubiect distonce.
All dislonces cre meo3ured from the subiecf to the ptone of
lhe film in lhe comero. This corresponds opprorimotely lo
lhe reqr upper edge of the drromium-ploted top of the body.
Proctise focusing in this woy with vorious subjects ot different
dislonces. Close the comero now ond ogoin ond then pretend
thot you hove lust noticed o good subilct ond wont lo focus
the comero on it. Try the some with the comero held upright.
View original page 7
Page 8 · Read text
An importont feoture of your RITINA:

     The light volues
       The RETINA  lll c hos o built-in photo-electric exposure meter.
         This eliminotes difficult colculotions ond gives you lhe correcl
         light volue. The lolter is o number corresponding to the
       omounl of light required for correct exposure.
         Point the comero ot the sublect, directing  it slightly down-
        words. A block pointer will move in the window  (6). Turn


                          t
%

           www.butkus.us


        lhe mefer selting ring (3), thus moving o red pointer until
        the lotter coincides with the block pointer of the exposure
         mefer. The block dot visible inside the window serves only for
         odiusting the exposure meter ond should be disregorded when
         toking reodings.  lf you hove foken the reoding with the cover
            (5) closed, reod off the light volue from the index mork (4b) *
       on the setting ring (3)
i8
View original page 8Page 10 · Read text
Supplement to REtINA lllc Instructions


Pleose.Nole: The incorporotion of o single-ronqe exposuremeter.hos mode ir nec6ssory ro repioleie.i;in-;";fi;;i
lhese instructions by rhe fol kiwi n g rli*"  p"sliJi    ri., il' li'i-"f I:menr. the secttons concerned ore lhose deoling with sitiingthe          (pose.8    meter                   rg 9),.sefring                               the                              nim                                    gpeeJ tt"s;; i6fl';;;Efhe   lwo       woys                                (poqe             of using                     the met-er                                                25).
lhe.numbers in the illustrotions  i6fei exciusively to the textof this.supplement,                ond                  do not                              coireiponJ'i"itJ                                                                     ;;;;;;ivrew                    feolures                           of      .ot .the comero                              lhe end of lhe insl-ructionbooklet  iiself.
I(ODAK AG SIUTTGART.WANGTI{
View original page 10Page 11 · Read text
www.butkus.us

Using the Exposure lheler
The RETINA lllc  hos o photo-electric exposure meter wiih
precision scole built into the body' This eliminqtes o lot of cql-
culotions, for it indicqtes the correct "light volue" for qlmosl
ony subiect. This light volue is shown by o number (morked in
 ,"i) *ni.n is o meosure of the qmouni of light required for cor-
 rect expoSure.
The precision scole of the exposure meler enobles you lo reod
 ofi whole os well os intermediote light volues, which is importont
for occurole exposure wilh color films'
 Delermining the light volue
To obtoin fhe correci reoding.  fitst sel lhe oppropriote film speed
 (see opposite poge). The different methods of toking reodings
 iruR".t"a light ond incident light) ore described on lhe bqck
 poge of this supplemenf.
 Point the comero ol the subiect, toking core no to obscure lhe
 honeycomb lens of the exposure meter with your fingers' The
 white poinfer of lhe meter will move in ihe window (17)' Turn
 the meter setting ring (14) to move the yellow pointer until  it
 coincides with the while pointer. Now reod ofi the light volue
 opposite fhe red triongulor index mork (15) on the meter setiing
 rins (14).
View original page 11
Page 12 · Read text
Setting the lilm Speed

                                  Alwoys remember lo set the
                               speed of the film in  the
                                     comero. This should be done:
                               o) on the film speed disc
                                           of the meter setting ring (16).
                                   Turn the film speed disc bY
                                meons of lhe smoll knob until
                              the block triongulor mork
                                   points to the oPProPriote
                                 speed number of the film in
                                       the comero in one of the two
                                 windows (for DIN ond ASA
                                        respectively). For instonce
                                    use 12 for o 121100 DIN film.
                                                        lf you forget lhis selling, you
                         moy obloin incorrect lighl
                                   volues ond thus wrong ex-
                                          posures  !


ond b) on lhe film indicotor (39), on
top of the rewind knob (7), which  is
morked with the vorious types of film
ovoiloble. This is os smoll but useful
oid for your memory, ond olwoYs
indicotes the type of film looded into
the comero. Rotote the inner milled
disc so thot the triongulor index
points to the film type or sPeed
looded in the comero. The Position
of the film indicotor hos no influence
on the exposure  ilself.
View original page 12Page 13 · Read text
www.butkus.us

 Refleded ond Incident light Reodings

 T.he exposure meter of your RETINA lllc con be used in two
 diffe.rent woys: for reflecfed light reodings, ond for incident light reoot ngs.
 Meosuring the Reflected light
 Reflected light reodings ore token from lhe comero position towords
 the subiect os described on poge 7. You therefore meosure the liohr
 reflecled from the subiect in fiont of fhe comero. This is the m'osr
 frequenily used.method, ond qives relioble exposures when the lioht
 is behind or to one side of th-e comero. lf thi scene includes gr6ot
 brightness differences, do not direct the exposure meter of loo bright or. loo dork o port of the subiect, but choose on oreo ofoveroge brightness.
On no occount  tilt the comero upwords when tokinq o reodino-Otherwise the meter will meosure'the brightness of Ihe sky, onlgive folse reodings.
ileosuring lhe lncident Light
 Incident light reodings ore loken in the reverse direction,  i. e. with
the meter pointino from the subiect towords the tokino oosition.
This is the hore oicurote method,'for  it directly meosure-s ihe liqht
folling on the subiect. For incident light reodingi the difiusinE 3cr;en
musf olwoys be fified over lhe cell. The diffusinq screen is normollv
corried in-ihe loop of elostic in the lid of lhe 6ver-reody cose.
Incident light medsurement  is porticulorly suitoble for determininq
ihe lighi volue in ogoinst-the-light shots ohd snow scenes, os well oi
close-ups ond smoll subiects.


                                    www.butkus.us

Insert lo RETINA lllc  Instructions.                  Engl.M-R-1230 0957OD
View original page 13Page 14 · Read text
One operqtion sefs ony


        The Synchro-Compur  shuiter of your RETINA corries the follow-
         ing three scoles'
       The Shutter Speed Sccle (14) : The numbers signify froctions
        of o second, thus 2 stonds for 1/2 second, l5 for lirs second,
        125 for  1,i125 second, ond so on.
       The Aperlure Scole (13) : The stop numbers indicote relotive
         opertures. The lorgest stop is f,'2, the smollest fi22.
       The light Volue Scole (27): The red figures from 2 to 18 ore
        the light volue seitings.
       The light volue setling required for ony shot moy be deter-
       mined from built-in light meter (see poge 8).
       To set the light volue obtoined on the shutter, pull the light
        volue lever (26) slightly outwords ond move it to the opprop-
         riote light volue number. lf this light volue is outside the
        ronge of movement of the light volue lever, odjust the ring
         corrying the light volue scole (27) ond shutter speed scole (14)
         occordingly. You con olso sel in-between light volues, e. g.
                  r 1.5.
       For instonce, once you hove set the light volue to 12, lhe
        index mork (12) will indicote one of the following operrure-
        speed combinotions:
         Shutter speed
         in seconds   1la  l/rs     l/ro        tlrr'                l l.ns        t/zso       l/soo
        Aperture  f/    22  16il85.64                 L8
            lf you don't wont to use lhe combinotion opposite the index
      mork (12), select the required combinotion by turning the
       speed ring. You will notice thot this clicks into ploce ot eoch
          seiting, to ensure occurote shulter speeds. When cne selects
      o foster shutter speed, the operture-speed  coupling outomotic-
        olly opens ihe lens operture. Adiusting the operture to o
        smoller stop olters the shutter setiing to o slower speed,
        ihus keeping the exposure constont oll the time.

          l0
I
View original page 14Page 15 · Read text
www.butkus.us
 operftrre-speed combinotion

   lf you wont to sel the exposure without reference to the lionr
  votue,. moke sure thot you odiust  first lhe shutter speed o-nq
  rnen the operture.  lt you do it fhe other woy round, the ooer_
                                                                    setiing rneIlr^"-t9j9shutter coupl,rngsoeed.   would olter the operiure when
                                                                      u nri I rhe  I:^:,?j-tj". jl^rjtT_ :?g:i, -'_,1! rhe .sh uner..speed   ri ns,

 the opdrtuie scole  (l


                                        Digitally signed by Mike Butkus
Mike Butkus DN:ou=Butkus.org,email=mike@butkus.org,cn=Mike Butkus, o, c=US
                                   Date: 2024.12.30 00:57:29 -05'00'


                                                          -'-.-'j--<
 Even.when you hove sel the exposure in this wqy, you con
 use.the operture-speed  coupling to odjust ciiher the ooerture or lhe speed ot wrll by turning the ring.
           hoppen                     rhot                        rhJ ope_rtu6                                            speed                                                                 ring                                       lever or Lt^-T1:treocnes rhe.glrq.ttmrt                    movemenl                  ot tls                          when odiustino                                                 the                                                        ooerture_ speed       coupling                        requ;red                to.the                                 operture                                       b,                                                           ,tiilJi  d""a-r.- specr.rvely.             thrs                 Indtcoles                          lhot the                                      lighting                                             condilions                                                 ore nor su[oore ior ihe operture or speed you intended lo use-

                                                                                                 ll
View original page 15Page 16 · Read text
Quick winding ond releosing


        Look through the finder eyepiece, sight the subiect, ond press
       the releose button (7). lf the shutter is not tensioned, you
        cqnnot press the buiton,
      To tension the shutier, pull out the ropid-winding lever (3o1
         In one movement os for os it will go. Then let it shoot bock
        into its.originol position. lf  it doei not move bock, you did        not pull it out for enough, so corry on to complete the trons-
        port movement. This ot lhe some lime tensions the shutter,
      ond - provided you hove o film in the comero - winds on


                    1&
                      -taff /iW.rI
                        I  I   lf.,A"l
      \\NI\\   NI
                           T


  I

        ihe film by one frome ond qdvonces the film counter (see
       poge l5). Now you con releose. You will notice how smooth-
        iy-the releose button operotes; this is importont to ovoid
       comero snoKe.
       Moke o hobit of operoting the ropid-winding lever immedio'
          tely ofter every exposure so os to hove your comero olwoys
        reddy for oction. Keeping the shutter tensioned - even tor       some lime - does nol horm  it in ony woy.


          12
I-
View original page 16Page 17 · Read text
Preporing for the first exposurewww.butkus.us

         j   [?i       [3[ T J, iHt                       fu? T:l"!.'l't i:lif i;!i sl!irrj!5,T;                               "?  :ri,yrr':,zuiyii'Lif y^ift'ii'l'of  3oT,",;'lo'"""iii''03;

                                                                  bock.   B:j:::"f'.: i:ii;t*tf" film vou hove ro open rhe comero


On the- bottom of the comero you will find the tripod busn
(33J. This is surrounded bv o doLjble lever {32). lf vou'oush inemilled. end of the lever'in the direction oi the oriow, the
qpposite end uncovers o bulton (31). Depress this button,'ono
the comero bock (41) will spring open.
This locking system.hos obvious odvqntoges. You con onry
open tne comero deltberotely, ond noi by ony occidentolmovement or knock.


                                                                             t3
View original page 17Page 18 · Read text
Now inserl fie film in fie comero


   www.butkus.us


  Before inserting the film, pull out the rewind knob (20) to its
  second stop. Turn the built-in foke-up spool (40) by its serrqf-
  ed flqnge (rl0o) until the slit in the core poinis irowords. Now
  push the trimmed film end into the slit Jnril ist is iusr visible
  on lhe other side of the spool core. Then drow the hlm ocross
  the film frock ond inserl the cqssette into the cosseile chomber.
  Push bock the_ rewind knob {20) into its normol position, core-  tully turnrng  tl ql the sqme time in the direciion of the orrow
  to-lension the film. Check thol the teeth of the fronsport sprocket
   l_3f) oroCe.rlf .en9oge the perfo.rotio.ns qt lhe lowey' edgd of the  rrm, ono Tnot ot teost two pertoroltons ot lhe uooer edoe over-
  lop the film trock (see illustiotion). Now close tlii comeio bocx.
 To get the-RETINA reody for the first exposure you still hove  to set the film counter-
  Push the button {38) in the direction of the orrow ond ot the
 some time depress the film releose bution (8). Repeot this

t4
View original page 18Page 21 · Read text
www.butkus.usWhen fie film is finished: Unlooding


To rewind lhe exposed film depress the reversing button (37) in
the bose of lhe comero ond holf pull oui the rewind knob (20)
io get ot it more eosily. Then lurn the rewind knob in fhe
direction of lhe orrow until the reversing button ceoses to
rolole. This is eosily obserued by the smoll block dot neor the
rim of the button.
You hove now rewound lhe film into its cossette. Ooen the
comero bock, fully pull out the rewind knob, ond remove
lhe cosselte.
Do not lood or unlood the film in direct sunlight or strong
ortificiol light, or you moy fog the first few exposures. After
removing the exposed film, rewrop it in its originol pocking
for full prolection ogoinst fhe light, until you ore reody to
process it.
View original page 21
Page 22 · Read text
Poinls for good pictures: Dislonce, Depth


Depth of field
To oermil instoni reqdinqs of the depth of field for ony oper-
turd ond distonce, o dEpth of fielil scqle (15) is orronged
svmmelricollv oround lhe distonce index (9)
Supoose vou hove set the qperture to f/8 ond the distonce
to ;bout'5t1, feet (see olso poge 28)' This.is how..you reod
off the deoth: To the left of the distonce Index lhe lrne mork-


         22 16 rr     516       .,r5;5      t6              1  a Y      f )1     'l
View original page 22Page 23 · Read text
Zone focusing for ocfion        www.butkus.us


 ilqe:'|"'$,"fThis tells          you. rho-rii;:'"rif"ri:i'i,f'/;;;",';"'a;l?"lj',Tr.',Jli                   yilh o                              seriins';i                                  ;6;;;                                                                      'g-rlit.                                       i'die;idirr'viij'ii'     o                           fietd.                  zone             of                            eltending        .deprh                                               rd                                            ir;;; .ng.up.Within        this'zone                 everyrhing                               wiil                                          Uri iiil?p.'-'

Zone focusing
Tedr.nicolly good exposures de-
pend.lorge-ly on the skilled com_
b.rno_tton of oppropriole  distonce,
shutter-speed, ond operlure set-
flngs. flowever, you moy come
gcross subiects where vbu iuslhovn't the time to work' out iherdeol seltangs or lo use lhe ronge-
rnoer- tt you don't wont to missthe piclure (os in sports ond oc_
tron shols, drildren ot ploy, etc.).
ror .such occosaons your RETINAcornes two zone focus seffinqs:
one.     tor neor ond one for distdnt      t'-:lr ui-ifr[frE i]usublects.
o)   For      neor              subiecls                      sef                      the                                      di_    LYr.'li lilt*f));stonce       lo          the smoll                     circle                        neor                                lhe
l*te-gt mork, ond the operture tovu. thts gtves1rou o depth of field   atrom oboul 6,5 to 20 feet.
q) For more dislonl subiects use
Ine smoil circle neor thi 15 feet
m.ork ond on operture of f/9. This
ti?U ,t?ll..t netd from obour
f) With these settings you must,
pornte.rl9yever,othovethe odequoleexposure light;meterthe_
wrth.lhe c.over closed _ should in-
ctrcote o light volue of ot leost 12.


                                                                l9
View original page 23Page 24 · Read text
r                            live shots with flosh


       Your RETINA hos o speed-syndrroniz-
     ed Syndrro-Compur shutter. Thoi
       meons thot you con toke flosh shots
         ot ony shutler speed up to lhs fostest
                                                                               )         sefling of t/q second with oll ovoil-
        oble flosh bulbs ond electronic  flosh
           units.

      The holder of the flosh socket (21)
         corries lhree lelters engroved on it:
        M, X ond V.
                                                           F'. a
    M ond X ore synchronizing  seftings            (t                                            ['       for flosh. V is the self-timer  ser-
         ting, The lhree settings ore odjusied
       by meons of the green syndrronizing        PHILIPS ond
         lever l2l. The flosh is fired on releos-
       ing the comero shutter. The toble       Synd.o.izlng  tev€r ser ro X
        (right) shows lhe suitoble shutler
        speeds ond the required setting of the
        syndrronizing lever for the difrereni
                                                                                                          l/60 sec        types of flosh. The operture to be         XP
       used con be obtoined from fhe so-      XO           l/s sec
        colled guide numbers whidt ore in-
       cluded with eodr pockoge of flosh
        bulbs. Divide this guide number by
      the distonce; thot gives you the
        operture number to use, For instonce,
           if the guide number is 120 ond you
       ore 15 feei from the subiect, 120;15
         :  8. In other words you set lhe oper-
        lure lever fo f/8.
                                                                                                       lf eleclronlc  flosh is us6d the syn,
     n                                               chronizing  levershould beset toX
View original page 24Related documents and language editions


From the M. Butkus Camera Manual Library. Original publisher and archive notices are retained.
Check the model and edition against your equipment.
PDF verified 2026-10-10.