Lenses & filters
Mamiya 645AF Interchange Lens User manual
User manual for Mamiya 645AF Interchange Lens. 34 pages in Japanese. Read the original PDF, download or print a copy without registration.
34 pagesJapanese5.3 MB PDF
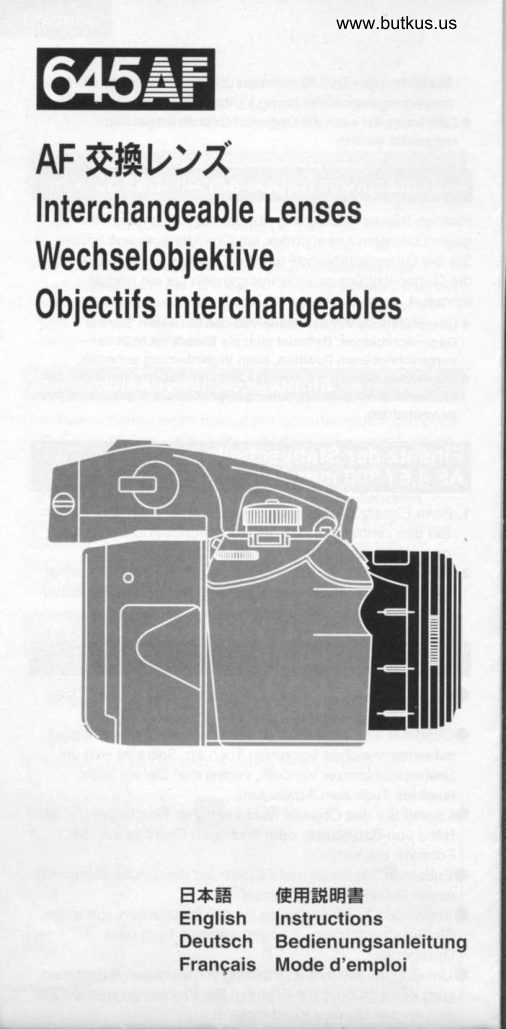
Loading your manual…Open PDF directly
Document details
- Brand
- Mamiya
- Model / document
- Mamiya 645AF Interchange Lens
- Document type
- User manual
- Language
- Japanese
- Pages
- 34
- File size
- 5.3 MB
- Category
- Lenses & filters
- Document date
- Not specified in catalog
Search available document text
Find a term, then jump to its page in the original PDF. Image-only pages may not be searchable; check the PDF for exact wording and diagrams.
Page 1 · Read text
www.butkus.us
FT
AF  *&VrT
Interchangeable Lenses
Wechselobjektive
0bjectifs Interchangeables


         EdE   EHHIEI
               English   lnstructions
               Deutsch   Bedienungsanleitung
                Frangais  Mode d'emploi
View original page 1Page 3 · Read text
Y     \Y4/-
                                                             www.butkus.us

  Thank you for purchasing a Mamiya product.                   Removing
 To use the camera at its maximum performance, read the              While holding down the lens release button O, rotate the lens
  instruction manual thoroughly before use so that you can use              in the direction of the arrow until  it stops, and release the lens
  the camera correctly based on full understanding  of its                 from the camera. (Fig E)
  functions and controls.                                               *After removing the lens from the camera body, protect them by
  After reading, retain the manual in an easily accessible                     attaching the caps.
  location for future reference.                                  *To prevent contact failure or corrosion, do not leave stain,
                                                                             scratch or fingerprint on the electronic contacts.


  Attaching
  1. Remove the camera's body cap and the lens's front / rear caps.        The aperture value is controlled on the camera.
  2. Mount the lens.                                                   Set the exposure mode setting dialto "Av" (iris-priority AE),
     Align the lens's alignment dot 6 with the camera's align-            then rotate the dial aperture ring to set the desired apefture
    ment dot @, fit the lens into the camera and rotate the lens           value. The aperture value can be varied in 1/2 steps. lFig E)
      in the direction of the arrow until  it stops. When a click
    sound is generated, the lens is mounted onto the camera.
     (Fig E)
  *During AF operation, do not touch the rotary parts such as the         The Depth-of-field  refers to the total area which will appear in
    distance ring.                                                             focus. This area increases when the lens aperture is de-

 645AF Interchangeable Lenses
                                                 lllnlmur                                                       ol                                                 Foq!                  0dcd    Angle
                                   ADonun        Lens          Donrtucilor                           Vhr                                         tIqhngm  dulil|lnt                                     Dhm      tlegrlficdon  Arca Coved   Equhqhntltocal-lendr 35nm     FllterSlze    wltfiouttolfiibnugbleYlqn€t||no  l€nrlloor  DlmendonWblght
I   AF35mm f/3.5    9 7elementsorouos     90'      22     Automatic   AutoManualFocus     35cm           0.1 5x    274 x375mm    22mm    77mm                  1         Bayonel   62x84mm480o
    AF45mm t/2.8    97elementsdt6rhq      74'      22     Automatic   Aulo Focus     45cm        0.13x    310 x 418mm    29mm     67mm               1         Bavonet   73.5x77mm
View original page 3Page 5 · Read text
www.butkus.us
Thank you for purchasing a Mamiya product.
To use the camera at its maximum performance, read the
instruction manual thoroughly before use so that you can use
the camera correctly based on full understandinq  of its
functions and controls.
After reading, retain the manual in an easily accessible
location for future reference.


Attaching
1. Remove the camera's body cap and the lens's   f ront/ rear caps.
2. Mount the lens.
   Align the lens's alignment dot @ with the camera's align-
  ment dot @, tit tfre lens into the camera and rotate the lens
   in the direction of the arrow until  it stops. When a click
  sound is generated, the lens is mounted onto the camera.
   (Fig E)
*During AF operation, do not touch the rotary parts such as the
  distance ring.
View original page 5
Page 10 · Read text
www.butkus.usRemoving
While holding down the lens release button @, rotate the lens
in the direction of the arrow until  it stops, and release the lens
from the camera. (Fig E)
*After removing the lens from the camera body, protect them by
  attaching the caps.
*To prevent contact failure or corrosion, do not leave stain,
  scratch or fingerprint on the electronic contacts.


The aperture value is controlled on the camera.
Set the exposure mode setting dial to "Av" (iris-priority AE),
then rotate the dial aperture ring to set the desired aperture
value. The aperture value can be varied in 1/2 steps lfig E)


The Depth-of-field  refers to the total area which will appear in
focus. This area increases when the lens aperture  is de-
View original page 10
Page 14 · Read text
www.butkus.us
E"I U {t|th't=1.h /-O^7   4 rrt,  ':t ib.FU>>7Dffi'&
 + r,':t7"&9f L,*q"2.> tT.AHLL-){l f7*q"
  {HOOfir r,*6           {,JD4 &-,XFDah lfi (,:  rht5*ctrL*T"h*'v-Ey.A1f< t=-hrLr
 7 4 L:EEA|LJ-T" (trtr)
* 7r_  h. 7 * _ h TIFE1+ tt. fE_88 t) > 2 tt€ E$EE.SEIJ rj L:+
   EEE,*l"t*LtC"< ffdLr"
FI U tl'L,t'ft
                                                                                               (,._ ++ l, /j r\L' -t ?Hn |   L t\ I >aA*EltDfi H
4, >>7eFEDOfr6[-ftt5*e^              E LzHn,)^L*3_" (BE)
*ry u*L,f=v>z,fi; 4 I: tt{RFEo)f=u>*p'y 7"a u< < fid
   L \o
View original page 14Page 16 · Read text
Removing                        www.butkus.us
while holding down the lens release button O, rotate the lens
 in the direction of the arrow until  it stops, and release the lens
from the camera. (Fig E)
*After removing the lens from the camera body, protect them by
   attaching the caps.
*To prevent contact failure or corrosion, do not leave stain,
  scratch or fingerprint on the electronic contacts.


The aperture value is controlled on the cam era.
Set the exposure mode setting dial to "Av" (iris-priority AE),
then rotate the dial aperture ring to set the desired aperture
value. The aperture value can be varied in 1/2 steps (Fig E)


The Depth-of-field  refers to the total area which will appear in
focus. This area increases when the lens aperture is de-
View original page 16
Page 17 · Read text
creased (78..11..16..22) and decreases when the aperture is
 increased  (f/8..5.6 .4..2.8). (Fig 4)
The Depth-of-field value is indicated by the Depth-of-field
scale engraved on both the left and right-hand sides of the
 reference mark on the lens.


Autofocus Use:
The manual-focusing  collar of these lenses has a double
function. When it is in the forward position on the lens barrel,
the engraving "AUTO FOCUS"  rlvill be visibie. This is the
autofocus mode when the Focus Mode Selector Lever is on
the "S" or "C". The focusing collar cannot be turned manually
in this position.
Manual Use:
The collar must be pulled backward, to cover the engraving.
When the focus ring is pulled backward, the mode switches to
the manual focus mode, and "@" is displayed on the
external liquid crystal display panel when the shutter button  is
half-pressed.  (Fig tr)


The 35mm lens changes the focus mode bretween auto (AF)
and manual (MF) by turning the AF/MF selector ring @ of the
lens. (Fig E)
*Before selecting auto focus mode, turn the focus mode selector
  lever on the camera body to the "S" or "C" position. When  it is
   in the "M" position, the lens cannot enter auto focus mode by
  turning the AF/MF selector ring.
View original page 17
Page 18 · Read text
www.butkus.us


The macro lens should be focused in manual mode so that the
focus mark lights on the external liquid crystal display panel in
the viewfinder.
*The focus mark may not light under certain shooting condi-
   tions.
Magnif ication
The abbreviation MAG e stands for magnification.
The MAG number is a reciprocal one, which means No.20 shows
the object is shot in the size of 1120, No.10 in the size of 1/1 0
and No.1 in the life size.(Fig E)


1. Align Mark i- on the hood with the lndicator Line 0 on the
   lens, and  f it the hood to the lens  f ront ring.
2. Fix the Lens Hood by rotating  it in the direction of the arrow.
   (The Lens Hood can be removed by rotating  it in the opposite
   direction.) (Fig E)


Align the matching marks on the lens and hood, and push and
turn the hood in the direction of the arrow until a click sound  is
heard.
*Before taking photos, check the installation position of the
  hood.  lf the hood position has deviated from the correct
  position, vignetting may occur.
*When using a polarizing  filter, choose a wide-circular polarizing
     f ilter"
View original page 18Page 19 · Read text
1. To use in the horizontal position, line up the center of the
   distance scale @ with the lens support's mount mark (D and
   fasten in place (Fig tr)
2.To use in the vertical position, line up the center of the dis-
   tance scale @ with the gap in the lens support 0 and fasten
    in place. (Fig [U)


O n frequently used product should be inspected periodically
  at your nearest Mamiya service center.
O Handle the lens carefully, taking care not to drop it or hit  it
  against an object.
O ffre lens is not waterproof. When it is moistened, wipe with
  a clean, dry cloth. lf it is exposed to a salt breeze, moisten a
  clean cloth, wring it well and wipe the lens with  it.
O to prevent affecting the mechanism and film, do not leave
  the equipment  in a place where chemical gas of naphtha-
  lene, formalin, etc. is produced. The surface finish may be
  deteriorated   if it comes in contact with a solvent.
O Wfren the lens sudace or vieMinder is stained with dirl or dust,
  remove  it with a blower or sweep gently with a lens brush.
O Wtren the lens surface or viewfinder is stained with a
  fingerprint or greasy object, wipe it gently with a clean, soft
  piece of gauze. lf the stain cannot be removed or the glass
  component becomes moldy, please consult your nearest
  Mamiya service center.
O Wfren the equipment has not been used for a long period
  or before taking an important picture, always try shooting to
  make sure that they function normally. In case of a problem,
  have your nearest Mamiya service center inspect them.
O Wfren the equipment  will not be used for a long period of
  time, remove batteries to prevent malfunction.
View original page 19Page 23 · Read text
Ansetzen
1. Entfernen Sie zundchst den Gehduse- sowie die beiden
   Objektivsch utzdeckel.
2. Ansetzen des Objektivs
  Setzen Sie das Objektiv ins Kamera-Bajonett, indem Sie
   die beiden Ansatzmarkierungen am Objektiv @ und am
  GehAuse @ aufeinander ausrichten. Dann drehen Sie das
  Objektiv nach rechts, bis es hdrbar einrastet. (Abb. E)

     Teilebezeichnung / Descriptif

                                    Objektiv-Ansatzindex


                                   Entfernungsrlng
                               Bague de mise au polnt

                                     Entfernungsskala
                                      Echelle des distances


Merci pour votre acquisition d'un produit Mamiya
Pour exploiter au mieux toutes les performances  offertes par
votre appareil aussi longtemps que possible, lisez
attentivement son mode d'emploi pour bien comprendre le
bon fonctionnement de ses fonctions et de ses commandes
Conservez ensuite le mode d'emploi i port6e de main pour
pouvoir le consulter dds que n6cessaire.
View original page 23Page 24 · Read text
Merci pour votre acquisition d'un produit Mamiyawww.butkus.us
Pour exploiter au mieux toutes les performances offertes par
votre appareil aussi longtemps que possible, lisez
attentivement son mode d'emploi pour bien comprendre le
bon fonctionnement de ses fonctions et de ses commandes
Conservez ensuite le mode d'emploi a portee de main pour
pouvoir le consulter des que necessaire.


Mise en place
1. Retirez le bouchon du boitier et les bouchons avant et
   arriere de I'objectif.
2. Montez l'objectif
  Alignez le repere d'alignement se trouvant sur l'objectif O a
   celui se trouvant sur le boitier @, inserez l'objectif dans le
   boitier puis tournez-le dans le sens de la fleche jusqu'en
   but6e. Sa fixation en place sera confirmee par un d6clic.
   (Fig E)
*En mode autofocus, ne touchez pas aux parties mobiles comme
   la bague de mise au point.
View original page 24
Page 26 · Read text
www.butkus.us
Retrait
Tout en pressant le poussoir de deverrouillage  d'objectif O,
tournez I'objectif dans le sens de la fleche jusqu'en but6e puis
d6gagez-le de I'appareit (Fig E)
*Une fois I'objectif reti16 de I'appareil, remettez imm6diatement
  leurs bouchons en place


L'ouverture se controle a partir de I'appareil.
Selectionnez  le mode auto a priorite diaphragme "Av" puis, a
I'aide du s6lecteur, choisissez I'ouverture souhaitee. La valeur
d'ouverture se regle par 1 12 lL. (Fig E)


La profondeur de champ correspond a la zone de nettete
dans l'image. Plus l'ouverture diminue (f/8, t111, tl16, fl22) et
plus la profondeur de champ augmente; inversement, plus le
diaphragme  s'6largit  (f lB, t15,6,1114, fl2,B) et plus elle diminue.
(Fig tr)
La profondeur de champ est indiqu6e par l'echelle de
View original page 26
Page 28 · Read text
www.butkus.us


                                                                      der Schriftzug "Autofokus"  ist verdeckt. Zur Umschaltung auf
                                                                     Autofokus schieben Sie den Ring von der Kamera weg, so
Der Bereich, innerhalb dessen verschieden positionierte               dass der Autofokus-Schriftzug  wieder zu sehen  ist. (Abb. tr)
Objekte scharJ abgebildet werden (Scharfebereich),   ist
abhdngig von der Entfernung, der Brennweite des
verwendeten Objektivs sowie der eingestellten
Blendendffnung. Eine groBere Blendendffnung  (f/8.. 5,6.. 4,0..        Das 35 mm Objektiv besitzt einen drehbaren Umschaltring um
2,8) fuhrt zu einem geringeren Schdrfebereich, eine kleinere             schnell und einfach von Autofokus (AF) auf manuelle
Blendenoffnung  (f/8.. 11.. 16..22) fuhrt zu einem groBeren             Fokussierung (MF) umschalten zu konnen. (Abb tr)
Schdrfebe  reich.                                               *Achten Sie darauf, dass sich der Fokus-Wahlschalter am
Auf der Entfernungsskala der Objektive werden die                     Kameragehduse  in der "S" oder "C" Position befindet. Befindet
Schdrfebereiche  fur einige Blendeneinstellungen  angezeigt.                 er sich in der Position "M", bleibt der Autofokus abgeschaltet
Zur Ermittlung des Scharfebereichs  wird die Entfernungsskala            auch wenn der AF/MF Umschaltring am Objektiv in die AF
                                                                              Position gedreht wird.an beiden Blendenangaben  rechts und links des Einstell-
Index abgelesen. (Abb tr) Der lnf rarotindex wird in der
Bedienungsanleitung der Kamera nAher beschrieben.

                                                         Das Makroobjektiv  ist im manuellen Scharfeinstellungsmodus
                                                                           scharf einzustellen, so daB die Scharfeinstellungsmarkierung
                                              am LC-Display des Suchers aufleuchtet.
                                                               *Unter bestimmten Aufnahmebedingungen kann dieAutofokus-Verwend  u n g  :                                                                          Scharfeinstellungsmarkierung vielleicht nicht aufleuchten.
Der Tubus fur die manuelle Scharfeinstellung  dieser Objektive
weist eine doppelte Funktion auf . Wenn er sich in der                 Der AbbildungsmaBstab   ist von unendlich bis 1:1 auf dem
                                                                   MaBstabsring  graviert. Bei den Ziffern handelt es sich umvorderen Position am Objektivtubus  befindet, ist der
eingravierte Schriftzug "AUTO FOCUS" sichtbar. Dies ist der           Kehrwerte, So steht 20, zum Beispiel, fur 1'.20, 10 fur 1:10
                                                         und 1 fur 1:1 (lebensgroB). (Abb. E)Autofokus-Modus, wenn der Fokusmodus-Wahlhebel  auf "S"
oder "C" gestellt ist. Der Scharfeinstelltubus kann in diese
Position nicht manuell gedreht werden.
Manuelle Verwendung:
Der Tubus muB zuruckgezogen werden, so daB der                       1. Richten Sie die Pfeilmarkierung I* auf der
eingravierte Schriftzug abgedeckt ist.                                   Gegenlichtblende auf den Ansatzindex O am Objektiv
Sie auch direkt am Objektiv von Autofokus auf Manuell                   aus, und setzen Sie die Gegenlichtblende an das Objektiv
umschalten. Wenn Sie den Fokussierring zum Gehduse                     an.
ziehen, befinden Sie sich in der manuellen Einstellung und               2. Sichern Sie die Gegenlichtblende durch Drehen in
View original page 28Page 30 · Read text
profondeur de champ grav6e a gauche et a www.butkus.usdroite du repere
de r6ference sur 1 'objectif.


Utilisation de I'autofocus:
La bague de mise au point manuelle de ces objectifs a une
double fonction. Quand elle est positionnee vers I'avant sur le
barillet d'objectif, I'inscription gravee "AUTO FOCUS" est
visible. C'est le mode autofocus quand le selecteur de mode
de mise au point est positionn6 sur "S" ou "C". La bague de
mise au point ne peut pas etre tournee manuellement dans
cette position.
Utilisation manuelle:
La bague doit etre tiree vers I'arriere pour recouvrir la gravure.
Quand la bague de mise au point est tiree vers le boitier,
position de MAP manuello, "@" s'affiche sur I'ecran LCD
externe quand vous pressez legeremnt le d6clencheur.
lris tr)


Avec cet objectif, on peut passer du mode automatique (AF)
de mise au point au mode manuel (MF) de mise au point, en
tournant la bague de s6lection du mode de mise au point
(AF/Mr) (Fis E)
* Avant de s6lectionner le mode de mise au point automatique, le
   levier de s6lection du mode de mise au point sur la cam6ra doit
  6tre plac6 sur la position "S" ou "C". Tant que le levier de
  s6lection se trouve en position "M", I'objectif ne peut pas 6tre
  mis en mode de mise au point automatique en tournant la
  bague AF/MF.


Les objectifs macro doivent etre mise au point en mode
View original page 30
Page 31 · Read text
manuel de fagon que la marque de mise au point soit allum6e
sur I'affichage LCD du viseur.
*ta marque de mise au point peut ne pas s'allume dans
  certaines conditions de prises de vue.
Grandissement
L'abrciviation MAG € donne le grandissiment. Cette valeur
correspond a un ratio. Le chiffre 20 signifie que I'objet a
photographier est au 1120d,le chiffre 10, qu'il est au 1110 e, le
chiffre qu'il est au rapport 1:1 (taille reelle) (Fig E)


1. Alignez le repere i* sur le parasoleil avec le tiret O sur
    l'objectif et inserez le parasoleil sur la bague  f rontale de
    I'objectif     .
2. Verrouillez le parasoleil en position en le tournant dans le
  sens de la fleche. (Le parasoleil se retire en se tournant
  dans le sens inverse.) (f ig E)


Aligner les reperes du pare-soleil et de I'objectif  , appuyer et
tourner simultan6ment  le pare-soleil dans le sens de la fleche
jusqu'au moment ou l'on entend un declic.
Avant de prendre des photos, contrOler la position
d'engagement du pare-soleil. Si le pare-soleil s'est d6plac6
par rapport aux reperes  il y a risque de vignettage (effet de
lucarne).
*Pour travailler avec un filtre polarisant, un filtre polarisant grand
  angle est recommand6.


1. En cadrage horizontal, alignez le centre de l'6chelle des
   distances @ avec le repere de fixation du support
   d'objectif O et verrouillez-le en position. lf ig tr)
2. En cadrage vertical, alignez le centre de l'6chelle des
View original page 31Page 32 · Read text
www.butkus.us


    Pfeilrichtung . (Zum Abnehmen drehen Sie die Blende in die
   entgegengesetzte  Richtung.) (Abb. tr)
;kZum Transport kann die Gegenlichtbiende umgesttilpt
  aufgesetzt werden"


Richten Sie die Markierung auf der Gegenlichtblende
gegenuber dem Ansatzindex am Objektiv aus, und setzen
Sie die Gegenlichtblende auf das Objektiv. Drehen Sie dann
die Gegenlichtblende im Uhrzeigersinn bis sie horbar
ein rastet.
*Unerprtifen Sie vor der Aufnahme den korrekten Sitz der
  Gegenlichtblende.  Befindet sich die Blende nicht in der
  vorgeschriebenen Position, kann Vignettierung auftreten.
*Verwencien Sie ei nen speziellen  Zi rkular-Polarisationsf   ilter der
   frir Super-Weitwinkelobjektive geeignet  ist um Vignettierungen
  zu vermeiden.


1. Beim Einsatz der Kamera im Querformat (Abb. El), richten
   Sie den zentralen lndex der Entfernungseinstellung @
  gegenuber dem roten Index (D der Stativschelle aus.
2. Verwenden Sie die Kamera auf dem Stativ im Hochformat
   (Abb. l0), richten Sie den Entfernungsindex @ gegenuber
  dem Spalt l) der Stativschelle aus.
View original page 32Page 33 · Read text
Ogefrandeln Sie lhre Ausrustung sachgemdB und schutzen
  Sie sie vor Schldgen und Stu rzen.
OOOlet<tive sind nicht wasserfest. Wischen Sie Feuchtigkeit
  mit einem weichen trockenen Tuch ab. Sollte es sich um
  Salzwasserspritzer  handeln, verwenden Sie ein leicht
  feuchtes Tuch zum Abwischen.
Olagern Sie das Objektiv nicht bei hoher Feuchtigkeit,  in der
  Ndhe von Salzwasser oder fluchtigen Chemikalien (2.8.
  Formalin o"d.).
OEntfernen Sie Staub und Fusseln auf den Linsenflachen  mit
  einem Pinsel oder Blasepinsel.
OVermeiden Sie jede Beruhrung der Glasfldchen. Entfernen
  Sie Fingerabdrucke  mit einem weichen Tuch oder
  Optikpapier.
OUnterziehen Sie lhre Ausrustung vor wichtigen Aufnahmen
  stets einer grundlichen Prufung. Bei Problemen wenden Sie
  sich an den lVamiya Kundendienst.
                rh1 F-^+1 Eq, ::p=e:it  ;ir regelmdBigen Abstdnden*i -.Gen ci'r
 vom Mamiya Kundendienst uberprufen.
Ogei ldngerer Nichtbrenutzung oder Lagerung entnehmen Sie
  grundsatzlich die Batterien.
View original page 33Page 34 · Read text
www.butkus.us
   distances @ avec I'interstice dans le support d'objectif l)
   et verrouillez-le en position. (Fig IU)


OUn produit fr6quemment utilise doit etre regulierement
  inspect6 par votre centre de maintenance Mamiya
OManipulez avec soin votre objectif en veillant a ne pas le
   faire tomber ni le cogner contre un autre objet
OVotre objectif n'est pas etanche. S'il est mouille, s6chez-le
  avec un chiffon doux et sec. Apres une exposition a l'air
   sal6, nettoyez-le avec un chiffon propre humide mais bien
  essore.
OPour 6viter tout endommagement des mecanismes et du
       f ilm, ne laissez pas votre 6quipement a proximite de
  naphtaline, formol, etc.. La finition de la surface pourrait
  etre d6t6rior6e si elle venait en contact avec un solvant
Ofn cas de poussiere ou de salete sur la lentille de I'objectif
  ou le viseur, retirez-la avec un pinceau soufflant.
Ofn cas de marque de doigt ou de trace de gras sur la
   lentille de I'objectif ou le viseur, nettoyez-la doucement
  avec un chiffon doux et propre. S'il est impossible de la
  nettoyer correctement, confiez votre objectif a un centre
  de maintenance Mamiya
OApres une longue periode d'inutilisation de votre
  6quipement et avant une seance importante de prise de
  vues, faites quelques essais pour verif ier qu'il fonctionne
  normalement. En cas de probleme, confiez-le a votre
  centre de maintenance Mamiya.
OPour 6viter toute corrosion ou dysfonctionnement des
  contacts, protegez-les des rayures, salissures ou marques
  de doigt.
OSi vous avez I'intention de ne pas utiliser votre equipement
  pendant une longue periode, retirez les piles pour 6viter
  toute fuite de liquide corrosif pouvant endommager votre
  eq u ipement.


                                      Frangais
View original page 34Related documents and language editions
From the M. Butkus archive. Original publisher and archive notices are retained.
Check the model and edition against your equipment.
PDF verified 2026-10-10.