Film cameras
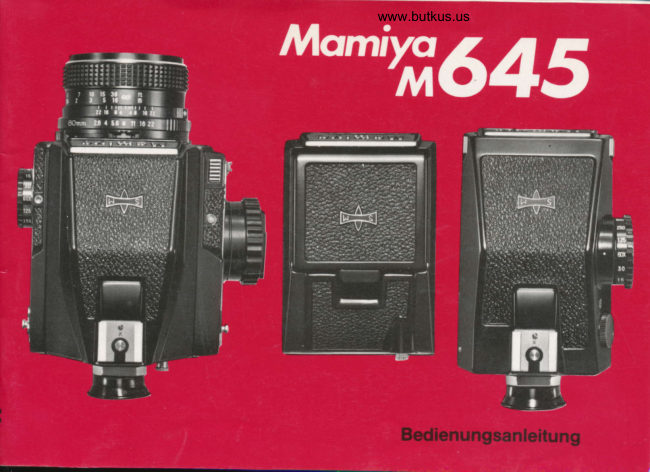
Mamiya M645 User manual
User manual for Mamiya M645. 80 pages in English. Read the original PDF, download or print a copy without registration.
80 pagesEnglish7.6 MB PDF

Loading your manual…Open PDF directly
Document details
- Brand
- Mamiya
- Model / document
- Mamiya M645
- Document type
- User manual
- Language
- English
- Pages
- 80
- File size
- 7.6 MB
- Category
- Film cameras
- Document date
- Not specified in catalog
Search available document text
Find a term, then jump to its page in the original PDF. Image-only pages may not be searchable; check the PDF for exact wording and diagrams.
Page 3 · Read text
The MamiyaM645 is a newly developed6 x4.Scm
          SLR which is a result of Mamiya's technology
            and experience as a leading manufacturerof
              professionafcameras. The M645 is designed to
              introduce the world of large-negativequality to
            camera users who are accustomed to the easy
             handlingand compactnessof 35mm SLR's.
             Every care has been taken to assure that your
           Mamiya M645 will provide you with years of
              trouble-free service. However,to avoid possible               This camera is designed for use with
             mishandling, be sure to carefully read this in-                either silver oxide or alkalinebatteries.
              structionmanualbefore usingyour new camera.              Althoughperformance,both silvertypes oxideoffer adequatebatteries
                                                                                                 last much longer.
                                                                 IMPORTANT: When  using the PD
                                                                             Prism Finder, make  it a point to use
                                www.butkus.us                (insilvetthisoxideinstance,batteriesbatterywhenlife availableis short-
                                                                           ened  if alkaline batteries are used).


.::*i1"'.brlasr'L-!r..           ',g8fis*aiiiint.                                                                                                                                                                                             i*tq"..le*:t"            -   :.i;
View original page 3Page 5 · Read text
The Mamiya M645  is a 6 x 4.5cm large-negativeSLR that                                                                                 rlr   Large, Bright Viewfinderis bothextremelyversatileand compact.
                                                                                                          It becomes easy to catch the peak of action when looking
                                                           through the  large, bright vieMinder. Because  of the
  I  r large-Negative   Quality                          Mamiya M645's automatic diaphragm and quick-return
The 6 x 4.5cm lormat offers approximately3 times more       mirror, the viewfinder never grows dim. lt is always bright,
area than the 35mmformat.Moreover,unlikethe 6 x 6cm       ready for the next photograph.
square negative,there is little waste of the negativearea.
For beautifulcolor enlargementseverytime,the 6 x 4.5cm      5.  InterchangeableFinders
formatis the idealformat.                               o Lighhreight, dual-function Waist-LevelFinder S
                                            A compactand lightweightfinderwhichopensand closes3.hmpact   Design                                                          with a singletouch,the Waist-LevelFinderS is ideal for
Despitethe large-negativeit produces,the MamiyaM645                                                      copying,close-ups,low and high angle pictures,and
is designedto handleas easilyas a 35mmSLR. lts com-                                                    workingin dim light.Additionally,it is instantlyconvertible
pact size and light weight are perfectly suited for the ac-                                                                to an eye-levelsportsfinderwhich accuratelyshowsthetion photographer.lt fits so well into one's hands that it
                                                             fieldsfor the 80,110,150,and210mmlenses,allowingonebecomesan extensionof his reflexes.                                                                to easilyfollowthe quickestaction.
tr
€.   Mamiya's Moving  Coil Elec'tronic Shutter           o Prism Finder
Mamiyahas developeda revolutionaryMovingCoil Elec-     The Prism Finder is well-suitedfor action photography
tronicallyControlledShutterfor the MamiyaM645.Elec-      Whetherthe verticalor horizontalformatis utilized,focus-
trical consumptionof this new shutter is approximately      ing and followingactionis as easy as on a 35mmSLR.
1/10 that of previous electronic shutters. Furthermore,     o AE (Automatic Exposure) Prism Flnder
consumptionremainsconstantregardlessof the shutter     The AE Prism Findercombinesan electronicshuttercontrol
speed being used. ln additionto accuracy,longwww.butkus.usbattery     mechanismand a TTL-typeCdS exposuremeter to provide
life is assuredby this new shutter.                              aperture-priority,fullyautomaticexposure.

                                                                                                                                                                                                                                ,..'.*;lgfli
View original page 5Page 6 · Read text
8.  UnlimitedScope
o PD Prism Finder                                    A full range of accessories are available for the Mamiya
The PD Prism Finder employs silicon cells for full-aperture,     M645 to assist the photographer in capturing virtually any
center-weighted readings. lt is your assurance that every       type  of image. Accessories include hand grips, inter-
negative will be properly exposed.                         changeable focusing screens, and auto extension rings
 . CdS Prism Finder with built-in meter                      complete with meter coupling.
Accurate through-the-lens exposure measurement  is        o Multiple-Erposure Provision
possible with the CdS Prism Finder which couptes to the        Merely lowering the multiple-exposure lever allows the
aperture of the lens and indicates the proper shutter       photographer to take as many multiple-exposures as he
speed to set on the camera.                                  wishes. During multiple-exposures,the exposure counter
tr                                                    does not move.
O'   Flatness of the Film Plane                                                             o Mirror Lock-Up
DevelopedthroughMamiya'slong experienceas a manu-                                                   The Mamiya M645 is designed to have minimal mirror
facturerot 120/220roll-filmcameras,the Roll-FilmInserts                                                            shock; nevertheless, when  it is necessary to completely
for the MamiyaM645 keep the film perfectlyflatfor edge-                                                            eliminate vibrations,all you have to do is lock the mirror
to-edge sharpness.Insertsare availablefor 120 or 22O                                                                           in the up position.To do so, simply lower the mirror lock-
roll-lilm.                                                      up lever. Mirror lock-up provision makes close-up and
                                                              telephoto photography possible even  at slow  shutter,f  r Multi-CoatedLenses
                                                       soeeds.Mamiya-Sekor lenses have achieved world-renown as pro-
                                                             o Two Shutter Release Buttonsfessional lenses of exceptional contrast, high resolution,
                                                    The Mamiya M645 is equipped with two ideally locatedclear definition, and excellent color balance. All the lenses
for the Mamiya M645, from wide-angle to telephoto, have        shutter release buttons, so that regardless of how you
                                                             hold the camera, there is always a release button at yourbeen multi-coated to maintain their high standard of per-
formance even under adverse lighting.                          finger tips.


                                                                          -:r'llJtul.$.ii;i;
View original page 6Page 7 · Read text
o Camera Body                                         Focusing Screen:
     CameraType:                                              Microprismcenterspot (standardfocusingscreen)
            6 x 4.5cmelectronicfocal-planeshutterSLR.                 surroundingarea is matte,with Fresnellens,focus-
       Film Type:                                                       ing screeninterchangeable,94Toof the picturearea
          120roll-filmfor 15 exposures,                                visible
           220 roll-film for 30 exposures                              Mirror:
       RollFilm Insert:                                                  Instantreturn,with mirrorlock-upprovision
                        fnterchangeable,two types availablefor 12Oand 22O          Film Transport:
             sizerollfilms.Actualnegativesize56 x 41.smm.                  Film transportby a single turn of the crank-equippe
       Standard Lenses:                                                          film advance knob. Provisionto prevent double ex-
           Mamiya-SekorC (multi-coated)                            posure.
         80mmf/1.9,automaticdiaPhragm,                   ExposureCounler:
             with metercoupler,67mmfiltersize                         Progressive type,  automatic reset, automatic
           Mamiya-SekorC (multi-coated)                        changeoverwithinsertiono1120/220roll-filminserts
         80mm l/2.8, automaticdiaphragm,                        Batlery Check:
             with metercoupler,58mmfilter size                       DepressingB.C. button illuminatesgreen L.E.D.if
       Lens Mount:                                                      batteryconditionis satisfactory.
          MamiyaM645bayonetmount                           Multiple-Exposure:
        Shutter:                                                 Loweringmultiple-exposurelever makes multiple
             B, 8-11500 sec.                                     exposurespossible;exposure counter does not
           MovingCoil ElectronicFocal-PlaneShutter,              move duringmultiple-exposures.
          FP and X (1/60sec.)synchronization,                                           O Interchangeable  Finders
            Shutterreleaselock provision                                                            Prism Finder:
        Battery Type:                                                         The image in the PrismFinderis right-sideup, lat-
          One 6V silver-oxidebattery4SR44                                                                            erallycorrect,and moves in the correct direction;
              or 6V alkalinebattery 4LR44                              magnificationof 0.74Xwith the standardlens at in-
       Focusing Method:                                                                                        finity,built-onhot-shoe;comeswith eyecup.          Each Mamiya-Sekorlens is equippedwith its own                                                AE Prism Finder:             helicoidfocusingmount         www.butkus.us                                                                               Aperture-priority,automaticexposureprism finderwith

h;;,,'".,,,;:.,,;*.r;drl                                                                         ,;*i*;--..     ,.+.;u                                                                                             ,r*iis
View original page 7Page 8 · Read text
built-inelectronicshuttercontrolmechanismand CdS          1/500 sec.), other featuressame as Prism Finder.
"    exposuremeter.Through-the-lens,center-weighted,full-Waist-Level Finder S:
     aperturemeteringwith shutterspeed in the viewfinder.        Opens and closes with a single touch; magnification
     Metercouplingrangeis EV2.85-EV17 (t/1.9,1/2sec.-               of 1.3X (w/standard lens at infinity);diopter correc-
     t/16,1/5OOsec.)withf/1.9lensandASA10Ofilm.Withthe             tion lenses interchangeablewith standard magnifier;
      f/2.8 lens,the metercouplingrangeis EV4-EV1g(t/2.9,              built- in sports finder shows field for standard lens
     1/2 sec.- t/22,1/500sec.)usingASA10Ofilm.Camera         and accepts a mask for 110,150,and 2'1Ommlenses,
      batteryservesas powersource.Otherfeaturessameas                all f ields showing approximately 80o/oof the picture-
      for PrismFinder.                                            taking area.
PD PrismFinderS:                                         Dimensions and Weight:
                                                                        (width, height, depth, w/80mm f/1.9 tens)     Prism Finder with built-in silicon cell, through-the-
                                                           (w/Waist-Level Finder S)     (w/1.9 tens)   (w/2.8 tens)      lens, full-aperture, center-weighted metering; 7
     LED's visible in the viewfinder for correct or com-        3-29/32" x3-15/16" x 6-9/16"    54.7 oz       48.9o2                              '100                                                              (99.3                                                            x166.5mm)      (15509)      (13859)     pensated exposure; with                         ASA and f/1.9 lens,                                                              "100
     meter coupling range of EV -'1.1S-  +18 (f/1.9,     (w/PrismFinder)
     8 sec. -  t/22,1/500 sec.); with f/2.8 tens,EV 0-  1g      3-29/32"x4-27/32""6-9/16"   61.6oz       55.7oz
      (t/2.8,8 sec. -  t/22, 1/500 sec.); camera body bat-         (99.3x 122.7x 166.5mm)    (17459]r     (15B0s)
      tery serves as power source; other features same as      (w/AEPrismFinder)
     Prism Finder.                                     3-29/32"x4-29/32"x6-9/16"  66.1o2      60.3o2
CdS Prism Finder:                                           (99.3x 124.7x 166.5mm)   (teZSg;      (1710s)
     Prism Finder with CdS through-the-lens full-aper-     (w/PD PrismFinderS)
      ture, center-weighted metering, zero method with       3-29/32"v 4-29/32" 6-9/16"  65.8 oz      60.0oz                                                                                                           "
                                                                            (18659)     (1700s)      indicator needle; couples to aperture and shutter         (99.3"124.7 166.5mm)    speed manuallyset; power source, one 1.5V silver                            "                                               (w/CdSPrismFinder)     oxide battery SR44 or alkaline battery LR44; with                                                       3-29/32"x4-29/32" ,6-9/16"   66.5 oz       60.7oz    100 ASA and f/1.9 lens, meter coupling range of
                                                          (99.3' 124,7x 166.5mm)    (18859)      fi72j9\    EV 2.85 -  17 (t/1.9,1/2 sec. -  t/16, 1/500 sec. );
     with f/2.8 lens, EV 4 -  18 (l/2.8, 1/2 sec. -  t/22,      Depthw/80mmf/2.8 lens;6-1/16"(154mm)


                                   ..:*i                                             :,;;j;\:::it.t#).
View original page 8Page 16 · Read text
PD Prism Finder S
(DetailedInstructionson pp. a7-a5l
Aperturering coupling pin
Couplesto the exposure meter
coupleron the aperturering.                                           Meter switch
                                                                         Pushingin on this switch when
                                                                                    the finder is attached to the
                                                                     camera will turn on the meterHot-shoe                                                                     and a LED in the finderwill light
 (with safety cover)                                                                 up. Evenif you releasepressure
Automaticallyfires cordfess                                                                                                            f rom the meter switch, the
flash units when the shutter                                                   meterwill remainon for approxi-
re lease button is depressed.                                                    mately 15 seconds and then
                                                                                 automaticallyturn off to con-
                                                                             serve electricity.
Eyepiece
Accepts accessories such as
eyecup, magnifier, and angle
finder.
Eyecup                                                                  Shutterspeed dial
Attachby slidinginto the groov-                                                     ASA windowes of the eyepiece.
                                                    ASA dialDioptercorrectionlens
retainerring                                                                                    Pull out and then turn.
                                                                   Finder releasebuttonRemove by unscrewing in a
counterclockwise   direction.                                                Turn clockwise until  it stops,
After inserting correction lens,                                              push in, and the finder can be
replaceretainerring.                                                                                lifted otf the camera body.
                                          14
View original page 16Page 17 · Read text
CdS Prism Finder                                                     "#,..,,
(Detailed instructions on pp.,16-5O)


Aperturering
couplingpin                                                                Shutter Speed Dial
Couplesto the exposure                                                  Be sure to manuallyset the
 meter coupler on the                                                                 shutter speed dial ol the
 aperturering.                                                             camera body to the speed
                                                                                    indicatedby this dial.
Hot-shoe (withsafetycover)
Automatically fires  cordless
flash units when the shutterre-                                              Power switch
leasebuttonis depressed.                                                            Set to OFF when the
                                                                                  meter  is not being
Eyepiece                                                                        used.
Accepts accessoriessuch as
eyecup, magnifier,and angle
f inder.                                                    ASA dial
Eyecup                                                                                        Pull out and then turn.
Attachby slidinginto the groov-                                                         ASA windowes of the eyepiece.
Diopter correction lens                                                                      Finder release buttonretainerring                                                                          Turn clockwise until it stops,Remove by unscrewing in a            Battery chamber cover              push in, and the finder can be
                     direction.counterclockwise                                                                                                    lifted off the camera body.                               Removewww.butkus.usa 1.5Vthebatterycoverintowiththea chamber.coin and                         lens,             insertAfter      insertingcorrection
replaceretainerring.                        15
View original page 17Page 18 · Read text
Waist-Level Finder S (ror detaitedinstructions,seepp s1-sg)
                                                                        Sports finder eyepiece
                                                                             Retractedwhen not used.

                                                                      Sports finder wire-frame
                                                                                       for standard lens
                                                                           Retractedwhen not used
                                                                       Finder hood opening
                                                                          flange
                                                                                          Pullup to open finder.


Auxiliarymaskfor 110,                                                           Magnifier release
150,and 21Ommlenses                                                                            Pushin to raise theNot necessary with stan-                                                                                  magnifier.dard lens.
Alignmentdot for
changingmagnifier
To remove magnifier,twist 90'
counterclockwiseand lift out.
The magnifier is interchange-
able with 5 types of magnifiers
with diopter corrections.
Finder releasebutton
Turn clockwise until it stops,
push in, and the finder can be
lifted off the camera body.
View original page 18Page 19 · Read text
Testing to See if the Camera Functions Properly

                         To release the shutter when there is no film in the camera, proceed as follows.
                              (For detailed instructions on particular points, refer to the page number shown
                                    in parentheses.)
                                   1. fnsert a battery into the camera (p.221
2                               2.(lfSetyouthehavemultiple-exposurejust purchased thelevercamerato "MULTl"and the(p.57)vinyl tuOe is still on the take-up
                               spool, there is no need to move the multiple-exposure lever.)
                                   3. Set the shutter speed dial to any shutter speed other than the O red mark
                                  (p.28)
3                                4.5. TurnAlignthethe filmshutteradvancereleaseknoblockuntilringitwithstops.the white dot and release the shutter
                                    (p.gt)
                      When ready to load the camera with lilm, return the multiple-exposure lever to
                                       its normal position. lf this is not done, the film will not advance.
                                                                 ll the shutter is released without a battery in the camera, the mirror will lock in4                              the up position. To return the mirror to its normal position, depress the battery
                          check button (18)as far as it will go.
                                                                   ll the shutter  is released with the shutter speed dial set to the red O  position,
                              the mirror will lock in the up position.To lower the mirror, turn the shutter speed
                                   dial in either direction (B or 1/500 sec.).5                               At times  it may be necessary to rotate the film advance knob two full turns to
                            cock the shutter when an empty take-up spool (without its original vinyl tube) is
                                     in the camera.
                        www.butkus.us

                                    17
View original page 19Page 20 · Read text
o Removing the Body Cap     O Attaching Lenses             o Removing Lenses


While depressing the lens release but-   While aligning the two alignment dots   While depressing the lens release but-
ton (12),turn body cap counterclock-   (31 & 4), insert lens into camera body    ton (12),grasp the part of the lens bar-
wise until the red dots are aligned and   Then twist lens clockwise until it clicks    rel that has the depth-of-fietd scate (30)
lift out.                             and locks into place.                 and alignment dot (31), and twist the
                                                                               lens counterclockwise until  it stops.
                                                                   Then lift out.


                                        18
View original page 20Page 21 · Read text
Focus  Screens
                              o Upper Body Cover
* After removing a lens, be sure to                                    o lnterchanging  Focnsing Screens
place caps on both the lens and cam-                                                                          Five ditferentfocusingscreensare avail-
era body.                                                                  able to suit variousphotographiccondi-
* Never touch the surface of the mirror.                                             tions.
*After removing a lens, it is recom-
mended to lock the shutter release but-
ton by setting the shutter release lock
ring (6) in srder to avoid accidentally
releasinga cocked shutter when plac-
ing the camera body face down on a
table.


                             Removethe upper body cover from the
                               cameraby slidingit to the rearand lifting
                                     up.


                            www.butkus.us

                                      19
View original page 21Page 22 · Read text
o  Attaching Finders
                                                       All of the finders are attiachedand removed                                                        ,f
                                                     in the same way, except for the AE Prism
                                           Finder which  is removed by a different
                                       method.
                                           Prior to attaching the  finder to the
                                    camera, confirm that the white dot on
                                         the  f inder release button is pointing
                                   upward
                                                                       lf the white dot on the button is aligned
                                         with the white dot on the finder, by de-
                                      pressing the button and removing your
                                           finger from it, the white dot on the but-
                                        ton will automaticallypoint upward In
                                              this condition,the button cannot be de-
                                                                           Place the rear part of the finder on theO Removing the focusing screen     pressed; consequently, the finder willLift up the focusingscreenusingthe two                                        not be accidentally detached from the   camera body while holding the frontfocusingscreenlugs(2).                                    camera.                                 part of the finder slightly upward. Slide
o  Attaching the Focusing Screen                                             the rear part forward until it stops and
Insertthe two tabsof the focusingscreen                                             gently lower the front part of the finder
intothe slotsat the back of the openingin                                       on to the camera body. lt will then lock
the cameratop and press lightlyso that                                                  into place.
the screenclicks into place.
rThe rcarsurfaceof the focusingscreen
is madeof plasticso use care to prevent
scratcheswhenremovingand attaching.


                                           20
View original page 22Page 23 · Read text
O Removing Finders


1. Turn the finder release button clock-    2. While pushing in on the release but-
wise until it stops (about 60"). Then you    ton with your thumb, lift the finder off
will be able to push in on the release    the camera body.
button.

                                 Precaution:
                                Do not leave both white dots aligned by turning the button while the finder is
                                      attached to the camera. The finder may become detached when the button is
                                        occasionally depressed, possibly causing damage.
                                                                        lf you depress the button to point the white dot upward while the finder is attach-
                                    ed to the camera, be sure to depress the finder against the camera body;
                                      otherwise the finder will not be locked into place.
                            www.butkus.us

                                           21
View original page 23Page 24 · Read text
CAUTION:
                                                                                             1. Carefully wipe the contacts of the
                                                                                   battery bef ore insertingit into the cham-
                                                                                    ber. Failureto do so could result in poor
                                                                                         electrical contact and consequent er-
                                                                                               ratic functioning of the camera.
                                                                                             2. When the camera is not used for a
                                                                               long period of time, remove the battery
                                                                      and store it in a cool, dry place.
                                                                                             3. When replacing a battery, properly
                                                                           dispose of the used battery immediate-
                                                                                                     ly as  it is potentiallydangerous.The
                                                                                  batteries are explosive and should
                                                                               therefore never be thrown into a fire.The Mamiya M645 uses one 6V silver-    2. Next, insert the battery, exercising
oxide battery 4SR44 (Eveready No.    caution that the  t poles match those     4. A battery that is not used for a long
544, U CAR  544, Mallory PX28 or   shown on the diagram of the chamber.    period, even if it is properly stored in a
equivalent) or alkaline battery 4LR44.    Battery removal will be simplified if the    dry, cool place, may lose some of its
1. Pull the battery chamber cover latch                                        batteryremoval ribbon(A)passes under   charge. Consequently,check its condi-
(24l' slightly toward the lens and the   and over the battery.                       tion after replacing it in the camera with
chamber cover will open.                                                         the battery check button.


                                           22
View original page 24Page 25 · Read text
This camera is designed for use with
either silver oxide or alkalinebatteries.
Although both types  off er adequate
performance,  silver oxide  batteries
last much longer.
IMPORTANT: When using the PD
Prism Finder, make  it a point to use
silver oxide batteries when available
(in this instance, battery life is short-
ened  if alkaline batteries are used).


                              When the  battery check button (18,     * When the battery is completely ex-
                                        located above the film advance knob)   hausted, the opened shutter will not
                                                     is depressed, the battery check lamp    close. At this time, it the battery check
                                    17, located above the shutter sPeed    button is pushed all the waY down as
                                               dial) illuminates.  lf the battery check     far as  it will 90, the shutter will then
                                  lamp fails to go on, it is time to replace    close.
                                         the battery.


                           www.butkus.us

                                         23
View original page 25Page 27 · Read text
Film Loading


 1. Load the film into the roll film insert.Two     3. In the same manner insert a roll of    5. Gently pull out some of the leader
types of film inserts available for 120 and    film in the upper compartment.          paper, pulling it over and around the
 22O roll films. Be sure to select the correct     4. Make sure that the black side ol the   pressure plate. Then insert the tip of
one for the film you normally use. Insertion   leader paper faces up.                  the leader paper into the slot of the
 of film is the same for either type. First,                                         take-up spool.
open both spool clips (36) toward the
 outside.
 2. Align the right-handside of an empty
 spool with the lower spool stud (39)
Then return the spool clip (36) to  its
 former position, making sure that the
 left-hand side of the spool is properly
 held by the spool clip
                            www.butkus.us

                                         25
View original page 27Page 28 · Read text
O Memo Clip


6. Gently rotate the take-up spool in   Load the film insert into the camera in   The memo clip found on the camera
the direction of the arrow until the start   the aforementioned manner. Close the    back cover can be used to hold the
mark of the film is aligned with the start   camera back cover by pressing it firmly.     film box top.
mark on the spool clip (34).                            t   lf the   f ilm advance knob moves      * The memo clip also doubles as a
                                            slightly from the time the f ilm insert is    safety lock to prevent the camera back
 t The above step is to be completed    placed into the camera to the time the   from accidentallyopening.  lf exces-
belore the roll-film insert is placed into   back cover is closed, there will be no    sivelythick paper is plaoed in the memo
the camera.                                                    ill effects. However, if the film advance    clip, it will no longer simultaneously
                                  knob moves too much, the first frame   serve as a safety lock
                                                will be fogged.


                                          26
View original page 28Page 29 · Read text
o Using Roll-Film Designed for Six Exposures
 t  Never foad film in direct sunlight. Load  it in the shade                lf you wish to use roll-film designed for six 6 x6cm ex-
or in your own shadow.                                       posures, follow the procedure outlined below.
 r  Roll-film inserts for both 120 and 22O tilm are loaded in          1. Load the film in a 120 film insert and use in the normal
the same manner. The exposure counter advances to 15        way. The film will take 7 exposures.
         '120                film insert is used, and to 30 when the 220          2. Alter 7 exposures have been taken, set the shutterwhen the
film insert is used.                                       speed dial to 1/500 sec., wind the film advance knob and
Make absolutely sure to match the film insert with the film         release the shutter 4 more times (the exposure counter
type being used.  lf the wrong insert is used, the correct           will indicate "11").
film plane will not be maintained and optimum sharpness         3. Wind the film advance knob once again so that the ex-
will not be achieved. Moreover, if 120 lilm is used in the        posure counter indicates "'12",open the back cover, and
220 liim insert, there  is the danger of the leader paper        remove the film insert. (Do not release the shutter when
getting caught in the shutter causing damage to the cam-         the exposure counter indicates "12".)
era.                                                                    4. Completely wind the remaining leader paper around
 t  Belore placing the film insert into the camera, make sure         the film take-up spool.
the leader paper on the take-up spool is flat and lies evenly            *   lf the film in the camera is completely wound onto th€
between the two edges of the take-up spool. The take-up        take-up spool, there is the danger of the tip of the leader
spool should be wound sufficientlytight to make it impos-        paper getting caught in the shutter curtain and damaging
sible for the leader paper to ride over the edge of the         the camera.
take-up spool.
 t Always align the start marks ol the lilm end spool clip
before placing the film insert into the camera.   (lf the slart
marks are aligned  within the camera wilh the aid of the
lilm advance knob,  the  lirst frame  will not be correctly
positioned.)

                            www.butkus.us

                                     27
       .,.s i:d*;,',:a;:r                                                                                                                                                                                                                              *i{-r,,.;,, **iiitig*u,ii,,*,,r, n,:.
View original page 29Page 30 · Read text
1 . After the film has been placed into
the camera make sure that the multiple-
exposure lever (23) is aligned,withthe
white  dot and  not  with  the  word
..M  U LTI''.
2. Wind the film advance knob until it
stops and the number 1 will appear in
the exposure counter window (17).The
shutter is now cocked and the camera
is ready for the first exposure.


                                             Align the  desired  shutter speed  with
                                         the shutter speed alignment mark (10)
                                      by turning the shutter speed dial (11)in
                                            either direction.
                                                  (a) The figures on the shutter speed dial
                                           represent the denominator ol a fraction.
                                           (Thus, 30 equals 1/30 sec.).
                                                  (b) The  letter B represents BULB. The
                                         shutterwill remain open as long as the
                                          shutter release button  is depressed
                                 when the shutter speed dial is set to B.
                                                (c) The red 60X represents the highest
                                       permissibleshutterspeed for electronic
                                          flash synchronization.
                                              (d)The red O mark is the position the

             28
View original page 30Page 31 · Read text
urG Ring/Stop-down Operation

shutterspeed dial is set to when the                        O AM Lever
AE PrismFinderor PD Prism Finderis                                                  1. For normal use, set the AM (Auto-
used.                                                                   Manual) lever (27) so that "A" appears
 *  lf the shutter is releasedwith the                                                    in the window. When this is done, the
shutterspeeddial set to the@position                                        aperture is always open, closing only
and the AE or PD Prism Finder is not                                  when the shutter is released.
attachedto the camera,the shutterwill                                                  2. When you wish to preview the depth-
lock in the open position.lf the camera                                                  of-field. move the AM lever to the "M"
is left in this condition,the battery will                                              position.
lose its power within several hours, so
rectify the situation at once. (Moving
the shutterspeed dial to B or 1/500 sec.
will closethe shutter.)
 t Set the shutterspeed dial only to                                      Set the desired f/stop on the aperturethe click-stoppositions.Usingan inter-                                           ring (32)by aligning the f/number withmediatepositionwill resultin inaccu-                                         the red reference dot (A). (The aper-rale exposures.                                           ture ring has a click  stop  for each
                                            f/stop. In-between clicks can also be
                                       u sed.)


                            www.butkus.us

                                     29
View original page 31Related documents and language editions
From the M. Butkus archive. Original publisher and archive notices are retained.
Check the model and edition against your equipment.
PDF verified 2026-10-10.