Film cameras
Minolta 16 User manual
User manual for Minolta 16. 12 pages in English. Read the original PDF, download or print a copy without registration.
12 pagesEnglish1.8 MB PDF
Loading your manual…Open PDF directly
Document details
- Brand
- Minolta
- Model / document
- Minolta 16
- Document type
- User manual
- Language
- English
- Pages
- 12
- File size
- 1.8 MB
- Category
- Film cameras
- Document date
- Not specified in catalog
Search available document text
Find a term, then jump to its page in the original PDF. Image-only pages may not be searchable; check the PDF for exact wording and diagrams.
Page 3 · Read text
www.butkus.us

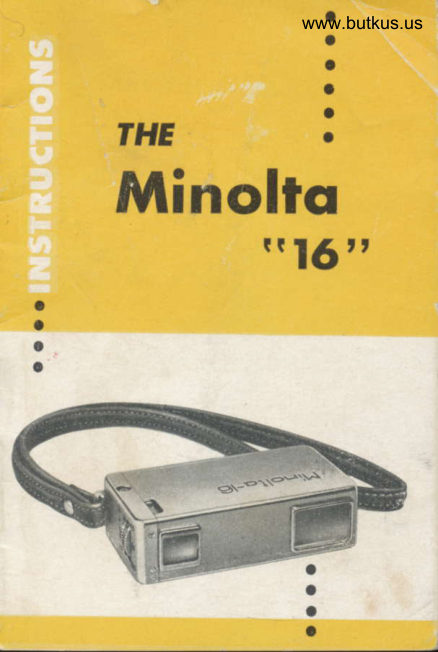
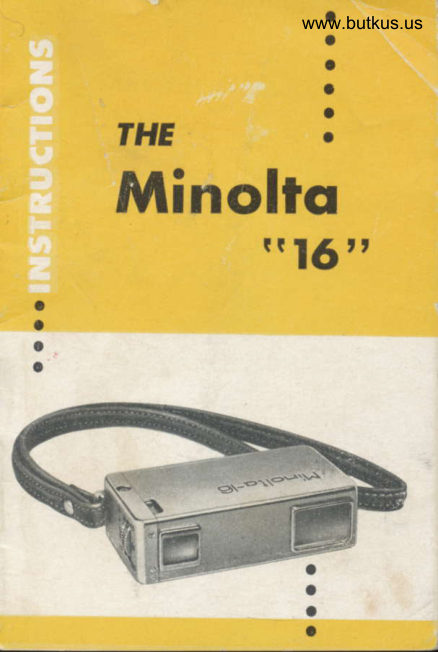
      THE
    Minolto * 16                    "
     As big as a pack of cigarettes-as easy
      to use as a box camera.

 Handsome as a cigarette case, smart as a
 powder compact, the Minolta 16 fits in pocket
 or purse. No focusing necessary-no  out-of-
 focus pictures possible.
A single loading produces 20 pictures.
The replaceable magazine lets you load in
daylight-in minutes.
AUTO}IATIC FEATURES
No winding, the film advances automatically.
The negatives space themselves uniformly.
A pressure plate keeps the film flat during
exposure then drops out of the way for the
next picture.
As the film advances the shutter sets itself so
you can repeat a shot almost instantaneously.

                     @
View original page 3Page 4 · Read text
LOADING the
Minolto  rr 16 tt
The simplest way to load the Minolta 16 is
by means of the disposable Minolta 16 film
magazine, These film magazines are wrapped
in light-proof paper and come in self'mailing
boxes for your convenience. Loading and un-
loading should take place in a dim light as
fast as possible.
   1. Take the film magazine out of its box
    and unwrap it. But keeP the box and
                                          20    wrapping to mail the film after all
     pictures have been exPosed.
  2. Press the outer-case clasp  (I), and pull out
View original page 4Page 5 · Read text
www.butkus.us


   the main camera
  body by the lea-
   ther cord to de-
   tach it from the
   outer case.
3. Open the mag-
  azine chamber
  door (G).
4. Insert the mag-
   azine into its ch-
  amber and close
  the door. Be sure that the magazine is in
   straight and that the door is closed properly.
5. Turn the counter dial (J), clockwise until
  the "S" on the dial coincides with the red
  dot on the operation plate (K). This spaces
  the frames evenly and counts the number
   of pictures left to take.
6. Push the main camera body back into the
  outer case until the clasp on the outer case
   catches. At this point the "S" on the counter
   dial will appear in the counter dial window,
   adjoining the red dot on the outer case'
7. Move the main srmera body in and out of
  the case 3 times. The figure "20" will
  appear in the counter dial window showing
  that tbe first film is in position and that
  there are 20 pictures left to take.

                       @
View original page 5Page 7 · Read text
www.butkus.us


Counter Dial Window
Outer-Case Clasp


 J.  Counter Dial
K.  Operation Plate

              @
View original page 7Page 8 · Read text
TAKING PICTURES
                      ttl6"  with rhe Minoltcl
   1. Adjust shutter speed (E).
   2. Adjust lens opening (F).
   3. Look through viewfinder (C) to compose
     picture, and press shutter release (B) to
    take picture.
  4. For flash pictures, plug the cord of the
    flash unit into the synchro terminal (A).
   The shutter speed should be \,'so or   t bs
     sec. for F class bulbs,  1':1r sec. for M class,
    and all speeds for electronic flash.
  5. After pressing the shutter release,- nysh tlre
    main camera body all the way back into the
    outer case. (No other picture can be taken
      txrtil this is done, since the shutter is not
    wound until the camera body is pulled out
     again. This prevents double exposure, beca-
    use the film is simultaneously transported
    to the next frame.) Now pull the main
    camera body out by its leather cord as far
    as it goes. This single in-and-out movement
    has performed 4 operations.
     A. Wound the shutter.
      B. Transported the film.
     C. Moved the lens into taking position.
      D. Allowed the viewfinder to be used.
  6. To use a filter or a close'up attachment
     lens, simply insert it into the taking window
    of the outer case. In this position  it  will
    not interfere with the movement of the
    camera body in and out of the outer case.
@
View original page 8Page 9 · Read text
www.butkus.us


        7. Keep-counteron shooting until the "O" appears in          the          dial window. This means that
         the last film is in position to be exposed.      -  After exposing the 20th film, push the ca-
        mera body in and out of the outer case 3
           times. At this point an "E' will show up in
           the counter dial window, indicating that the
          magazine may be removed from the qlmera.
        B. Tolemove the exposed magazine,iust fol-
        low steps 2 and 3 under "Loading" then
        remove the magazine and re-close the ca-
        mera as in steP 4.
      The lens of Minolta'16, being only 25 mm in{'        size has a very great depth of field, so that
    I        anvthinc photosriphed, fiom within a few feet          'the          of           &hera fo infinity will be in sharp focus.
         Esoeciallv the sharpness shows its height when
       th6 subj6ct is takeh at 15 feet away from the
r.      camera. For taking close'up pictures, use the         close-up attachment lens No. I for 3.3 feet (plus
       or minus 4 inches) or No. 2 tot 2 feet (plus
       or minus 2 inches) according to your need.
                           @
View original page 9Page 11 · Read text
www.butkus.us


  Wind the filrn around the drunl for  |  1/z
   turns, making sure that the film goes in a
   straight line.
l. Sinrultaneously place the filrn roll into the
   srlaller chamber and the drum into the
   larger chamber of the magazine, slipping
   the film between the two chantbers into the
   slots at the edge of each chamber. Check
   again to see that the film travels across the
   nragazine bridge in a straight line and not on
   a slant. Then close the lids of both chambers.
  After closing the lids apply a piece of
   pressure-sensitive  cellophane tape on around
   the chantbers to fix the lids. This process
  may be done under subdued light (never
   in direct light).
(r. If the magazine is not irnr-uediately loaded
   into the camera, wrap it in light-tight paper'
                        @
View original page 11Page 12 · Read text
'         Accessories Available
 I Filter Kit (UV, Y4B, BlA, and 80A)
2 Close-up Attachment Lens (No. 1 or No.2)
3 Minolta Baby Flash with clamp
4 Projector
5 Enlarger
6 Developirig Tank


                 o
                     ;                {:)Z-.
                                      -lt-\V


    CHIY(lDA K(lGAKU SEIK{l K. K.
                 (lSAKA, JAPAI{
View original page 12Related documents and language editions
From the M. Butkus archive. Original publisher and archive notices are retained.
Check the model and edition against your equipment.
PDF verified 2026-10-10.