Film cameras
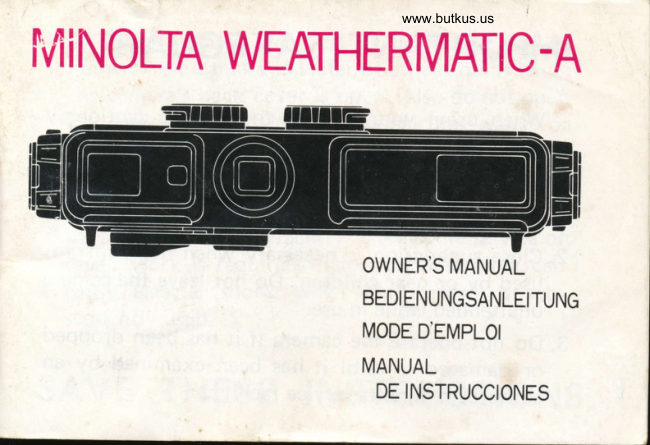
Minolta Weathermatic - A User manual
User manual for Minolta Weathermatic - A. 23 pages in English. Read the original PDF, download or print a copy without registration.
23 pagesEnglish2.4 MB PDF
Loading your manual…Open PDF directly
Document details
- Brand
- Minolta
- Model / document
- Minolta Weathermatic - A
- Document type
- User manual
- Language
- English
- Pages
- 23
- File size
- 2.4 MB
- Category
- Film cameras
- Document date
- Not specified in catalog
Search available document text
Find a term, then jump to its page in the original PDF. Image-only pages may not be searchable; check the PDF for exact wording and diagrams.
Page 2 · Read text
3. Do not operate the camera if it has been dropped or damaged - until it has been examined by an
authorized Minolta service facility.


4. To protect against electrical shock hazards, do not immerse the camera in water or other liquids while the
camera's back cover is open. Also do not open the back cover while in or under the water, or while the
camera is wet.

5. To reduce the risk of electric shock, do not disassemble this camera, but take it to an authorized Minolta
service facility when some service or repair work is required. Incorrect reassembly can cause electric shock
when the camera is subsequently used.


This manual created and owned by www.butkus.org/chinon and should only be located there.

SAVE THESE INSTRUCTIONS


Your new Minolta Weathermatic-A is the ideal do-anything, go-anywhere photographic
traveling companion. It is just as at home in a backpack on top of a mountain or skiing down
one as it is at the beach or around the pool.
    Its rugged watertight construction and 110 format conveniences, such as drop-in cartridge film loading,
   built-in electronic flash, and compact size makes taking quality photos simple and easy in even the
   most adverse conditions.
   Please read this manual carefully all the way through and follow the simple instructions for
   the best results and longest service with your camera. Then keep it for later reference as
   needed.


4 CONTENTS

NAMES OF PARTS                     8   USING YOUR WEATHERMATIC-A

SUMMARY OF OPERATION            12   IN VARIOUS WEATHER
                                   CONDITIONS AND PICTURE
PREPARATION AND BASICS           16   TAKING


Opening and closing the back cover         16  SITUATIONS                     57
                                                            BR>
Installing the battery                     25   On or near the water                57

Checking the battery                     28   At the beach                       58

Loading and advancing film               30    In rain, mist or fog                  59

Viewfinder                            36   In snow and cold weather             59
View original page 2Page 4 · Read text
12 SUMMARY OF OPERATION

1. Make sure camera is completely clean and
dry.
2. Lift back-cover release tabs, twist backcover
release knobs and open back cover (p. 181.


3. After installing and checking battery (p. 25),   4. Operate film advance lever repeatedly until
insert film cartridge (p. 30), and press back         first exposure locks in place and the lever will
cover securely into place and lock it (P. 22).      not move (p. 32).
View original page 4
Page 5 · Read text
5. Check and/or clean lens cover glass and set       6. Look through eyepiece and compose
focus for your subject (p. 38).                       subject in viewfinder (p. 36). Depress shutter
                                                     release slightly; if red lamp in finder lights at
                                          * sun symbol, turn control to (cloud image)
                                               cloud symbol. If it lights at cloud symbol,
                                                    turn to r' flash symbol and take picture
                                                 within flash range when lamp begins to
                                                    pulsate (p. 50). Always squeeze shutter
                                                     release smoothly.


PREPARATION AND BASICS

Opening and closing the back cover IMPORTANT INSTRUCTIONS FOR PROPER USE
OF THIS CAMERA
The back cover of your Weathermatic-A is equipped with an O-ring that forms a
watertight seal when the cover is properly fitted to the camera body. This enables the
camera to be used under conditions (such as rain, snow, and in or underwater) where use
of conventional cameras is either not recommended or impossible.
View original page 5Page 6 · Read text
IT IS OF UTMOST IMPORTANCE TO ALWAYS BE SURE YOUR
WEATHERMATIC-A IS COMPLETELY CLEAN AND DRY BEFORE OPENING
THE BACK COVER. ALSO THAT THE BACK COVER'S O-RING IS CLEAN
AND IN GOOD CONDITION BEFORE THE BACK COVER IS CLOSED BY
DOING THIS YOU WILL OBTAIN THE FULL SERVICE LIFE INTENDED FOR
THIS SEAL.


Opening the back cover

1. Hold the camera with the back
cover facing you and lift the back-
cover release tabs on both back-
cover release knobs. Then turn
both back-cover release knobs
counterclockwise in the direction
of the arrows until the back cover
opens.


2. Lift the back cover away from the camera body. You can let the back cover hang from
the back-cover connector strap or remove it completely for cleaning by disengaging the
strap from the pin on the back cover.


Be sure never to crease or twist the connector strap. ONCE THE BACK COVER IS OPEN
                                 THE CAMERA IS NO LONGER
                                 WATERTIGHT AND MAY BE
                              DAMAGED IF WATER OR SAND
                                  ENTERS THE CAMERA.


Closing the back cover

1. Make sure that the inside lip of the camera body and back cover's O-ring are clean and
wiped by a soft clean cloth and that the back-cover release knobs are at "OPEN". Then align
the back cover with the camera body.
View original page 6Page 7 · Read text
2. Press both ends of the back cover with
                                           your thumbs as shown. Then, with the palm
                                               of your hand, press down on the center of
                                                the cover to assure a proper seal.


                                      3. Turn the back-cover release knobs in the direction of
                                    the arrows all the way to "CLOSE" and push the back-
                                 cover release tab's locking pins into the holes in the
                                 knobs.


Installing the battery

Be sure the back cover is attached to the connector strap before closing.
Your camera's built-in flash and exposure warning system are powered by one 1.5v AA-(penlight)
size alkaline-manganese (Eveready E91 or equivalent), sealed carbonzinc or nickel-cadmium
battery.


To install this:
 1. With the back cover open, lift the battery-
chamber cover as shown.
View original page 7Page 8 · Read text
The battery can be installed or replaced at any
                                          time without damage to loaded film.


2. Insert a battery as specified with the plus
end out as indicated inside the chamber, then
close and latch the cover.


28 Checking the battery                    The battery should be checked immediately
                                                     after installing and from time to time thereafter,
                                                 especially before starting on trips or taking
                                                 especially important pictures. To do this, turn
                                       on the built-in flash by moving the
                                              exposure/function control knob to the flash
                                           symbol. If the finder/monitor lamp lights and
                                             begins to pulsate in approximately 10 seconds,
                                                the battery is serviceable. If these signals do not
                                                     light within 30 seconds make sure a fresh
                                                 battery is properly inserted or replace an
                                            exhausted battery as soon as it is convenient.
                                   To save battery power, be sure to turn the
                                             exposure/ function control knob to either the
                                          sun or cloud symbol after checking the battery.


Loading and advancing film

• For taking pictures without battery,         1. With the back cover open, lift the tab near the
see the note on page 48.                      finder eyepiece as shown to open the film-chamber
                                            cover.
View original page 8Page 9 · Read text
2. Insert the film cartridge into the camera. 3. Close the film-chamber cover and push in on it
until it clicks shut.
4. Close and latch the camera's water-tight 5. Use your right thumb to operate the film
back cover as described on page 22. advance lever repeatedly until it locks (about
three full strokes). A series of 1's should be
visible in the film data window to indicate the
first exposure.
• The shutter release cannot be depressed unless the film advance has been operated until
it locks.
Film speed settings are automatically adjusted when a film cartridge is loaded. However use of
high speed films under extremely bright conditions such as beach or snow scenes is not
recommended.
Load and unload film in subdued light, never in direct sunlight.
When used in cold weather or if the camera is not used for a long period of time, the winding
lever may not return all the way when the film is advanced. If this happens, push the lever back to
its rest position with your thumb.
If the film advance lever should stop before winding is complete and there is still unexposed film
in the cartridge, push the lever with your thumb until it moves all the way to its advance stop. This
will free the mechanism and return to operation.
If a series of diagonal lines or the film's black paper backing appears in the film data window
while advancing the film, do not wind any farther as the film cartridge will be difficult to remove.
4www.butkus.orgView original page 9Page 10 · Read text
36 Viewfinder
                                  Looking into the eyepiece of your Weathermatic-A you
                                           will see a bright frame with focus-symbol settings
                                   above it. What you see inside this frame is the
                                     approximate subject area at the three farther focus-knob
                                             settings. Pictures at the two closer settings should be
                                   framed within the two short parallax-correction marks
                                      near the righthand corners of the frame.

                                The red lamp at the right side of the finder lights for
                                         low-light warning (see p.48), and pulsates to indicate
                                        recycling when the camera is used in flash operation (p.
                                          50).


38 Focusing

A large focusing knob with focus symbols simplifies setting focus with your Weathermatic-A.
For sharpest pictures, simply turn this knob so that the index is opposite the symbol for your
subject.
A focus-symbol table is located on the bottom of the camera for easy reference.


                                        Set the knob so that the index is opposite the
                                    mountain symbol for scenic pictures at distances of
                                      about 5.3m (17-1/2 ft.) or more from the camera at
                                         the cloud symbol; 3.5m (11 ft.) or more at the sun
                                     symbol.
View original page 10Page 11 · Read text
The symbol within the yellow dot marks the setting at
which most "people-picture" snapshots are taken (about
3.5m or 11 ft.) and has a click stop to keep it in
position.


At this distance, the part of a standing adult from about
head to ankles can be seen in the finder bright frame
with the camera held horizontally. Subjects from about
3 to 5m (10 to 16 ft.) will be acceptably sharp at the
cloud symbol; from about 2 to 11 m (7 to 36 ft.) at the
sun symbol.


 For head-to-hips pictures of people (at 2m or 7 ft.), set
 the knob so the index is opposite the dot.

The symbol focuses the lens for 1.2m (4 ft.), at which
you can see from the top of the head to about mid-chest
 in the finder.
View original page 11
Page 12 · Read text
At the symbol that looks a "*" open at the
                                                        top, the camera is focused for close head-
                                                   toshoulder portraits at 90cm (3 ft.).


Depth-of-field

Depth-of-field table on the right indicates the exact
focusing range at each focus-symbol setting.
View original page 12Page 13 · Read text
TAKING PICTURES (WITH EXISTING LIGHT)

 1. Make sure the lens-cover glass clean and dry and film is fully advanced.


2. Set focus for the proper camera-to-subject distance.

3. Hold the camera horizontally or vertically in a comfortable way so that it is steadied against
your face and will not move when you take a picture. Both hands and the camera strap should
be kept behind the front edge of the camera.


4. Compose your picture within the bright frame.

5. When not taking flash pictures, start with the exposure/function control knob set at the -* sun
symbol.

6. Depress the shutter release slightly. If the red lamp at the right in the finder does not come on,
hold the camera steady and continue to squeeze the release all the way down to make the
exposure. If the red lamp at the right in the finder comes on, move the exposure/ function
control knob to the cloud symbol. If the lamp still comes on when the shutter release is
depressed slightly, existing light is too low for proper exposure, and you should turn the control
knob counter-clockwise to the (* * ) flash symbol and proceed as explained on page 48.


                     NOTE

                                               It is important to always be sure the camera's lens-cover
                                  glass is clean and dry be fore taking pictures. Water droplets
                            on it will cause picture blur and spots caused by water drying
                            on the glass will reduce picture contrast.

                              For information about taking pictures in or near the water, see
                                     p. 57.
View original page 13Page 14 · Read text
If the battery is unserviceable or completely lacking, the red lamp in the finder will not come on and the built-in flash will not charge. In this case, however you can take pictures by setting the exposure/function control knob to the sun symbol for subjects in bright sun, or to the cloud symbol for cloudy-bright conditions. Flash PICTURES 1. Turn the exposure/function control knob to the flash symbol. The built-in electronic flash will start charging if a serviceable battery is installed. 2. At the flash symbol, the red lamp at the right in the finder will come on when the shutter release is depressed slightly. When this and/or the flash monitor lamp on the back of the camera starts to pulsate, the camera is ready for flash pictures. 3. Making sure that your subject is within the flash range indicated on the bottom of the camera for the film type in use, set the focus knob for the distance from camera to subject. 4. Compose your picture in the viewfinder. 5. Hold the camera steady and squeeze the shutter release all the way down.View original page 14
Page 15 · Read text
Flash range Type of film Distance (above water) Color negative 0.8 - 4.Om (2.6 - 13 ft.) ASA 100 ASA 400 0.8 - 6.3m (2.6 - 20 ft.) Color reversal 0.8 - 2.7m (2.6 - 9 ft.) ASA 64 Black and white 0.8 - 5.3m (2.6 - 17 ft.) ASA 125 NOTE: Turn the exposure/function control knob to either the sun or cloud symbol to save battery power when not using the flash. If a flash exposure is made when the finder/monitor lamp is not pulsating it will probably be underexposed. UNLOADING THE FILM IMPORTANT! ALWAYS BE SURE THE CAMERA IS COMPLETELY CLEAN AND WIPED DRY BEFORE OPENING THE BACK COVER. After taking the last picture on a cartridge, operate the film advance lever repeatedly until a series of diagonal lines or the film's black paper backing appears in the film data window (about two full strokes). Do not wind any farther as film will be difficult to remove. Then remove the back cover as indicated on p. 16, open the film chamber cover and remove the cartridge.View original page 15
Page 16 · Read text
USING YOUR WEATHERMATIC-A IN VARIOUS WEATHER CONDITIONS AND PICTURE
TAKING SITUATIONS or near the water

 NEVER OPEN THE BACK COVER IN
                                     Always be sure the camera's lens-cover glass is PLACES WHERE WATER DROPLETS
                                             clean and dry before taking pictures. Water MAY FALL OR BE SPLASHED INTO
                                               droplets left on the glass will cause picture blur         THE CAMERA.
                                       and spots caused by water drying on its surface
                                 may reduce picture contrast. If this is not
                                                 practicable, as when taking pictures near or on the
                                              surface of the ocean, lake or swimming pool, dip
                                              the camera into the water for an instant before
                                             taking the picture.

                                          This spreads the water evenly over the entire
                                              surface of the lens cover glass and provides an
                                                 effective way to obtain good results.

                                     Always make sure the camera is clean and wiped
                                           dry before opening the back cover and that your
                                            hands, face, hair, etc. are dry before loading and
                                           unloading film.


                            NEVER OPEN THE CAMERA'S BACK
                           COVER TO CHANGE FILM, ETC, WHILE
After using the camera in or near       ON THE BEACH OR OTHER PLACES
chlorinated or salt water, rinse the outside   WHERE THERE IS BLOWING SAND,
of the camera (WITH THE BACK COVER  DUST, ETC.
ATTACHED AND SEALED) with fresh
                                         Before opening the back cover to change therunning water to remove any salts or
                                             film or battery, carefully inspect the outside ofresidue.
                                              the camera for sand that may have lodged in or
                                        around controls or near the cover's O-ring. IfThen wipe it dry with a clean soft cloth.
                                       any sand or dirt is found, rinse the camera inNEVER USE HEAT TO DRY THE
                                              fresh running water to remove it and thenCAMERA.
                                               carefully wipe the camera dry with a clean, soft
                                                 cloth. If sand or dirt should happen to fall into
At the beach                                the camera while opening the back cover, be
 Never put your camera on a hot surface      sure to whisk or blow it out of the camera
such as sand, or keep it in a closed, dark-     before opening the film or battery chamber
colored container or elsewhere in which it    covers.
may be subject to relatively high
temperatures..                            Before closing the back cover carefully inspect
                                            and, if necessary, clean the O-ring. See page 78.
View original page 16Page 17 · Read text
In rain, mist or fog                      In snow and cold weather


When using your Weathermatic-A where     Batteries by nature tend to decrease in capacity
moisture in the form or rain, mist or fog is    as the temperature goes down. Though
present, make sure the lens-cover glass is    considerably better than sealed carbon-zinc in
clean and dry as water droplets on it will      this respect, Ni-Cd Batteries and alkaline
cause image blur and spots caused by water  batteries are no exception.
drying its surface may reduce picture
                                                       If an old battery is used at temperatures belowcontrast. Most pictures should be made at
                                       0°C (32°F), the flash may not work and thethe sun or cloud symbol positions. If the
                                       warning light may not come on. Thus it isred lamp comes on at both of these
                                    recommended that the battery be fresh if thesymbols, existing light is too low for proper
                                      camera is to be used in cold weather. (Forexposure and flash exposure may be taken
                                            taking pictures without a battery, see the noteby turning the exposure/function control
                                    on p. 48).knob to the flash symbol. However, if the
amount of water droplets in the air between                                    Though the mechanical operation should be
the camera and subject is great, it is best                                                satisfactory down to considerably lower
not to use the flash as the droplets may                                            temperatures, it is best to keep the camera in a
reflect the light causing bright, out-of-focus                                warm inside pocket when not taking pictures
spots and uneven exposure.                                      and try to minimize the amount of time it is
                                             subject to cold temperatures. This also applies
                                                to carrying extra cartridges of film.


                TAKING PICTURES UNDERWATER

THE WEATHERMATIC-A'S WATERTIGHT SEAL IS DESIGNED TO BE USED AT DEPTHS NO
GREATER THAN 5M (15 FT.).

When entering a warm building from the cold,    Focusing
allow your Weathermatic-A to warm up to room
temperature and wipe it completely dry before
opening the back cover to change the film or      The refractive index of water is greater than that of
battery.                                                       air. Thus, underwater subjects will appear to be closer
                                            and larger than they actually are. This also has the
Also, be sure the camera is wiped completely dry   effect of increasing the focal length of the lens in
before going into cold outdoors as water droplets   your Weathermatic-A and narrowing its field of view.
could freeze under camera controls and possibly
damage the camera.                            For all practical purposes, however, as the camera's
                                                    lens and your eyes are affected equally by refraction,
                                                 they will "see" alike and underwater focusing is the
                                         same as on land. If it is easier to preset the lens focus
View original page 17Page 18 · Read text
out of the water, set the focus knob to a point that
represents a distance which is approximately 25%
closer than the focus-symbol setting for "on-land"
shooting.
For example, for underwater photography set focus at
the " 0 " symbol (0.9m or 3 ft.) instead of the mid-
chest figure for an on land distance of 1.2m (4 ft.)
range for underwater subjects is 2m (7 ft.).
Tips for taking pictures underwater
Do not jump or dive into the water or swim while holding the camera or throw the camera into
the water as impact with the water could damage the camera or break its water-tight seal and cause
leakage.
Avoid taking flash pictures in cloudy waters as large particles suspended in the water will be
photographed as bright spots, so-called "backscatter" and fine silt will reduce contrast.
As visibility in water is limited by the amount of light penetrating its surface, the clarity of the
water and the camera to-subject distance, it is best to take underwater pictures as close to the
surface and your subject as possible. This also improves the color and contrast of your subjects.
After using your Weathermatic-A underwater, especially that which contains chlorine or salt,
rinse the camera in fresh water for a minute or two to wash off any salt, chemicals or debris that
might be on the camera. Then wipe the camera completely dry with a soft clean cloth before
opening the back cover.
For more life-like underwater pictures, set focus to " 0" symbol 0.9m (3 ft.) and use the flash.
ASA 100 film is recommended for all underwater photography. The maximum effective flash
At depths greater than 5m (15 ft.), water pressure will push the shutter release in making the
camera inoperable. Flooding may also result.
ACCESSORIES
Sportsfinder (optional)View original page 18Page 19 · Read text
The Sportsfinder allows you, in those situations where it is not possible or practical
to use your camera's viewfinder, to compose your subject or scene correctly.

It is ideally suited for the underwater use of your Minolta Weathermatic-A.
To properly frame your subject in the Sportsfinder, your eye should be positioned
approx. 80mm (3 in.) behind the center of the sportsfinder's grid.

If the eye is correctly positioned, the hole in the center of the grid should appear
perfectly round and you should not be able to see the slopping sides of the
sportsfinder. The grid lines and frame should all appear as thin black lines.

Underwater, the area of the scene covered by the sportsfinder will correspond to that
covered by the camera viewfinder.

The sportsfinder will give approx. 85% coverage of the scene.
Use of the Sportsfinder above water is the same as underwater, but the coverage of
the finder will be only 64% of what will actually appear on the film.


                                                              Installing the 0-ring Making sureMAINTENANCE OF O-RING
                                                                         to carefully align the corners of the 0-
Your Weathermatic-A's ability to resist the elements and stay         ring with those of the back cover's
watertight depends on the condition of the back cover's 0-ring.       black 0-ring retainer, fit one of the
With proper care, it should be serviceable for approximately one      short sides of the 0-ring over the black
year. Be sure to inspect the 0-ring for cuts, tears, abrasion and fit      retainer and into the groove on one
each time the back cover is opened. If there is any sand or dirt on    end of the back cover. Then carefully
the inside of the back cover or 0-ring, remove the 0-ring as           lay the 0-ring in the space between the
described below and wash both thoroughly in fresh running water.    clear outer cover and the black
                                                                             retainer. With your thumbs on the
Then blot off excess moisture and allow them to air dry in subdued   exposed corners of the 0-ring, roll the
light, never in direct sunlight. If the 0-ring is worn or stretched so     0-ring over the black retainer and into
that the back cover will not seat properly, the 0-ring should be        the groove.
replaced.

Removing the 0-ring

Insert the tip of a ball point pen or similar blunt object into the
notched end of the black retainer and carefully lift the 0-ring out of
the groove.
Then being careful not to stretch the 0-ring, remove it from the
back cover.
View original page 19Page 20 · Read text
82 TECHNICAL DETAILS
Type: All-weather, watertight pocket camera using No. 110 film cartridges, with built-in
electronic flash

Lens: Minolta 26mm f/3.5, 4 coated glass elements in 3 groups; Angle of view: 45° (34° under
water)

Focusing: 90cm (3 ft.) to infinity by continuous control knob with 5 distance symbols, 1 with
click stop

Shutter: Metal-blade, before-the-lens mechanical type, fixed 1/200 sec. speed

Exposure control: By 3-position control with click-stop sun, cloud, and flash symbols for
successive use when finder lamp lights

Viewfinder: Oversize type with red lamp that comes on when shutter release is depressed
slightly as low-light/use-flash warning and also pulsates when flash has recycled; bright frame
with parallax-correction marks, focus setting visible above frame

Power source: One 1.5v AA-size (penlight) alkaline-manganese (Eveready E91 or equivalent),
or nickel-cadmium cell for light sensor, finder lamp, and flash operation

Flash: At flash-symbol setting of exposure/function control knob, built-in flash turns on and
aperture is automatically adjusted by focusing for correct exposure
View original page 20
Page 21 · Read text
Flash range: Type of film >Distance (above water) Color negative 0.8 - 4.Om (2.6 - 13 ft.) ASA 100 ASA 400 0.8 - 6.3m (2.6 - 20 ft.) Color reversal 0.8 - 2.7m (2.6 - 9 ft.) ASA 64 Black and white 0.8 - 5.3m (2.6 - 17 ft.) ASA 125 Recycle time*: Approx. 10 sec. with fresh alkaline-manganese cell, approx. 6 sec. with rechargeable nickel-cadmium cell; indication by pulsation of monitor and finder lamp Number of flashes*: Approx. 180 with fresh alkaline-manganese cell, approx. 90 with nickel-cadmium cell * As determined by Minolta's standard testing method. Actual performance will depend on type, brand, manufacturer's lot, age of batteries, and ambient temperature. Film advance: Thumb-actuated lever; 52° Sealing: By water-tight O-ring (maximum usable depth 5m) Dimensions: 53 x 72 x 190mm (2-1/16 x 2-13/16 x 7-1/2 in.) Weight: 345g (12-3/16 oz.) without cell Other: High-visibility and buoyant ABS plastic housing; neon monitor lamp for flash, focus- symbol and flash-range tables on bottom Optional accessories: Sportsfinder, neckstrap, carrying case and sportscase with belt Specifications subject to change without notice TROUBLE-SHOOTING GUIDE Things to check if your camera does not operate properly 1. Film-advance lever won't operate Are both back-cover release knobs in "OPEN" position? Has the film already been advanced? Have all the pictures on the cartridge been taken? Is the back cover's O-ring attached correctly?View original page 21
Page 22 · Read text
2. Shutter can not be released. Is the back cover positioned correctly? Has the film-advance lever been completely cocked? Has the back-cover connector strap gotten between the cover and the body? 3. Low-light warning lamp does not light Is battery installed correctly? Is the battery dead? 4. Back-cover release tabs cannot be worked 5. Monitor lamp does not pulsate Is battery installed correctly? Are the back-cover release knobs in the "CLOSE" position? Is battery dead? • Has Exposure/Function control been set at flash position? 5. Flash does not fire Is the back cover position properly? Have the pins on the release tabs beer bent? Was shutter released before monitor lamp came on? 8. Exposure/function and/or focus knobs are difficult to move Is the battery dead? 6. Back cover cannot be closed Water between the knobs and the body has become frozen • Dirt or sand has gotten between the knobs and body Camera-to-subject distance too far? [0.9 - 1.5m (3 - 5 ft.) is recommended.] Temperature is very low 9. Exposure and/or focus is not satisfactory Was water clear? Is lens-cover glass soiled? If flash was used, was the light Was there water drops or condensation on the lens-cover glass? scattered by particles in the water? Was focus setting compensated for?View original page 22
Related documents and language editions

From the M. Butkus archive. Original publisher and archive notices are retained.
Check the model and edition against your equipment.
PDF verified 2026-10-10.