Film cameras
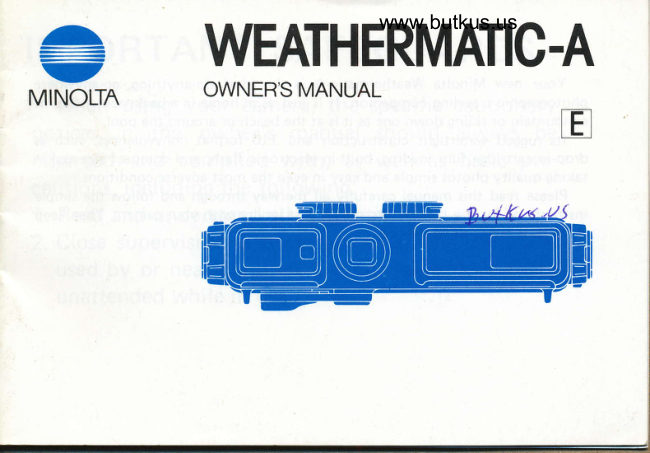
Minolta Weathermatic-A User manual
User manual for Minolta Weathermatic-A. 40 pages in English. Read the original PDF, download or print a copy without registration.
40 pagesEnglish6.2 MB PDF
Loading your manual…Open PDF directly
Document details
- Brand
- Minolta
- Model / document
- Minolta Weathermatic-A
- Document type
- User manual
- Language
- English
- Pages
- 40
- File size
- 6.2 MB
- Category
- Film cameras
- Document date
- Not specified in catalog
Search available document text
Find a term, then jump to its page in the original PDF. Image-only pages may not be searchable; check the PDF for exact wording and diagrams.
Page 3 · Read text
Your new Minolta Weathermatic-A  is the ideal do-anything, go-anywhere
photographic traveling companion.  lt is just as at home in a backpack on top of
a mountain or skiing down one as it is at the beach or around the pool.
    Its rugged watertight construction and 110 format conveniences, such as
drop-in cartridge film loading, built-in electronic flash, and compact size makes
taking quality photos simple and easy in even the most adverse conditions.
   Please read this manual carefully all the way through and follow the simple
instructions for the best results and longest service with your camera. Then keep
it for later reference as needed.
View original page 3Page 4 · Read text
www.butkus.us
IMPORTANT SAFEGUARDS
  When using you r cam era, the specif ic cautionary
notices in the owner's manual shou ld always be
observed and complied with, as well as basic pre-
cautions, including the following:
 1 . Read and understand all instructions.
 2. Close supervision is necessary when the camera is
   used by or near children. Do not leave the camera
   unattended while in use.
View original page 4
Page 5 · Read text
3. Do not operate the camera if it has been dropped

                                                                                                                                                                                                                                                                                                                                                                            '                                   h as been exam   i ned by an                       u nti I it  or dam aged
  authorized Minolta service facility.
4. To protect against electrical shock hazards, do not
  immerse the camera in water or other liquids while
  the camera's back cover is open. Also do not open
  the back cover while in or under the water, or
  while the camera is wet.
View original page 5Page 6 · Read text
www.butkus.us

5. To reduce the risk of electric  shock, do not
  disassemble this cam era, but take  it to an author-
  ized M inolta service facility when som e service or
   repair work is required. Incorrect  reassem bly can
  cause electric shock when the camera is sub-
  sequently used.
SAVE THESE INSTRUCTIONS
View original page 6
Page 8 · Read text
www.butkus.us
CONTENTS

NAMESOFPARTS                 ......6        On or n€ar th6 wator                        . . , 26   5
SUMMARY OF OPERATION            . ..  8      Atthebeach                      ....27
PREPARATION AND BASICS  . . ..  .,  1O       fnrain,mistorfog   ,.              ...24
  Opening and closing                                ln snow and cold weather             . . . . 29
   thebackcover                      ...,.'    10    TAKING PICTURES UNDERWATER  30
  Installingthebattery              ...13       Focusing                                            . . 30
  Checking the battery                    ...  14       Tips for taking pictures underwater  . . 31
  Loading and advancing film              , .,  15   ACCESSORTES                  ...31
  Viewfinder                      ......18          Sportsfinder....                        ...,   31
  Focusing                                     ..  19    MAINTENANCE OF O-RING           ..  32
TAKING PICTURES (WITH EXISTING       TECHNICAL DETAILS ..           ....,   33
   Lf GHT)                                ....   ..  22    TROUBLE-SHOOTING GUIDE .......35
FLASHPICTURES               ...,24     CARE AND STORAGE.                    , . .37
UNLOADING THE FILM            ..,..   25
USING YOU R WEATHERMATIC-A
  IN VARIOUS WEATHER CON-
   DITIONS AND PICTU RE TAKING
    SITUATIONS                   .....   26
View original page 8Page 11 · Read text
SUMMARY OF OPERATION

   The steps pictured on this page outline use of your Weathermatic-A  in normal "on-land"
 conditions. They give a general idea of how very easy it is to get properly exposed pictures
 with this camera and are keyed to corresponding sections of this manual for ready reference,


1, Make sure camera is completely clean
   and drv.                                 3. After installing and checking battery
2. Lift back-cover release tabs, twist back-          (p. 13), insert film cartridge (p. 15), and
   cover release knobs and ooen back cover         press back cover securely in to place and
                                                                     12).
    (p.10).  t-                             lock it (p.r
fr[w$M
View original page 11Page 12 · Read text
www.butkus.us


 This brief guide may also be useful as a quick refresher for good results afteryou have not
 used your camera for some time. lt is not, however, a substitute for the detailed instructions
  in the rest of this manual, which should be thoroughly studied for best results.
                                        6, Look through eyepiece and compose sub-
                                                     ject in viewfinder (p. 18). Depress shut-
                                                      ter release slightly; if red lamp in finder
                                                            lights at it  sun symbol. turn control to 4.  Operate film advance lever repegtedly      6  cloud symbol. lf  it lights at cloud
    until first exposure locks in place and       symbol, turn to El flash symbol and
    the lever will not move (p. 16).              take picture within flash range when
   Check and/or clean lens cover glass and      lamp begins to pulsate (p. 24). Always
     set focus for your subject (p. 19).               squeeze shutter release smoothly.
      nt2       G                             --r     \  _t     G{  %
View original page 12Page 13 · Read text
PREPARATION AND BASICS

10  Opening and closing the back cover
  IMPORTANT INSTRUCTIONS FOR
   PROPER USE OF THIS CAMERA
     The back cover of your Weathermatic-A
    is equipped with an O-ring that forms a
    watertight seal when the cover is properly
    fitted to the camera body. This enables the
   camera to be used under conditions (such as
    rain, snow, and in or underwater) where use     Opening the back cover:
    of conventional cameras  is either not recom-     1. Hold the camera with the back cover
   mended or impossible.                             facing you and lift the back-cover re-      IT IS OF UTMOST IMPORTANCE TO        lease tabs on both back-cover release  ALWAYS BE SURE YOUR WEATHER-   MATIC-A IS COMPLETELY CLEAN AND            {Dtsut*  DRY BEFORE OPENING THE BACK
  COVER, ALSO THAT THE BACK
  COVER'S O-RING IS CLEAN AND IN
  GOOD CONDITION BEFORE THE BACK
  COVER IS CLOSED. BY DOING THIS
  YOU WILL OBTAIN THE FULL SERVICE
   LIFE INTENDED FOR THIS SEAL.
View original page 13Page 14 · Read text
www.butkus.us


   knobs. Then turn the back-cover  release    NOTE
   knobs counterclockwise in the direction       Be sure never to crease or twist the con-
   of the arrows until the back cover opens.      nector strao.
2. Lift the back cover awav from the
   camera body. You can let the back cover     ONCE THE BACK COVER IS OPEN
  hang from the back-cover connector    THE CAMERA IS NO LONGER
   strap or remove  it completely for clean-     WATERTIGHT AND MAY BE DAM.
   ing by disengaging the strap from the pin     AGED IF WATER OR SAND ENTERS
   on the back cover.                     THE CAMERA.
View original page 14
Page 15 · Read text
Closing the back cover
1. Make sure that the inside lio of the
   camera body and back cover's O-ring
   are clean and wiped by a soft clean cloth    3. Turn the back-cover release knobs in the   and that the back-cover release knobs are                                                    direction of the arrows all the way to   at "OPEN". Then align the back cover      "CLOSE" and push the back-cover  re-
   with the camera body.                             lease tab's locking pins into the holes in2. Press both ends of the back cover with        the knobs.   your thumbs as shown. Then. with the
   palm of your hand, press down on the    NOTE
   center of the cover to assure a proper       Be sure the back cover is attached to the
    seal.                                      connector strap before closing.
            tofl    r*i'
                                                       :tt    pL'ikt't,lJ ;               ,
View original page 15Page 16 · Read text
www.butkus.us


Installing the battery
   Your camera's built-in flash and expo-
sure warning system are powered by one
1.5v AA-(penlight) size alkaline-manganese     2, Insert a battery as specified with the plus
(Eveready E91 or equivalent), sealed carbon-      end out as indicated inside the chamber,
zinc or nickel-cadmium  batterv.                    then close and latch the cover.
To install this:                        NOTE
1. With the back cover open.  lif t  the      The battery can be installed or replaced
   batterv-chamber cover as shown.              at any time without damage to loaded film.
                                 CF.tl              !3r
View original page 16Page 17 · Read text
14  Checking the battery
      The batterv should be checked immedi-     sure a fresh battery is properly inserted or
    ately after installing and from time to time     replace an exhausted battery as soon as it is
     thereafter, especially before starting on trips     convenient. To save battery power, be sure
    or taking especially important pictures. To    to turn the exposureffunction control knob
   do this, turn on the built-in flash by moving    to either the sun or cloud symbol after
    the exposure/function control knob to the     checking the battery.
     (flash) symbol. lf the finder/monitor lamp
     lights and begins to pulsate in approximately
       1 0 seconds, the battery is serviceable.  lf these   o For taking pictures without battery, see
     signals do not light within 30 seconds make        the note on page 23.
View original page 17Page 18 · Read text
www.butkus.us


Loading and advancing film
1. With the back cover open, lift the tab     2.  lnsert the film cartridge into the camera
   near the finder eyepiece as shown to     3.  Close the film-chamber cover and push
   ooen the film-chamber cover.                         in on it until  it clicks shut.
View original page 18
Page 19 · Read text
5. Use your right thumb to operate the film
                                           advance lever repeatedlv until it locks
                                                  (about three full strokes). A series of 1's
    Close and latch the camera's water-tighl        should be visible in the  f ilm data window
   back cover as described on page 1 2.              to indicate the first exposure.
         K -::-:-   X


,
View original page 19Page 20 · Read text
www.butkus.us
              \\
                               When used in cold weather or if the
The shutter release cannot be depressed      camera is not used for a long period of
unless the film advance has been opera-       time, the winding lever may not return
ted until it locks.                                       all the way when the film is advanced. lf
Film speed settings are automatically        this happens, push the lever back to its
adjusted when a film cartridge is loaded.         rest position with your thumb.
However use of high speed films under           lf the film advance lever should stop
extremely bright conditions such as       before winding is complete and there is
beach or snow scenes is not  re-         still unexposed film in the cartridge,
commended.                                push the lever with your thumb until it
Load and unload film in subdued light,      moves all the way to its advance stop.
never in direct sunlight.                        This will free the mechanism and return
                                                to operation.
                                                                  lf a series of diagonal lines or the film's
                                              black paper backing appears in the film-
                                          data window while advancing the film,
                               do not wind any farther as the film
                                                     cartridge will be difficult to remove.
View original page 20Page 21 · Read text
t8 Vieurfinder                               Looking into the eyepiece of your                                                 Weathermatic-A you will see a bright frame
                                             with focus-symbol settings above it. What
                                         you see inside this frame is the approximate         o                          subject area at the three farther focus-knob
                                                         settings. Pictures at the two closer settings            IA6                                           should be  f ramed within the two short
                                                      parallax-correction marks near the right-
                                             hand corners of the frame.
                                         The red lamp at the right side of the
                                             finder lights for  low-light warning (see
                                              p.23), and pulsates to irldicate recycling
                                       when the camera is used in flash ooeration
                                             9.24t.

                                                 FocusingA  large focusing knob with focus
                                             symbols simplifies setting focus with your
                                               Weathermatic-A. For sharpest pictures, sim-
                                            ply turn this knob so that the index  is
                                                     opposite the symbol for your sublect.
                             A focus-symbol table is located on the
                                              bottom of the camera for easv reference,
View original page 21Page 22 · Read text
www.butkus.us


I
I          h'r'il:


     Set the knob so that the index is opposite     The symbol within the yellow dot marks the
     the mountain symbol for scenic pictures at     setting at which most "people-picture"
      distances of about 5.3m ( 1l-112 ft.) or more     snapshots are taken (about 3.5m or 11 ft.)I    from the camera at the cloud symbol;3.5m    and has a click stop to keep it in position.
      (11 ft.) or more at the sun symbol.             At this distance, the part of a standing adult
                                           from about head to ankles can be seen in
                                                        the  f inder bright  f rame with the camera held
                                                        horizontally. Subiects from about 3 to 5m
                                                   (10 to 16 ft.) will be acceptably sharp at the
                                                cloud symbol; from about 2 to 11m (7 to
                                            36 ft.) at the sun symbol.
View original page 22Page 25 · Read text
TAKING PICTURES (WITH EXISTING LIGHT)

                                     glass clean and22  1. Make sure the lens-cover       dry and  f ilm is fully advanced.
      2. Set focus for the proper camera-to-
        subject distance.
     3. Hold the camera horizontally or verti-
         cally in a comfortable way so that it  is      4. Compose your picture within the bright
        steadied against your face and will not                      f rame.
      move when you take a picture. Both       5. When not taking flash pictures, start
       hands and the camera strap should be        with the exposure/function control knob
        kept behind the front edge of the camera          set at the -.o; sun sYmbol.
View original page 25Page 26 · Read text
www.butkus.us


6.  Depress the shutter release slightly. lf   NOTE                                  23   the red lamp at the right in the finder   o lt is important to always be sure the
   does not come on, hold the camera        camera's lens-cover glass is clean and dry
   steady and continue to squeeze the        before taking pictures. Water droplets on
   release all the way down to make the            it  will cause picture blur and spots
   exposure.  lf the red lamp at the right in       caused by water drying on the glass will
   the  f inder comes on, move the exposure/        reduce picture contrast. For information
   function control knob to the o  cloud       about taking pictures in or near the
   symbol. lf the lamp still comes on when         water, see p. 26.
   the shutter release is depressed slightly,    o  lf  the battery is  unserviceable  or   existing light is too low for proper        completely lacking, the red lamp in the
   exposure, and you should turn the con-        finder will not come on and the built-in
   trol knob counter-clockwise to the A          flash will not charge. In this case, how-
   flash symbol and proceed as explained        ever you can take pictures by setting the
   on the next page.                               exposure/function  control knob to the
                                              sun symbol for subjects in bright sun, or
                                          to the cloud symbol for cloudy-bright
                                                     conditions.
View original page 26Related documents and language editions
From the M. Butkus archive. Original publisher and archive notices are retained.
Check the model and edition against your equipment.
PDF verified 2026-10-10.