Film cameras
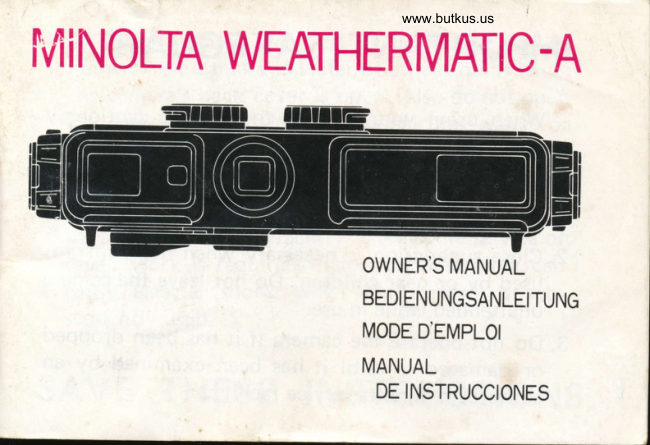
Minolta Weathermatic A Color User manual
User manual for Minolta Weathermatic A Color. 105 pages in German, French, Spanish, English. Read the original PDF, download or print a copy without registration.
105 pagesGerman, French, Spanish, English7.0 MB PDF
Loading your manual…Open PDF directly
Document details
- Brand
- Minolta
- Model / document
- Minolta Weathermatic A Color
- Document type
- User manual
- Language
- German, French, Spanish, English
- Pages
- 105
- File size
- 7.0 MB
- Category
- Film cameras
- Document date
- Not specified in catalog
Search available document text
Find a term, then jump to its page in the original PDF. Image-only pages may not be searchable; check the PDF for exact wording and diagrams.
Page 2 · Read text
IMPORTANT SAFEGUARDS

       When using your camera, the specific cautionary
       notices in the owner's manual should always be
      observed and complied with, as well as basic pre-
        cautions, includ ing the following:
        1. Read and understand all instructions. (
        2. Close supervision is necessary when the camera is
         used by or near children. Do not leave the camera
             u nattended while in use.
       3. Do not operate the camera if it has been dropped
        or damaged    until it has been examined by an                     -         authorized Minolta service facility.
\
View original page 2Page 3 · Read text
www.butkus.us
 4. To protect against electrical shock hazards, do not
   immerse the camera in water or other liouids while
   the camera's back cover is open. Also do not open
   the back cover while in or under the water, or
  wh  i le the camera is wet.
5. To reduce the risk of electric shock, do not
   disassemble this camera, but take it to an author-
   ized Minolta service facility when some service or
   repair work is required. Incorrect reassembly can
  cause electric shock when the camera is sub-
   sequently used.
SAVE TH ESE INSTRUCTIONS
View original page 3
Page 4 · Read text
2   Your new Minolta Weathermatic-A  is the ideal do-anything. go-anywhere
         photographic traveling companion.  lt is just as at home in a backpack on too of
        a mountain or skiing down one as it is at the beach or around the poo..
             Its rugged watertight construction and 110 format conveniences, such as
         drop-in cartridge film loading, built-in electronic flash, and compact size makes
         taking quality photos simple and easy in even the most adverse conditions.
            Please read this manual carefully all the way through and follow the simple
          instructions for the best results and longest service with your camera. Then keep
               it for later reference as needed.
           lhre neue Minolta Weathermatic-A ist der ideale Reisebegleiter  ftir tiberall
      und jederzeit: ob im Rucksack beim Bergsteigen oder Schifahren, am Strand
        oder Swimmingpool.
         Durch die robuste, wasserdichte Ausfrihrung und die Vorteile des 110-Film-
        formats, wie problemfreies Einlegen der Filmkassette, der eingebaute Elek-
        tronenblitz und das Taschenformat, lassen sich rasch und einfach oualitdts-
         fotografien selbst unter schlechtesten Bedingungen erzielen,
           Bitte lesen Sie diese Bedienungsanleitung  sorgfdltig und vollstdndig durch.
      Wenn Sie sich an die einfachen Anweisungen halten, wird lhnen die Kamera
         viele Jahre hindurch treue Dienste leisten. Halten sie diese Anleitung auch in
        Zukunft immer griffbereit.
L",
View original page 4Page 5 · Read text
Votre nouveau Weathermatic-A Minolta est le compagnonwww.butkus.usde voyage id6al
qui vous permet de r6aliser n'importe quelle photo; il vous suivra partout, oir
que vous alliez. ll est aussi facile de le glisser dans un sac d dos lors d'une escalade
ou d'une descente i skis que de l'emporter d la plage ou d la piscine.
  De conception nouvelle, 6tauche, adoptant des solutions pratiques tels le
chargement par cartouche-f ilm No. 110 et le flash 6lectronique incorpor6, trds
compact,  il vous permettra de r6aliser le plus facilementdu monde d'excellentes
 photos.
   Lire attentivement ce mode d'emploi avant d'utiliser l'appareil et suivre les
instructions afin d'obtenir les r6sultats les meilleurs.

  Su nueva Minolta Weathermatic-A es su perfecta compafiera fotogr5fica de
viaje que hace de todo y va donde quiera. Ella estar6 justo como en casa en su
mochila, en la cumbre de una montaffa o esquiando, tanto como en la playa o
alrededor de una oiscina.
  Su robusta construcci6n herm6tica al agua y sus 110 convenientes formatos,
tales como carga de cartucho de pel icula de f6cil inserci6n, flash electr6nico
incorporado, y su tamafro compacto hacen de tomar fotos de calidad, simple y
fdcil a0n en las mds adversas condiciones,
   Por favor l6a este manual cuidadosamente de principio a fin y siguiendo las
simples instrucciones obtendrd los mejores resultados y un duradero servicio con
su cdmara. Luego gu5rdelo como referencia para mds tarde cuando sea necesario.
View original page 5
Page 7 · Read text
www.butkus.us
IN HA LTSV E RZ E ICH N IS
BEZEICHNUNGEN DER TEILE      .,.8     EINSATZ DER WEATHERMATIC-A
KURZANLEITUNG  .  ,                         , ,.12     UNTER VERSCHIEDENEN
VORBEREITUNGEN UND                WITTERUNGS- UND AUF-
 GRUNDEINSTELLUNGEN   , . . . .  . ...16     NAHMEBEDINGUNGEN                     . .62
  Offnen und SchlieBen des                    Auf oder nahe dem Wasser                    . .62
    Rr"ickdeckels  . .  .                ...16    Am Strand                                              . .62
  Einlegen der Batterie              ,,'25      lm Regen oder Nebel                             . .63
  Batteriepr0fu ng                         .. .24      lm Schnee und bei kaltem Wetter . .  .  . .64
  Einlegen des Films und                UNTERWASSERAUFNAHMEN,,,,,    . .65
                                                      E ntfernu ngseinstel lu ng ,  ,                    . .65     F ilmtransport                                         ' .'30  Suc h er                           ...36       Tips fur Unterwasseraufnahmen   . . .  .  . .65
  Entfernungseinstellung   , .  .         ...38    ZUBEHOR                                                  . .75
FOTOG RAF IE R EN (EBI AUS-                 Sportsfinder   ,.                                     . ,75
 REICHENDER BELEUCHTUNG)     .  , .,45   WARTUNG DES DICHTUNGSR INGS   . .78
BLITZAUFNAHMEN  .  ,             ...50    TECHNISCHE DETAILS ..                   . .84
HERAUSNEHMEN DES FILMS  ....  ...55    FEHLEFISUCHE  .,,.                                . .92
                                   PFLEGE UND AUFBEWAHRUNG,  ,.  . 100
View original page 7Page 8 · Read text
6 TABLE DES MATIERES
  NOMENCLATURE                   8      Sur ou d proximit6 de l'eau             , , . 66
  SOMMAIRE D'UTILISATION.          12     Alaplage                         ,.,..67
  PREPARATION ET OPERATIONS             Sous la pluie, dans la brume
   DE BASE                             16        oulebrouillard                 ....,68
     Ouvertu re et  f ermetu re                      Dans la neige ou par temps froid   . . , , 68
      duboitierdos.,                 ..,..16      PRISES DE VUES SOUS-MARINES
   M ise en place de la pile               25      Miseaupoint,                     ,,,69
     V6rificationdelapile,.,.,.             2a       Conseils pour des prises de vues
    Chargementet avancedu film,.,     .,.  30        sous-marines  ...                .....70
    Viseur                            ...35    ACCESSOTRES                         ...  75
    .Mise au point  .                              ..  38       Sportsf inder (Viseur sportif .)            . . 75
  PRISES DE VUES (EN LUMIERE          PRESERVATION DU JOINT
   AMBTANTE)  ,...                 ..,.45      D'ETANCHEITE                  ......    7A
  PRISES DE VUES AU FLASH .......    50   CARACTERISTIOUES TECHNIOUES 86
  DECHARGEMENT DU FILM..         55   CONTROLE DES DI FFERENTES
  UTILISATION DE VOTRE                 FONCTIONS DE L'APPAREIL  ..  ,.  . 95
   WEATHE RMATIC-A DANS DES         ENTRETIEN ET CONSERVATION  .,101
   COND ITIONS ATMOSPH E R  I OU ES
    ET DES SITUATIONS DIVERSES  . . 66
View original page 8Page 10 · Read text
8 NAMES OF PARTS
  BEZEICHNUNGEN DER TEILE
  NOIT'ENCLATURE
 NOMBRES DE LAS PIEZAS
                        @ Shutter release
                       @ Focus knob
                         @ Soortsfinder alignment index
                         @ Viewfinder
                       @ Light sensor
                         @ Exposure/function control knob
                         @ Lens-cover glass
                           Mike Butkus   DigitallyDN:email=mike@butkus.org,Date:cn=Mike2025.01.01signedButkus,by14:13:23Mikeo, ou=Butkus.org,Butkusc=US-05'00'         @ Built-in flash
                         @ Back-cover release knob
                         @ Back-cover release tab
View original page 10Page 11 · Read text
www.butkus.us


@ Ausloser        @ D6clencheur       @ Disparador
@ E ntfernu ngseinstel   I knopf @ Bouton de mise au point  @ Perilla de enfoque
@ Ausrichtmarke frir den  @ nepdre d'alignement du  @ tndice de alineamiento-  Sportsfinder                    Sportsfinder (viseur sportif)       del Sportsfinder
@ Sucher         @ vir"u.         @ Visor
@ Lichtsensor       @ c"ttrte         @ Sensor luminoso
@ Bel ichtu ngs-/Fu n ktions-  @ Borton de contr6le de   @ Perilla de control de
   Einstellknopf                    l'exposition/fonction nement     exposici6n/fu nci6n
@ OUjet tiuabdeckscheibe                           du flash        @ Cristal del cubre-objetivo
                                  de protection de             @ Verre                        @ Flash incorporado@ Blitzleuchte                                        l'objectif
                                                                                 Perilla                                                               de liberaci6n                         @@ nUctOeckel-Ausloseknopf                                                                                posterior                                                         de            @ Ftasfr incorpo16                                                                                            la tapa()  niict<Oeckel -Au sl oseriegel           @ Bouton de d6verrouillage  @ Lengiieta de liberaci6n                            du dos de l'appareil            de la tapa posterior
           @ Lrngu"tte de s6curit6
View original page 11Page 13 · Read text
www.butkus.us


@) Filmtransporthebel   @ Levier d'avance du film   CD  Palanca de avance de la                                                                  pelicula@ Oren fiir die Tragschlaufe  Q) Oeuillet de dragonne
                         @ Ojete para la correa@ okutar        @ Oculaire                                                  (0 Ocular del visor(a) E ntfernu ngstabel le    @ taute des symboles
                            de mise au point    @ Tabla de simbolos de enfoque@ Seriennummer                                    (5; Num6ro de s6rie         (o N0mero de serie@ Tun"tt"  fijr die
    Blitzreichweite     @ taUte d'exposition/fl ash @ Tabla de gama de flash
@ ritrauten-Fenster           i?) Fendtre de lecture des         \,1),,;\ Ventanilla de posici6n
                               donn6es du film            de la pelicula
@ Fitmtammerdeckel             @ Couvercle du logement   @) Tapa de la rec6mara@ Batteriekammerdeckel       du film                    de la pelicula
(D g  t ittUerei tsch af tslampe                        @) Couvercle du logement  @ Tapa de la rec5mara de la pila
                                                                                                       flash'jJ Dichtungsrings             de la pile      @ trimpara monitora del                                                  (ro) T6moin lumineux du
 (12,, Halteband frir den                             fl ash         @ Rnitto en O
    Rtickdeckel
             @ loint d'6tanch6it6    @ Correala tapa posteriorconectora de(10 Ruct<oect<et
                         {2 Lanidre de maintien   @ tapa posterior
                                            (13) Oos du boitier
View original page 13Page 14 · Read text
12 SUMMARY OF OPERATION                2.  Lift back-cover release tabs, twist back-
  KURZANLEITUNG                          cover release knobs and ooen back cover                                                                (p. 18).
  SOMMAIRE D'UTILISATION
  RESUMEN DEL FUNCIONAMIENTO       Die bieden Ri.rckdeckel-Ausliiseriegel auf-
                                                    klappen, die R0ckdeckel-Auslbsekniipfe
                                          drehen und den RUckdeckel 6ffnen   1. Make sure camera is completely clean         (Seite 181.      and dry.
      Kontrollieren, ob die Kamera voll-       Relever la languette de s6curit6 et
     kommen rein und trocken  ist.                    tourner les boutons de d6verrouillage du
                                                     dos de l'appareil (p. 18).       S'assurer que l'appareil est absolument
       propre et sec.                          Levante las lengiietas de la  tapa
                                                           posterior, tuerza las perillas de liberaci6n
      Aseg0rese que su c5mara estd completa-      de la misma y abra la tapa posterior      mente limpia y seca.
            r#'
View original page 14Page 15 · Read text
Merci de faire un don de 2,50 € pour soutenir ce site via E-bay ... www.PayPal.me/butkus


Bitte spenden Sie 2,50 Euro, um diese Website über E-Bay zu unterstützen ... www.PayPal.me/butkus
View original page 15
Page 16 · Read text
www.butkus.us
3. After installing and checking battery    4, Operate film advance lever repeatedly    IJ
   (p.251, insert film cartridge (p.30), and         until first exposure locks in place and
   press back cover securely into place and        the lever will not move (p. 32).
   lock it (p. 22).                                      Meh rmals den   Filmtransporthebel
  Nachdem die Batterie eingelegt und         betatigen, bis das erste Bild einrastet und
   deren Starke ijberprtift worden ist (Seite        der Hebel sich nicht mehr bewegen l6Bt
   25), eine F ilmkassette einlegen (Seite          (Seite 321.
   30) und den R0ckdeckel fest schlieBen
  und verriegeln (Seite 22).                       Faire fonctionner le levier d'avance du
                                                     film i plusieurs reprises iusqu'i ce que la  Aprds avoir ins6r6 et v6rifid la pile        premidre vue se mette en place jusqu'au
    (p. 25), introduire  la cartouche (p. 30) et         blocage du levier d'armement (p. 32).   remettre le dos en place en appuyant
   dessus, verrouiller  lp. 22J,.                  Accione la palanca de avance de la                                              pelicula repetidamente hasta que la
   Tras de instalar y comprobar ta pila (n59.        primera exposici6n se coloque en su sitio
    251, inserte el cartucho de pelicula (p60.      y la palanca no se mueva m6s (p5g. 32).   30), y presione la tapa posterior ase-
   gur6ndola en el sirio y cidrrela (pitg.22l.
               -
View original page 16Page 17 · Read text
5. Check and/or clean lens cover glass and    6. Look through eyepiece and compose
    set focus for your subject (p.38)   .              subject in viewf inder (p. 36). Depr:ss
                                               shutter release slightly; if red lamp in                                 kontrollieren   Die Objektivabdeckscheibe                                                  finder                                                                                           turn                                                             lights                                                          sun symbol,                                                      at                                                             *                          und danach        gegebenenfalls reinigen   und                                                               cloud                                                   control                                                                   symbol.                                                      to o                                                                                                                lf it tights   die Entfernung zum Objekt einstellen       at cloud symbol, turn to   /        f lash
    {Seite 38).                             symbol and take picture within flash
    V6rifier et/ou nettoyer le verre de pro-       range when lamp begins to  pulsate
   tection de l'objectif et effectuer la mise          (p. 50). Always squeeze shutter release
   au point id6al pour votre sujet (p. 38)           smoothly.
   Compruebe vlo el cristal del cubre-ob-       Durch das Okular blicken und das Ob-    jetivo y fije el foco para su sujeto (p6g.        jekt im Sucher positionieren (Seite 36).
    38).                                           Leicht den Ausliiser driicken: Falls die
                                             rote Lampe im Sucher bei Belichtung
                                               ,,Sonne f,  " aufleuchtet, den Knopf in                                                Stellung ,,Wol ke 6  " drehen. Falls sie
                                                    bei Belichtung ,,Wolke" aufleuchtet, den
                                          Knopf auf das Blitzsymbol /    stellen.                                             Sobald die Lampe zu blinken beginnt,
                                                   kiinnen Sie innerhalb der Blitzreichweite
                                                              auf nehmen (Seite 50). Den Ausliiser
                                             immer weich betiitigen.
View original page 17Page 18 · Read text
www.butkus.us


 Regarder  i travers l'oculaire et cadrer le
 sujet dans le viseur (p. 361. Appuyer sur
 le ddclencheur de l'obturateur. Si une
 lampe rouge s'allume dans le viseur sur le
symbole "soleil" f   , amener le bouton decontrole sur le symbole "nuage" 6.  Si
elle s'al lume sur le symbole "nuage",
passer sur le symbole "flash" /   etprendre la photo dans la gamme "flash"
lorsque la  lampe commence e
clignoter (p.50).  ll faut toujours agir
avec douceur sur le d6clencheur.
Mire a travds del ocular y componga  la
escena en el visor (p5g. 36). Deprima
suavemente el disparador; si la l6mpara
roja del visor se enciende en el simbolo
"sol" *   , gire el control al simbolo"nube" a   Si ella se enciende en el
simbolo nube, girelo hacia el simbolo
"flash" /  y y tome la foto dentro de la
gama de flash cuando la lSmpara empiece
a parpadear (p5g. 50). Siempre que
apriete el disparador, h5galo suavemente.
View original page 18
Page 19 · Read text
PREPARATION AND BASICS
16 VORBEREITUNGEN UND
   G RUNDEINSTELLUNGEN
  PREPARATION ET OPERATIONS      Offnen und SchlieBen des Riickdeckels
  DE BASE                         WICHTIGE HINWEISE FUR DIE RICH-
  BASE Y PREPARACION             TIGE KAMERABEDIENUNG                                       Der Rlickdeckel lhrer Weathermatic-A
   Opening and closing the back cover                 ist mit einem Dichtungsring versehen, der
  IMPORTANT INSTRUCTIONS FOR PRO-     die Kamera nach dem SchlieBen des Deckels
  PER USE OF THIS CAMERA                    vor Wassereintritt sch0tzt. Dadurch kann die
     The back cover of your Weathermatic-A    Kamera unter Bedingungen eingesetzt
    is equipped with an O-ring that forms a    werden, unter denen der Einsatz von
   watertight seal when the cover is properly    gewohnlichen Kameras entweder nicht
    fitted to the camera body. This enables the     empfehlenswert oder gar unmbglich ist (wie
   camera to be used under conditions (such as     z.B. im Regen, im Schnee, im oder unter
    rain, snow, and in or underwater) where use     Wasser)  .
   of conventional cameras is either not recom-      ES IST VON AUSSERSTER WICHTIG.
   mended or impossible.                    KEIT, DASS DIE KAMERA VOR DEM
      IT IS OF UTMOST IMPORTANCE TO   OFFNEN DES RUCKDECKELS VOLL-
  ALWAYS BE SURE YOUR WEATHER-   KOMMEN REIN UND TROCKEN IST.
   MATIC-A IS COMPLETELY CLEAN AND   WEITERS MUSS DARAUF GEACHTET
  DRY BEFORE OPENING THE BACK    WERDEN, DASS DER DICHTUNGSRING
  COVER. ALSO THAT THE BACK   VOR DEM SCHLIESSEN DES RUCK-
  COVER'S O-RING IS CLEAN AND IN   DECKELS SAUBER UND IN GUTEM
  GOOD CONDITION BEFORE THE BACK   ZUSTAND IST. FALLS SIE DIESE VOR-
  COVER IS CLOSED. BY DOING THIS   SICHTSMASSNAHMEN  BEACHTEN,
  YOU WILL OBTAIN THE FULL SERVICE   WIRD DER DICHTUNGSRING SEINE
   LIFE INTENDED FOR THIS SEAL.         VOLLE FUNKTION BEHALTEN.
View original page 19Page 20 · Read text
www.butkus.us

Ouverture et fermeture du dos du boitier        Abertura y cierre de la tapa posterior
INSTRUCTIONS IMPORTANTES POUR    INSTRUCCIONES IMPORTANTES PARA
UNE UTILISATION ADHEOUATE DE    EL USO ADECUADO DE ESTA CAMARA
CET APPAREI L                           La tapa posterior de su Weathermatic-A
  Le dos de votre Weathermatic-A  esr     est6 equipada con un anillo en 0 que forma
6quip6 d'un joint d'6tanch6it6 qui, torsque     el sello herm6tico al agua cuando la tapa es
 celui-ci est correctement fix6 au corps de    encajada adecuadamente al cuerpo de la l'appareil, le rend totalement etanche.    cSmara. Esto permite el uso de la c6maraGr6ce i ce joint d'6tanch6it6, vous pourrez     bajo condiciones  (tales como lluvia, nieve, y
utiliser cet appareil dans des conditons   en 6 bajo el agua) donde el uso de las (pluie, neige, dans et sous l'eau...) oi  il n'est     c5maras convencionales no es recomendableni possible ni recommand6 d'utiliser un    o es imposible.
appareil ordinaire.                  ES DE EXTREMA IMPORTANCIA
   IL EST DE LA PLUS GRANDE IM-   ESTAR SIEMPRE SEGURO OUE SU
PORTANCE DE TOUJOURS VERIFIER    WEATHERMATIC-A ESTE COMPLETA.
OUE VOTRE WEATHERMATIC-A EST   MENTE LIMPIA Y SECA ANTES DE
COMPLETEMENT PROPRE ET SEC   ABRIR LA TAPA POSTERIOR, LO
AVANT D'EN OUVRIR LE DOS ET   MISMO OUE TAMBIEN EL ANILLO EN
OUE LE JOINT D'ETANCHEITE EST    "O" DE LA TAPA POSTERIOR ESTE
PROPRE ET CORRECTEMENT PLACE    LIMPIO Y EN BUENAS CONDICIONES
AVANT DE REFERMER L'APPAREIL    ANTES DE CERRAR LA TAP A POSTE-GRACE A OUOI VOUS OBTIENDREZ   RIOR. HACIENDO ESTO UD. OB-UNE ETANCHEITE PARFAITE ET   TENDRA EL SERVICIO COMPLETO DE
DURABLE.                   POR VIDA PROPUESTO PARA ESTE
                                     SELLO.
View original page 20Page 21 · Read text
18 Opening the back covol                              fldches jusqu'i ce que le dos du boitier
    Offnen des Riickded<els                              s'ouvre.
     Ouv€rture du dos du boitier
     Abortura de la tapa posterior                    Sostenga la c6mara con la tapa posterior
                                                mirando hacia si y levante las lengiietas
   1. Hold the camera with the back cover      de liberaci6n de la tapa posterior sobre       facing you and lift the back+over release       ambas oerillas de liberaci6n de la misma.                                                                   gire las perillas                                                                   de liberaci6n                                                                              de la                                               Luego                                    release                                       knobs.                     back-cover      tabs             bofh         on                                                               posterior                                                                                 contrahorario                                                         en sentido                                                tapa                                     release                                     knobs                      back-cover     Then             turn               bofh                                               en la direcci6n de las flechas hasta oue la      counterclockwise in the direction of the
       arrows until the back cover opens.               tapa posterior se abra.
     Die Kamera so halten. daB der R0ck'
      deckel zu lhnen gerichtet ist, und die
      R0ckdeckel-Ausliiseriegel der  beiden
       Riickdeckel-Ausliiseknbpfe  aufklappen.
     Danach die RUckdeckel-Ausliisekniipfe
      in Pfeilrichtung nach links drehen, bis
        sich der Riickdeckel iiffnet.

      Tenir l'appareil en plagant le dos face d
      vous et amener la languette de s6curit6
        sur les deux boutons de deverrouillage du                           www.butkus.us
      dos du boitier. Tourner ensuite ces deux
      bouton dans le sens inverse des aiguilles
     d'une montre selon la direction des
View original page 21Page 22 · Read text
www.butkus.us


                              Den Rirckdeckel vom Kameragehiiuse
                                          abnehmen. Sie kiinnen dann den Ri.rck-
                                           deckel entweder am Halteband hbngen
                                             lassen oder zum Reinigen ganz ent-
                                              fernen, indem Sie das Halteband vom
                                                        Stift am Riickdeckel lirsen.
                                           Sdparer le dos du corps de l'appareil.
                                      Vous pouvez soit le laisser pendre grdce
                              d la lanidre de maintien, soit l'enlever
                                          compldtement pour le nettoyer en 6tant
                                                         la broche qui fixe cette lanidre au dos du
                                                           boitier.
                                      Levante la tapa posterior fuera del
                                         cuerpo de la c5mara, Ud. puede dejar
                                       que la tapa posterior cuelgue de la correa
2. Lift the back cover away from the camera     completamenteconectora de la paratapa elposteriorlimpiado,o sacarladesen-
   body. You can let the back cover hang     ganchando la correa del pasador sobre la   from the back-cover connector strap or      tapa posterior.   remove it completely   f or cleaning by
   disengaging the strap from the pin on the
   back cover.
View original page 22Page 23 · Read text
20 NOTE
    H INWEIS
   NOTE
   NOTA
     Be sure never to crease or twist the     ONCE THE BACK COVER IS OPEN
    connector strap.                  THE CAMERA IS NO LONGER
                                   WATERTIGHT AND MAY BE DAM.      Das Halteband darf nicht geknickt oder     AGED IF WATER OR SAND ENTERS
    verdreht werden.                        THE CAMERA.
      Prendre garde d ne jamais plisser ou
    tordre cette lanidre de maintien.
                                    SOBALD DER RUCKDECKEL GEOFF-
       Aseg0rese de no doblar o torcer la correa     NET WORDEN IST, IST DIE KAMERA
    conectora.                         NICHT MEHR WASSERDICHT. SIE
                              KANN DAHER BESCHADIGT WER-
                                     DEN, WENN WASSER ODER SAND
                                               INS KAMERAI NNERE GELANGT.
View original page 23Page 24 · Read text
www.butkus.us


UNE FOIS OUVERT, L'APPAREIL NE
SERA EVIDEMMENT PLUS ETANCHE,
DONC IL PEUT ETRE ENDOMMAGE
SI DE L'EAU (OU DU SABLE)
PENETRE A L'INTERIEUR.

UNA VEZ OUE LA TAPA POSTERIOR
ES ABIERTA LA CAMARA NO SERA
MAS HERMETICA AL AGUA Y
PUEDE SER DETERIORADA SI EL
AGUA O LA ARENA ENTRA EN LA
CAMARA.


                                                           ),
View original page 24Related documents and language editions

From the M. Butkus archive. Original publisher and archive notices are retained.
Check the model and edition against your equipment.
PDF verified 2026-10-10.