Film cameras
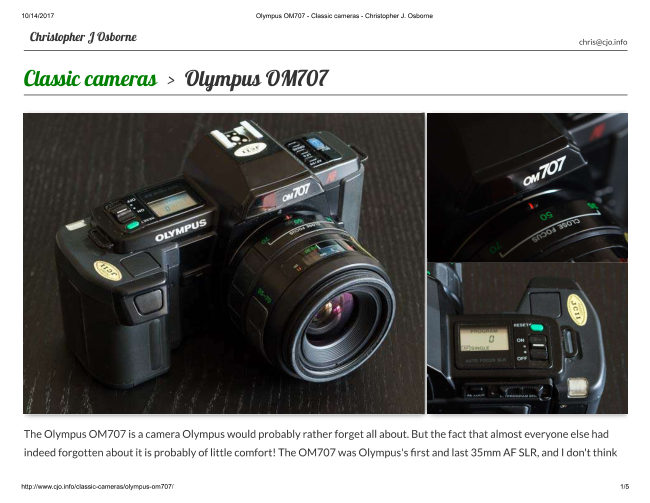
Olympus OM 707 User manual
User manual for Olympus OM 707. 84 pages in French, Spanish. Read the original PDF, download or print a copy without registration.
84 pagesFrench, Spanish4.4 MB PDF
Loading your manual…Open PDF directly
Document details
- Brand
- Olympus
- Model / document
- Olympus OM 707
- Document type
- User manual
- Language
- French, Spanish
- Pages
- 84
- File size
- 4.4 MB
- Category
- Film cameras
- Document date
- Not specified in catalog
Search available document text
Find a term, then jump to its page in the original PDF. Image-only pages may not be searchable; check the PDF for exact wording and diagrams.
Page 2 · Read text
www.butkus.us
                                                         [E-E]lslGoLyMPus


IINSTRUCTIONS    IINSTRUCCIONES
IMODE D'EMPLOI    I GEBRAUCHSAI,ILEITU NG
View original page 2Page 3 · Read text
E Thank you for purchasing the Olympus OM-707. The OM-707 is a fully automatic SLR
   camera which incorporates the very latest in photographic technology in an incredibly
   compact form. Autofocus, programmed exposure modes and afr(#al   Power Flash
   Grip 300 all facilitate problem-free photography. In addition, connected to a Full-
  Synchro Flash F2W, the world's first flash unit capable of synchronizing with any
   shutter speed up to 1|2OOO sec., the OM-707 offers the user a simple, error-free method
   of attaining professional-level results in areas such a fill-in flash photography.
   Before using the camera, please study this instruction manual carefully with the OM-707
   in front of you, so that you can get the very best performance and service life from your
  new camera.


The following symbols are used during explanation of operating procedures.
                    d       o-^-O              rrrrl      X         Correcto            In                 Operation        Operation order      Automatic
                                                                                                      .  operation                                                                                                   \. :./                                                   r lz
                                                                                                                                                                             --a!-                                               ,lt,                                                                        -a-                                                 /l\                  /'i'\
                Attention         Press lightly        Lamp on        Lamp blinking
View original page 3Page 4 · Read text
www.butkus.us
G Die OM-707 ist eine vollautomatische Kleinbild-spiegelreflexkamera  die modernste
   Technologie in unglaublich kompakter Form bietet. Autofocus, Programmautomatik und
   integriertes Blitzgerdt (Batteriegriff 300 mit eingebautem Blitz) sorgen fiir unbeschwertes
   Fotografieren. Dariiberhinaus kann der Vollsynchron-Blitz F28O angeschlossen werden,
   der mit Verschlu8zeiten bis zu ll20O0 Sek. synchronisiert werden kann. Damit eroffnet
   sich in.Kombination mit der OM-707 die Moglichkeit, auf einfache Art auspruchsvolle
  Aufnahmetechniken wie z.B. die Tageslicht-Aufhellblitz-Technik  anzuwenden.
  Wir empfehlen, vor Gebrauch diese Bedienungpanleitung  sorgfiiltig durchzulesen, so da$
   Sie alle Moglichkeiten, die diese Kamera bietet, optimal auschopfen kcinnen und ein
   langer strirungsfreier Betrieb gewlhrleistet ist.


Die folgenden Symbole werden bei der Beschreibung der Bedienungsschritte verwendet.
                          qo                   rrtrf                               o-
                                                                       Aufnahme-
     Richtig          Falsch          Bedienung                                 -                 Reihenfolge          automatik
                                       -t                                                                        r. l.z                                      ,'-                \__,,               -)k/l\                 /i\
                                    Leicht               Achtung                                        driicken        Anzeige leuchtet       Anzeige blinkt
View original page 4Page 5 · Read text
E Table of Contents
Preparations befo re Taki ng Pictures            9  ToTakeBetterPhotographs.      ....60
  r Lobding the Power Flash Grip 3OO             oAutofocus(AF)                  ....61
    Batteries                               10   oProgram                        .....65                                i
  o Loading the Power Grip 100 Batteries   .  13   oTTL Direct "OTF" Light Metering. . . , . .77
  o Mounting an AF Lens  .                    15    oViewfinderDisplay              ...79
Taking Photographs   I                         17   oLCDPanel.                      ...81
  o Turning on the Power                      18   oOM Lenses                              . . . .83
  o Loading the Film                          19   oOMAFSystem                 .....85
  oTaking Photographs  .  ,                 22    o Notes on Using the OM-707 with Previous
  o Rewinding the Film                      26    OMSystemUnits.                ...86
TakingPhotographsll    .                    28  HandlingCare                     ....89
  oTaking a Continuous Series of Shots        29  StorageCare                       ....90
  o Using the Power Focus                   30  OuestionsandAnswers ..             ...91    I  o Using the Program Shift   .                 33    Description of Controls                         . . 99
  o Using the Focus Lock System             36   Main Specifications  of the OM-707        . . 105
  o Using the AE Lock  .                           Main Specifications of Power Grip 100        107
                                                                Power Flash  o Using the Reset Bufton                             38N   Main Specifications of
                                                                                             107  o Using the Self-Timer .  .                     41   Grip300                                        ..
  o Using an OM Lens                       43
Taking Photographs  lll                      46
  e Using the Power Flash Grip 300             47
  o Using the Full-Synchro Flash F280         50
  o Using the T20 and T32 Electronic
   Flashes                         .....54
  o Using a Conventional Auto Flash .         . . 57
View original page 5Page 8 · Read text
www.butkus.us
                                      El To replace the grip, align with the indicators O
                                              and @ and then push up until it locks.                           _                                                                   ll  Pourlemettre la poign6e, aligner les rep6res O et
                           _ @ et pousser vers le fiaut jusqu'au verroirillage.                                                  1€j P3ra volver a colocarla, alinee con los indicadores
                                                                               hacia arriba hasta                                                 y luego tire                                                          I  v @                                                                              que'Griffsse trabe.                                               erneuten                                                                                                            die                                                      Anbringen                                ^[9 Zum                                                       des
                                                  Markierungen O und @ vbn Griff und Gehiiup in
                                               ubereinstimmung bringen und den Griff nach oben
                                                      schieben, bis er einrastet.

   Note: slide the power switch oFF whEn loading batteries or replacing the grip.trE Remarque: Pousser l'interrupteur d'alimentation  sur OFF pour mett-re les-piles en place ou d6monter
                   la poign6e.
tr Nota: Deslice el conmutadorde alimentaci6n  hacia OFF cuando coloque pilas o cambie la empufiadura.
G Hinweis: Beim Einsetzen der Batterien oder beim Austausch des Griifs den Ein/Aus-schaltei auf Of'n
                stellen.


                                                                                                  12
View original page 8Page 9 · Read text
Loading the       Grip 1           r|es
Mise en place d     iles dans la    n6e 100
Colocaci6n de  ilasbn la E     fiadbra de Alimentaci6n 100
Einptzen der                   Batteriegriff 100

                                Remove the battery cover on the bottom of the
                                                  grip.
                                    Retirer le couvercle des piles situd sous la          IE  poign6e.
                                                                      las pilas en la parte inferior de la                                   tr Ouite la tapa de
                                        empufiadura.
                 G Die Batteriefachabdeckung  von der Unterseite des
                                              Griffs abnehmen.


                                                                                 and                                   tr  Insert the batteries in the correct directions                                             replace the cover.
                  E  In'troduire les piles dans les bonnes directions et
                 g  remettreInserte lasle pilascouverclc.en las posiciones correctas y vuelva
                                         a colocar la tapa.
                 G Die Batterien seiten- und polrichtig einlegen und
                                            die Batteriefachabdeckung  wieder aufsetzen.
                           tra LRO3 (AAA) batteries                  Ec piles LRO3 (AAA)                          tr+ pilas LRO3 (AAA)                  G+ LR03 (AAA) Batterien
View original page 9Page 10 · Read text
www.butkus.us
E fo remove the grip, slide the grip lock knob and
_  push down on the grip. f,l Pour retirer la ioign6e, pousser le verrou de
_  lib6ration de la poign6e et tiier sur ta poignie. l1!J Para retirar la empuftadura, deslice el conmutador
   de desbloqueo y presione hacia abajo la empuffa_
    du ra.
G Zum Abnehmen des Griffs den Griff-Entrieselunes-
   \ngpf in_ die Ausrastposition schieben u"na OEn   Untt nach unten schieben.
tr To replace the grip, align with the indicators @
   and @ and then push up until it locks.
E Pour remettre la poignr5e, aligner les repdres @ et
   €) et pousser vers le haut jusqu'au verrouillage.
E  P^ara volver a colocarla, alinee con los indiCadores
                         hacia arriba hasta que se trabe.    I  v @ y luego tireG Zum erneuten Anbringen des Griffs  die
   Markierungen O und @ v-on Griff und Gehduse in
   llbereinstimmung bringen und den Griff nach oben
    schieben. bis er einrastet.


                                                       14
View original page 10Page 11 · Read text
Mounting an AF Lens
      Montage d'un objectif AF
      Montaje del objetivo AF
      Ansetzen der AF0bjektive

   To mount an OM lens, refer to page 43.
   Pour monter un objectif OM, se reporter i la page 43.trEE Para montar un objetivo OM, refi6rase a la p6gina 43.
G Zum Anbringen eines OM-Objektivs siehe Seite 43.


                        Remove the rear lens cap and the body cap.
                         Retirer le bouchon arridre de I'objectif et  le
                       bouchon du boitier.
                                             posterior del objetivo y la tapa del             lEtr Ouite la tapa
                           cuerpo de la camara.
         @ Die hintere Objektivkappe und die Gehdusekappe
                         abnehmen.
View original page 11Page 12 · Read text
www.butkus.us
 p  Rlign the red dots and slowly rotate the lens until
 L _ AlrgnerlidtiH;"tes reperesrougeset  faire- tourner lentement
                                                                                                                                 t ouchcr au      ,l'objectif  .j u sq u'au ver-rou illage. bpo,
 _  ryg,ntant I'obiectif.
  rpr Artnee los puntos rojos y gire lentamente el objetivo


                         -

    Femove the front lens cap.
     Retirer le bouchon avant?e I'objectif.
    Retire la tapa  f rontal del objetivo.
    Die vordere Objektivkapp",inif"in"n.
E Removing the tens:   press         the              lens                    release button and turn the lens    co       u nterc               lock              w isp
Gl D6montage Oe t;i'blectif:   .{ppuyer                          bg}rt-o.,           sur                 le                    de                                                   de    l'objecrif                rourner             et                            t;objictii                                d;;                                    ddverrouillagej" sens inverse         aiguilles              d'une                     monrre.. . 9"rItj _Exrracci6n del objetivo:   Presione             el bot6n para rcltar el objetivo y girelo           la izquierda._  hacia
[9 $bnehmen des Objektivs:  Ogl. Objektiv-Eniriegelungsknopf                                          Kamera-                    am  gehduse               dri.icken,                             Oii-'Ci6i"ttiv                                  gegen                                                 den   16lI   Uhrzeigersinn                  drenen.-un"d
View original page 12Page 13 · Read text
oittw
                             Taking Photographs   I
   E Witn autofocus and programmed exposure, the OM-707 puts the fuscinating world of SLR         photography at your fingertips: a perfect shot is only a press of the shutter release away.
                                       Prise de vues I
                                                        programm6e de I'OM-707, vous   E Grece i  la mise au point automatique et i  I'exposi.tion          obtiendrez des clich6s r6ussis par simple pression sur le d6clencheur.
                      Toma de fotografias  I
   E Con el enfoque autom6tico y la exposici6n proglamada, la OM-707 pone en sus manos el
         fascinante mundo de la fotografia reflex monocular: una foto perfecta con s6lo apretar el
          disparador.
                              Aufnalunetechniken  I
   G trllt dem Autofocus-system und der Programmautomatik der OM-707 beherrschen Sie die
          faszinierende Welt der Spiegelreflexfotografie durch einen Druck auf den Ausltiser: Perfekte
       Aufnahmen bei einfachster Handhabung.

17
View original page 13Page 14 · Read text
www.butkus.us       Turning on the Power              Encendido de la c6mara
       Mise en place de I'alimentation      Einschalten der Kamera
E  Wft"n power is switched ON, the lens ls s€t to 6 and all functions reset (see page 4O).
                                                                                                                 dE  Q,t.run.O l'alimentation est mise, I'objectif est 16916 sur e et toutes les fonctions sont remises-   z6ro (voir page 40).lll  Cuando se active la alimentaci6n de la c6mara, el objetivo se fijar6 €n € y se repondr5n todas    las funciones (vea la p6gina 4O).
G  S"i.  Einschalten der Kamera wird das Objektiv auf unendli6fu o gefahren und alle Funktionen
   werden auf die Ausgangsposition zur0ckgestellt  (siehe Seite 4O).
                                                     I    -Ej Slide the power switch ON.
                                                      I   tr  Pousser I'interrupteur d'alimentation sur ON.                                                      I   LSl Deslice el conmutador de alimentaci6n a ON.
                     G Den Ein/Aus-Schalter  in die ON-Position schieben.
                        E  Film speed and battery condition are shorvn for
                                                                  1 -5 sec.
                        E  I-u.sensibilit6 du fitm et l'6tat des piles sont indi-
                             _  qu6s pendant 1,5 s.                                                lSj Durante 1,5 seg. se visualiza la sensibilidad de la
                             _  pelicula y el estado de las pilas.                 @ fitmempfindlichkeit und Batteriezustand werden
                                                     1,5 Sek. lang angezeigt.


    a.    iEL OK     a  E Battery power below 50 %            rL  [, Change the batteries.                                         des piles en dessous de SO %       | |   fl Changer les piles.                    'R'  E Energie     E         s,L                                                                                          "v:   ll            Korrekt   , li..- E E:[3:,*iJfli,ii'; ll{}:T':;     G                                                   uo "   u I E:ii3,','"fi,Blfil,,,. 18
View original page 14Page 15 · Read text
Loading the Film        Carga de la pelicula
             Chargement du film     Einlegen des Films
@ Loading and  f ilm-speed selection for DX  f ilm are automatic. Conf irm the power is on. Use only_ ISO 1OO when using non DX  f ilm.ll La s6lection de seisibilit6 du film est automatique avec les cartouches cod6_es DX. S'assurer que   I'alimentation est mise. Les films non cod6s ne sont utilisables qu'en sensibilit6 100 ISO.
$l La carga y selecci6n de la sensibilidad para la pel icula DX son iutom6ticas. Confirme que la unidad       encendida. Utilice 0nicamente ISO lOO cuando use una pelicula que no sea DX.
E-est6Das Filmeinfiideln und die Empfindlichkeitseinstellung  erfolt bei DX-codierten Filmen auto-   matsich. Achtep Sie darauf, dalJ die kamera eingeschaltet  ist. Nicht DX-codierte Filme werden
   auf ISO l0O12l" eingestellt.
                                                                         'l  LE Make sure film is DX type.
                                                           |   [   S'assurer quc le film est de type DX.                                                           |  fgl Cercionese que la pelicula sea del tipo DX.
                 @ Darauf achten, dafJ es sich um einen Film mit DX-
                                                Codierung ltandclt.


                                         a,NM                 lEl To open the back, press the locking button and
                                                            slide the release knob.
                                                                          ll  Pour ouvrir le dos, appuyer sur le verrou de ferme-
                              _  ture et pousser la commande de I'ouverture du dos.                                                                          lll  Para abrir la tapa posterior de la c6mara, presione el
                                              boton de seguro y deslice la perilla de desbloqueo.
                     G Zum Offnen der Kamerariickwand den Sicherungs-
                                          knopf driicken und den Riickwand-Entriegelungs-
                                             knopf in die Freigabeposition  schieben.
View original page 15Page 16 · Read text
www.butkus.us
1l1 E] Avoiding direct sunlight, insert the film cartridge.
                                    en plein soleil.  (   fl  Introduire  le film en 6vitant d'€tre
\.,  tr  Evitando la luz solar directa, inserte el cartucho de          la pelicula.
  G Oie Filmpatrone beim Einlegen vor direkter
        Sonneneinstrahlu ng schiitzen.
       lEl Take care not to touch the shutter curtain with
         your  f inger or the  f ilm leader.
           ll   Eviter de toucher au rideau de l'obturateur avec
    _   les doigts ou avec I'amorce du film.           lll  Tenga cuidado de no tocar con los dedos la          cortina del obturador o la guia de la pelicula.
       -[9 Dabei weder Verschlu$vorhang noch Film-
           fiihrung mit den Fingern beri.ihren.

   p  Align the film leader with the mark and gear the
        sprocket teeth to the film perforations.
      fl  Aligner I'amorce du film avec la marque et engager
   _  les crantages dans les perforations du film.      l9l Alinee la guia de la pelicula con la marca y engrane
        los dientes de la rueda dentada con las perfora-
        ciones de la pelicula.
  G nen Filmanfang an die rote Markierung anlegen     und die Perforationen im Film auf die Zahnrolle
        auflegen.

        Close the camera back and . . .  .
       Refermer le dos de I'appareil et . . .  .
        Cierre la tapa posterior de la c6mara y . . .  .
       Die Riickwand schlief$en und . . .  .
View original page 16Page 17 · Read text
The film is autornatically wound on until the exposure counter reads 1.
   Le film est automatiquement enroul6 jusqu'i la premidre vue indiqu6e sur le compteui d'images.
                                         que el contador de exposiciones indique 1.trEtr La pelicula se bobina autom6ticamente hasta
G Der Film wird automatisch vorgespult, bis eine "1" auf dem Bildziihlwerk erscheint.
                                          rrf
                     -
  [B Wh"n the film is incorrectly loaded, Q Utints and the exposure counter continues to display 0.
     Reload the film.
 E  Si le film n'est pas correctement charg6, O clignote et le compteur de vues continue i indiquer
      0. Rechareer  le film.
 E Cuando s6 carga incorrectamente la pelicul'a, Q  destella y el contador de exposiciones con-      tin0a indicando 0. Vuelva a colocar la pelicula.
 E  gei falsch eingelegtem Film blinkt die O -Anzeige und das Bildziihlwerk wird auf 0 zuriick-       gestellt. Den Film erneut einlegen.                                                                         .

                 @ Film type confirmation  is posible through the
                                           window in the camera back.
                         E  I-a confirmation du type de film utilis6 est possible
                                                                                  i  travers la fendtre d'identification sur le dos de
                                                                 I'appareil.
                         E  Es posible confirmar el tipo de pelicula a travds de
                                                                      la ventanilla de la tapa posterior de la c6mara.
                      G Der Filmffp kann jederzeit durch das Sichtfenster
                                                             in der Kamerariickwand  eingesehen werden.
View original page 17Page 18 · Read text
www.butkus.us
Taking Photographs
Prise de vues
Toma de fotografias
Fotografieren

          'l   ie. Press the shutter release halfway to activate the
               viewfinder display.   rE Appuyer li'gdrement sur le diclencheur pour
                                                 f:.   retivcr I'affichage du visc'ur.
           Oprima ligeramente el disparador para activar  la
                    indi caciones del visor.
           ct Den Auslciser leicht beri.ihren, um die Sucher-
               anzeige zu aktivieren.
        E (f fre d isplay continues   f or 3O sec.)        E  ( L'affichage dure 30 secondes.)
               iS (Se presentan durante 30 seg.)
                                                                   lang.)
  E Gl (Oie Anzeige erscheint 30 56[unden       E Frame your subiect.-
                  fl  Cadr.'r ic sujr.t.
       S  Encuadre el objeto fotograf iado.
    @ Den Bildausschnitt wdhlen.
               g.                I                ,q" not touch the  f ront-most part    .hJ;;----l                I E N" pas toucher d I'extremiti,avant "fde I'ohjectif.          I
                I  * No toque la parte delantera del objetivo.                                          i                   tr:b.t d:         L_9                         tfltvdffnung    nicht verdecken.                      I
View original page 18Page 21 · Read text
de                                                                                               el iluminador                                                             autom5ticamente                                                           se activa                                                      insuficientes,                                   son                              iluminaci6n                      de              conditiones             las:E Cuando                                                                   (distancia                                             m con un                                                        de toma: aprox.3                                                      correcta                                              distancia                     para                                              la                            determinar           autom6tico   *toqu"
   oUi"tiuo F1,8 de 50 mm). Sin embargo, existen algunos casos, segln el tipo de ob.ietivos utilizado, en
    los cuales no puede utilizarse este iluminador. Aun en estas condiciones  la distancia al objeto puede
   determinarse cuando se usa el F280'
G g"i schrvachem Licht wird der Autofocus-MefJblitz automatisch zur Entfernungsmessu-ng  zuryschaltet                                                                      nachverrvendetemObjcktiv)                                                                In.ein_igen                                   F/1,8 Objektiv).                       mm,-                             *it 50                                                                      fallel.(e    il,l.tsb.rcich:                  ca. i -                                                                      des F2B0 Autofocus-Ein-                                                               bei Einsatz                                                                           ist                                           werdc. Jedoch                                     cingesetzt                             nicht         der Mefiblitz                     iedoch   tann
    stellung moglich.


   Automatic battery check/Contr6le automatique des piles
         /Comprobaci6n autom5tica de pilas/Automatischer Batterietest
  E Wnen battery power falls below 50 %o, fl Utints after each shot, and charge time is increased
      when using the Power Flash Grip 3OO; therefore, changing the batteries is recommended.
  E euand l'6nergie des piles tombe en dessous de 50 %, A ctgnote aprds chaque prise de vue et         ta dur6e de ci'arge .ri uug-.nt6e en utilisant la poign6e "Flash" 300; par cons6quent, le change-
      ment des piles est recommand6.
  E Cuando la cargu de las pilas disminuye por debajo del 50 %, I  parpadea despu6s de cada
       disparo y el tiempo de carga aumenta cuando se utiliza la Empufradura de Al imentaci6n y
        Flash 300; por lo tanto, se recomienda el cambio de pilas.
  G nei einer'Batterieleistung unter 50 % blinkt Anzeige fl nach jeder Ausliisung und bei Ver-
      wendung des Batteriegriffs 300 mit eingebautem Blitz erhoht sich die Ladedauer. Batterie-
       wechsel wird emPfohlen.
View original page 21Page 23 · Read text
E On completion of rewind, the shuter is released, Q   f lashes and the                                                                                              f rame cou ntEr reads "O".
                                                    I  e la fin du rebobinage, le d6clencheur est relich6, Q s'allume et le                          _  compteur de vues indique "0".                      E  et finatizar el rebobinado, se libera el disparador, destella O y el
                          _  contador de fotogramas indica "O".
                   G  e-  Ende des Riiickspulvorgangs  wird der Verschlu$ freigegeben, die
                                  Q-Anzeige blinkt und das Bildzdhlwerk zeigt "o" an.


                                             Open the oamera back and remove the film.
                                                         Ouvrir le dos de I'appareil et retirer le film.
                                           Abra la tapa posteiior de la cSmara y retire la                                                                                                                                             trlltr                                                               pelicula.
                         G Die Kamerartckwand dffnen und den Film ent-
                                                 nehmen.


                       The  f ilm is completely rewound into the cartridg€.
                        Le film est complitement  rentr6 dans sa cartouche.                                                                 trEtr La pelicula ost6 complstamente rebobinada en el cartucho.
             G Der Film ist vollstiindig in der Patrone aufgewickelt.
27
View original page 23Page 24 · Read text
www.butkus.us
-

       Ol,tlW
                                Takins photoqraohs ll    E wittr a Continuous l\F modo, and a erEgram Shfii if,'at lets you choose at any time to shift             within the program in an apertu-rs or shutterpreferred rnan#r, tne oM-zo7 piovideii;;ih;             expression of wery photographic idea.
                                          Prise de vues II                                  continue                         point AF                  al    E                                         et tJ a-g-carag. a;"p;;gtamme permettent au photographe             d'exprimertf  mrye                                  son                        totalement                                         idie photographique.

       EJ con un modo de enroqu.e.                             de prosrama que re permite en              gu-qlqytgr momento cambiar"".of?,Ati^",,1?:Tffit*J'ldentro del programa la abertura o velocidad de obturaci6n, la
          OM-7O7 proporciona la expresi6n de cada ideJfotogr6fica.
    G Durch die wahrm.glichkeit v"'tlfr1ffi:l3,ihH[?*jlr.*ro und der Frexib'itiit des
             Boguq,.nt-shifts  _mit -beliebigem Zugiff auf Zeit- und Blendinautomuiit<--- '--- eiLubt--;     aie oM-zo7              die Realisierung aller fotografschen Einfit[e und vorstellungen.

                                                                                                      28
View original page 24Page 25 · Read text
Taking a Continuous Series of Shots
                    Prise de vues en rafale
              Toma de una serie continua de fotografias
                 Serienaufnahmen
     [fl Continuous focusing and shooting is especially usefulwhen shooting moving subjects. As soon      as the subject is in focus, the picture is taken and the film wound to the next frame. This
  _  process is repeated as long as the shutter release is held down.
  E  L. mise au point autom-atique en prise de vues en rafale est particulidrement utile p.our des       sujets en mouvement. Dds que le sujet est net, la photo est prise et le film avance d la vue
  _  suivante. Ce processus se r6p6t6 aussi longtemps que l-e d6clencheur est maintenu press6.    l9l El enfoque ydisparo conttnuo es especialmente 0til cuando se fotografian objetos en movimien-       to. Tan pronto como el objeto est6 en foco, se toma la fotografia y la pelicula sa bobina hasts
        el pr6ximo cuadro. Este proceso se repite mientras se mantenga presionado el disparador.
  $  neim Fotografieren von sich bewegenden Motiven empfiehlt es sich, auf kontinuierliches Scharf-       stellen in Verbindung mit Serienschaltung des Motors umzustellen. Sobald das Motiv scharfge-
        stellt ist, erfolgt eine Aufnahme und der Film wird zum nlchsten Bild transportiert. Dieser Vor-
       gang wird solange wiederholt, wie der Ausl<iseknopf gedriickt wird.
                         E Press the D R IVE button to enter thg rmnrr
                                                 mode.
                                                          Press the shutter release.
                                                                    fl  Rppuyer sur la toucltc DRIVE pottr cntrcr dans lc                                    mode l.rnTt.
                                              Appuycr sur le ddclenchcur.
                               $  Presione el boton DRIVE para establecer el modo
                                                         rdanTr   .
                                                        Presione el disparador.
                      G D.n I''ilmtransportknopf DRIVL drijcken, ttm aut'
                                                     Sericnaufnallmcn  tadnf| umzuschalten.
                                           Dcn Ausloscr driickcn.

zv
View original page 25Page 27 · Read text
@ Wfren the knob is shifted to the right, the lensfocuseson clossr                                       subjects. When shifted to the left, the lens focuses on farther
                                         subjects.
                             pn poussant le curseur vers la droite, la distance de mise au point                     E                                     se rapproche du minimum. En poussant le curseur vers la gauche,
                         _   la mise au point se dirige vers I'infini.
                                     lSl Cuando se desplaza la perilla hacia la derecha, el objetivo enfoca                                           los objetos m6s cercanos. Cuando re desplaza hacia la izquierda,
                                               el objetivo enfoca los objetos m6s lejanos.
                                         -[S Wird der Knopf nach rechts geschoben, wird das Objektiv auf
                                    k0rzere Entfernung eingestellt. Durch Verschieben des Knopfes
                                  nach links wird das Objeiktiv auf grii0ere Entfernung eingestellt.


                    press the lens locking button @ while using the power focus as this will put thetr Be sure not to   camera into autofocus mde.
tr S'assurer de                    n-e pas appuyer sur le bouton de verrouillage d'objectif C     utilisant la mise au   point motoristie sinon I'appareil sera mis en mode autofocus.           "n
E Tenga cuidado de no presionar el bot6n de seguro del objetivo @ mientras utiliza el enfoque
   motorizado ya que esto colocaria la cdmara en el modo de enfoque autom6tico.
G
View original page 27Related documents and language editions
From the M. Butkus archive. Original publisher and archive notices are retained.
Check the model and edition against your equipment.
PDF verified 2026-10-10.