Film cameras
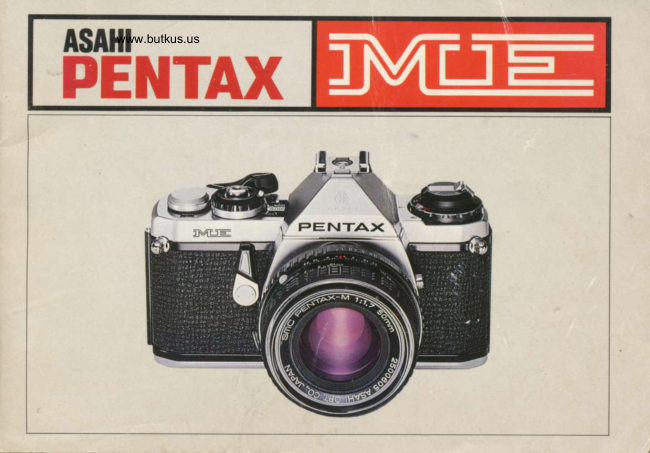
Pentax ME User manual
User manual for Pentax ME. 39 pages in English. Read the original PDF, download or print a copy without registration.
39 pagesEnglish6.2 MB PDF
Loading your manual…Open PDF directly
Document details
- Brand
- Pentax
- Model / document
- Pentax ME
- Document type
- User manual
- Language
- English
- Pages
- 39
- File size
- 6.2 MB
- Category
- Film cameras
- Document date
- Not specified in catalog
Search available document text
Find a term, then jump to its page in the original PDF. Image-only pages may not be searchable; check the PDF for exact wording and diagrams.
Page 2 · Read text
IMPORTANT

SMC Pentax lenses and Pentax
accessories are engineered and
produced meticulously to
precise Asahi Pentax
specifications. Lenses and
accessories from other
manufacturers are not produced
to these precise specif ications
and, therefore, may cause
difficulties with - or actual
damage to - a Pentax camera.Asahi Pentax cannot assume
any responsibility or liability
for diff iculties resulting  f rom
the use of any other brand of
lenses or accessories with an
Asahi Pentax camera.
View original page 2
Page 4 · Read text
Digitally signed by Mike Butkus
           Mike Butkus DN:org, cn=Mikeemail=mike@butkus.org,Butkus, o, ou=Butkus.c=US
                                                                      Date: 2025.01.04 19:37:04 -05'00'


O Neck strap ring            @ Hot shoe               @ Focusing ring
                                                                            Distance scaleO Exposure counter                   I Exposure compensation dial       (D
O Self-timer lever           @ Film rewind crank         @ Depth-of-field scale
O Shutter release button       @ Film rewind knob/Back            (D Aperture/Distance index
O Shutter speed index button         cover opener             @ Aperture ring
@ Rapid-wind lever           @ Lens release lever          @ X*ync socket
O Shutter dial              @ Upraised alignment dot      @ Viewfinder eyepiece
                                                                               2.
View original page 4Page 5 · Read text
a.a              www.butkus.us

   :)


 (D Film advance/rewind         @ Wi nder/Tripod receptacle     @ Film take-up spool
   indicator                             (D Film rail                              (E Back cover
@ Guide pin channel          @ Film guide rail              @Film pressure plate
(DWinder direct contact        @ Shutter blades
   terminal                @ Film rewind button
@ Film chamber            O Film transport coupler
@ Battery chamber           @ Sprockets
.3
View original page 5
Page 6 · Read text
SPECIFICATIONS


             Type  35mm fult-frame SLR camera with aperture preferred automatic
                       exposure electronic focal-plane shutter and open-aperture center-
                        weighted Through-The-Lens metering.
         Lens mount    Pentax K bayonet.
      Standard lenses  SMC Pentax  50mm f/1.2
                 SMC Pentax-M 50mm f/1.4
                SMC Pentax-M 50mm f/1.7
                 SMC Pentax-M 40mm  f 12.8
             Shutter    Seiko MFC vertical-run metal focal-plane shutter; automatic
                       exposure electronically controlled between 8 and 1/1000 sec.;
                      manual mechanical speed of 1/100 sec. plus B; provided with
                          shutter button lock and "Cocked" indicator.
Flash synchronization   X socket on front of camera body, plus X-contact hot/cold accessory
                          shoe; X  f lash synchronizing at 11100 sec.
             self-timer    Delays shutter release 4-12 seconds.
          Viewfinder    Silver-coated' pentaprism finder; split-image microprism focusing
                           screen; 92Yo oI picture-taking area visible and 0.97x magnif ication
                           (with SOmm lens at infinity); -0.5 diopter eyepiece. LED dots
                            inside viewfinder indicate automatically selected shutter speeds, plus_
                         over and under exposure warning. Correction lens adaptor M,
                          Magnif ier M and Refconverter M fit the viewf inder frame.
Mirror and diaphragm    lnstant-return mirror and automatic diaphragm.

                                                                      4.
View original page 6Page 7 · Read text
www.butkus.us


           Film wind and rewind Single-stroke rapid wind lever, plastic-tipped for winding comfort.
                                135" throw with stand-off angle of 30'. Rapid rewind crank for
                  Firm roading ;r"Tt;lil.ijlT'io;","k/sure  roadins.
            AutomaticwinderMEcamerabodyacceptstheneW1.5-frames-per-secondautomatic
                       '                         film winder, for consecutive or single frame exposure operation.              Exposure counter Automatic reset type.
               Exposure meter  Open-aperture, center-weighted Through-The-Lens meter, with GPD
                                           cells for fast light response, with LED exposure read-out; rapid wind
                                           lever and shutter release button acting as meter switch. Exposure
                                     ranse; EV1 - 19 (ASA1OOtl1.4). Film speed range: ASA12 - 1600.
                                 Exposure compensation dial: 114x, 1 l2x, 1x,2x, 4x.
                   Battery Two 1.5V silver oxide batteries (G13); LED's double as battery
                                 check lamp.
                   Back cover Standard back with memo holder, interchangeable with Dial Data                                                         l
                       ME for data recording on film.
                  Body size 131mm x 82.Smm x 49.Smm.
                Body weight 460 grams.


o5
View original page 7Page 8 · Read text
1. Remove the rear lens and
body caps.
2. Match the red dot @ on the
camera body with the red dot
@ on the lens. Insert th€ lens
 into the body and turn it
clockwise until the lens locks
with a click.
3. In the dark, when the red
dots are difficult to see, align
the upraised white dot @ on
the lens barrel with the lens
release lever @ by touch. Then
turn and lock as above.

4. To detach, hold the camera           lf you have to put the lens
with your loft hand. Depress the   down without the rear lens cap,
lens release lever @ while          place it only front-element-
turning the lens counter-          down, never  f ront€lement-up.
clockwise with your right hand.                            When changing lenses outdoors
                                  with film in the camera, avoid
                                       direct sunlight.
                                                   6.
View original page 8Page 9 · Read text
INSERT!NG BATTERIES
             www.butkus.us


Two silver oxide batteries are
packed separately. Be sure to
insert them into the battery
chamber before operating the
cam era   .               'o@                                    *,

 CAUTION                            Insertion Open the battery       button. lf they are weak, the
                              chamber cover with a coin.       LED dot will .just  f ticker as a
                                        Insert the two batteries into the    warn ing  f or battery replacemenl
                                    battery chamber of the camera         lf the batteries are dead, the
                                       as shown above, each with plus    LED will not lighr.
                                    (+)side facing down. For       ALWAYS CARRY SPARE
                                   replacement, use Eveready 576E   EATTE R  I ES,
                                   or Mallory MS76H or equivalent
                               Check Under normal
                                    condilions, one set of batteries
                                        will last about one year or                                  operate the electronic shutter     l'-.' ffi
                                approximately 10,000 times. lf
                                  battenes are active, one of the
                          LED dots will lighr when you
                                   depress the shutter release
View original page 9Page 13 · Read text
www.butkus.us

                The ASA film speed rating of all 35mm films is given in the data
                    sheet packed with each roll of film. The higher the ASA number,
                    the more sensitive the  f ilm is to light.
                To set the index, lift up the ASA dial @ and turn it until the ASA
                 number of your film is opposite the orange index mark.


                As a reminder of the type of  f ilm in your camera, tear off the top of
                                         f ilm box and insert it into the Memo Holder on the back cover of the
                   camera.
View original page 13Page 14 · Read text
REMEMBER to set the dial at "1x" for normal exposure.
The scafe l4x, 2x, 1 x, 1 l2x, 1 /4x) indicates the exposure factor.
You wifl obtain'l@while                             1 l2x and 1 l4x
automatically program the camera to deliver one half and one
fourth the amount of light to the film. The 2x and 4x settings
automatically double and quadruple the light reaching the film.


Use this control only when necessary to give intentional over or
underexposures @.                        For example, set thediat at 4x or 2x when shooting against the light, and at 1l4x or
1l2x when shooting against dark backgrounds. In addition, the
dial can be set between the indicated positions to achieve more I  t
specif ic exposure control.                               ,1tl*                                       tr


                                                       12o
View original page 14Page 16 · Read text
AUTOMATIC EXPOSURE CONTROL


                            Keep the shutter dial at AUTO.
                       The electronic shutter of the ME works fully automatically at any
                                                                                          the                                                                            seen in                                                                                                                                                                            f igures
                                                                  U                                                                                 of seconds                                                                                          lZ to             \                speedviewf inder,betweentrom'l110002 to  l andOOO 8referseconds.to  f ractiorrsThe
                            1/1000 second). 1 to Bs indicates fullseconds.
                               After advancing the rapid wind lever, do not push it  f lush with the
                             camera body as this will turn off the metering circuit, but leave it at
                                          its partially extended position and then depress the shutter release
                             button halfway to switch on the electronic circuits. one of the 16
                               red LED dots alongside the shutter speed scale inside the viewf inder,
OYTRrm                                will illuminate indicating the automatically selected shutter speed.500                                          (lf the OVER or UNDER warning illuminates, open up or close
2flt                      down the aperture.) When desiring to change the shutter speed,
r25                            simply rotate the aperture ring untilthe LED is aligned with thef,t30                            speed of your choice.
                                             (lf the LED dot just flickers or does not light, change the batteries.
                             See page 7.) t5II                             Depress the shutter release button allthe way to take the picture' 2
  I
2r
4s
8s
ur{0ER


                                                                                  14o
View original page 16Page 17 · Read text
www.butkus.us

     To prevent accidental release of the shutter after cocking. turn the
       shutter dial by pressing on the white button 6 and set it at ,,L,'
       (Lock). To return the shutter dial to "AUTO", lust move  it back to
          its original position where  it will lock into place.


                     CAUTION
   I                  lf you should happen to press the shutter button while the
            shutter dial is set on AUTO with the lens cap on, or in very
          poor lighting conditions, the mirror may lock up, resulting
   I             in abnormally long exposure. To correct this, the shutter                                  ,il)
   I          can be quickly closed by turning the shutter dial to 100X.
a           After closing the shutter, be sure to reset the shutter diar            a
            to AUTO.

     r15
View original page 17Page 18 · Read text
Your Pentax ME is meticulously designed and constructed mainly
for automatic exposure. You do not have to set the shutter speeds
everytime you take pictures. As long as the batteries are active,
you are always assured of property exposed fine quality
photographs. So always be prepared with spare batteries. In case
you find yourself without spare batteries while taking pictures, you
can then utilize the 1 /1 00 second manual shutter speed. Press on
the white button of the shutter dial and set it at "100X" (1/100
secondl. At this setting, the shutter will operate at 1 /100 sec.
Select the aperture according to the brightness of your subject
(refer to the exposure guide accompanying the film).
The "100X" setting  is also for use with electronic flash. (See page24l
The "8" (Bulb) setting  is used when desiring to make "Time"
exposures longer than 8 seconds. To use, attach a cable release to
the shutter release button of the ME which is first mounted on a
tripod. The shutter will open when the plunger of the cable release
is depressed and remain open as long as pressure  is maintained. Fol
ultra long exposures such as several minutes or hours, use a cable
release with a locking device.


                                                                                                                                                                                                                                '|                                                  6.
View original page 18Page 19 · Read text
www.butkus.us


                                The standard focusing screen of your ME has a
                                          central split-image circle surrounded by a
                                   microprism cpllar. While viewing through the
                                       viewfinder, turn the focusing ring until your
                                        subjcet comes into sharp focus. lf your subject
                                                      is not in focus, the image in the split image
                                               circle will appear divided into upper and lower
                                        portions, and the image in the microprism
                                             collar will appear broken into many small
                                                                                         f ragments.
View original page 19Page 20 · Read text
As a general rule, your camera can be held more firmly in the left hand, which does not release the
shutter. lf you hold your camera with the right hand - the hand that releases the shutter - this maycause camera movement. often, blurred pictures are due to camera movement.

Horizontal position A.               Vertical position B.                  Vertical position C.
Hold the.camera  f irmly with       Hold your camera tightly to        Hold your camera tightly to your
your left hand, and draw your     your forehead with your left       forehead with your left hand,
arms close to your body.           hand, and draw your right            raise your right arm and draw
                             arm close to your body.           your left arm to your body.


                                                                                     18.
View original page 20Page 21 · Read text
www.butkus.us

        After the last picture on the roll has been taken, the rapid-wind lever will not advance any further
 I      crank.{Caution:Depressdo notthetryfilmto rewindforce thebuttonlever),@indicatingand turn thatthe rewindthe filmcrankmust asbeindicatedrewound.toLiftrewindup thetherewindfilm
        into its cartridge. lf the film is being properly rewound, the film rewind indicator @ will  f licker. I     Rewind until the tension on the crank lessens, indicating that the leader end of the film has been
        released from the take-up spool. Pull out the film rewind knob (the back will open automatically), and
       remove the film cartridge.
     AVOID DIRECT LIGHT WHEN UNLOADING THE FILM.


I
I                   I

     o19
View original page 21Page 22 · Read text
Depth of field is the range between the nearest and farthest
distances which are in focus at a given lens aperture.
lf you want to know how great the depth of field is at a certain
aperture, focus on the subiect and look at the depth-of-field scale
on the lens. In the photograph below, the distance scale is set at
5 meters; that is, the lens is focused on a subiect 5 meters away
The calibrations on each side of the distance index correspond to
the diaphragm setting and indicate the range of in-focus distance
for different lens aperture.
For example,  if a lens opening of t14is to be used, the rang€ on the
distance scale ring covered within the figure 4 on the depth-of-field
scale indicates the area in focus at that lens opening' You will note
from the depth-of-field scale in the photograph that the range from
approximately 4 to 7m is in focus. Note that as the lens apsrtures
        the efiective depth of field also changes. For the depth of
"iting",field at different apertures and distances. refer to the next page'


                                                     o
                                                       Dittanc€ (m)

                                                  20.
View original page 22Page 24 · Read text
The red area in the table indicates the coupling        aperture settings is, of course, determined by the
range of the meter, and should not be interpreted    minimum and maximum apertures of the lens
as the camera's total range of f/s16p-56u11a.           being used. For example, with the 50mm f/1 .4
speed combinations. As you will note from the         fens and ASA1O0 film, an apertur€ fromt11.4
table below, with an ASA25 film, you may use        (the maximum aperture of this lensl to f/22
any shutter sped from 4 sec. to 1/1O00 sec., the      (the minimum aperture) may be used with any
actual shutter speed depending upon the               shutter speed from 1 sec. to 1/1O00 sec.
apsrture being used. The total range of the


SH UTTE R


                                                                                 22.
View original page 24Page 25 · Read text
www.butkus.us


                  The self-timer delays release of the shutter 4-12 seconds, depending
                  upon how far the self-timer lever is advanced. To operate the self-
                       timer, push the lover counterclockwiss  until  it stops. To start,
                   push up slightly on the self-timer lover.
View original page 25Page 26 · Read text
The ME has an "X" socket @ on the side of the         lf your electronic flash is of the small shoe-mount
lens mount, and a separate X contact @ on the      type capable of cordless operation. mount  it on
built-in hot/cold accessory shoe. This hot/cold        the hot shoe, as illustrated.  lf your flash is not of
shoe contact remains electrically disconnected        the shoe mount type. then plug its cord into the
until an accessory's shoe is inserted. This is         "X" socket @  .
accomplished by a tiny micro*witch built into     When using electronic  f lash. be sure to set the
one of the shoe rails. This excellent arrangement      shutter dial at "100X." This is the highest shutter
affords good protection from the hazard of          speed at which electronic  f lash units may be used.
electric shock when using the other flash socket
on the front of the camera body.
P


                                                                           24o
View original page 26Page 27 · Read text
www.butkus.us

   lf you intend to take infra-red photographs,         by turning tha focusing ring accordingly. For
 remember to use the infra-red mark indicated          instance, if your subject is in focus at infinity,
 with an orange line on the depth-of-field scale.       turn the focusing ring and move the infinity (-)
  First, bring your subject into sharp focus. Then     mark to the infra-red mark.
 determine the subject-to-camera distance from
 the distance scale on the lens. Then match your     o NOTE: An infra-red focusing adjustment  is not
 subject-to.qamera distance to the infra-red mark      required when working with infra-red color film.


.25
View original page 27
Related documents and language editions


From the M. Butkus archive. Original publisher and archive notices are retained.
Check the model and edition against your equipment.
PDF verified 2026-10-10.