Film cameras
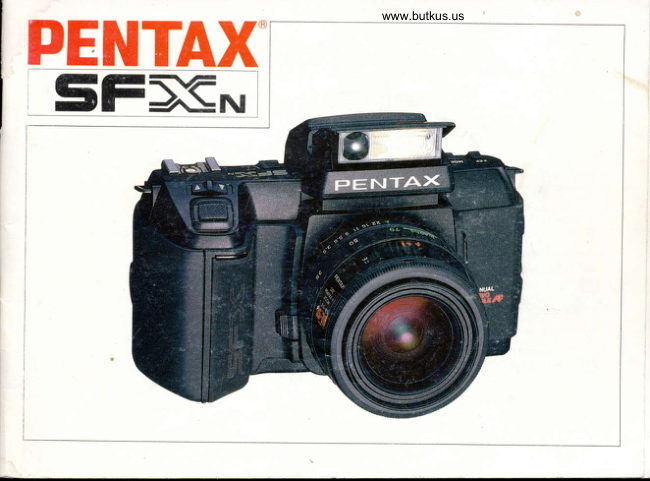
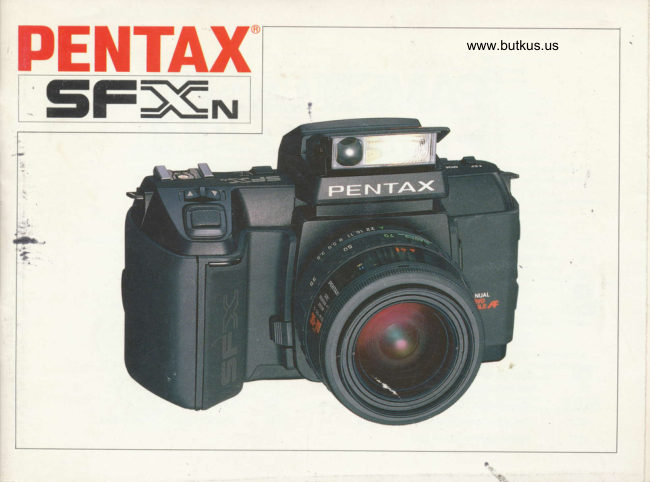
Pentax SFX User manual
User manual for Pentax SFX. 99 pages in English. Read the original PDF, download or print a copy without registration.
99 pagesEnglish8.4 MB PDF

Loading your manual…Open PDF directly
Document details
- Brand
- Pentax
- Model / document
- Pentax SFX
- Document type
- User manual
- Language
- English
- Pages
- 99
- File size
- 8.4 MB
- Category
- Film cameras
- Document date
- Not specified in catalog
Search available document text
Find a term, then jump to its page in the original PDF. Image-only pages may not be searchable; check the PDF for exact wording and diagrams.
Page 6 · Read text
BEFORESHOOTING


1. Remove the battery         2.  Att""n a Pentax-Flens.   3. Open the back cover       4. Turn the-mainswitch
    grip and inserta lithium      (page6)                     a n d l o a d t h e f i l m .            on. (page7)
   b a t t e r y . ( p a g e s 4 & 5 )                                  (pages11-13l.


   Since this camera is an auto-focus camera, taking
    pictures with   it  is extremely simple. However, it
    will not operate properly if'you set it up or handle
       it  incorrectly. Perform the following operations,
                                                                                       o  After adjustingthe    referring to  the pages listed, before you  begin
                                                                                            diopter of the eyepieceto    taking pictures.                                                                                   your eyesight,insert the   There are also many ways to shoot photographs                                                                         Eyecup F into the    with this camera. Pleaserefer to the section about                                                                                 accessorygroove. (page 28)    the specific mode you want to use before going
   on to page 3.


o 2
View original page 6Page 7 · Read text
OUTLINE OF OPERATIONS


1. Set the desired exposure mode by     2. Set the focus mode switch at the      3.  Positionthe subjectwithin the
   sliding the select switch to the UP      SINGLE position. (page29)             viewfinder's focus frame [[  ]l  .
   or DOWN position while holding      When you pressthe shutter                         lf the green in-focus signal I O]
   the mode/drive switch at the            releasebutton halfway down,             at the bottom of the viewfinder
  MODE position. (pages7 & 14-          the auto-focusingmechanism is           lights up when you pressthe
   25)                                     activated and the lens starts             shutter releasebutton halfway
                                       moving. (pages30-35)                down, the subjectis in'focus.
                                                                          (pages30-35)


                                                          o After shooting the designatednumber of frames,
                                                                               and take it to a photo                            www.butkus.usrewind the film into its cartridge
                                                            servicefor development as soon as possible.(pages36
                                                 & 3 7 )
View original page 7Page 8 · Read text
INSERTINGBATTERV

                                                                                                   ( L i t h i u m B a t t e r y G r i p )
      This cameracomes equippedwith the
      standardLithium Battery Grip. For this grip,
      use one 6V lithium battery (National/
      PanasonicBR-P29p, DuracellDL-223A,
      EvereadyEL2CR5 or Sanyo 2CR5).


                                                                            BR-P2op/DL-223A      E L2CR5/2CR5


                              o When you change            1. Remove the grip by turning its mounting screw
                                batteries,the CENTIC           counterclockwisewith a coin.
                              (Central Information           2. Positionthe lithium battery properly by matching its      'UrrSmxO.-OgB       Cluster) LCD display                                                                   polarity marks ("+" and "-")  with those insidethe                             panel will be activated,
                          and all its indicatorsand           grip, then mount the grip at the original position.
                                the f lash-readyindicator         (The old battery can easily be removed by pulling
                              o f  t h e R T F w i l l  l i g h t u p .         the band.)

                                                                   x  f nsert BR'P2Dp and D L-223A within the inner f rame
                                                                          of the battery chamber as shown above.


o 4
View original page 8Page 9 · Read text
( "AA"-size Battery Grip)


                      AUTO

                                                                                  - \  l  l Ir rE- r l

3. As illustrated,the CENTIC panel shows the selected      As illustrated,the "AA"  Battery Grip (optional)can be
   exposuremode. lf the panel remainsinactiveor all        used with four "AA"-size alkaline batteriesof the same
     its indicators light up, the battery is either exhausted       type. Make sure they are insertedproperly.
    or not insertedproperly, so check it again.


*Battery Warning Mark
When the battery weakens,the battery warning mark [-1
on the CENTIC panel and the viewfinder indicatorswill
start bl inking to inform you of this condition. Replace
the battery as soon as possible.lf the battery drops
below      the required voltage,                          the                              shutter                                    release
lock    automatically,                and the                          indicators                               on                                      the CENTIC                                           buttonwww.butkus.uswill       oHowever,"AA"-sizetheirmanganesepower supplybatteriesis limitedare alsoandusable.use of alkaline
p a n e lw i l l a l l l i g h t u p .                                          batteriesis recommended.

                                                                                                             5 o  1
View original page 9Page 10 · Read text
ATTACHINGAND REMOVINGLENSES

                                 Read this section even if the lens is arready mounted on the camera.
                                       o Remove the body-mount cap and the rear lens cap.
                                  The Body-Mount cap F and the Lens-Mount cap K are avairabreas options.


                                                  until the lens locks with a click. when mounting the lens by touch under
                                       dim light, method O  is recommended.
                                              2. To remove the lens cap, press in the tabs on both sides.
                                              3. To remove the rens,turn  it counterclockwisewhire pressingthe lens
                                            releaselever toward the camera body.

                                       o Attach the front and rear lens caps on the detached lens to protect it from
                                       dust and scratches-The lens should be set down with the front lens side down,
                                     as illustrated.
                                                        *  lf a Pentax-A or -M rens is mounted directry onto the camera, it can be used
                                        only in the manual-focusmode (page34).  lt can also be used as an auto-focus
                                       lens in combination with the AF Adapter 1.7X (optional).
                                                             " old Screw-firountTakumar rensescan be used with the Mount Adapter K
                                           (optional). However, focusing must be made using the viewfinder,s matte area.


                                                 t-_+
                                      oo not damageor stain the lens information contacts or the AF coupler on                                                                            I
                                                                            I  the mount surfacesof the camera and the lens. lf this occurs, wipe them
                                                                                                j  SentlVwith a clean dry cloth.

o 6
View original page 10Page 11 · Read text
MAIN SWITCH,SHUTTERRELEASEBUTTONAND CONTROLSWITCHES


                                                                      Control Switches
                                                       The mode/drive and ISO/exposurecompensation
                                                                switches can be operated by moving the switch to the
                                                               d e s i r e dp o s i t i o n( M O D E o r D R I V E , t E F o r  I S O ) a n d
                                                                       sliding the select switch to the UP or DOWN position.
                                                       The select switch is also used to set a shutter speed.
                                             MODE = Exposure mode (ProgrammedAE, etc.)
                                                     DRIVE = Self-timer, single advance,consecutive
                                                             advance
                                                    +EF = Exposurecompensation
                                                          ISO = Film speed

    Main Switch                                                   Shutter ReleaseButton
    Wheneversetting an exposure mode or releasingthe         When the main switch is turned on and the shutter
     shutter,make sure you turn the main switch on  [ 1..'r)]         releasebutton is pressedhalfway down, the auto-focusing
      first. Turn  it off  I O  ] when you are not using it to           and light-meteringmechanismsare activated,and the
     avoid accidentalshutter releases.                     CENTIC panel and viewfinder display indicatorslight up.
                                                            (The indicatots remain on for approximately 10 seconds
     o When the main switch is set at the  [ 'rt)] position, a         even after the shutter releasebutton is released.)Tor
    PCV tone will inform you of correct focusing and self-         releasethe shutter, pressthe shutter releasebutton all the
     timer operation.                                     way down.
                                                               o  lf you pressthe shutter button with the back cover
                                                             open, the shutter will be releasedat a f ixed speed.

                               www.butkus.us


                                                                                                                                                   --,rir&qd-i;,*:,         ; 3,p***l[b;iaf         ,;,*u-,                                        7 t-.iEfl
View original page 11Page 13 · Read text
VIEWFINDERDISPLAY


Viewf inder Inclications
    t     I   Focus frame indicator
 > O <   Focus indicator (front-focus, in-focus and
         back-focussignals)
       I      Flash-readyindicator (A flash-readyindicator
           for the built-in RTF is located next to the
          viewfinder eyepiece)
  M     Metered Manual indicator
  A      Shutter-PriorityAElAperture-priorityAE
          indicator
   P    ProgrammedAE indicator
2OOO-2  Shutter speed indicator ("2OOO" for 1l2OOO
        second and "2"  f or 1/2 second)
  LT    Long-Timeexposureindicator
  tEF   Exposurecompensationindicator


                            www.butkus.us
View original page 13Page 14 · Read text
USABLE  FILM  (DX-coded film and non-DX-coded filml


                                 0 o o o o o O o o . o o i


                                            -information

DX-Codedfilm                                    Non-DX-CodedFilm
When DX-codedf ilm is loaded in the camera,the ISO       When loadingf ilm that is not DX-coded,make sure you
film speed is set automatically. This type of  f ilm will           set the ISO f ilm speedindicatedon the packagemanually.
have a DX mark on its packageand/or a DX information     When the ISO/exposurecompensation switch is pushed to
panel on its cartridge.                                       the ISO position, the ISO film speedof the film used
                                                         previouslyis indicatedon the CENTIC panel.While
o The automatic ISO film+peed setting for DX  f ilm is          holding the compensation switch at this position, slide
availableonly for film with an ISO rating between 25           the select switch to the UP or Down position to set the
and 5000, so make sure you use film in this range.            desiredfilm speed.One move of the select switch either
o  lf the automatic ISO film-speed settin! for DX film is        increasesor decreasesthe film speed bv'll3  of a step in
cancelledby the override mechanism describedat right,        the range between ISO 6 and ISO 6400.  lf the select
the DX mark on the CENTIC panel will blink to               switch is held at one position, the speed is changed
warn you.                                                continuously.
                                                   UP:    Heightensthe sensitivityof the f ilm, up to ISO
                                                               6400.
                                         DOWN: Lowers the sensitivityof the film, down to ISO 6.
View original page 14Page 15 · Read text
FILM LOADING


Always load or unload film in a shady spot, or shield it
from direct sunlight with your body.

1. Open the camera's back cover by sliding down the
   backcover releaselever while depressingthe back-
   cover lock button.
2. A  f ilm cartridge can be easily inserted by sliding its
   upper part into the film chamber f irst.


  The DX-information pins are very important for                           O   f itm chamber
                                                              O OX-intormationpins   correct automatic ISO film speed setting. Do not
                                                              O Guide rails
   bend them, and keep them  free from  scratches,www.butkus.us               O Sprocket teeth   stains,dirt and dust.
                                                              O   f itm loadingmark

                                                                                                            1 1 o
View original page 15Page 16 · Read text
Film loaded slack


                                       ! 0 0 E o o o o o o o 0 0


                    0 O O 0 o O o o o o o 0 o o o o o 0 0 0


3. As illustrated,pull the film leaderout until its end
   alignswith the film loading mark of the camera
   body.

o Do not leavethe filin slack.
o  lf the film leader is sharply bent, straighten it or cut  it
out before loading.
View original page 16Page 17 · Read text
4.  Close the back cover, as illustrated.                             6.  Film advanceautomatically stops when the exposure
5. Tu rn   t h e m a i n s w i t c h o n . Th e sh u tte r a u to ma tica lly            counter reachesthe first frame, and the CENTIC
    releases to advance the  f ilm  to the  f irst frame.                 panel appearsas it does above.
                                                    The f ilmloaded mark lights up, and the f ilm-advance
                                                     and end-of-film marks blink each time the film is
o The type  of film  loaded  in the camera can be checked          advancedto the next frame.
in  t h e  f ilm   i n f o r m a t i o n w i n d o w.
o The film  is advanced to the first frame, even  if the back
 is c lo s e d aft e r  t h e m a i n s w i t ch  is tu rn e d o n .


                                                                                                                  lf  the filmJoaded, film-advance and end-of-film
                                                     marks do not appear on the CENTIC panel, the
                            www.butkus.usfilm  is not loaded properly. Open the back cover
                                                     and reload the film.
View original page 17Page 20 · Read text
SHOOTINGIN THE PROGRAMMEDAE MODE


Exposure Modes When Aperture Ring is Set at "A"
                                                        'ff          r ProgrammedAE modes
               . ProgramAction
       'Normal Program
       'Program Depth
                     I  Shutter-Priority AE mode   r,'.i

o The exposure modes mentioned above can be used only
 in combination with SMC Pentax-F or -A lenses.

Programmed Auto Exposure System                               1. When the ProgrammedAE mode is selected,the
The camera automatically selectsthe optimum                CENTIC panel confirms it by activating the
combination of aperture and shutter speed to ensure          IPROGRAM] indicator and one of three other
correct exposure according to the lighting conditions              indicators-   [ E]   for ProgramAction, INORMAL]
surrounding the subject. The ProgrammedAE modes                for Normal Program and IE$ ] for Program Depth.
free you  f rom compl icated exposure controls and allow           Set the desired ProgrammedAE mode by moving
you to concentrate on the subject, so take advantageof            the select switch to the UP or DOWN position while
them for standard shooting and in situations when shutter         pressingthe mode/drive switch at the MODE position.
speed is crucial. This camera features three Programmed
AE modes suitable for a wide range of photographic
situations.


r,tlR                    ,.&*i&es**,
View original page 20Page 21 · Read text
SHOOTINGIN THE PROGRAMMEDAE MODE


Expos ure M o d e s W h e n A p e r t u re Rin g is Se t a t "A "

                    I  ProgrammedAE modes
               . ProgramAction
               . Normal Program
               . ProgramDepth
                     I  Shutter-Priority AE mode

o The exposure modes mentioned  above can be used only
in combination  with SMC Pentax-F or -A lenses.

Proqrarnmed Auto  Exposure System                               1. When the ProgrammedAE mode is selected,the
The camera automatically  selects the optimum                CENTIC panel confirms it by activatingthe
combination   of aperture and shutter speed to ensure           IPROGRAM] indicator and one of three other
correct exposure according  to the lighting conditions               indicators-   [ a]   for ProgramAction, INORMAL]
surrounding  the subject. The Programmed AE modes                 for Normal Program and IElJ ] for Program Depth.
free you   f rom compl icated exposure controls and allow            Set the desired ProgrammedAE mode by moving
you  to concentrate  on the subject, so take advantage of            the selectswitch to the UP or DOWN position while
them  for standard shooting and  in situations when shutter          pressingthe mode/drive switch at the MODE position.
speed is crucial. This camera features three Programmed
AE modes suitable for a wide range of photographic
s it u a t io n s .

                            www.butkus.us


r  1 A
View original page 21Page 22 · Read text
li,i,i,       F.r,J
                                                         r      oxO-_--O i

                                         PRllGRAM.

                                                         r      oxO----O  i

2. When you press the shutter release button  halfway        ProgrammedAE Mode Warnings
   down,  the camera displays "P"  and a shutter speed                 lf the subject is too bright or too dark, the viewfinder
     in the viewfinder,  as wel I as a shutter speed and           and CENTIC indicatorsblink to warn you. When the
   apert u r e v a l u e o n  t h e C E N TIC  p a n e l.                      selectedshutter speed is 1/30 second or slower (shown
                                                        by orange indicators in the viewfinder), the use of a f lash
                                                                 or tripod is recommended to avoid camera shake. (See
                                                   page 26 for more detailed information on warnings.)


o When the Normal Program mode is selected,the
CENTIC panel also displaysa sub-modeindicator (t E   I ,
ItE]  or  t rfrl), dependingon the focal length of the
lens in use.
                                                                                                                                                                                                                                                                                  ' t 7 .
View original page 22Page 23 · Read text
Normapl Program Mode                          Program Action Mode
 PRl|GRAM.           PR0GRAM.                                                 trI


When the Normal Program mode is selected,the camera        This mode is programmed to select a relatively high
automatically sets one of the sub-modes(Wide IEl   .           shutter speed,making it ideal for action shooting such
Standard Im]  or Tele Itl]l  ), flspsnding on the focal          as sports and wildlife photography. lt also minimizes
length of the lens in use.The sub-modeis also automatically     camera shake and vibration to prevent blurred images.
switched when the focal length of the zoom lens changes.
When the macro setting of a zoom lens is used, the
Normal ProgramTele IE]   is automatically set.
                                               Program Depth Mode
When an SMC Pentax-A lens is used, the camera auto-
matically selectsthe Normal Program Standard mode.                      PROGRAM.

Normal Program Sub-Modes and Lens Focal Lengths

 Wide  I url]
 Standard IE]      Between 40mm and 11Omm              This mode is programmed to maximize the depth of
                                                                           field. Use it for subjectsrequiring both near and distant Tele It|]]          Longer than 1 1Omm                                                       elementsto be in sharp focus, such as portrait shots
                                                               with a background setting (buildings, landscapes,etc.),
                            www.butkus.usor taking close-ups.

rI*
View original page 23Page 24 · Read text
Exposure Mode Clear Button
Pushingthis button instantly resetsall the current settings
(exposuremode, drive mode, exposurecompensation,
etc.) to the settingsdescribedbelow.

 Exposure   Lens at "A"  setting     -+  Normal
  Mode:                              Program
            Lens at any f-number  +  Aperture-
                                           Priority AE
 Drive Mode:                              Single Advance
 Exposure
  Compensation:                          --+ tO.O


                                                 1 9o
View original page 24Page 25 · Read text
SHOOTINGIN THE SHUTTER.PRIORITYAE MODE


Shutter-PriorityAE Mocle                                         2. To select a faster shutter speed,slide the select switch
Once the desired shutter speed is set, the camera                     to the UP position. Slide it to the DOWN position to
automatically selectsan appropriate aperture according            select a slower shutter speed. One push moves the
to the lighting conditions surrounding the subject for               shutter speed to the next setting, and the speed is
a perfect exposure. Use this mode to capture a fast-                shifted continuously if the select switch is held at
moving subject (as in sports) as well as for taking               one position.
ordinary snapshots.

1. When you select the Shutter-Priority AE mode,
   the CENTIC panel confirms it by displayingIAUTOJ,
     [^] and the shutter speed selected.lf any other
    indicator on the panel lights up, use the mode/drive
   switch and the selectswitch to set this mode.
                            www.butkus.us


o2O
View original page 25Page 26 · Read text
AUTO                                                    \ t l r ,
                           > L:'I'[[,         r]  I
                                                     r      DXo----o I

                                   AUTO                                            r l l r /
                                                     r      DXo----o '

3. When you pressthe shutter releasebutton halfway          Shutter-PriorityAE Mode Warnings
   down, "A" and a selectedshutter speed will appear       When the subject is too bright or too dark, the viewfinder
    in the viewfinder, while the CENTIC panel indicates      and CENTIC indicators blink to warn you.  lf this occurs,
   the aperturesuitablefor the selectedshutter                  shift the shutter speed either to a faster setting (toward
   speed.                                           "2OOO"l or to a slower one (toward "LT")  until the
                                                               indicators stop blinking. When selectinga shutter speed
                                                                     of 1/30 second or slower (shown by the orange indicators
                                                                          in the vieMinder), the use of a flash or tripod is recom-
                                               mended to avoid camera shake. (Seepage 26 for more
                                                              detailed information on warnings.)


                                                                                                            2 1 c
View original page 26Page 27 · Read text
SHOOTINGIN THE APERTURE-PRIORITYAE


Exposure Modes When Aperture Ring is Set at an F-Number
        r  Aperture-Priority AE mode
        r Metered Manual mode
        r  100 (fixed at 111O0sec.)
        r  Bulb


o Seepage 52for detailedinformation on "100" and
"bulb" settings.
o The exposure modes mentioned above can be used in
combinationwith SMC Pentax-F,-A, -M and SMC Pentax                                                                      1. When you select the Aperture-Priority AE mode,
lenses.                                                                the CENTIC panel confirms it by activating its
                                                        tAUTOl,  Ir] and IF-]  indicators.lf the camera is
Aperture-Priority AE Mode                                        set at any other mode, use the mode/drive switch and
Once the desiredaperture is set, the camera automatically         the select switch to set this mode.
selectsan appropriate shutter speed according to the
lighting conditions surrounding the subject for the best
possibleexposure. Use this mode for photographing
subjectsin which the depth of  f ield is crucial, such as
close-ups,landscapesand portraits.


                            www.butkus.us
View original page 27Page 28 · Read text
MODE


                                                       r      oxo--_-o i

                                    AUTO

                                                           r      DXo----o  i

   2. When you pressthe shutter releasebutton halfway
     down, "A" and a shutter speedwill appearin the        When the subject is too bright or too dark, the vieMinder
      viewfinder, while the CENTIC panel indicates           and CENTIC indicatorsblink to warn you. Turn the
      the shutter speed.                                       aperture ring either to a smaller f-number (toward f l1-4,
                                                                     etc.) or to a largerone (towardf 122, etc.) until the
                                                                 indicators stop blinking. When the selectedshutter speed
                                                                                   is 1/30 second or slower (shown by orange indicators in
                                                                the viewfinder), the use of a flash or tripod is recommend'
                                                        ed to avoid camera shake. (Seepage 26 f or more detailed
                                                            information on warnings.)


                                                                                                   23c
View original page 28Related documents and language editions
From the M. Butkus archive. Original publisher and archive notices are retained.
Check the model and edition against your equipment.
PDF verified 2026-10-10.