Film cameras
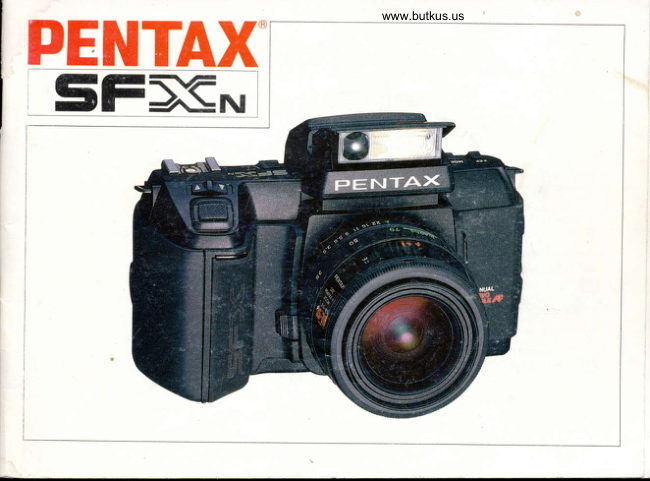
Pentax SFXn User manual
User manual for Pentax SFXn. 70 pages in English. Read the original PDF, download or print a copy without registration.
70 pagesEnglish17.3 MB PDF
Loading your manual…Open PDF directly
Document details
- Brand
- Pentax
- Model / document
- Pentax SFXn
- Document type
- User manual
- Language
- English
- Pages
- 70
- File size
- 17.3 MB
- Category
- Film cameras
- Document date
- Not specified in catalog
Search available document text
Find a term, then jump to its page in the original PDF. Image-only pages may not be searchable; check the PDF for exact wording and diagrams.
Page 2 · Read text
The Pentax SFXru is a highly advanced camera
that enables you to take excellent quality
photographs.
The Pentax SFXt't helps you take quality
photographs with highly advanced automatic
features such as an action-stopping 1/4000-
second sh.utter, an automatic bracketing mode
which reproduces subtle but essential tone
gradations, automatic focusing, a built'in TTL-
auto flash unit and more.
Careful reading of this operating manual will
help you take advantage of all the photographic
capabilities this equipment has to offer.


The nambs of the camera's worki4g parts are listed
in the nomenclature sections on the front and back
flaps of this manual, so please keep the flaps
                                        readunfoldedm'F4for quick reference while you
 this manual.
We sincerely hope you will enjoy taking memorable,
 high-quality pictures with this remarkable camera
 for many years to come.
View original page 2Page 4 · Read text
VIEWFINDER INDICATION


                                    t   l


 L J    Focus frame indicator                      4000 -4  Shutter speed indicator ("4000" for
                                                                                                                   1 /4000 second and "4" for  'l /4 second) > O <   Focus indicator (front-focus, in focus and
           back-focus signals)                   LT   Long-Time exposure indicator
     I      Flash-ready indicator (A flash-ready indicator   rEF   Exposure compensation indicator            for the built-in RTF is located next to the
            viewf inder eVepiecel
 M     Metered Manual indicator
  A     Shutter-PriorityAE/Aperture-Priority
       AE indicator
  P    Programmed AE indicator
.69
View original page 4Page 7 · Read text
Venmo @mike-butkus-camera  Ph. 2083
PayPal Name  Lynn@butkus.org      www.PayPal.me/lynnbutkus
View original page 7
Page 9 · Read text
BEFORE SHOOTING


                                 www.butkus.us


     @


1 . Remove the battery       2. Attach a Pentax-F lens     3. op"n the back cover      4, Turn the main switch
   grip and insert a lithium        (page 8)                    and load the  f ilm.             on. (page 9)
   battery. (pages6&7)                                         (pages 1 |-13)

,  Since_.   this camera is an auto-focus camera, taking
   pictures with it is extremely simple. However, it
    will not operate properly if you set it up or handle
     it incorrectly. Perform the following operations,                                                 .   After adiusting the
    referring to the pages listed, before you begin                                         diopter of the eyepiece to
    taking pictures.                                                                     your eyesight, insert the
   There are also many ways to shoot photographs                                   Eyecup F into the
   with this camera. Please refer to the section about                                         accessory groove. (page 26)


o4
View original page 9Page 10 · Read text
OUTLINE OF OPERATIONS                           www.butkus.us


1. Set the desired exposure mode by    2. Set the  f ocus mode switch at the     3. Position the subiect within the
   sliding the select switch to the [^]           Sf NG LE position. (page 27l,               viewf inder's focus frame [[ J]  .
   or [v] position while holding          When you press the shutter                      lf the green in-focus signal Io]
   the mode/drive switch at the               release button halfway down,              at the bottom of the viewfinder
  MODE position. (pages 9 & 14-          the auto-f ocusing mechanism is             lights up when you press the
    25],                                         activated and the lens starts               shutter release button halfway
                                        moving. (pages 28-33)                down, the subject is,in focus.
                                                                                            (pages 28-33)


                                                                                               5.
View original page 10Page 12 · Read text
www.butkus.us

                                                                                                                             { "AA"-size Battery Grip)


                                 F- -
                                                                                                                                                                I                                                I              (7                    I
 3. As illustrated, the CENTIC panel shows the selected        As illustrated, the "AA" Battery Grip (optional) can be
   exposure mode while the main switch is turned on.          used with four "AA"-size alkaline batteries of the same
       lf the panel remains inactive, the battery is either             type. Make sure they are inserted properly.
   exhausted or not inserted properly, so check  it again.


*Battery Warning Mark
When the battery weakens, the battery warning mark Iq]
on the CENTIC panel and the viewf inder indicators will
start blinking to inform you of this condition. Reolace
the battery as soon as possible. lf the battery drops
below the required voltage, the shutter release button will     o 'AA'-size manganese batteries are also usable.
lock automatically, and the ind;cators on the CENTIC           However, their power supply is limited and use of alkaline
panel will all light up.                                             batteries is recommended. Do not use the Ni-Cd batterv
                                                                                                                7t
View original page 12Page 13 · Read text
ATTACHING AND REMOVING LENSES

                                     Read this section even if the lens is already mounted on the camera.
                                   o Remove the body+nount cap and the rear lens cap.
                                  The Body-Mount Cap F and the Lens-Mount Cap K are available as options'
                                     1. Align the red dot on the camera with the red dot on the lens (see Q and
                     @ ), place the lens onto the camera's lens mount, and turn it clockwise
                                                     until the lens locks with a click. When mounting the lens by touch under
                                       dim light, method @ is recommended.
                                     2. To remove the lens cap, press in the tabs on both sides.
                                   3. To remove the lens, turn it counterclockwise  while pressing the lens
                                                   release lever toward the camera body.

                                                     . Attach the front and rear lens caps on the detached lens to protect  it from
                                            dust and scratches. The lens should be set down with the front lens side down'

                                                                                                                     used                                        * lf a Pentax-A or -M lens is mounted directly onto the camera, it can be
                                        only in the manual-focus mode (page 32). lt can also be used as an auto-focus
                                                lens in combination with the AF Adapter 1.7X (optional).
                                            * Old Screw+nount Takumar lenses can be used with the Mou.nt Adapter K
                                                (optional). However, focusing must be made using the viewf inder's matte area.


                                 Do not damage or stain the lens information contacts or the AF coupler on
                                             the mount surfaces of the camera and the lens. lf this occurs, wipe them
                                            gently with a clean dry cloth,

o8
View original page 13Page 14 · Read text
MAIN SWITCH, SHUTTER RELEASE BUTTON AND CONTROLwww.butkus.usSI'VITCHES


                                                              Control Switches
                                                     The mode/drive and !EF/lSO switches function in
                                                          combination with the select switch. Slide the select
                                                                  switch as you press the above switches to the desired
                                                                     position. Then set values and operating modes mentioned
                                                               below.
                                           MODE = Exposure mode (programmed or ,,p,, AE
                                                          mode, etc.)
                                                 DRIVE = Single frame advance. consecutive advance,
                                                                           self-timer, multi-f rame self-timer and automatic
                                                                     bracketing modes.
                                                     iEF = Exposure compensation, automatic bracketing
Main Switch                                                               steps.
                                                           ISO = Film speedIONI                    Signals correcr focusing and self-timer        t-I     [.t)] :     --           operation with Pcv tone.                    Shutter Release Button
                                                                           CENTIC panel and    L   t  I I : CancetspCVsignals.                          Auto-focusing, light-metering, the
                                                                 the viewfinder display are all activated when the shutter
TOFFI-  to  I : Be sure to set the main switch at this          release button is depressed halfway down.
                  position when the camera is not in use.        Press the button further down to release the shutter.
                                                          o The shutter may be operated at a fixed speed when tne
                                                            camera's back cover is ooen.
                                                                       r The CENTIC panel will remain on for a few seconds after
                                                    you remove your finger from the shutter release button.
                                             CENTIC llluminator Switch
                                                 When photographing  in darkness, press the ,,ML,, button
                                                               to illuminate the CENTIC panel.


                                                                                   9.
View original page 14Page 15 · Read text
USABLE FILM (ox+odod film and non-DX'coded filml


                  ifi-oooooooooo


        ilm speed

DX-Coded film                                         Non-DX-Coded Film
When DX+oded  f ilm is loaded in the camera, the ISO        When loading film that is not DXcoded, make sure you
f ilm speed is set automatically. This type of  f ilm will              set the ISO film speed indicated on the package manually'                                                                                                                         (f  is pushedhave a DX mark on its package and/or a DX information       Whon the ISO/exposure compensation switch
panel on its cartridge.                                              to the ISO position, the ISO film speed of the film used
                                                               previously is indicated on the CENTIC panel. While
                                                             holding the compensation switch at this position, slide
                                                                 the select switch O to the [^] or [v] position to set the
                                                                     desired   f ilm speed. One move of the select switch either
                                                                    increases or decreases the film speed by 1/3 of a step in
                                                             the range between ISO 6 and ISO 6400. lf the select
                                                             switch is held at one position, the speed is changed
.  lf the automatic ISO film-speed setting for DX film is         continu ously.
cancelled by the override mechanism described at right,           Ir] :    Heightens the sensitivity of the  f ilm, up to ISO
the DX mark on the CENTIC panel will blink to                       6400.
warn you,                                                                  [t]:    Lowers the sensitivity of ttie film, down to ISO 6.

o 1O
View original page 15Page 17 · Read text
0Dooooooo0

                    o          0000uoooo    oooofto00


              www.butkus.us

4. As illustrated above, align the tip of the film leader
   with the film loading mark O
  O Film guide rails
  O Sprocket teeth
  O ritm loading mark
. Make sure the film perforations engage the sprocket              . Make sure the  fi lm is loaded flat; take up any slack left in
teeth O Properly.                                            the film by sliding the film leader back into the cartridge.
. Also make sure the  f ilm is placed properly between              .  lf the film is sharply bent, straighten  it out or cut off
the  f ilm guide rails Q                                        the bent oortion,


a tz
View original page 17Page 21 · Read text
SHOOTING IN THE PROGRAMMED AE MODE

Exposure Modes When Aperture Ring is Set at "A"
     r Programmed AE modes
              . Program Action
               . Normal Program
       .Program Depth
     r Shutter-Priority AE mode

o The exposure modes mentioned above can be used only
in combination with SMC Pentax-F or'A lenses.                        www.butkus.us

Programmed Auto Exposure System                         1. When the Programmed AE mode is selected, the
The camera automatically selects the optimum                CENTIC panel confirms  it by activating the IP]
combination of aperture and shutter speed to ensure                indicator and one of three other indicators -   [ E ] for
correct exposure according to the lighting conditions             Program Action. INORMAL] for Normal Program
surrounding the sublect. The Programmed AE modes            and I Eil ] for Program Depth. Set the desired
free you from complicated exposure controls and allow          Programmed AE mode by moving the select switch @
you to concentrate on the subiect, so take advantage of            to the [^ ] or [v] position while pressing the mode/
them for standard shooting and in situations when shutter           drive switch tl) at the MODE position.
speed is crucial. This camera features three Programmed
AE modes suitable for a wide range of photographic
situations.

                                                                              . When the Normal Program mode is selected, the
                                                 CENTIC panel also displays a sub<node indicator ([ E ],
                                                                                                              I m ] or I tf] I ), depending on the focal length of the
                                                                       lens in use.

o 16
View original page 21Page 23 · Read text
Normal Program                                     Program Action Mode


                                                                                           t r-l ,-f ,-l                                    IL'tJU           F'1.11
When the Normal Program mode is selected, the camera         This mode is programmed to select a relatively high
automatically sets one of the sub-modes (Wide [@l   .             shutter speed, making  it ideal for action shooting such
Standard Im] or Tele Itl]l  ], depending on the focal            as sports and wildlife photography.  lt also minimizes
length of the lens in use. The sub-mode is also automatically      camera shake and vibration to prevent blurred images.
switched when the focal length of the zoom lens changes.
When the macro setting of a zoom lens is used, the
Normal Program Tele Ir|]]  is automatically set.                                                 Program Depth Mode
When an SMC Pentax-A lens is used, the camera auto-
matically selects the Normal Program Standard mode.

Normal Program Sub-Modes and Lens Focal Lengths
 Sub-mode          Focal lerlgth of lens
 Wide [,.,]           Shorter than 4Omm
                                                                This mode is programmed to maximize the depth of Standard  [',,  ]      Between 4Omm and 11Omm
                                                                            field. Use it for subjects requiring both near and distant Tele I  f ,]           Longer than 1 1Omm                                                            elements to be in sharp focus, such as portrait shots
                                                            with a background setting (buildings, landscapes, etc.),
                                                                or taking close-ups.


o 18
View original page 23Page 24 · Read text
www.butkus.us


Pushing this buttcn instantly resets all the current settings
(exposure mode, drive mode, exposure compensation,
etc.) to the settings described below.
 Exposure Lens at "A" setting      -'  Normal
  Mode:                               Prbgram
              Lens at any f-number +  Aperture-
                                             Priority AE
 Drive Mode:                           --+ Single Advance
 Exposure
  Compensation:
View original page 24Page 25 · Read text
SHOOTING IN THE SHUTTERPRIORITY AE MODE


Shutter-Priority AE Mode                                 2. To select a faster shutter speed, slide the select switch
Once the desired shutter speed is set, the camera                    to the [^] position. Slide it to the [v] position to
automatically selects an appropriate aperture according               select a slower shutter speed. One push moves the
to the brightness of the subiect to obtain perfect                    shutter speed to the next setting, and the speed is
exposure. This mode is suitable for freezing the                      shifted continuously  if the select switch is held at
movement of a fast-moving subiect on film, for                  one oosition.
deliberately expressing the movement on film, or for
taking snapshots of moving subiects'

1. When you select the Shutter-Priority AE mode.
   the CENTIC panel confirms  it by displaying IA],
       [ > ] and the shutter speed selected. lf any other
    indicator on the panel lights up, use the mode/drive
   switch O and the select switch O to set this mode.


o20
View original page 25Page 26 · Read text
www.butkus.us

                   A
                                mLjt',:a'             rc
                   A                                     ttlr/
                                                                                                                                                                                     It        t  i.Ll                                      r     DXo___o  i
3. When you press the shutter release button halfway            Shutter-Priority AE Mode Warnings
   down, "A" and a selected shutter speed will appear        When the subject  is too bright or too dark, the viewf inoer
    in the viewf inder, while the CENTIC panel indicates        and CENTIC indicators blink to warn you. lf this occurs,
   the aperture suitable for the selected shutter                     shift the shutter speed either to a faster setting (towaro
   sDeed.                                                       "4OOO"'l or to a slower one (toward "LT") until the
                                                                      indicators stop blinking. When selecting a shutter speeo
                                                            of 1 /30 second or slower (shown by the orange indicators
                                                                             in the viewfinder), the use of a flash or triDod is recom-
                                                  mended to avoid camera shake. (See page 56 for more                                                                     detailed information on warnings.)t


                                                                                                                   21 .
View original page 26Page 27 · Read text
sHooTrNG rN THE APERTURE-PRIORITY AE 1
                                                                                                                                                                                                                                                                                                                                                                                                                                                                                                                                                                                                                                                                                              j

Exposure Modes When Aperture Ring is Set at an F-Number

           I  Aperture-Priority AE mode
           I  Metered Manual mode
           I  125 (fixed at 1/125 sec.l
           t  Bulb

. See page 50 for detailed information on "1 25" and
"bulb" settings.                                                       www.butkus.us
r The exposure modes mentioned above can be used in
combination with SMC Pentax-F, -A,'M and SMC Pentax                                                          1. When you select the Aperture-Priority AE mode,
lenses.                                                           the CENTIC panel confirms  it by activating its
                                                                    tAl , t >1 and IF-] indicators. lf the camera
Aperture-Priority AE Mode                                                              is set at any other mode, use the mode/drive
 Once the desired aperture  is set, the camera automatically           switch O and the select switch (O to set this mode.
 selects an appropriate shutter speed according to the
 brightness of the subject for the best possible exposure.
 Use this mode for photographing  subiects in which
the depth of fietd is crucial, such as close-ups. landscapes
and portraits.


azz
View original page 27Page 28 · Read text
MODE                                                     www.butkus.us

                      A
                           > t- -               rc
                    A
                           > F- -               rc
  2. When you press the shutter release button halfway     down, "A" and a shutter speed will appear in the         When the subject  is too bright or too dark,Nthe vieMinoer
      viewf inder, while the CENTIC panel indicates             and CENTIC indicators blink to warn vou. Turn the
      the shutter soeed.                                            aperture ring either to a smaller f-number ltoward  f l1 .4,
                                                                           etc.) or to a larger one (toward  t /22, etc.l until the
                                                                         indicators stop blinking. when the selected shutter speeo
                                                                                       is 1/30 second or slower (shown by orange indicators in
                                                                   the viewfinder), the use of a flash or tripod is recommeno-
                                                            ed to avoid camera shake. (See page 56 for more detailed
                                                                 information on warnings.)


                                                                                           23.
View original page 28Page 29 · Read text
SHOOTING IN THE METERED MANUAL MODE


Metered Manual Mode                                                        1. When you press the shutter release button halfway
                                                                                                         a shutterTo obtain the correct exposure in this mode, set a shutter         down, the viewf inder displays "M" and
speed and an aperture according to the exposure meter's           speed. lf, as illustrated above, two indicators - one
reading,  lt is also possible to intentionally over- or under-            solidly  lit and another blinking - appear at the same
expose the subject for a special visual effect or a photo-             time, it indicates an incorrect exposure' lf this occurs.
graphic theme.                                                        adjust either the shutter speed or the aperture so that
                                                             only one solidly  lit indicator remains..This indicates
When the Metered Manual mode is selected, the CENTIC            that the exposure is correct.
panel confirms it by activating  its IM] , [>] shutter speed
and [>j aperture indicators. lf the camera is set at any             2. To determine the shutter speed first
other mode, use the mode/drive and select switches to set         Turn the lens aperture ring one way or the other until
this mode.                                                        only one solidly  lit indicator remains in the view-
                                                                       finder. lf the correct exposure cannot be obtained this
                                                          way, reset the shutter speed.


.24
View original page 29Page 30 · Read text
www.butkus.us


 t3'*_-ffizt'r


3. To determine the aperture first                           Metered Manual Mode Warnings
   Slide the select switch to the [^] or [v] position until      When the subject  is too bright or too dark, the viewfinoer
   only one solidly  lit indicator remains in theviewf inder.        indicators blink to ttarn you. Turn the aperture ring
     lf the correct exposure cannot be obtained in this            either to a smaller f-number (toward f/1 .4, etc.) or to
   way, reset the aperture.                                  a larger f-number (toward t122, etc.l until the indicators
                                                           stop blinking. When the selected shutter speed is 1/30
                                                            second or slower (shown by the orange indicators in
                                                                 the viewfinder), the use of flash or tripod is recommeno-
                                                      ed to avoid camera shake. (See page 56 for more detailecl
                                                               information on warnings.)


                                                                                     25.
View original page 30Page 31 · Read text
EYECUP F AND DIOPTER ADJUSTMENT


Diopter Adjustment Mechanism                            Eyecup F
Unless the diopter  is correctly adiusted, the viewfinder        The Eyecup F is attached to the viewfinder accessory
image cannot be viewed clearly. Adlust the diopter to            groove.
your eyesight before using the camera.
                                                 To use the diopter adiustment slide or attach the view-
To adiust the diopter, point the camera to a bright area          finder cap (standard) and an optional viewfinder
without focusing. Move the diopter ad,ustment slide            accessory such as the Magnifier FB, remove the Eyecup F
sideways until you can find a point where the focus frame      by pushing up its sides as in the illustration.
at the center of the viewfinder can be seen most clearly.
The diopter adjustment range is between -2'5 and +1.5
diopters.

                                                                              . The Eyecup F cannot be used in combination with
 . SMC Diooter Correction Lenses-M are also available as        an ootional viewfinder accessory such as a diopter
 options.                                                         correction lens.
.26
View original page 31Related documents and language editions

From the M. Butkus archive. Original publisher and archive notices are retained.
Check the model and edition against your equipment.
PDF verified 2026-10-10.