Film cameras
Pentax Spotmatic User manual
User manual for Pentax Spotmatic. 51 pages in English. Read the original PDF, download or print a copy without registration.
51 pagesEnglish7.0 MB PDF
Loading your manual…Open PDF directly
Document details
- Brand
- Pentax
- Model / document
- Pentax Spotmatic
- Document type
- User manual
- Language
- English
- Pages
- 51
- File size
- 7.0 MB
- Category
- Film cameras
- Document date
- Not specified in catalog
Search available document text
Find a term, then jump to its page in the original PDF. Image-only pages may not be searchable; check the PDF for exact wording and diagrams.
Page 3 · Read text
www.orphancameras.com

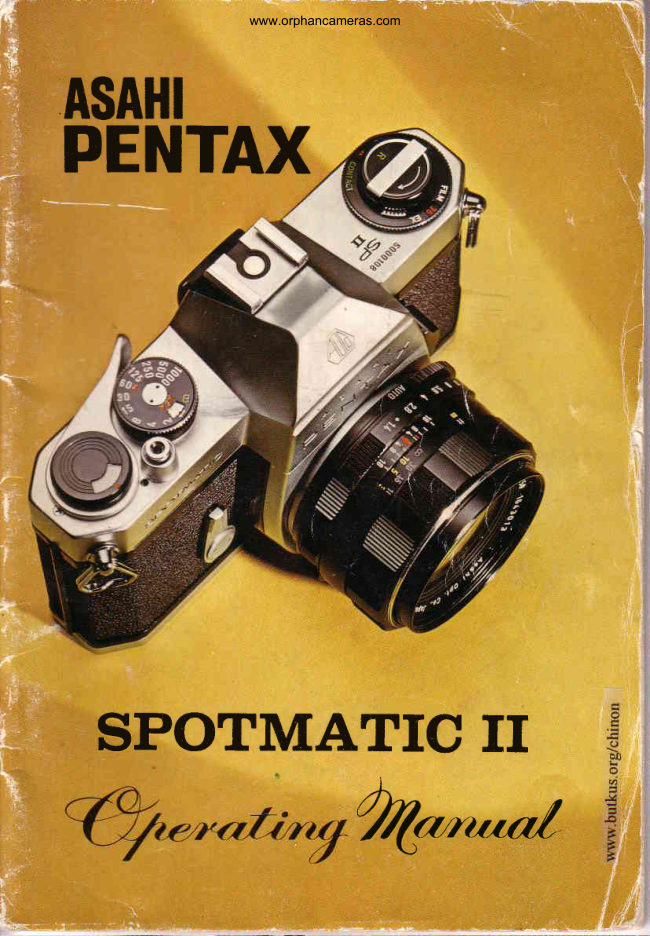
      ASAHIPENTAX
    SPOTMATIC   II

    Your  Asahi  Pentax Spotmatic   II  is the  finest  photographic  instru-
 ment on the market.  The "Super-Multi-Coating" on the Takunrar  lens,
 developed by Pentax  and  available  only on Spotmatic   II  Takumars,
 reduces  flare  and  boosts contrast  to a degree  far beyond  rvhat was
 previously  possible in  optical technology.   It  is a tougher  coating than
 is available on any competitive  lenses and results in pictures  rvith more
 detail and  richer  colours than  is possible with  any  other  system  at
 any price.

   The Spotmatic   II  itself is an outgrowth  and refinement  of the  orig-
 inal Spotmatic which introduced through-the-lens metering to the world
of photography.   Its stopped-down metering system is the most accurate
method  for perfect exposure determination.    It also automatically  gives
you a depth-of-field preview.    It  is an averaging system  for the easiest
and most dependable exposures in typical picture-taking  situations. This
metering  system has been refined and improved each year in the Spot-
matic  to a degree of accuracy unmatched  in the industry.

   The  original  Spotmatic was the most compact 35mm SLR made.
The Spotmatic  II retains  that same traditional  compactness and classic
feel.   It also is designed for use with  the accessories from  the Pentax
system,  including   all  of  the superb Takumar  lens ranging  frorri the
ultra-wide-angle 17mm Takumar  up  to  the  super-telephoto l000mm
Takumar.  The  Pentax system can grow  with  you as your  interests
develop in any direction.

  We are very proud of the Pentax Spotmatic II. We are sure you
will be, too.
View original page 3Page 7 · Read text
Specifications


                        Type
                        35mm single-lens reflex with  built-in  light
                                  meter.
                           Film and Picture Size
                        35mm film (20or 36 exposures). 24mm x 36mm.
                          Standard Lenses
                                  Super-Multi-CoatedTakumar 50mm  f./L.4 or
                        55mm  f 1I.8 with  fully automatic diaphragm.
                                         Filters and lenshood size: 49mm. Equipped
                                     with diaphragm preview lever which affords
                                      visual check of depth of field. Distance scale:
                           45cm (18'/) to infinity.
                                 Shutter                                                      !
                                 Focal plane shutter, with single non-rotating
                                           dial.  Speeds:B, 1-111000sec.  Film  speed
                               (ASA)  setting dial and window on shutter
                              speed dial.  Built-in self-timer releases shut-
                                         ter in 5-13seconds. Shutter curtains of spe-
                                          cial rubber ized silk .
                        Warning Signal
                             The index of shutter speedsturns to red when
                    www.butkus.us     the shutter and film speed settings are off the                                                                                                - -,fer                                   meter's measurability rp:            to page 16.
                          Finder
                                 Pentaprism  finder  with  micropl ^srrt Fresnel
                                    lens for instant focusing; 0.88x magnification
                                     with 50mm lens and approximately life-size
                                     with 55mm lens.
                         Focusing
                                Turn the distance scale ring until the subject
                              image on the ground glass comes into focus.
                           Reflex Mirror
                                      Instant return type with special shock absorb-
                                    ers for minimum vibration.
                        Lens Mount
                         42mm threaded lens mount.

  4
L
View original page 7Page 8 · Read text
www.orphancameras.com


     Film Advance
      Ratchet-type  rapid  wind  lever  (for  film  ad-
     vance and shutter cocking).  10' pre-advanc-                           "       ing and 160  advancing  angle.
    "Cocked"               Indicator
     A red disk appears in a small window  along-
      side the shutter release button when the shut-
       ter is cocked, and blacks out when  it is released.
    Film ExposureGounter
     Automatic re-set type.
    Flash Synchronization
     FP + X  Lontacts  for  conventional   flash  cord
      connection. Separate FP/X  contact on hot shoe
       for  convenient  flash cordless connection.
    ExposureMeter
      Built-in meter measuresthe brightnessof the
     ground glass, and couples directly to shutter
    and film speedsettings. Film speed(ASA) set-
      ting ranges from 20 to 3200(LV1-18 for ASA-
    100 film with standard lens.) Meter is powered
     with a mercury battery.
    Film Rewind
    Rapid rewind crank:r'forspeedy film take-up.                            'utton     Film rewind releas       on bottom of cam-
     era body rotates v,  ^i film is being rewound.
   Loaded Film Indicator
    Loaded film reminder dial underneathfilm re-
    wind knob is marked EMP. (empty), Z0 and
    36 (exposures) in green (for  colour; tungsten
     type), in white (black and white) and in orange   FTo
  FTF{  . F        l    (for colour; daylight type).
   Dimension
    Width 143mm (5.6') x height 93mm (3.66,) x r-doBo  ,t)   thickness 88mm (3.4,).   F.)J4*,r{   Weight
    853grams (1 lb. tI oz.) with 50mm  f /I.4 lens.I,.  Body alone: 622grams (1 lb. 4 oz.)
 BB
View original page 8Page 9 · Read text
Short operatingcourse

   A mercury battery for the light meter is packed separately. Be sure to
    insert  it into the batterl' housing ivhen operating the camera. For bat-
    tery insertion, refer to Page 17.


                             1.,SETFILM SPEED
                                             Lift the outer ring of the shutter speeddial,
                                      turn  it around and set the same number as
                                   the ASA number of the loaded film to the
                                   small red index which appears alongsidethe
                                      figure 1. Then cock the rapid wind lever.


                                      2. SET SHUTTER SPEED
                               Turn the shutter speeddial and set the speed
                               you wish to use to the index. When outdoors,
                                     set the speedat l/125 sec.or faster, depend-
                                    ing upon the lighting. When indoors,set it at
                                    L/30, or  in  its neighbourhood. Change the
                                     shutter speed later, when necessary. (Refer
                                        to 5 on the next page.)


                                    3. COMPOSEAND FOCUS
                               While viewing through the viewfinder, turn
                                  the distance scalering with your thumb and
                                  index finger until you get the sharpest image
                                      of your subject at the microprism centre of
                                  the finder.


6
View original page 9Page 10 · Read text
www.orphancameras.com


     4. TURN ON LIGHT METER SWITCH
    Push up the srvitch button with vortr thurnb.
    Through the viewfinder, you wili obsbrvethe
    movement of the meter's needleon the right
     side of the ground glass. Be sure to turn off
     the meter's switch when not actually taking
    readings.


     5. ROTATE DIAPHRAGM RING
   The needlemovesup and down with the turn
    .  of the d,iaphragmring. When the needlerests
     at the centre, you will get correct exposure.
       If the needle does not come to the centre no
    matter how far you turn the diaphragm ring,
    change the shutter speed. When the needleis
     off centre and closeto the (t  ) mark, you will
    get over-exposure:change the shutter speed
     to a faster setting.  If the needleis closer to
    the (-)  mark, you will get under-exposure:
   change the shutter speedto a slower setting.

    6. RELEASE SHUTTER
    Hold your camera,firmly and trip the shut-
     ter. When the shutter is released,the meter
    switch will automatically turn off, and the
   needle will remain fixed off and underneath
    the centre. The diaphragmwill reopento its
     full aperture and the overali image will look
    brighter. Cock the rapid wind leyer for the
    next picture. (When taking a series of pic_
    tures under the same iighting conditions, it
     is not necessaryto repeat instructions 4 and 5.)
View original page 10Page 11 · Read text
Howto holdyourcamera


       In horizontal  position  A. Hold   In  vertical  position  B.  Hold   In  vertical  position  C.  Hold
      the  camera  firmly   with  your   your camera tightly to your fore-  your camera tightly  to your fore-
        left  hand, and draw  your arm   head with  your  left hand, and  head with  your  left hand, raise
      close to your body.              draw  your  right  arm  close  to   your  right arm and draw your
                                       your body.                                left arm  to your body.


                                       which are not sharp are due to move-
                                    ment of the camera. When you focus
                                             with  the camera held  horizontally
                                             (Position A), hold the lens barrel as
                                                  illustrated.  Cradle the camera with
                                         your  left hand thumb and little  fin-
                                              ger.  Turn  the diitance  scale ring
                                            with your thumb and index finger.
                              When holding the camera vertically,
                                 some people release the shutter with
                                          the thumb (Position B), while others
                                          releaseit with the index finger (Posi-
                                                 tion C).  Position C is more desirable
   As a generalrule, your camerashould   for fast focusing and shooting. With
    be held more firmly by the left hand   the Asahi Pentax, whether held ver-
    which does not release the shutter.    tically or horizontally, you see your
       If you hold your camera with  the   subject image through  the  taking
     right hand -- the hand which releases  lens, enabling you to compose, focus
    the shutter -   it may cause camera  and shoot with a minimum of time
    movement.  Very  often,  pictures  and effort.

8
View original page 11Page 12 · Read text
www.orphancameras.com

                     Film loading
                                  Avoid direct sunlight when loading your
                                          film.

                                                               l. Open the back by pulling out the
                                     rewind knob until back cover snaps
                                   open.
                                         2. Place the film cassette into the cas-
                                         sette chamber, and push back the re-    /,x.                         wind knob. Draw out the film leader
                                and insert it into slot of the take-uo
                                       spool.
                                         3. Advance the film by alternately turn-
                                         ing the rapid wind lever and releas-
                                         ing the shutter until both sprockets
                                  have properly engaged the film per-
     n                                 forations. Close the back by pressing                                                                    it firmly.
                                         4.  If the film is properly loaded, the re-
                                  wind knob will turn counter-clock-
                                    wise when you advance the film by
                                         turning the rapid wind lever.

   Film type reminder dial     Setting ASA film speed
                                               The  ASA   film
                                                 speedrating of all
                                       35mm  films   is
                  Use the film                      given in the data
                      type  dial to                      sheet packed with                            D                  show  what                     each roll of film.
cf                     type of film                    The  higher  the
 l 0 {                          is  in  your                 ASA number, the
                    camera.                       more sensitivethe
                When  you                             film.  Lift the out-
have pulled out the rewind knob to       er ring of the shutter speeddial and
open the back when loading the       rotate  it  until the ASA number of
film, turn the dial selector so that      your film  is opposite the red index
the type of film appearsin the win-      mark.
dow. To check whether the camera     Be sure to set your  film speed on
is loaded,turn the film rewind knob       the shutter speed dial because the
clockwise.  If   it  turns  freely. the        dial  is connected to the exposure
camera is not loaded.                  meter system.
View original page 12Page 13 · Read text
I
                Film wind and rewind


                                        Cock the rapid wind lever for
                                                 the  first  picture; the exposure
                                               counter automatically turns to                                                                   '1',                                                     indicating that the first pic-
                                                    ture is ready to be taken.
                                          2  After the  final  picture on the
                                                                  roll (20 or 36 exposures)has been
                                                 taken, the rapid wind lever will
                                                 not turn all the way as you stroke
                                                                              it.  This indicatesthat the final
                                                    picture has been taken on your
                                                            film, and that the film must be
                                            rewound. DON'T open the back
                                                       of the camera, or  all exposed
                                            frames will be ruined.
                                          3 Unfold the film rewind crank.
                                          Depress the film rewind release
                                                   button.  Turn the rewind crank
                                                       to rewind the film  into the film
                                                  cassette. The film rewind crank
                                                permits rewinding at a smooth,
                                          even rate.  (Under some atmos-
                                                 pheric conditions, erratic or too
                                                  rapid rewinding will cause static
                                                      electricity marks,on the film.)
                                       You will feel the tension on the
                                              rewind crank lessenas the leader
                                     www.butkus.us       end of the film slips off the take-
                                          up spool.
        1 The first portions of the film can-        Stop rewinding when you feel
           not be used for picture taking as        this happen. AVOID  DIREC'f
           they have already been exposed     SUNLIGHT WHEN UNLOAD.
             to light. Generally, two blank ex-      ING YOUR FILM.  (The rewind
          posures should be made before       release button  will  return  to
           taking your first picture. Cock      normal position as you load your
           the rapid wind lever until it stops.      next  film  and turn  the rapid
         Watch to seethat the film rewind       wind lever.)
          knob automatically turns coun-       Pull out the film  rewind knob
            ter-clockwise, indicating that the        (the back  will open automati-
             film  is moving from cassetteto        cally), and remove the film cas-
           take-up spool. Trip the shutter.        sette.

  10
View original page 13Page 14 · Read text
www.orphancameras.com

   Brightfield focusing
        1 You can start viewing and focusing
           before and after cocking' the rapiA
          wind lever. When the preview lever              "AUTO"               is in          (automatic) position,
                            "OFF",          and the meter is at         the dia-
                   exceptforthe           *ffift':i:g;ffl
        2  Turn the distance scale ring  until
           your subject image is clearly in focus.
                   It is not always necessary for you to
           view and focus with the diaphragm
              fully open.  In bright sunlight, you
          can easily focus with  diaphragm
           closed to f/5.6 or f/8 and  still ob-
          serve the depth of field.  It  is easi-
             €r, however, to focus with the dia-
         phragm  fully open as your subject
         image is much brighter.
                        "MAN"          When the letters        appears
          besidethe lever, the lens is in manual                     "AUTO"            position; when          appears, it
              is in automatic position.
          Microprism
          Asahi Pentax camerashave a Fresnel
           lens with a microprism centre under-
          neath the ground glass. As you look
          through the finder, you will see that
           the Fresnel lens consists of many
           concentric rings which provide the
           brightest  possible image on  the
          ground glass.
           The microprism is the centre por-
            tion  of  this diagram. When your
           subject is in focus, the image in the
          microprism  will be sharp and per-
             fectly  clear.   If your subject is not
             in focus, the microprism will break
           the image up into many small dots,
        much  like  engraver's screen. You
         can focus your subject on any por-
            tion of the ground glass.

                                    1 1
View original page 14Page 16 · Read text
www.orphancameras.com

                         Shutter
 Turn  the shutter speed dial clock-   speed may be set either before or
 wise  or  counter-clockwise to  the   after cocking the rapid wind lever.
 shutter speed desired. The shutter  As you cock the shutter by turning                                                             "cocked"                                      the rapid wind  lever, the
                                         indicator turns to red showing that
                                      the shutter is cocked.                  .
                                The indicator window blacks out
                                  as you trip the shutter button. For
                                 use of the X setting on the shutter
                                 speed dial, refer to page 18.
                                      With the shutter speeddial set on
                             B (bulb), the shutter will stay open
                                   as long as you depress the shutter
                                        button. As you release your finger
                                   from the shutter button, the shutter
                                        closes. When a long exposure is
                                     desired while using the B setting,
                                      attach a shutter releasecable with a
                                       locking device to the shutter button.                                                    "Time"                                     This will permit a        exposure.

1 At slow speeds-slower than I/J0   2 To protect the shutter mechan-
    -  support your camera rigidly or      ism, trip the shutter release be-
  use a tripod to prevent movement      fore putting  the camera out  of
   of your camera.                   use for any extended period.

                     Depth-of-fieldguide
                                      the range on the distance scale ring
                                   covered within  the figure 8 on the
                                         depth-of-field guide  indicates the
If you want to know how great the   area in focus at the lens opening.
depth of  field  is at a certain aper-  You will note from the depth-of-field
ture, look at the depth-of-field guide.   guide in  the photograph that  the
In the above photograph, the distance  range from approximately 10 to 25
scale is set at 5 meters . . . the lens is   feet is in focus. Note that as the lens
focused on a subject 5 meters away.   apertures chang€, the effective depth
The calibrations on each side of the   of field also changes. For the depth
distance index  correspond to  the    of' fields at different apertures and
diaphragm setting and indicate the   distances, refer to page 14-15.
range of in-focus distance for differ-                                                                                       f  Depth of fi.etd is the range between the   Ient lens apertures. For example, if       I  nearest and farthest distances uthich     I
the lens opening of f/8 is to be used.   L  are in focus at different lens apertures.  J
View original page 16Page 19 · Read text
Rangeof light measurement
    The exposure meter of the Spotmatic measuresthe brightness of the ground
     glass. Therefore, the meter should be turned on alter you have focused
     your subject on the ground glass. The follorring table shows the range of
     the meter's light measurement, and should not be interpreted as the cam-
     era's total range of f/stop-shutter speed combinations. As you will  note
     from the table below, with an ASA100 film, -v-oumay use any shutter speed
     from 1 sec. to 1/1000sec. in combination rvith any aperture that will bring
     the meter needle to the midpoint in the viervfinder. The  total range of
     the aperture settings is, of course, determined by the minimum and max-
    imum apertures of the lens being used. For example, u,ith the 50mm f./I.4
     lens and ASA100 film, an aperture from  f ll.4 (the maximum aperture of
      this lens) to  f /16 (the minimum aperture) may be used with any shutter
    speedfrom 1 sec. to 1/1000sec. that wili bring the meter needle to midpoint.

                                    1            I             I             I      1            I             I      1                   I             I                                 o      1      ASA                       2             8     1 5    3 0     6 0   r25   250   500     I OO0
      20
                . 2 5
      32
                . 4 0
                . 5 0
       64
                . 8 0
     100
          r25

                                   I O U                                                     l      20 0
                .  25o
                .  320
     400
         500
          640
     800
          I000
          1250         :lj    {'li
     1600      .i.l
             r 2000                  tl                . 25A0
     3200                   t;_'. l;
      The areaA indicatesthe readingrangeof the meter. The area B indicatesthat althoughthe shutterspeedindexis
       blackandthe meterneedlemoves,the meteris NoT operatingproperly.
      When ihe rrcter needle is ceqtered with tlxe shutter sfeed dia! set at B usittg ASA 20-5O  filttts, this
        indicates that tirc eaact shutt€l sbeed requif,eCis 2 seconds Please erpose your Picture for 2 seconds

16
View original page 19Page 20 · Read text
www.orphancameras.com

                   Mercury battery


                         How to check  it
                                         1.  Set the shutter speed dial to B
                                         (bulb) position.
                                         2.  Turn the ASA dial to ASA 100.
                                                                  "on"                                        3.  Push the meter switch to
                                            position.
                               Look at the meter's needle through
                                     the viewfinder.   lf the needle rapidly
                                    drops, the meter battery has sufficient
                                     capacity;  if   it does not, replace the
                                mercury battery.
                         How to replace   it
                            Open the battery housing cover on the
                                 bottom cover plate with a coin.  Re-
                            move old battery and insert new bat-
                                        tery with 11) side toward the top of
                                     the  camera.  For replacement, use
                                    Mallory PX-400 or RM-400-R or equiv-
                                      alent.
                           GAUTION: The mercury battery is
                                            like a phonograph record.   It can be
                            damagedby skin acids. Handle by the
                               edges with a dry cloth only. Be sure
                                    the battery is cleaned with the cloth
                                   before insertion into the camera. The
                                     battery  is not rechargeable.
DANGER!   A  serious accident has been reported of a small child who has put a rnercurt
battery  into his mouth and has been hos/italized  for  serious gripes and stomach inflamma-
tion.   Please aluays heep a mercury  battery from  the reach of small  children.

                                                       L 7
View original page 20Page 21 · Read text
Flashsynchronization


   The Spotmatic  II has FP and X terminals  at the front of the camera body,
   and a separate FP/X  contact on the built-in hot shoe. The table below shows
   which  flash contact, which shutter speed and which  flash bulb may be com-
   bined for maximum lamp efficiency.  Unless these combinations are rigidly                                                                             "X"   followed, there  will  be a failure  in flash synchronization.  Note the
   setting  is exactly at the 60 marked on the speed dial.  This  indicates the
   highest shutter speed at which electronic flash units ma1" be used.
   Use the hot shoe flash contact only when using the Super-Lite  II  or any
   other  electronic  flash or flash gun  that has a flash contact on the shoe
   bracket. To select FP or X, just turn the FP/X  switch rim so that eiether
   one of the marks appears in the window.


     www.butkus.us


      N  Wnnn not using tttcs  terminals, keep the plugs inserled in the terminals.

          \_   SHUTTER                      'l                     1                 I    1    1    1   1    1   1    1                                                                  1                        \   SPEED      FLASH  \T      1000 500  250  125 60   30  1 5   8   4    2
     TERMTNAL \-                           x
    FP   FPFPd;,B"y";'B".;tlCloss(ScrewBost
                                                                            r cto"                                                                             I                                                                -
                                                                                                      I U Ctorr& MFClor.    X                                                        rlectronicFlosh                                                                            I

18
View original page 21Page 22 · Read text
www.orphancameras.com

                          Self-timer
                              Depending upon how far down you turn the
                                     self-timer cocking lever O,  it will releasethe
                                   shutter in 5-13seconds. When operating the
                                      self-timer, always depressthe self-timer re-
                                 lease button @ to release the shutter. Do
                                  not depressthe shutter button . " . it will im-
                                mediately releasethe shutter without delayed
                                   action. The self-timer cocking lever should
                             be turned down at least 90" or the release
                                 button will not operate.
                lntra-redphotography
                                                       If you intend to take infra-red photographs,                                                                t(R"                           remember to use the small     index mark-
                            ed on the depth-of-field guide. Some of the
                           Takumar lenses,however, like the above pic-
                                   ture of Super-Takumar 50mm f/I.4, do not                                           ((R"                            have the    mark. The index is just a short
                             orange line.
       First, focus your lens on your subject. Determine the lens to subject
      distance from  the distance scale. Then match your lens to subject                       ((R"      distance to the     mark by turning  the distance scale accordingly.
     For instance, if your subject is in focus at  infinity,  turn the distance                                                     rtR"      ring and move the infinity ("") mark to the     index.           ((R"     The      index marking on the Takumar lenses is based on the lens
      setting at infinity.
  Howto make deliberatedoubleexposure
 . t  FIoa1t-{
 r.a{ol1
 a0
  lio
 0
;lJ4*.,Ft
p
  l>,.
 FB
   For deliberate double exposures,make the first exposurein the normal way
   Then tighten the film by turning the rewind knob C, and keep hold of th(
   rewind knob.  Depressthe film rewind release button @ and cock the rapic
   wind lever.  This tensions the shutter without advancing the film.  Finally
   release the shutter to make trr'e second exposure. Then make one blank
   exposure, before taking the next picture, to avoid overlapping.
View original page 22Page 23 · Read text
lmportant notes


                                       Always  keep  the  meter  switched   off when
                                            not  actually  taking  readings.   Leaving  the
                                       meter  switched  on  will  rapidly  exhaust  the
                                               battery.      It  is also necessary  to keep  the
                                       meter  switched  off when  mounting  a Super-
                                   Takumar   or SMC  Takumar   lens on  the
                                       Spotmatic    II  camera  body.     If   it  is
                                        switched  on, the  tip  of  the  automatic
                                     diaphragm  release  pin  of  the  lens  will   hit
                                           the  pin  release  plate  inside  the camera
                                     body  and   it may  get damaged.


                      When the index of the shutter speeds
                               turns to red, it indicates that the
                               shutter and film speed settings are
                                     off the meter's measurability range.
                        Change the shutter speed setting
                                  to a faster or slower setting.
                            Refer to page 16.


                           When  the meter  is the switched oD, the                                      lens (any Super-Takumar  or SMC Takumar  3
                                       lens) is in  its manual  position even when                                                                     "AIJTO"                                       the diaphragm  preview  lever  is in
                                     (automatic)  position.  When  the meter  is
                                   switched  off manually,  or automatically
                                           after  shutter  release, the lens returns
                                           to  its automatic  position when   it  is set
                                       "AI"JTO"                                               in             position.


20
View original page 23Page 24 · Read text
www.orphancameras.com


                                                      Exposure4                                                                                                                              f actor
      Exposure increase factors which  apply
      when taking  pictures with  filters,                          x 1 . 6 3
       close-ups, macro- and micro-photos,                        x 1 . 9 6                No! x3.20      do not apply  to the Spotmatic.
                                                             x4.80
                                                                      x 5.46


        Primarily made for use with the Spotmatic
            II, the Super-Multi-Coated Takumar 50mm
               f /1.4 can also be used with the original
       Spotmatic, the models SL and SP 500.
        Further,  it can be used with only two other
       cameras: Asahi Pentax SV and Sla with
       an orange-coloured R marking on the
         film rewind knob.  Use with any other
       camera will damage the rear element lens.
View original page 24Page 25 · Read text
How to take care of your camera


     1. STORAGE

      a)  The  instrument,  when  not  in use, should be protected  from  damp-
     ness and dust.  Preferably,   it should be kept  in its case and, as an addi-
       tional  precaution,  inserted  into a polyethylene  bag.

      b)  Care should be taken  to see that  the camera  is not  kept  in abnor-
      mally  high  or low temperatures  - normal  room temperature   is best.

       c)  Take  the precaution  of removing  any batteries  since, no matter  how
       well  made  these may  be, there  is always  a  risk  of  deterioration  and
      corroslon.

     2. EXERCISE

       All mechanical instruments need to be exercised regularly to keep them
       in good condition. Cameras are no exception to this rule.   If you put
     your car in storage for the winter, the first thing a prudent owner does
       in the spring is to have it serviced before putting  it back on the road.
     There is not quite the same parallel between a motor car and a camera,
      nevertheless,you should store your camera where you can get at it easily
     and put  it through its normal operations at least once per mOnth.  i.e.

      a)  Set the shutter release and fire.

      b)  Turn  to a slow shutter speed and again .set the  shutter  release and
        fire.  Also operate delayed action device (self-timer).

       c)  Examine the exposure meter  for  correct  operation.

      d)  Check film transport.

      e)  Check the range finder or pentaprism viewfinder.

     These actions will  keep the mechanism in good order, retaining the
      natural qualities of the lubricant - thus ensuring the camera is ready for
      instant use when required.

22
View original page 25Page 26 · Read text
www.orphancameras.com


 3. RUNNINGTEST BEFOREUSE
 Before embarking on a holiday where your camera will be your constant
 companion or, in fact, any other reason for the camera being required
 on an important assignment, make a few  trial exposures.  It  is advis-
 able to test the camera at least four weeks prior to your departure to
 give time  for a test film  to be exposed and processed. NIany spoiled
 holiday records would have been avoided if  this precaution had been
 taken.

 4. DUSTYCONDITIONS
When your camera is used on the beach, or other conditions where dust
or sand can easily infiltrate the mechanism, take the precaution of put-
ting the instrument with  its case into a polyethylene bag or other con-
tainer so that flying dust or sand are prevented from entering the cam-
era.  This applies particularly, of course, if  it  is laid down on a sandy
beach. Furthermore, avoid leaving the camera in such a position that
direct sunlight is allowed to fall upon  it for a long length of time.

5. LOOSEPIECESOF FILM
This nuisance is often the cause of trouble with a camera. Small chips
of fitm can easily damage the mechanism. Therefore, check your cam-
era every time  it  is loaded. Always make sure  it  is free from small
pieces of film.

6. TREATINGYOUR CAMERATENDERLY
Your camera is a fine, precision instrument.   It has been produced with
great care and attention to detail. Do not allow  it to be swung by its
shoulder strap, thrown  into  the back of a  car, or  in any other way
treated as if  it were as robust as a battleship.  If you protect the cam-
era against possible damage due to a knock, you will be amply repaid
by years of excellent and trouble-free service.
View original page 26
Page 27 · Read text
lnterchangeableLenses

        The Asahi Pentax offers many  inter-    Regardless  of  the  lens  selected  for
        changeable lenses in a wide  variety    your  Asahi  Pentax,  there   is never
          of focal lengths, all of which are high-   need  for  an  accessory  viewfinder,
            ly respected by both professional and   ordinarily   required  for  rangefinder
        amateur  photographers  for their  fine   type cameras.
          resolution.  The photographic  cover-
        age  of  the  various Takumar  lenses  When  interchanging  lenses, hold the
            is illustrated on page 25.  With  focal   lens by the distance scale ring. When
         length longer than 55mm, the subject   attaching  a lens,  filter,  or lenshood,
        image  is seen through  the viewfinder    do not screw   it too  tightly,  3s you
          larger than  its  life  size.            may  find   it  difficult  to remove.

    Fixed FocusingSetting
        Because of the considerable depth of   (marked  rvith  * ,i have a fixed  focus
            field of wide-angle lenses, ]-ou can use   mark.  Just align with the index the
        them as fixed focus lens  if the dia-    orange-coloured  figures  of  the  dia-
        phragm  and distance  scales are set   phragm and distance scales, and the
          properly.  For your convenience, the    lens  n'ill be in fixed focus from  fore-
        Super-Takumar  and SMC  Takurnar    ground to infinity.  You'll  find this ex-
         lenses shown  on pages 26 and 27   tremely  convenient  for fast shooting.

               (SMG                                       ) Takumars    Super-Multi-Goated
        Pentax SMC Takumar  lenses are   tensity so colour balanceis strikingly
         the world's first 7 -layer multi-coated   improved.  Brighter blues. Vibrant
         lenses. A  truly remarkable optical   reds. Truer  yellows. SMC Taku-
        achievernent.  Conventional lenses  mar lenses make  it possible. And,
       have only 1-3 layer coatings. The   no ghosts or flares even when shoot-
         additional coating of SMC Takumar    ing  against the sun.  Ultra  violet
        lenses let in more lighting resulting    light  is reflected off the glass sur-
          in  truer  colours. Ref lection  is re-   face. So, only true colours are ab-
       duced to 0.2% allowing the remain-   sorbed. Undesired rays are kept out.
         ing 99.8% of light to pass through.  SMC Takumar lenses are for people
        This means higher  light  transmis-   interested in the ultimate in photo-
         sion, and the brightest lens possible.  graphic lenses.
        Colours pass through with equal in-

   24
L
View original page 27Page 28 · Read text
D I F F E R E N C E
          O F
            A N G L E
          O FI             T A K U M A RL E N S E SI
             28mm W


                             85mm


I
I

            2OOmm            4OOmm                               I OOOmm


              All photographs were taken  from the same location and distance from the subject.
View original page 28Related documents and language editions

From the M. Butkus archive. Original publisher and archive notices are retained.
Check the model and edition against your equipment.
PDF verified 2026-10-10.