Sewing machines
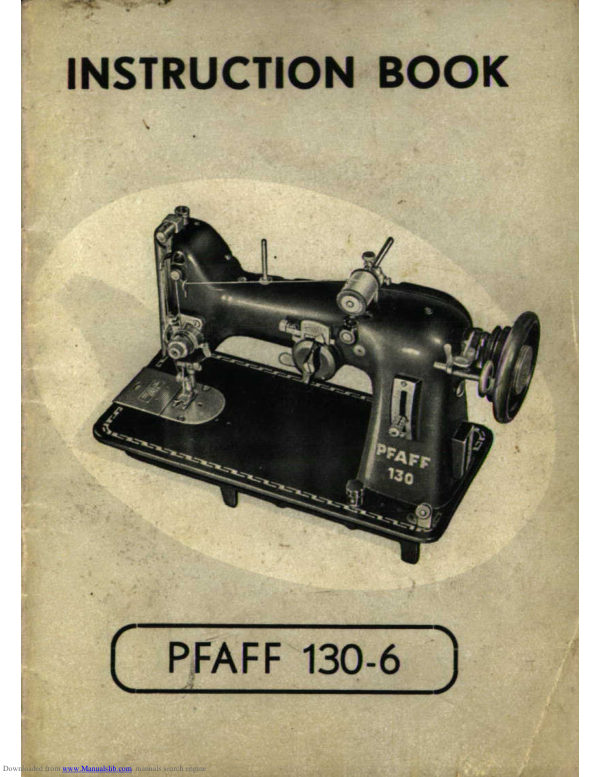
Pfaff Model 130-6 Instruction Book — User manual
User manual for Pfaff Model 130-6 Instruction Book. 43 pages in English. Read the original PDF, download or print a copy without registration.
43 pagesEnglish5.1 MB PDF
Loading your manual…Open PDF directly
Document details
- Brand
- Pfaff
- Model / document
- Pfaff Model 130-6 Instruction Book
- Document type
- User manual
- Language
- English
- Pages
- 43
- File size
- 5.1 MB
- Category
- Sewing machines
- Document date
- Not specified in catalog
Search available document text
Find a term, then jump to its page in the original PDF. Image-only pages may not be searchable; check the PDF for exact wording and diagrams.
Page 2 · Read text
Insfrucion book for the
     PFAFF Sewing  Machine (Model 130)
           For best results, study these instructions carefully-par-
           ticularly those parts on the care of the machine. Before
         leaving the factory your PFAFF was adjusted, carefully
          tested, and found to be perfect  in every respect.  If you
         follow  the  simple  suggestions  outlined  here, you  will
         enjoy your  PFAFF...   find   it  endlessly useful..,  and,
         through-out  the years be glad that your  choice  is  the
           finest sewing machine in the world.

                               I. Useful hins
            to help you get the best results with your PFAFF
          Use fine thread and a  fine needle adjusted for loose
          tension when sewing thin, light fabrics.
            For ordinary lock  stitch or zigzag seams, regulate the
         tension so that the interlacing of upper and under threads
         takes place  in  the center of  the  stitching. For making
         buttonholes,   stitching  on  buttons,  eyeletting    rolling
         seams, and hemstitching, the tension of the under thread
         should be somewhat  tight, since  it  is desirable to have
          the threads interlock more toward the underside of the
          fabric.
          Use unglazed thread  for  ordinary sewing, and  soft
        yarn  for embroidering,  darning,  etc. Since these yarns
         are smoother and more flexible than the hard and brittle
        glazed cotton, they assure well-drawn-in  stitches,  thus
         protecting the seams when the fabric  is washed.
         Skipping of stitches may be caused by:
            1. Needle not having been  inserted properly.
            2. Using other than the recommended PFAFF Needles.
            3. Needle being bent by wrong handling, or too fine
               for the thread used.


Downloaded from www.Manualslib.com manuals search engine
View original page 2Page 3 · Read text
Thread breaking may be caused by;
               1. Any of the three reasons mentioned above.
             2. Tension too  tight.
               3. Using bad or knotty thread.

        Bad stitches may be caused as a result of;
             1. Tensions being too loose or too tight. Both tensions
               should be equal.
                2. Using needles and threads that do not conform to
                the thickness of the fabric. Top and bottom thread
               should be the same.
                3. Fluff having accumulated between the upper tension
                 discs, or underneath the tension spring of the bobbin
               case.
         Heavy working of the machine may be caused by:
              1. The motor belt having become too loose after con-
                stant  use,  therefore,  not  pulling  properly.  In that
               case, the motor bracket has to be adjusted.
             2. The motor belt being too  tight. Do not over-tighten
                        it.
              3. The  shuttle race  being obstructed by  fluff, which
              must be removed.
              4. The machine having become clogged. Note the  fol-
               lowing  instructions for  proper  oiling and  cleaning.

                   II. To  oil and clean the machine
          Apply  rust-proof  grease  on   all  nickel-plated  and
           polished  parts. This done,  all greased parts  should be
          cleaned with a clean rag. Then, apply a  little PFAFF-Sew-
           ing Machine Oil at the oiling points marked with arrows
              in Figures 1, 2, and 3.

          2


Downloaded from www.Manualslib.com manuals search engine
View original page 3Page 7 · Read text
After raising the presser foot, run the machine  for a
             little while without thread, wipe off the down-dripping
           oil and apply a drop of PFAFF Sewing  Machine  Oil to
           all points where  there  is  friction. Make   it a  rule  to
         clean and  oil the machine from time to time, especially
       when  it has been  in constant use, or has not been used
         for a long time.
         VERY IMPORTANT: Before  using the machine  for the
           first time, apply to the hook a drop of PFAFF Sewing
        Machine Oil.
          Keep the oil can clean.
           The needle plate should be taken off frequently and
        cleaned of accumulated fluff on the underside.
                                         III. The needle
                 If the  needle  is  inserted  incorrectly,  the top thread
           will jam  in the hook, and tear. The correct way to install
         the needle  is with the flat of the shank toward the hand
             lift.
                In general, follow this simple rule: Use a finer needle
          for finer thread and a heavier needle for heavier thread.
                              IV. Feeding
                 If the material does not feed (move), turn presser bar
         pressure  screw  to  the  right  to  increase  the pressure.
         There  should be  as  little  pressure  as possible on  the
         presser bar-use just enough to feed the material.
          Too much pressure causes excessive wear  in  feeder
        and foot.
        When  in doubt,  call  in qualified PFAFF mechanic.
        IMPORTANT-When  inserting a new needle, make sure
          that the needle thumb screw  is loose enough to permit
        you to slide the needle  all the way up to the stop pin,
          then tighten the thumb screw. If the needle is not inserted          in this way,   it will cause SKIPPING of stitches, and pos-
           sible needle breakage.
         6


Downloaded from www.Manualslib.com manuals search engine
View original page 7Page 8 · Read text
1. Threading  Ale needle
            Put spool on spindle, draw through hook guide 1, around
            circular guide 2, around the tension discs 3, and through
         check spring 4, around guides 5 and 6, and into the lower
          hole of the take-up 7 down through thread guide 8 into
         guide above the needle 9-and thread needle from front
          to back. (Fig. 4).
                              2. To  "t the nedie
        LOOSEN lock screw above needle clamp. Insert needle
          with flat shank to back, tighten lock screw-and you're
         ready to sew.
                     3. To remove bobbin case  (Fig.  5)
            Turn the machine back on  its hinges. Open  latch  in
         bobbin case by grasping latch between thumb and fore-
          finger  (it  is easier with  the  left hand)-and  pull. The
         bobbin case comes  right  out. To remove the  bobbin,
          release  latch again and the bobbin will drop right out.
          Practice a few times, so as to get used to this operation.
                     4. To wind the bobbin  (Fig. 6)
           For beginners  it  is suggested that the balance wheel
        be disconnected so that the machine  will not  turn. For
         experienced  operators,  the  balance wheel can remain
         connected   if  desired  so that a bobbin can be wound
         while  sewing on a garment. Wind  thread around  the
         bobbin a couple of times away from you. Place bobbin
        on winder spindle so that the single slot fits into the pin
             in the side of the winder spindle.
           Place spool of thread   I  on  either  spool  holder  (1).
       Draw thread down between tension disc 2 to the bobbin
         placed on winder spindle 3. Press down on winder catch
        4 to lock bobbin in winding position. Now you are ready
          to wind bobbin. Turn on power until bobbin  is wound.  If
        you do not wish to wind the bobbin to capacity, press
        winder disconnect  lever  5. When bobbin  is full, release
             is automatic.

                                                     7


Downloaded from www.Manualslib.com manuals search engine
View original page 8Page 10 · Read text
Fig. 5


                                                      9


Downloaded from www.Manualslib.com manuals search engine
View original page 10Page 12 · Read text
5. To replace bobbln caseo  (Fig.  7)
               Slip bobbin  into bobbin case, and draw  the thread
          through the bobbin case slot 1, away from you, under
           tension spring 2. Turn machine back on its hinges expos-
           ing base for bobbin case. With bobbin case latch opened,
         between thumb and forefinger,  slip bobbin  into center
         hook and drop latch back. Push down bobbin case with
         thumb to make sure that case is lacked in position.


                             Fig. 7


                               6. To commence  Sewing
        IMPORTANT-Turn wheel towards you to pickup bobbin
            thread.
           Allow needle  to descend and  rise once. The  under
          thread  then appears  in the form of a loop out of the
          needle hole.
           Then lower  presser foot by means  of presser  foot
            lever. Draw  both upper and lower thread ends under
           the presser fot and to the rear.
                                                  1t


Downloaded from www.Manualslib.com manuals search engine
View original page 12Page 13 · Read text
To  protect  presser  foot and  feed,  never operate
        machine without placing fabric under the presser foot.
          With the cloth inserted and the presser foot lowerec(
           turn the balance wheel toward you. At the some time,
         give a  slight pressure with your knee against the knee
         control-or against the  foot control on some portable
         models.

                            7. To remno    the work
           Stop the machine. Turn the balance wheel toward you
            until the take-up (see section on threading the needle) is
         at its highest point. (Or turn the wheel to complete the
            stitch.) Raise presser  foot. (On  lifting the  presser foot,
         the tension  is automatically released.) Draw the cloth to
          the  rear  of  the needle.  Cut  the  thread  close to  the
         material on the thread cutter.

                8.  To regulate the tension of the upper thread
          The tension of the upper thread  is regulated by means
         of tension nut (M),  (Fig. 4). Turning  this screw clockwise,
          the tension  will become  tighter. Unscrewing  it, counter-
          clockwise,  it will become looser.
          Having adjusted  the  tension  for a  certain  kind  of
          thread, (you can best judge  this tension for yourself by
           pulling the thread gently with your hand when you have
         threaded the machine  through  the tension  spring),  just
         glance at the number marked  in the bell behind the ten-
          sion nut, and note  its relative position.
                  If the upper tension  is too loose, the under thread will
           pull down the upper thread, forming  little knots or loops
         as shown  in  Fig.  8.  If the upper tension is too tight, the
        under thread  is drawn  up, as illustrated  in  Fig. 9 Fig. 10
        shows the  locking  in the two threads  in the center  of
         the material, as a result of the proper adjustment of both
          tensions.

         12


Downloaded from www.Manualslib.com manuals search engine
View original page 13Page 14 · Read text
Fig. 8


                                             Fig. 9


                                            Fig. 10

                9. To regulate tension of th  under thread
                   If the tension  is too loose, take the bobbin case out of
           the machine  (Fig. 5), and tighten the small tension screw
            (Z) in a clockwise  direction with the aid of the screw
            driver. If the tension  is too tight, unscrew  it in a counter-
          clockwise direction. (Fig.  11).

                    10. To regulate the length of stitch
            The  length of  the  stitches  is regulated by the  stitch
          regulator screw. (Fig.  6).  In the zero-(or neutral)-   posi-
            tion, there  is no feeding at all. The numbers above zero
         are for forward  stitching; the space below for reverse
            stitching.
                                                           13


Downloaded from www.Manualslib.com manuals search engine
View original page 14Page 15 · Read text
z
                                                                 Fig. 11

          Loosen regulator screw, and push up to desired posi-
          tion from 1 to 5. Position one is the smallest stitch. When
        you have chosen the size of stitch you want, tighten the
        screw. To sew  in reverse, simply push the locked screw
       downward, below position zero. It will automatically sew
         the some size stitch  in reverse.

                                   11. The Dial-A-Stitch
                 If the nose of the Dial-A-Stitch  lever  (G),  (Fig. 12),  is
       on point zero of the scale, the machine  is performing the
          straight stitch.  If you turn the lever, (G), to the  left, the
        ,machine is doing the zigzag stitch. The width of the zig-
        zag  stitch  is increased asthe lever, (G),  is turned to the
            left,  bringing the width  of  the zigzag  stitch up  to a
       maximum of 11/64".
                 If lever H  (Fig. 12)  is pressed against the body of the
        machine, and then shifted down  into position  II, the ma-
         chine will sew to the right of the stitch made in the nor-
         .mal position.  In  position III,it will sew  still farther  to
         the right, continuing the same kind of stitch for which the
        14


Downloaded from www.Manualslib.com manuals search engine
View original page 15Page 16 · Read text
dial  is  set. This  is useful  for applique, fancy  stitching,
           straight sewing, embroidery, buttonholes, and sewing on
          buttons.
                 If the machine  is not running, the  shifting procedure
          should not be made,  or the size of the zigzag  stitch
          should not be changed, unless the need.  is malted. Other-
          wise, the needle might be bent or broken.

          B


                                           Fig. 12

             12. To tak. opart and clean the kook  (Fig.  13)
                 If pieces of thread, lint or dust have gotten inside the
         hook, impeding the action of the machine, it is necessary
                                                          15


Downloaded from www.Manualslib.com manuals search engine
View original page 16Page 17 · Read text
to remove the upper and lower parts of the bobbin case.
         Turn the balance wheel so as to see clearly screws EI,
           E-2, and E-3. Unscrew these, and take off the hook bow.
       NOTE:  Since  these  screws are  extremely  small,  it  is
         necessary to use great care so as not to lose them.
         Grasp center hook between thumb and forefinger, and
          turn the balance wheel gently until the lower case  slips
          out. Clear out the dirt with a cloth, and put a drop of oil
        on the running  surface under the case. Replace lower
        bobbin case. Do not force  it, as  It will damage the part.
        Replace the hook bow, and screw the three screws back


                                         Fig. 13
        16


Downloaded from www.Manualslib.com manuals search engine
View original page 17Page 18 · Read text
into position.  If this is difficult, do not force it-cal'for
          your  mechanc.   Parts damaged by force  will  not be
          replaced  free of charge.
               13. To regulafe pressure  of the presser fool
           Screw or unscrew the bushing (V), (Fig.  4), to increase
           or decrease pressure of the presser foot, and to regulate
                 it for the type of material used.

           14. Adjusting the tension of the thread confroller spring
              For embroidering and darning, ease the tension of the
           thread controller spring a  little more than in the case of
           sewing. When working on  thick or hard materials, the
           tension should be tighter. To tighten the tension, turn the
            lever of the tension sleeve as shown  in Fig. 4.
               a) indicating the position for darning and embroidering;
              b) indicating the normal position;
                c) indicating  the  position  for sewing  thick and  hard
               materials.
            The direction for turning the lever is indicated by  ""
            for  loose  (light), and "F"  for fast (tight).

                                15. The needle
          Make sure that you use the PFAFF needles designed
           for your mohine-Needle  Series 130 R. These are finely
          machined, tempered and polished  steel, and are avail-
           acle in sizes    Ito11, for the most delicate to the heaviest
           sewing.
                            16. To lower the feed
             For darning and embroidering, the feed can be lowered
         by turning the knob  (X),  (Fig. 6), on the front right-hand
            side of the bed plate. Turn  it right to lower the feed;
            turn  it left to raise the feed.
                                                      17


Downloaded from www.Manualslib.com manuals search engine
View original page 18Page 19 · Read text
NO ATTACHMENTS ARE NEEDED for all normal sewing
       and most types of fancy sewing. The PFAFF comes equip-
       ped with a hinged presser foot. No. 44088 (Fig. 14), which
             is used for these purposes. This should remain on your
        machine most of the time. To remove  it, loosen the screw,
       and  lift presser foot out to the left. To replace it, slip it
                                 back into position, holding  it
                                          firmly  in place between the
                                thumb and forefinger of the
                                            right hand and  tighten  the
                                     screw.
                                               Fig. 14
           44088          44088


                                dard type  of presser foot,
                                   No.45037,  (Fig.  15),  is inclu-
                                ded for those who prefer to
                                                                      it.   Luse
         45037             45037         Fig. 15


                    17. Sewing on bufions  (Fig.  16 and 17)
         Use  foot No. 46120  for sewing on two- or four-hole
        buttons, for snaps, hooks and small bone or metal rings.
                                               (Fig.  18); Lower  lever H  of
                                        the  Dial-A-Stitch  into  posi-
                                            tion   III with dial set as far to
                                      the right as possible. Lower
                                       the feed,
           46120            46120       Fig. 16

       18


Downloaded from www.Manualslib.com manuals search engine
View original page 19Page 20 · Read text
Fig. 17


                            Fig. 18


            With stitch regulator set between 1 and 2, place button
          on  fabric,  under  button  foot, so  that  needle passes
           through center of right hole of the button. Then adlust the
           zigzag  stitch with  the  dial so that  the needle posses
           through the center of the  left hole of the button.
           To  fix the button  to the  fabric,  four or five double
             stitches will do. When  stitching on buttons having four
            holes, place the fabric with the button as far back as
           necessary to permit fastening the second pair of holes,
            too.
            At the  lost stitch,  leave the needle at the  right and
            adjust the machine for  straight stitches of which a few
              will suffice to lock the stitch.
                                                            19


Downloaded from www.Manualslib.com manuals search engine
View original page 20Page 21 · Read text
18. Butonholes  (Fig.  19 and 20)
          Screw on buttonhole foot, No. 42297. (Buttonholes can
       be made with or without cord The cord used can be         varied, depending on your choice, from  the  finest to
         Pearl Cotton No. 5).
           For corded buttonhole, draw the cord through the hole            in the buttonhole foot, towards the rear. The tension of
         the upper and under thread must be tightened to obtain
       a well drawn-in  stitch.
          The length of the buttonhole should be marked in pencil
        on the fabric.
          With Dial-A-Stitch lever H in position  I, (Fig. 12), adjust           stitch regulator between zero and one. Adjust the fine-
         ness of the zigzag  stitch  with screw  B, to  the  left  of


                                           Fig. 19
        20


Downloaded from www.Manualslib.com manuals search engine
View original page 21Page 22 · Read text
the dial, according to the heaviness of cording used.  if
          the zigzag  is  set at number two,  this  is adequate for
        most  cardings.
           After these preparations, the  first edge is sewn to the
        marked  length. When  this is done, leave the needle at
         the right side of  this edge  in the fabric. Now, raise the
         presser bar and swing the fabric half around, clockwise,
         so  that the edge now  lies at the  right of the needle,
          parallel with the cord guide. Keep the work clean. Cut
          off excess cord.  This makes  neater  buttonholes. Then
         lower the presser bar and allow the needle to make one
        more  stitch to the  left.


                                          Fig. 20
                                                             21


Downloaded from www.Manualslib.com manuals search engine
View original page 22Page 23 · Read text
The needle  is now in the fabric at the left of the cord.
          Raise the needle and push lever G into its second groove
         by turning  it  to the left.  In this way,  the wider zigzag
             stitch for the first bar tack is set. To make the bar, four
           to  five zigzag  stitches are necessary, and while doing
           these, the fabric must be held somewhat to reduce the
          forward feeding. On makinp the  last stitch of the bar,
          leave the needle in the fabric to the left. Then, bring the
          needle up and push lever G back  into  its  first groove
              in the position in which you sewed the  first edge. Now
         sew edge two. Readjust the lever into the second groove
           to make the second bar tack, being sure that the needle
                is raised before switching the zigzag lever. This second
          bar tack made, again raise the needle and push lever G
         back to the farthest position on the right and make some
           plain stitches to lock the threads.
            The cutting of the buttonhole  is made with the button-
           hole knife. This must be performed with care to avoid
         damaging the buttonhole threads. Insert either the nar-
         row or the broad blade into the holder and fasten  it by
            tightening the screw.


                              19. Ornamental seams
              For plain and straight ornamental seams use the normal
           presser foot. For  parallel seams use  the edge  stitcher
           with  ruler,  No. 41350. By  skillfully alternating  straight
         and zigzag stitches of varying width and length, you can
         make any number of attractive patterns-especially  in-
            teresting as dress decorations. (Fig.  21).
           An additional variety of effects  is produced by alter-
            nating seams to the right and left of center. (Fig. 22). To
         sew left of center, push lever H up; to sew right of cen-
              ter, push lever H down.
             Colored thread is often used to enhance the appearance
           of the work.
           22


Downloaded from www.Manualslib.com manuals search engine
View original page 23Page 24 · Read text
Fig. 21
                  20 Overedged hems
        Overedged hems are very popular for trimming ladies'
      and children's dresses, underwear, etc. Fold the edge as        required and baste  if necessary. Then cover the folded
      edge with zigzag  stitches, small to ,medium-small, at a         stitch length of 1/16th  inch. Cut the projecting edge off        carefully with a pair of scissors.

                                                            23


Downloaded from www.Manualslib.com manuals search engine
View original page 24Page 25 · Read text
Fig. 22

          An additional ornamental seam, parallel to the edging,
          adds a handsome effect. (Fig. 23).

                                 21. Applique work
            Trace the design on both fabrics, with the cloth to be
          appliqued extending 1/16th  inch beyond the edge of the
           design. Place the cutting on the fabric so that  it corre-
          sponds to the pattern, and baste  it on.
          24


Downloaded from www.Manualslib.com manuals search engine
View original page 25Page 26 · Read text
Fig. 23

                                                                25


Downloaded from www.Manualslib.com manuals search engine
View original page 26Related documents and language editions
From the ISMACS International. Original publisher and archive notices are retained.
Check the model and edition against your equipment.
PDF verified 2026-10-11.