Film cameras
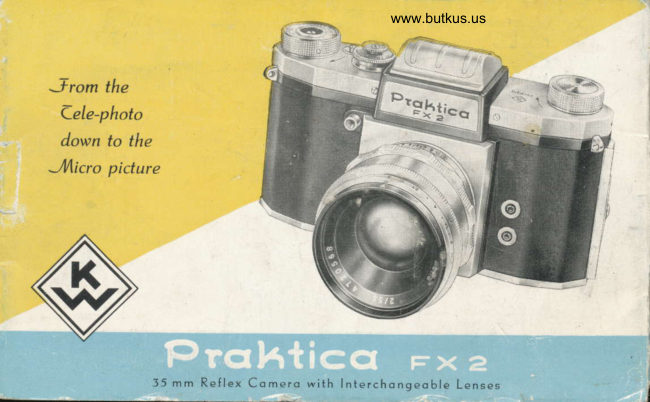
Praktica FX 2 - Color User manual
User manual for Praktica FX 2 - Color. 32 pages in English. Read the original PDF, download or print a copy without registration.
32 pagesEnglish8.9 MB PDF
Loading your manual…Open PDF directly
Document details
- Brand
- Praktica
- Model / document
- Praktica FX 2 - Color
- Document type
- User manual
- Language
- English
- Pages
- 32
- File size
- 8.9 MB
- Category
- Film cameras
- Document date
- Not specified in catalog
Search available document text
Find a term, then jump to its page in the original PDF. Image-only pages may not be searchable; check the PDF for exact wording and diagrams.
Page 4 · Read text
Bitte spenden Sie 2,50 Euro, um diese Website über E-Bay zu unterstützen ... www.PayPal.me/butkusView original page 4
Page 5 · Read text
r.t


                                                                                                                                                                                                                                                                                                                                                                                                                                                                                                               i

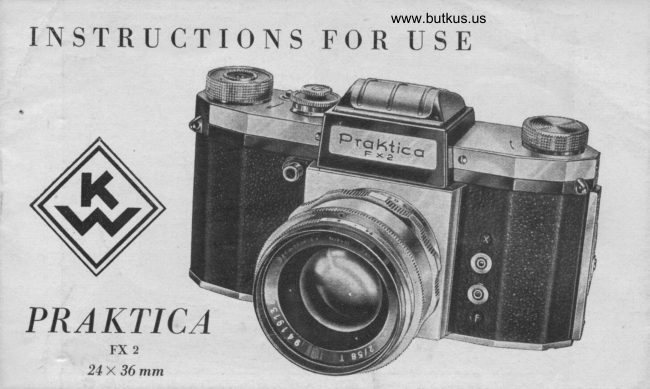
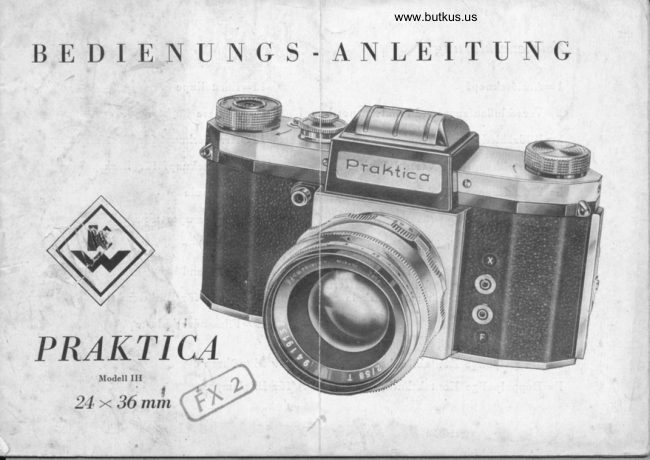
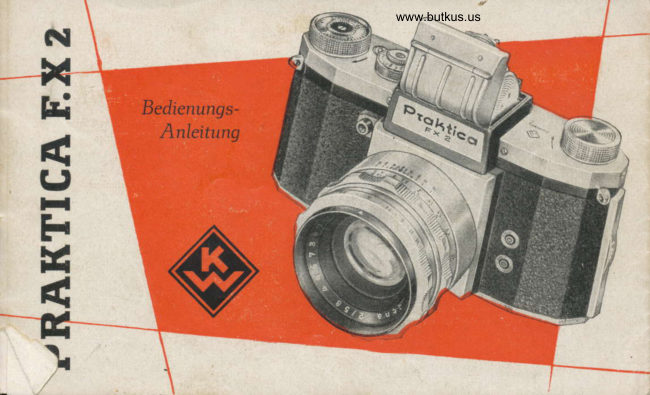
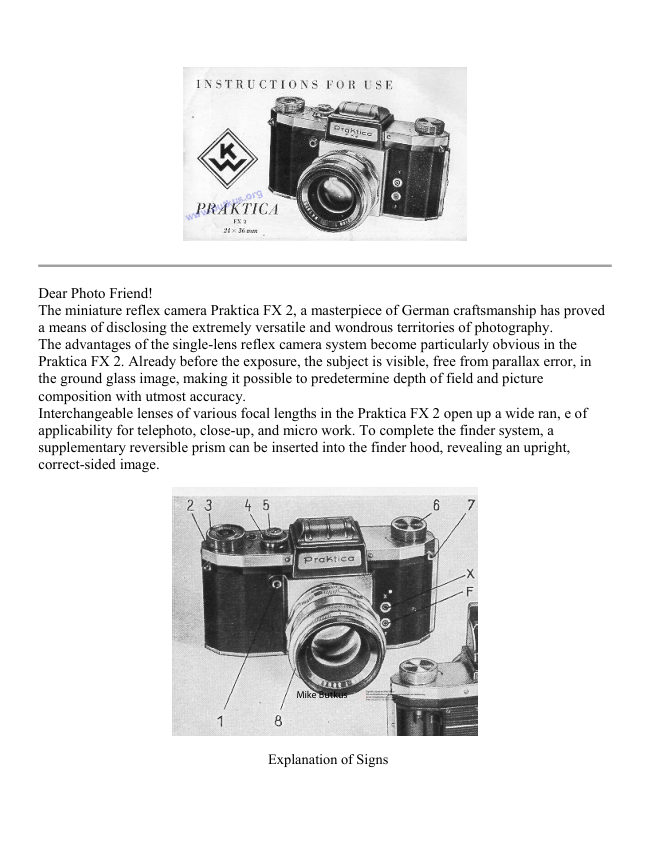
Dear Photo Friend!         Thc miniaturc reflex camcra "Praktica FX 2", a masterpiece of
                             German craftsmanship, discloses to the amateur and professional
                                      photographcr thc cxtrcmcly vcrsatilc and wondrous territorics of   '
                                      photography.
                            Thc advantages of the singlc-lens reflex camera systcm become.
                                                                                                               the                    {          particularly obvious in the Praktica FX z. Alrcady beforc
                                      exposure, thc subjcct is visiblc, frcc from parallax crror, in the
                                      ground-glass imagc, making it possible to predctcrmine depth of                           il                                           ficld and picturc composition with utmost accuracy'
                                       Interchangcablc lenscs of various focal lcngths in the Praktica FX z,
                               somc of thcm with automatic diaphragm, open up a wide rangc
                                     of applicability for telc-photo and close-up exposurcs.
                         To complete the finder system, a supplcmcntary reversing prism
                                     can bc insertcd into the finder hood, revealilg an upright, latcrally
                                         corrcct image.
View original page 5Page 7 · Read text
The Lenses
                                     The Praktica FX z may be used with normal or special-
                                              typc lenses with focal lengths from 3y mh to yoo mm and
                                             with speeds up to f.fr.1, hence making it possible to pene-
                                                     trate into practically any spbere ol photograpby.
                                              All tbe lenses are easily intercbangeable by means of their
                                              threaded mounts. It is advisable, before changing the lens,
                                           to release the camera shutter, so that the mirror, a vety
                                                 sensitive elemenr, will be protected from damage. Any
                                             unclean spots on the anti-reflex coaring should be iemoved
                                              only with a soft, perfectly clean and grease-free brush. In
                                              case there is a film in the camera during lens change, take
                                              care to protect the opening from glaring light.

                              The Pre-setting Diaphraqm
                              When exclanging lenses with the diafihragm pre-setting
                                                  device, make sure that the pressure lever (z) always rests
                                                 against the rear stop. If necessary, push it to the rear stop
www.butkus.us                              with your finger tip. Should the cimera be equipped with
                                                           an automatic pre-set lens, the arrest-
                                                                      ing knob (r) with the red dot has to
                                                           be moved to the left (looking at the
                                                             camer^ from the front).
View original page 7Page 10 · Read text
Focusing
     is performed by means of the distance-setting ring on the lens mount. This ring has to be
     turned to the lef.t, or to the right, until the image on the ground-glass screen appears perfectly
     sharp. During focusing, the lens should be set at full aperture. !flhen using the sports finder,
    you may either focus beforehand on the ground-glass, or set the distance adiusting ring to an
 .   estimated, or measured range.

The Diaphragm
     is adiusted by means of the diaphragm ring. The small numbers indicate wide lens apertures,
    whereas the large diaphragm numbers refer to the smaller apertures. The volume of light
    entering the camera through the lens can be regulated by the diaphragm. Large diaphragm
    apertures permit short exposure speeds, small apertures require longer speeds. The next dia-
    phragm number upwards on the scale makes it necessary to double the exposure time.
     Besides, the diaphragm is a primary means of regulating the depth of field in relation to the
     various distance settings, as may be seen from the chart on page 7.
View original page 10Page 11 · Read text
www.butkus.us
 The new Automatic Lliaphragm
 For lenses with automatic diaphragm, the praktica FX z has been
 equipped with a special release medranism. Lenses of this type ofter
 a considerable facility with regard to readiness for action owing to
 the fact that the diaphragm closes down automatically to the pre_set
 stop, Remove the lens from the cameta, and the release mechanism
 for the automaric diaphragm becomes visible inside the camera
 front, This mechanism has to be disconnected if other lenses than
those with automatic diaphragm are to
be used (r).
For lenses with automatic diaphragm,
the mechanism is put into working
position by pushing the red-marked
knob to the left.
To wind up the automatic diaphragm, turn the front tensioning ring
on the lens mount as far as it  will go to the right. Th"
selected for the exposure is adiustable on the same ring by"p"rtur.means
of a locting device either before or after the shutter is wound up.
Meyer lenses with automatic diaphragm need not to be wound up.
Intermediate tubes to be used with  automatic lenses must be
marked "2".

5
View original page 11
Page 12 · Read text
The distance scale                         Diaphragm and depth.of field
on tbe Praktica lenses   not ol prtrrary |m-              The*extent of the depth-of-field is shown,
                                                  for every diaphragm stop and distance
poltance, locusing chielly being perlormed
                                                                    setting, on the depth-of-field scale' The part
on tbe t'ield lens. You may, ot' course, com-             of thc image within the range of the two
pare tbe distance on the scale.                               identical diaphragm numbers indicating the
                                                             sclccted lens aperture on the dcpth-of-fieldTbis d.i.ttance scale gains greater oalue in
                                                           scale will always be sharp. The left-hand
connection usith the parallel-running deptb-
                                                 numbers signify the depth of field in front,
of-field scale which indicates tbe range of                                            and the right-hand numbers. the depth of
sbarpness pertaining to tbe aaribus settings.                field at the back of the focal plane.


                                                                                           6
View original page 12Page 15 · Read text
www.butkus.us

 '.t;'Iiitt,.i Iirr' ..llr:11,,:  .,t)i'i'rl.
Thc duration of the exposure is set by mcans of the specd-                               rsetting knob and thc milled disk on top of this knob. There
are black numerals on the knob marking the short speeds
(l/soo to tf"u tr". and L -Ll+o sec.) and red numerals mark-
ing the longer speeds (1/ro to f2 sec.), and "B" for any
desired length of time.

For short speeds, the red triangle on the milled disk must
point towards the black triangle on the camera top, whereas
for longer exposures, the red triangle on the disk has to
stand opposite the red triangle on the camera top. "8" cx-
posures should be made v/ith the disk set on the short
speeds.              ffi
View original page 15
Page 19 · Read text
www.butkus.us

                                        The special cable release
                                                                          'Ihe special cable release n.r*i,,  exposing for any length
                                                                      of time. fhc shutter having been set at "R", you depress
                                                                       thc relcase plungcr, tlicrcby locking the little knurled platc
                                                                      rrnd kccping tlrc shuttcr opcn. By slight prcssure.)n  thc
                                                                                                    krtrrrlcrl platc it bccourcs unlockcrl, follorvcd by closing of
                                                                    Ihe shutter"3j                                                                              If you depress thc knurled plate and turn  it to thc right
                                                                       before pushing in the plunger, the mcchanism is not locked
                                                             and the cable rclease rvorks in the ordinary manner.
                                                      As soon rls you remove your thumb from the plunger knob.*il.;u,-,                                                                   tlre shutter closes automaticallv.

                        Alnzost motionless - long instant exposule
3     #ffi,
View original page 19Page 20 · Read text
f  I u,;h sy n J  t ro  r ti t u tio rt
on the front of rhe camera are t\ro bipolar contact sockets, the X contact (above) fot
electronic flashes and short-burning flash bulbs, and the F contact (below) for long-
burning flash bulbs.
X contact (above):
Shutter speed 1/5e sec. with a flash duration of 0.1 to 1ms (f&jes to yrooo sec.). For
a flash period of 1 to 5 ms (frooo to l2es sec.) rhe shutter has to be set to the t, rnu.t  .
This contact is also designed for short-burning flash bulbs, in which case the shutter
speed depends on the practical flash period. As a rule, this will b,  ,/"u, or ym sec.
F contact (below):
With this contact  it  is possible to synchronize the shortest shutter speeds to those
flash bulbs whose ignition period is less than 10 ms and whose practical flash duration
is greater than zo ms.
where longer shutter speeds than f56e sec. are being used, the value of 20 ms has to
be added to the shutter speed in ms. The resulting total represents the practical
duration which has to be achieved by the flash.
 I nt portant  :  N..ter  pt,/t      flu'b lttrlb into t/-tt flasb trnit l,tiorL  tl','  J/)trn.'r  bd.\                          ,the                                                                          !r

                                                                74
View original page 20Page 22 · Read text
The lighthood
 Depressing a little knob r on the bad< of the camera causes
 the lighthood to spring open and the image field lens to be-
 come visible. The lighthood is closed by pressure on the light-
 hood cap, whereby all the parts are folded automatically  into
 their original position, except the rear finder eyepiece which
has to be pushed in beforehand.

The magnifying lens
For critical focusing of the finder image a magnifying lens
may be swung in, yielding an approximately 4fold magnifi-
cation of the ground-glass image.
                                                      16
View original page 22Page 23 · Read text
www.butkus.us
        7 lw sltorts l'irnlcr
       Rapidly moving obiects may be taken with the direct-vision frame finder.
      The flap of lighthood cap 4 has to be swung up, the riragnifier brought into
        operating position and rear eyepiece y pulled up. The eyepiece must be
       pushed in again before the lighthood is closed.
*
       T'he reversible prism
      The prism reveals, at eye-level, an upright and laterally cor-
        rect reflex image. This is of great advantage in sports scenes
      where you can follow your subject in the direction of its
       movements.
                                        Magnif ication of finder image  :
                                     approx: 4 times.
                           The reversible prism is in-
                                           serted into the open lighthood
                               from above, while the latch
                                  button is being depressed,
                                whereupon  it  is bolted by
                                 means of fastening knob 7.
View original page 23Page 24 · Read text
By pushing of thc bolt in the direction of the arrow, the
camcra back is unlocked and may be takcn off. Spool holds,
parts of the transport mechanism, and the focal plane shutter
arc now open to view. Nevcr touch the shutter curtains ! Pull
out film rcwind knob and place the film cartridge into the
fceding-spool bcarer with the film leader, coating down-
wards, pointing towards the receiving spool. Draw approxi-
matcly ro cm of film out of the cartridge and fix the be-
ginning of thc film into the slit in the receiving spool.
Makc sure that the sprocket tceth catch the film per-
foration. Advance the film by turning the transport knob.
Link the camera back into its groove and close it with
slight pressure. The latch must snap in audibly. You now
cxposc two blanks. Check the transport mechanism by paying
attention, while winding the shuttcr, that thc rewind knob
rotatcs in the opposite dircction of the arrow. After thesc
two blank exposurcs you sct thc counting mechanism on
strokc r - and your Praktica is rcady for picture-taking.
                                                 1B
View original page 24Page 25 · Read text
Removing the film
At the end of the film, you will  feel a certain resistance when
winding the shutter - a sign that the entire film strip has been
exposed and must be rewound into the cartridge. This is done
by depressing the release knob of the rewind mechanism and
rotating the rewind knob evenly in the direction of the arrovr.
The film leader slips out of the receiving spool noticeably  -
whereupon the rewind performance is completed. Open the
carnera back and take out the cartridge with the exposed film.
Do not exdrange films in bright sunlight but,  if possible, in the
shade. The cartridge with the exposed film should be wrapped
in light-tight paper, or in its original packing material, before
being given away for processing.  - The camera is now free to
accept a new film.

Negative material
The Praktica FX 2 takes perforated 35 mm cine film, available at your photo dealer's either in cartridges or in bulk.
The film strip in a ca*ridge yields 36 exposures. Sometimes, however, half-length cartridges are used. In case you fill
your own cartridges or cassettes, you need 1.60 meters (5, 4')  of film for 36 exposures, You can, of course, load
shorter lengths if you wish to.
 Cclor films are supplied in the same lengths and packings as blad<-and-white. It  is precisely the color film that goes
so well with the Praktica, for you pre-view much of the final effect of the color pictuie aheady in the colorcd ground-
glass image, The Praktica lenses are color-corrected, too.
                                                                                       2Q
View original page 25Page 26 · Read text
www.butkus.us

                                               Liose-u;-r   The helical focusing moun.t of the normal lens
                                                   makes it possible to approach your object up to                                     exposures                                                    about 5o cm (zo ins.). Exposures at a shorter
                                                            distance necessitate the use of extension tubes.
                                                      These tubes are screwed in between camera and
                                                                  lens, either separately or combined. Tubes r to
                                            3 ioined togcther yield a picture ratio of r:r.
                                            You will find various grouping possibilities and
                                                            distance values in the followine table.


The image is viewed in the field
Iens, the same as for any other
exposure.

27
View original page 26Page 28 · Read text
www.butkus.us


Micro exposures
tequire an additional adapter for connecting
the microscope to the camera. Please note
that the image field lens of the Praktica is
available also with clear glass spot and
hairline cross for extreme enlargements.

Color filters
to be used in the Praktica may have slip-on
or screw-in mounts. This holds good also
for sunshades.

23
                                                    &
                                                                                     ,$,
View original page 28Page 29 · Read text
'Vben       locusing on tbe image t'ield lens, bold             For frame-f inder oieaing (especiallyyour Praktica in cbest lez:el and take  it up close                 scenes) tbe position ol tbe camera oill
to yot!./ eye usben using tbe nagnifying  lens,                     allJ adapted to tbe situatton.
View original page 29
Page 31 · Read text
V EB KAMERA-WERKE NIEDER SEDLITZ
Dresden A tl, Edgar-Andrd-StraBe 56

III-9-I9 Ag ro,'1o3o3 4i6 too E
View original page 31
Page 32 · Read text
www.butkus.us
 Speziclzwischenring mit Doppeldrohtousliiser
 fiir outomotische Blenden              Mit Hilfe eines Speziolzwischenringes  in
                                               Verbindung mit dem Doppeldrohtousl6ser
                                                                    ist es moglich, die Funktion der outomo-
                                                        tischen Blende ouch bei Verwendung von
                                                   Zwischenringen und dem Bolgennohein-
                                                              stellgercit oufrechtzuerholten  (wichtig bei
                                         Mokrooufnohmen bewegter Objekte).
                                               Dieser Ring konn ollein (Ring - Lcinge
                                                 14 mm) oder in Verbindung mit den on-
                                               deren Zwischenringen und dem Bolgen-
                                                        noheinstellgercit benutzt werden. Dos
                                               Auslosen der outomotischen Blende und
                                          der Komero erfolgt hierbei mit einem
                                                   Doppeld ro htousloser. DerSpeziolzwischen-
                                                      ring wird in jedem Folle hinter dem Ob-
                                                               jektiv befestigt. Donoch schroubt mon den
                                                    Doppeldrohtousloser in den Ausloseknopf
                                          der Komero und in den AnschluB om
                                                  Zwischenring. Die Justierschrouben sind
                                                so einzustellen, doB vor der VerschluBous-
                                                    losung die Blende ouf den kleinsten Wert
                                                  geschlossen wird,
                            VEB KAMERA- UND KINOWERKE DRESDEN

lll-9-97 lt r43s 4s9 5
View original page 32Related documents and language editions
PrakticaPDF
Praktica FX 2
User manual
15 pages · GermanRead →
PrakticaPDF
Praktica FX 2 andere
User manual
13 pages · GermanRead →
PrakticaPDF
Praktica FX2
User manual
33 pages · GermanRead →
PrakticaPDF
Praktica FX2 camera
User manual
7 pages · GermanRead →

PrakticaPDF
For of Praktica FX2
User manual
31 pages · Not specifiedRead →
From the M. Butkus archive. Original publisher and archive notices are retained.
Check the model and edition against your equipment.
PDF verified 2026-10-10.