Film cameras
Revue AC5 User manual
User manual for Revue AC5. 39 pages in English. Read the original PDF, download or print a copy without registration.
39 pagesEnglish6.7 MB PDF
Loading your manual…Open PDF directly
Document details
- Brand
- Revue
- Model / document
- Revue AC5
- Document type
- User manual
- Language
- English
- Pages
- 39
- File size
- 6.7 MB
- Category
- Film cameras
- Document date
- Not specified in catalog
Search available document text
Find a term, then jump to its page in the original PDF. Image-only pages may not be searchable; check the PDF for exact wording and diagrams.
Page 1 · Read text
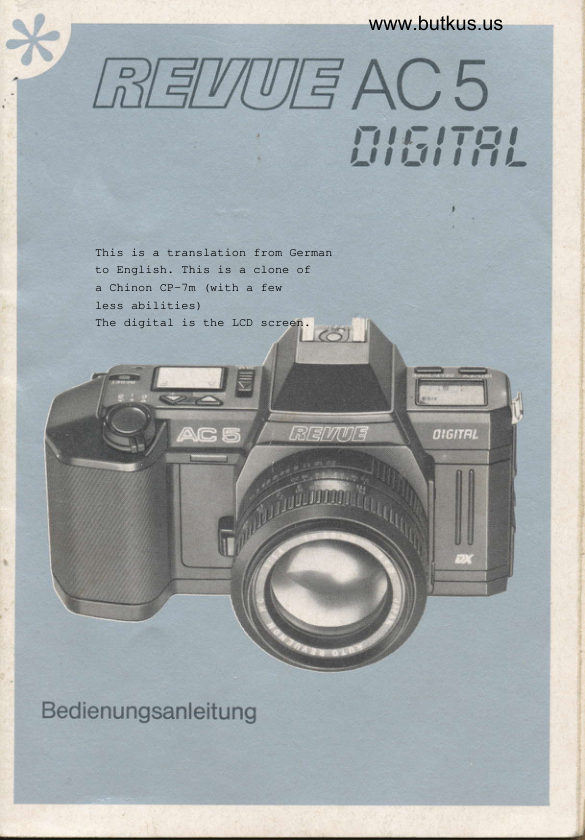
www.butkus.us
 RtrWWIEAC5
              n lfiiTFt L


       This is a translation from German
       to English. This is a clone of
       a Chinon CP-7m (with a few
       less abilities)
       The digital is the LCD screen.

                                                          rffi"'l|       1l                                 &.


Sedienungsanleitung
View original page 1Page 18 · Read text
Description of the parts:

1.  Multiple Exposure Switch (M.B.)
    2. Shooting Mode Selector (MULTI MODE)
    3. Up/Down Buttons (+/-)
    4. Reset Button (RESET)
    5. Lock/Single Shot/Continuous Shooting Switch (0/1/S)
    6. Shutter Release Button
    7. Self-Timer LED
    8. Lens Release Button
    9. Hot Shoe (with center contact)
    10. Self-Timer/Time Button (SELF/TIME) .
    11. ISO/EV Button
   12 Liquid Crystal Display
    13. Aperture Ring
   14 Cable Release Socket
    15. Depth of Field Scale
    16. Focusing Ring
    17. Metering Memory Button
    18. Viewfinder Eyepiece
    19. Film Guide Rail
    20. Film Rail
    21. Rewind Coupling
    22. Back Cover Release Lever
    23. Back Cover Release Button
    24. DX Film Contacts
    25. Focal Plane Shutter
    26. Tripod Socket
    27. Film Counter Window
    28. Film Pressure Plate
    29. Data Back Contacts
    30. Camera Back Cover
    31. Sprocket Wheel
    32. Take-up Spool
    33. Film Start Index
    34. Battery Compartment Cover
    35. Rewind Button (concealed)
    36. Protective Cover for Rewind Button
View original page 18Page 19 · Read text
www.butkus.us

Technical Type:
Specifications: Compact automatic 35mm single-lens reflex camera with motor drive and TTL open-aperture metering
(center-weighted integral metering), three programs (instantaneous working aperture metering), aperture-priority
automatic exposure, manual exposure, and liquid crystal display.

Display on Liquid crystal display:
Exposure mode, shutter speed, film sensitivity, film counter, self-timer operation, long exposure time, battery check and
exposure compensation. 24 x 36 mm.

Image format: Lens mount:
REVUE-Bao nettan smart B (compatible with K and RK connectors).

Mirror:
Closure:
Electromagnetically controlled focal-plane shutter. Exposure times continuously variable from 8 to 1/2000 s in automatic
mode (maximum operating time in automatic exposure mode is 15 s), 15 shutter speeds from 8 to 1/2000 s in manual
exposure mode. Electronically controlled automatic and manual exposure.

Trigger:
Electronic shutter with safety lock and connection for remote release.

Viewfinder:
Fixed pentaprism viewfinder with horizontal view, split-image indicator with microprism ring, 18 LEDs in three colors to
indicate shutter speeds from 1/2000 to 1/60 s (green), 1/30 to 1 s (orange, warning for long exposure times), 2 to 8 s
(underexposure LED blinks), under/overexposure warning (red), three-stage program automatic exposure (green), and
flash readiness (red).

Viewfinder magnification:
0.87x magnification at infinity with a 50mm standard lens. -1.0 diopter.

View in the viewfinder:
92 degrees vertically and horizontally.

Exposure metering:
TTL open-aperture metering, center-weighted integral metering with immediate working aperture re-measurement for
program automatic exposure control with a color-corrected silicon measuring cell.

Exposure range:
LW +1 bis LW +20 (F 1,4/50 mm, ISO 100).

Exposure measurement value memory
Automatic exposure metering value storage functions for automatic exposure with aperture priority.

ISO range:
Automatic setting: ISO 25 to 5000 with t/s-LW segment (for DX-coded film). Manual setting: ISO 25 to 5000 (for film
without DX coding).

Exposure compensation:
LW -4.0 to LW +4.0 with/2-LW segment (for DX film).
View original page 19
Page 20 · Read text
Programmed
Automatic exposure:
Three-stage.
ACTION: Program for fast-moving subjects. The aperture remains open until a shutter speed of 1/500 s. Between 1/500
and 1/2000 s, the aperture changes according to the programmed shutter speed.

NORMAL: Program for general photography. The aperture remains open until the shutter speed reaches 1/60s.
Between 1/60 and 1/2000 s, the aperture changes according to the programmed shutter speed.

CREATIVE: Program for slowly moving subjects or depth-of-field control. The aperture remains open until the shutter
speed reaches 1/8 s. At shutter speeds faster than 1/8 s, the aperture changes according to the programmed shutter
speed.

Operating mode
Reset: Press the reset button to return to the normal program.

Program-
Automatic exposure-
Signal: The program LED flashes when the aperture is set within 4 f-stops of the fully open aperture. When the aperture
is set more than 4 f-stops from the fully open aperture, the program LED lights up during program automatic exposure.

Program exposure
automatic control curves: On the back of the camera.

Manual exposure time selector:
Manual shutter speeds can be adjusted using the +/- buttons in M mode in 14 steps from 8 to 1/2000 s.

Film Transport:
Automatic transport via built-in micromotor, adjustable for single-frame and continuous shooting. Continuous shooting
at up to 2.5 frames per second. Built-in shutter safety lock in the 0/1/S switch.

Film winding:
Automatic loading via built-in micromotor. Automatic transport to the first image by closing the back cover.

Film rewind:
Automatic rewinding with rewind button and automatic stop after rewinding.

Multiple exposure:
The film transport and frame counter can be switched off using switches.

Self-timer:
Electronically controlled, 10-second lead time (lead time can be adjusted from 1 second to 90 minutes) with LED display
and liquid crystal display (counting down). Switching off is possible.

interval timer:
The interval can be set to up to 90 minutes.

Long exposure:
The exposure time for long exposures can be set to up to 90 minutes.

Hot shoe:
With "X" synchronization and contact for REVUE flash units with special contact.
View original page 20
Page 21 · Read text
www.butkus.us


"X" synchronization:
"X" flash synchronization at 1/100 s with REVUE flash units with special contact.

Synchronization with longer exposure times:
1/60 s or longer in manual mode

Voltage supply:
Four 1.5 V "AA" alkaline batteries or one 6 V lithium battery (2CR-5).

Voltage reserve:
12 seconds in all operating modes.

Battery test:
Liquid crystal display

Dimensions:
155.5(L) x 89(H) x 54.5(D) mm.

Weight:
514 gm

Technical specifications are subject to change!
View original page 21
Page 22 · Read text
Fig. A

Liquid crystal display (LCD)

The REVUE AC 5 is equipped with a large liquid crystal display that shows the information
necessary for taking pictures. 1) Operating modes
2) Three-step program mode
3) DX film marking
4) Exposure compensation
5) Frame counter/Self-timer countdown/Long exposure and interval timer time
6) Self-timer indicator
7) Shutter speed/Film sensitivity
8) ISO marking
View original page 22
Page 23 · Read text
www.butkus.us


Fig 8

Viewfinder

In the viewfinder, information is displayed via LEDs.
1) Flash ready (red)
2) Action program (green)
3) Normal program (green)
4) Creative program (green)
5) Overexposure (red)
6) Shutter speed (green/orange)
7) Underexposure (red) In the viewfinder, shutter speeds are displayed in increments
of one f-stop, while the display on the liquid crystal display in A and P modes shows
increments of half f-stops.
At shutter speeds between 2 and 8 seconds, the underexposure LED lights up and blinks at
shutter speeds longer than 8 seconds.


Attaching the carrying strap:
1. Thread the end of the carrying strap through the holder on the camera housing (Fig. 1).
2. Thread the end of the carrying strap through the plastic holder and tighten it (Fig. 2).
View original page 23
Page 24 · Read text
Attaching the Lens: The REVUE AC 5 is equipped with a universal bayonet mount (compatible
with K, KA, and RK mounts), so that all interchangeable lenses with "K", "KA", or "RK" mounts
can be attached.

1. To attach the lens, align the red dot on the lens with the red dot on the camera body (Fig.
3). Then insert the lens into the camera body and rotate it clockwise until it clicks into place.

2. To remove the lens, press the lens release button, rotate the lens counterclockwise until it
stops, and then remove it from the camera body (Fig. 4). Do not operate any camera functions
while attaching or removing the lens.


Inserting the Batteries:
The REVUE AC 5 is powered by four 1.5 V alkaline batteries (M) or one 6 V lithium battery
(2CR-5).
1. To open the battery compartment, slide the release button on the battery compartment
cover (Fig. 5).

2. Insert four 1.5 V alkaline batteries (M) into the compartment, paying attention to the plus
(+) and minus (-) markings on the cover (Fig. 6).
Fig. 7 shows the insertion direction for a 6 V lithium battery (2CR-5).

3. Close the battery compartment cover. Set the O/1/S switch to "1" or "S"; the exposure
mode and frame counter will then be displayed on the liquid crystal display (Fig. 8). Pressing
the shutter release button halfway will also display the shutter speed. If no display appears,
the batteries are inserted incorrectly or are discharged. In this case, insert the batteries
correctly or insert four new batteries.

Notes:
To prevent damage from battery leakage, do not use batteries of different types,
manufacturers, or charge levels.

Do not open the batteries or throw them into a fire. If the camera will not be used for an
extended period, remove the film and batteries. Battery performance decreases with falling
temperature.
View original page 24
Page 25 · Read text
www.butkus.us

Before using the camera in cold weather, a set of new batteries should be inserted. A spare set
should be carried in a warm pocket in case the batteries need to be replaced during use.

Battery life: The stated data applies to 36-exposure film rolls and is based on our
test results.

           Lithium battery (2CR_5)                Four 1.5V M-alkaline batteries (AM3)
               150 films                                80 films


Note: Rechargeable "AA" NiCd batteries can also be used, but are not recommended. If using
these batteries, make sure they are compatible with the REVUE AC 5.

Battery check: Set the 0/1/S switch to "1" or "S" and press the shutter button halfway (Fig. 9).
New batteries must be inserted in the following cases:
• If all indicators on the LCD display are flashing.
• If, when the shutter button is fully pressed, the shutter does not release and no indicators on
the LCD display and no LEDs in the viewfinder light up.

0/1/S Switch: When the camera is not in use, this switch should be set to "0" to prevent
unintentional recordings and to conserve battery power. All electrical functions are then
switched off, the shutter is locked, and the liquid crystal display is turned off. To operate the
camera, the 0/1/S switch must be set to "1" or "S" (Fig. 10).

1 - Single-frame mode: After each shot, the film is advanced by one frame.
S - Continuous shooting mode: By holding down the shutter button, up to 2.5 frames per
second are taken.

Shutter release:
The REVUE AC 5 is equipped with a two-stage electromagnetic shutter release (Fig. 11).
1. When the shutter release is pressed halfway, the electronic circuits, including the liquid
crystal display and the viewfinder LEDs, are activated. After releasing the shutter release, the
light meter and display remain switched on for 12 seconds.

2. When the shutter release is pressed all the way down, a picture is taken.
View original page 25Page 26 · Read text
Loading the film:
1. Set the O/1/S switch to "1" or "S".

2. To open the back cover, press the back cover release button and slide the back cover release
lever downwards (Fig. 12).

3. Insert a film cartridge into the film chamber with the protruding end of the cartridge pointing
towards the bottom of the camera (Fig. 13).

4. Pull out the film leader until it reaches the yellow film start index. The teeth of the sprocket
wheel must engage with the lower perforations of the film (Fig. 14).

5. Close the camera back cover until it clicks into place (Fig. 15). 6. The film will automatically
advance to the first frame, and "1" will appear on the frame counter.

If the frame counter display does not advance but continues to show "0," open the camera
back and reload the film correctly.

• With DX-coded film, the ISO number will appear during loading. After loading, the DX mark
and the metering data (shutter speed) will be displayed, and the film speed will be set
automatically. The metering data (shutter speed) will be displayed for 12 seconds - (A).

• With non-DX-coded film, the ISO mark will blink for 12 seconds after loading. This indicates
that the film speed must be set manually - (B). (See diagram on page 27.)

If the frame counter display does not advance but continues to show "0," open the camera
back and reload the film correctly.

• With DX-coded film, the ISO number will appear during loading. After loading, the DX mark
and the metering data (shutter speed) will be displayed, and the film speed will be set
automatically. The metering data (shutter speed) will be displayed for 12 seconds - (A).

• With non-DX-coded film, the ISO mark will blink for 12 seconds after loading. This indicates
that the film speed must be set manually - (B). (See diagram on page 27.)
View original page 26
Page 28 · Read text
when loading


                                    after loading


                                    after 12"


Setting the film sensitivity:
1. When using DX-coded film: With DX-coded film, the film sensitivity is set automatically. -
The DX mark will then appear on the LCD display.

2. When using film without DX coding: To set the film sensitivity, press and hold the ISO/EV
button and press the +/- button (Fig. 16). The adjustable range is ISO 25 to 5000 in 1/3 EV
increments. The film sensitivity can be checked by pressing the ISO/EV button.
View original page 28Page 29 · Read text
www.butkus.us

                             Exposure modes

Program (P)                  Automatic time setting (A)


Selecting the Exposure Mode:
The REVUE AC 5 features three program automatic exposure modes
(P, P-ACTION, P-CREATIVE), aperture-priority mode (A), manual mode (M), and long-exposure
mode (B). To set the mode, simply press the corresponding corner of the MULTI MODE switch
(Fig. 17).

Pressing the P corner repeatedly will display "P", then "P-ACTION", and finally "P-CREATIVE" on
the liquid crystal display. For further details, see the section "EXPOSURE MODES".
View original page 29Page 30 · Read text
Programmed Automatic Exposure:
The REVUE AC 5 features three programs: "P", "P-ACTION", and "P-CREATIVE". The normal "P"
mode can be used in most cases. The camera automatically selects the optimal combination of
shutter speed and aperture. Programmed automatic exposure is ideal for general
photography, allowing you to take pictures quickly and easily without complicated settings.
1. Set the lens to the smallest aperture (Fig. 18).
2. Pressing the "P" corner of the MULTI MODE switch once selects "P", pressing it again selects
"P-ACTION", and pressing it a third time selects "P-CREATIVE". • If the shutter speed blinks on
the LCD display or the "V" indicator lights up or blinks in the viewfinder, programmed
automatic exposure cannot be used in that situation. • If the displayed shutter speed is 1/30 s
or slower (the orange LED in the viewfinder lights up), a flash or a tripod should be used. • For
more information about the program characteristics and the applicable ranges, see the
"EXPOSURE MODES" section.

Mode Reset Button:
By pressing the mode reset button in P-ACTION, P-CREATIVE, A, M, and B modes, the camera is
reset to the normal P mode.

1. Pressing the reset button resets the camera to the normal program mode, then "P" is
displayed on the LCD screen and the "P" LED in the viewfinder lights up (Fig. 19). This cancels
all exposure and self-timer settings.

2. After pressing the reset button, the shutter speed measured in P mode is retained and
displayed on the LCD screen for 12 seconds. If the reset button is pressed after activating the
self-timer, the measured shutter speed is displayed on the LCD screen for one second; then
the self-timer is switched off.

Focusing:
In the center of the viewfinder is the split-image rangefinder with a microprism ring, surrounded
by the focusing screen. When the camera is properly focused, the image on these focusing aids
is sharpest.

Look at the subject through the viewfinder and rotate the focusing ring on the lens until the
upper and lower halves of the split-image indicator merge (Fig. 20). Focusing with the split-
image indicator is particularly suitable for subjects with predominantly vertical lines. The
microprism ring is also a useful aid for focusing. If the distance is not set correctly, the image
on the microprism ring will appear as a pattern of shimmering dots (Fig. 21).
View original page 30
Page 31 · Read text
www.butkus.us

These shimmering dots disappear as soon as the distance is correctly set. The focus can also be
checked using the image on the ground glass screen. Indirect focusing is also possible. To do
this, estimate or measure the distance to the subject as accurately as possible and set the
focusing ring on the lens accordingly (Fig. 22).

Removing the exposed film:
When all the frames on the film have been exposed, the frame counter number flashes for 12
seconds, and the exposure indicator disappears.

1. Slide the protective cover of the rewind button in the direction of the arrow and press the
rewind button (Fig. 23).
2. While the film is rewinding, the display on the frame counter runs backward.
3. When the film is completely rewound, a flashing "0" appears on the frame counter.
4. The back cover can then be opened and the film removed (Fig. 24). The back cover must not
be opened before the motor stops, even if the "0" appears on the frame counter.

Note: If the motor stops before the "0" appears on the frame counter, the back cover must not
be opened. In this case, the batteries are discharged and must be replaced. Once rewinding is
complete, the "0" flashes for 12 seconds.

Flash Photography:
The REVUE AC 5 is equipped with a special flash system that significantly simplifies flash
photography. In A and M modes, X-synchronization is available at 1/100 s; longer flash
synchronization times are possible.

1. Attach a REVUE flash unit with a special contact to the camera (Fig. 25). Set the aperture
indicated on the flash unit's aperture scale on the lens's aperture ring. Press the A or M corner of
the MULTI MODE switch.

2. A few seconds after switching on the flash unit, the flash ready lamp lights up. As soon as
the flash is sufficiently charged, the camera's shutter speed is automatically set to 1/100 s.
Then the flash ready LED (red) and the 1/125 s LED (green) light up in the viewfinder, and
"100" appears on the liquid crystal display. Now the shutter release can be pressed to take a
picture.

3. If, after taking a picture, before the flash is recharged, the operating mode is switched to A
or M, the camera automatically switches to automatic exposure with aperture priority (A) or
manually selected shutter speed (if less than 1/125 s) until the flash is recharged. In this case,
the flash must be set to "AUTO".
View original page 31
Page 32 · Read text
* Synchronization with longer exposure times:
To synchronize with an exposure time longer than 1/100 s, press the M corner of the MULTI
MODE switch and set the desired shutter speed with the +/- button. Read and set the aperture
on the aperture scale of the flash unit.

* When using other flash units, set the MULTI MODE switch to M and the shutter speed to
1/60 s.

Self-timer:
The REVUE AC 5 features an electronic self-timer with a red LED on the front of the camera.
The delay time can be set up to 90 minutes. After the self-timer shot, the film is automatically
advanced by one frame.

1. To activate the self-timer with a 10-second delay, press the SELF/ TIME button (Fig. 26).

2. Focus on the subject and press the shutter button. The self-timer LED blinks. The liquid
crystal display counts down the seconds until the shutter is released. Switching off the self-
timer: Press the ISO/EV button. The self-timer can be stopped after activation by pressing the
SELF/TIME button, but this does not switch off the self-timer mode. It can also be switched off
by pressing the reset button, but this will reset the operating mode to Normal-P. Notes: o
When using the self-timer in P and A modes, it is recommended to cover the viewfinder with
the viewfinder cover to prevent light from entering through the viewfinder and interfering
with the camera's automatic exposure system (Fig. 27).

A shorter or longer delay time than 10 seconds can be set by pressing and holding the
SELF/TIME button and then pressing the +/- button.

1. The delay can be set between 1 and 60 seconds in one-second intervals and between 1 and 90
minutes in one-minute intervals.

2. 10 seconds before the picture is taken, the self-timer LED starts to blink and remains lit
during the last 2 seconds (Fig. 28).

3. During the self-timer delay, the picture counter can be displayed by pressing the +/- button.
View original page 32
Page 33 · Read text
www.butkus.us

Exposure Modes:
3 Exposure Programs: The REVUE AC 5 is equipped with three programs, which expand your
photographic possibilities: You can select the program that best suits the respective situation
(Fig. 29).

1. P (Normal Program) - For general photography. Select "P" if you cannot decide between P-
ACTION or P-CREATIVE.

2. P-ACTION - Minimizes the effects of camera shake through the shortest possible shutter
speeds and is best suited for photographing fast-moving subjects. Suitable for telephoto
lenses.

3. P-CREATIVE - Prioritizes small apertures, thereby increasing the depth of field. This program
is practical for subjects where focusing is difficult and when using wide-angle lenses.

Program Automatic Exposure Signal and Aperture Setting:
Unlike other cameras, the REVUE AC 5 allows all K-mount interchangeable lenses (and even KA
and RK interchangeable lenses) to be used in the program modes. Generally, the smallest
aperture setting should be selected.
Although perfectly exposed shots are possible at any aperture setting, the applicable program
range is limited, so the program automatic exposure signal LED is useful for checking the
aperture setting for program operation. The program automatic exposure signal LED for P, PA,
or PC in the viewfinder blinks when the aperture is set within four stops of the maximum
aperture. The aperture should then be adjusted so that the program automatic exposure
signal LED does not blink. However, if you do not want to close the aperture beyond a certain
point, you can, of course, take the picture with your desired aperture.

Table (with 1:1.4/50 mm lens with the smallest aperture setting).
View original page 33
Page 34 · Read text
Table (with 1:1.4/50 mm lens with aperture set to 5.6).

Exposure measurement and applicable program range:
The measuring range is the range in which a measurement is possible with the exposure
meter. The applicable program range is the range in which a program combination of aperture
and shutter speed is possible.

For example, with a 50 mm, f/1.4 lens at ISO 100, the measuring range is from EV +1 (f/1.4 1s)
to EV +20 (f/22 1/2000 s). The measuring range depends on the film speed.

II. Automatic Operating Mode:
By pressing corner A of the MULTI MODE switch and setting the desired aperture, the camera
automatically selects the shutter speed continuously between 8 s and 1/2000 s. The "A"
operating mode is practical for taking pictures with specific aperture settings according to
individual requirements. 1. Press corner A of the MULTI MODE switch. An "A" and the shutter
speed will be displayed on the liquid crystal display (Fig. 30). 2. Set the desired aperture by
rotating the aperture ring on the lens (Fig. 31).

• If the aperture is too wide open for the prevailing light conditions, the red overexposure LED
in the viewfinder will light up and the "2000" indicator on the liquid crystal display will blink. In
this case, close the aperture by rotating the aperture ring or use a less sensitive film.

• If the displayed shutter speed is 1/30 s or longer (orange LED in the viewfinder lights up as a
warning of potential camera shake), a tripod should be used or the shutter speed should be
shortened by opening the aperture. Another option is to use a flash.

• If the shutter speed is longer than 8 s, the red underexposure LED in the viewfinder and the
"B" indicator on the liquid crystal display will blink. In this case, open the aperture further or
use a more sensitive film or a flash.
View original page 34
Page 35 · Read text
www.butkus.us


Instructions for setting the aperture:
The following information is intended as general guidance. With ISO 100 film:

Lighting conditions                          Aperture range
Sunshine                                          F/8 – 22
cloudy                                               F/2.8 – 56
                                                          f/1.4 – 2.8indoors

III. Manual Mode:
The manual mode of the REVUE AC 5 allows you to set the shutter speed and aperture
manually.

1. Press the M corner of the MULTI MODE switch (Fig. 32).

2. Set the desired shutter speed by pressing the +/- button (Fig. 33). The shutter speed
increases or decreases step by step. If the shutter speed disappears from the LCD display,
press the M corner of the MULTI MODE switch again or press the shutter release button
halfway.

3. Set the desired aperture by rotating the aperture ring on the lens (Fig. 34).

4. In the viewfinder, the measured shutter speed is displayed, while the set shutter speed
blinks. Adjust the shutter speed and/or aperture so that only one shutter speed LED lights up
in the viewfinder.

Exposure Compensation (P- A mode):
The camera's exposure setting can be affected when there is a large difference in brightness
between the main subject and the background. This leads to underexposed or overexposed
photos. In such cases, use the exposure compensation system. You can also use this system to
deliberately create an overexposure or underexposure effect. The exposure factor can be
adjusted by up to four f-stops up or down in increments of 1/2 EV (Exposure Value).

When using DX films:
1. Press the ISO/EV button so that the ISO number and exposure compensation are displayed
(Fig. 35).
2. Press and hold the ISO/EV button and press the +/- button to set the film sensitivity to the
desired exposure compensation position (Fig. 36).
3. After taking the picture, be sure to reset the exposure compensation back to "0".
View original page 35Page 36 · Read text
Notes:
• The symbols "+" and "-" indicate overexposure and underexposure, respectively.
• To reset the exposure compensation to "0," press the reset button.
• The set value can be checked by pressing the ISO/EV button.

When using films without DX coding:
The set value will not be displayed. Press and hold the ISO/EV button and press the +/- button
to change the film sensitivity for exposure compensation. Each film sensitivity step
corresponds to ½ exposure stop.

Example: Exposure setting at ISO 100/21"
Film sensitivity                              Aperture range
ISO 25                                  +2 (EV)
ISO 50                                  +1
ISO 100                                 0
ISO 200                                         -1
ISO 400                                         -2

Exposure Metering and Memory:
Under normal lighting conditions, the pictures taken with the REVUE AC 5 are perfectly
exposed thanks to the integrated automatic exposure control. However, lighting situations
may occur that can mislead the system, for example, subjects with very strong light contrasts
or backlighting. In these cases, exposure metering and memory should be used.

1. Press the corner A of the MULTI MODE switch (Fig. 37).

2. Aim the camera so that the main subject is in the center of the viewfinder's split-image
indicator. If necessary, move closer to the subject or, if using a zoom lens, zoom in to
telephoto.

3. Hold the shutter release button halfway down and press the exposure memory button
(Fig. 38). A blinking "A" will appear on the liquid crystal display. The exposure value is stored as
long as the exposure memory button is held down.

4. Swing the camera back to the original subject and focus. Then press the shutter release
button all the way down to take the picture.
View original page 36
Page 37 · Read text
www.butkus.us

Multiple Exposure:
The REVUE AC 5 allows you to take an unlimited number of multiple exposures of a single
image.

1. Slide the M.B. switch in the direction of the arrow (Fig. 39). The frame counter display on
the LCD screen will blink after pressing the shutter button.

2. Now press the shutter button all the way down to take the first shot. The film will not
advance; only the shutter will be cocked. The frame counter display will also not increase. In
this way, any number of shots can be taken on a single frame.

3. Slide the M.B. switch back so that the red area is no longer visible.
Notes: If the multi-exposure switch is reset while the frame counter display is blinking, the film
will advance to the next frame. If the frame counter display is not blinking when the multi-
exposure switch is reset, the film will advance to the next frame when the shutter release is
pressed halfway or when a corner of the MULTI MODE switch, the ISO/EV button, or the
SELF/TIME button is pressed.

Long Exposure:
For shooting night scenes and for exposure times longer than 8 seconds, use the Bulb (B)
mode. The shutter remains open as long as the shutter release button is held down. Using a
cable release and a tripod is recommended to prevent camera shake.

1. Press the B corner of the MULTI MODE switch (Fig. 40).

2. Set the aperture ring to the desired aperture (Fig. 41). 3. Press and hold the shutter release
button. The exposure time will be displayed on the LCD screen in seconds (up to 60 seconds)
and in minutes (from 1 to 90 minutes).

Notes:
• The maximum exposure time depends on the battery capacity. For long exposures, it is
recommended to use new batteries.
• Cover the viewfinder with the viewfinder cap to prevent light from entering.
View original page 37
Related documents and language editions
From the M. Butkus archive. Original publisher and archive notices are retained.
Check the model and edition against your equipment.
PDF verified 2026-10-10.